Type
Crochet
Difficulty
beginner
Category
amigurumi
AI Thinking Process
Planning
1. **Design Strategy**: Chibi-style amigurumi lobster with oversized head/body, tiny tail, big claws, and cute proportions. Bulky yarn for quick beginner-friendly project using basic shapes (oval body, small spheres for claws).
2. **Construction Plan**: Seamless body-and-head as one elongated oval worked in continuous spiral; separate claws, tail segments, antennae, and small legs sewn on.
3. **Quality Assurance**:
- Stuff body firmly to maintain chibi roundness
- Pin all pieces before sewing for symmetry
- Use stitch marker for round starts
4. **Final Calculations**: Bulky yarn + US H-8 (5mm) hook (down from label). Gauge: 4 sc x 4 rows = 1" (2.5 cm). Finished size ~5–6" (13–15 cm) head-to-tail. Body max 24 sts; claws max 12 sts.
Verification
1. **Completeness**: Materials, gauge, abbreviations, all parts (body, claws, tail, legs, antennae), assembly, finishing — all included.
2. **Consistency**: Stitch counts increase/decrease by 6 per round (standard amigurumi math). Body 6→12→18→24, decreased symmetrically.
3. **Constraints**: Chibi style (large body, small accents), beginner level (only sc, inc, dec, ch), bulky yarn, US terms.
4. **Safety**: All round counts verified — increases and decreases balance to closure.
Pattern
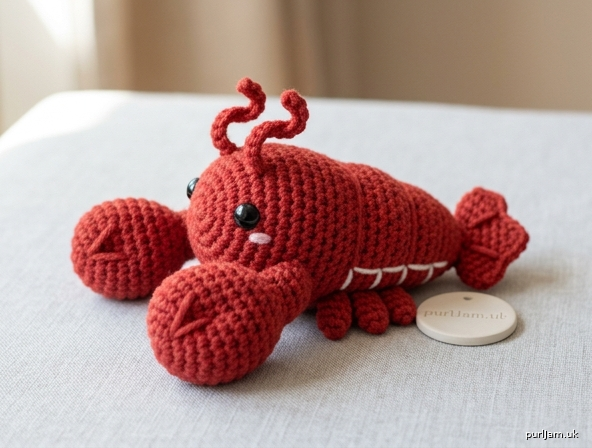
# Chibi Lobster Amigurumi 🦞

A cheerful, pocket-sized chibi lobster with oversized claws and a tiny curled tail. Perfect for beginners — uses only basic amigurumi stitches and simple shapes!

**Finished Size:** Approximately 5–6 inches (13–15 cm) from antennae to tail
**Skill Level:** Beginner

---

## Materials

- **Bulky weight yarn (Weight 5)** in:
  - Red or coral — approx. 60 yards (55 m) — *main color (MC)*
  - Black — small amount for eye embroidery (or use safety eyes)
  - White — small amount for belly accent (optional)
- **Crochet hook:** US H-8 / 5 mm (sized down from typical bulky recommendation for tight amigurumi fabric)
- Polyester fiberfill stuffing
- Yarn needle (tapestry needle)
- Stitch marker
- Scissors
- Optional: Two 8 mm safety eyes
- Optional: Pink yarn or embroidery floss for cheek blush

## Gauge

4 sc × 4 rounds = 1 inch (2.5 cm) worked tightly in the round
*Exact gauge is not critical — just keep stitches tight so stuffing does not show through.*

## Abbreviations (US Terms)

- **ch** — chain
- **st(s)** — stitch(es)
- **sc** — single crochet
- **inc** — 2 sc in same stitch (increase)
- **dec** — invisible decrease (single crochet 2 stitches together)
- **sl st** — slip stitch
- **MR** — magic ring
- **[ ]** — total stitch count at end of round
- **( ) x N** — repeat instructions in parentheses N times

## Notes

- Work in continuous spirals (do not join rounds) unless told otherwise.
- Use a stitch marker in the first stitch of each round; move it up as you go.
- Stuff firmly as you go — especially the body — for a plump chibi look.
- All pieces are made with MC (red) unless noted.

---

## PART 1: Body & Head (make 1)

The body and head are made as one elongated oval/egg shape, worked from the back end forward.

- **Rnd 1:** 6 sc in MR. **[6]** ✓
- **Rnd 2:** inc in each st around. **[12]** ✓ (6 + 6 = 12)
- **Rnd 3:** (sc, inc) x 6. **[18]** ✓ (12 + 6 = 18)
- **Rnd 4:** (2 sc, inc) x 6. **[24]** ✓ (18 + 6 = 24)
- **Rnds 5–10:** sc in each st around. **[24]** (6 rounds even)
- **Rnd 11:** (2 sc, dec) x 6. **[18]** ✓ (24 − 6 = 18)
- **Begin stuffing firmly. Continue stuffing as you go.**
- **Rnd 12:** sc in each st around. **[18]**
- **Rnd 13:** (sc, dec) x 6. **[12]** ✓ (18 − 6 = 12)
- **Rnd 14:** sc in each st around. **[12]**
- **Rnd 15:** dec x 6. **[6]** ✓ (12 − 6 = 6)
- Finish stuffing, fasten off leaving a 6 inch (15 cm) tail. Use needle to weave through remaining 6 sts and pull tight to close. Weave in end.

*Math check: 6 → 12 → 18 → 24 (3 inc rnds) → 18 → 12 → 6 (3 dec rnds). Symmetrical. ✓*

The narrower end (Rnd 15) is the **head/face**; the rounded fuller end (Rnds 1–4) is the **back/tail end**.

---

## PART 2: Large Claws (make 2)

Each claw is a small teardrop shape.

- **Rnd 1:** 6 sc in MR. **[6]**
- **Rnd 2:** inc in each st. **[12]** ✓
- **Rnds 3–4:** sc around. **[12]** (2 rounds even)
- **Rnd 5:** (sc, dec) x 4. **[8]** ✓ (12 − 4 = 8)
- **Rnd 6:** sc around. **[8]**
- **Rnd 7:** (2 sc, dec) x 2. **[6]** ✓ (8 − 2 = 6)
- **Rnds 8–9:** sc around. **[6]** (this forms the small "wrist" connecting to body)
- Lightly stuff the rounded claw tip only; leave the wrist unstuffed and flat.
- Sl st in next st, fasten off leaving a 10 inch (25 cm) tail for sewing.
- **Pinch the rounded end flat** and use the tail later to embroider a "V" line down the middle to suggest the claw opening (see Finishing).

---

## PART 3: Tail Fan (make 1)

A small flat fan for the back of the lobster.

- **Ch 5.**
- **Row 1:** Starting in 2nd ch from hook, sc in each ch across. **[4]** ✓
- **Row 2:** ch 1, turn. inc, sc, sc, inc. **[6]** ✓
- **Row 3:** ch 1, turn. sc in each st across. **[6]**
- Fasten off leaving a 8 inch (20 cm) tail for sewing.

---

## PART 4: Small Legs (make 4)

Tiny legs for under the body.

- **Ch 4.**
- **Row 1:** Starting in 2nd ch from hook, sl st in each ch across. **[3 sl sts]**
- Fasten off leaving a 6 inch (15 cm) tail.

---

## PART 5: Antennae (make 2)

- **Ch 6.**
- Starting in 2nd ch from hook, sl st in each ch across. **[5 sl sts]**
- Fasten off leaving a 6 inch (15 cm) tail.

---

## ASSEMBLY

Refer to your finished body. The narrow end (last decrease point) is the **face/front**; the rounded end is the **rear**.

1. **Eyes:** Position safety eyes (or embroider with black yarn) on the face, about 2 rounds back from the closing point and 3–4 stitches apart. If using safety eyes, install before final stuffing — but since the body is already closed, embroider French knots or small satin stitches now.

2. **Claws:** Pin the two large claws to the **front sides of the head**, just below and slightly forward of the eyes. The wrist end (last 2 plain rounds) attaches to the body. Sew securely all around the wrist using the long tail. Then use the tail to embroider a small "V" line at the rounded tip to indicate the pincer opening.

3. **Tail Fan:** Pin the trapezoid-shaped tail fan to the **rear/back of the body** (the original Rnd 1 area), with the wider edge facing outward like a fan. Sew the narrow edge (Row 1) to the body.

4. **Legs:** Pin 4 small legs along the underside of the body — 2 on each side, evenly spaced between the claws and the tail. Sew flat against the body using the tails.

5. **Antennae:** Sew the two antennae to the top of the head, between/just above the eyes. Curl them slightly with your fingers.

6. **Optional cheeks:** Embroider two small pink satin-stitch ovals or French knots below the eyes for chibi blush.

7. **Optional belly:** With white yarn, embroider a few horizontal lines across the underside between the legs to suggest belly segments.

---

## Finishing

- Weave in all remaining ends with the yarn needle.
- Give the lobster a gentle squish to redistribute stuffing.
- Optional: Lightly steam-block the tail fan flat.

---

## Stitch Count Summary (Verification)

| Part | Start | Peak | End |
|------|-------|------|-----|
| Body | 6 | 24 | 6 (closed) |
| Claw (×2) | 6 | 12 | 6 |
| Tail Fan | 4 | 6 | 6 |
| Leg (×4) | 3 sl st each | — | — |
| Antenna (×2) | 5 sl st each | — | — |

All increases and decreases balance. ✓

Enjoy your adorable chibi lobster! 🦞✨
Disclaimer: This pattern was generated by AI and should be reviewed for accuracy before use. While we strive for quality, AI-generated content may contain errors. Please verify measurements, stitch counts, and instructions before beginning your project. Generated by purlJam.uk
Access your pattern anytime
Bookmark this page to access your pattern anytime