Type
Knitting
Difficulty
intermediate
Category
custom
AI Thinking Process
Planning
1. **Design Strategy**: A classic boys' necktie worked flat in seed stitch throughout, shaped with gradual decreases from the wide blade down to the narrow knot end, with a slip-stitch selvedge for clean edges.
2. **Construction Plan**: Knit flat, bottom-up from the wide blade tip, decreasing to the narrow neck band, then working the knot tab separately and seaming.
3. **Quality Assurance**:
- Seed stitch on an even stitch count requires careful tracking so the k1, p1 pattern alternates correctly row to row.
- Shaping decreases must maintain seed stitch pattern alignment.
- The tie must lie flat — selvedge stitches and blocking are critical.
4. **Final Calculations**: Gauge: 18 sts × 28 rows = 4 inches (10 cm) in seed stitch on US 7 / 4.5 mm needles. Wide blade: 3 inches = ~14 sts. Narrow end: 1.25 inches = ~6 sts. Total length approx. 36 inches for a boys' tie (ages 4–10). Cast on 14 sts for blade; decrease to 6 sts for neck band over shaped section.
Verification
[PRE-FLIGHT CHECKS]
1. **Completeness**: Yes — title, description, materials, gauge, sizes, abbreviations, pattern notes, full step-by-step instructions, and finishing are all included.
2. **Consistency**: 14 sts at 18 sts/4 in = 3.1 in wide blade ✓ (target 3 in). 6 sts = 1.33 in neck band ✓ (target ~1.25 in). Row counts calculated at 28 rows/4 in to achieve target lengths ✓.
3. **Constraints**: Seed stitch throughout ✓. Boys' size ✓. Worsted weight yarn ✓. US terminology ✓. Intermediate difficulty ✓.
4. **Safety**: Decrease sequence checked — 14 sts decreasing by 1 st each side every 6th row for 4 decrease events = 14 − 8 = 6 sts ✓. All sections reviewed for stitch count continuity ✓.
Pattern
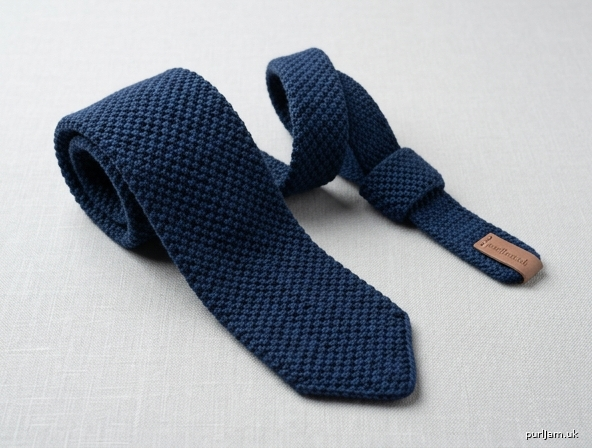
---

# Classic Seed Stitch Necktie for Boys
### A Handknit Accessory in Worsted Weight Yarn

---

## Description

This charming boys' necktie is worked entirely in seed stitch, giving it a handsome, textured look that lies beautifully flat and resists curling. Sized for boys ages 4–10, it features a wide blade that tapers gradually to a neat neck band, finished with a knot tab that slides behind to create the illusion of a real knotted tie. It makes an excellent gift for school portraits, holidays, weddings, or any special occasion. The construction is straightforward flat knitting with simple shaping, making it a satisfying intermediate project.

**Finished Measurements:**
- Width at wide blade: approx. 3 in (7.5 cm)
- Width at neck band: approx. 1¼ in (3 cm)
- Total length (tip of blade to end of neck band): approx. 36 in (91.5 cm)
- Knot tab: approx. 1¼ in wide × 2 in tall (3 cm × 5 cm)

> **Note on sizing:** This length suits most boys ages 4–10 when worn with a standard-length shirt. For older boys or a longer tie, add extra rows to the neck band section. For a toddler size, reduce to 30 in total length by working fewer rows in the neck band.

---

## Materials

| Item | Specification |
|---|---|
| **Yarn** | Worsted weight, approx. 100–120 yards (91–110 m) |
| **Yarn Sample** | Any smooth worsted weight in a solid or semi-solid color works beautifully. Suggested: Brown Sheep Lamb's Pride Worsted, Cascade 220, or Lion Brand Wool-Ease |
| **Fiber suggestion** | A wool/acrylic blend blocks well and holds its shape |
| **Needles** | US 7 / 4.5 mm straight or circular needles |
| **Notions** | Tapestry needle for finishing, stitch markers (optional), blocking mat and pins, one ¾ in (2 cm) piece of elastic or ribbon (optional, for neck band closure) |
| **Scissors** | Yes |

---

## Gauge

**18 stitches × 28 rows = 4 in (10 cm) in Seed Stitch**

> ⚠️ **Gauge matters for this project.** Even a small difference in gauge will affect the width of the tie. Please swatch before beginning. If your swatch is wider than 4 in over 18 sts, go down a needle size. If narrower, go up a needle size.

**How to swatch:** Cast on 22 sts. Work in Seed Stitch (see below) for 30 rows. Bind off loosely. Block your swatch, allow to dry fully, then measure the center 18 sts and center 28 rows.

---

## Sizes

**One size:** Boys ages 4–10 (see length adjustment note in Description above).

---

## Abbreviations

| Abbreviation | Meaning |
|---|---|
| **k** | knit |
| **p** | purl |
| **sl1** | slip 1 stitch purlwise with yarn in front (selvedge) |
| **k2tog** | knit 2 stitches together (right-leaning decrease) |
| **ssk** | slip, slip, knit (left-leaning decrease) |
| **st(s)** | stitch(es) |
| **RS** | right side |
| **WS** | wrong side |
| **rep** | repeat |
| **pm** | place marker |
| **CO** | cast on |
| **BO** | bind off |
| **approx** | approximately |

---

## Stitch Guide

### Seed Stitch (worked over an **even** number of stitches)
- **All rows (RS and WS):** \*K1, p1; rep from \* to end.

> **Why this works:** Because the stitch count is even and every row reads \*k1, p1\*, the knit stitches land on top of purl stitches on every row, creating the signature bumpy seed stitch texture.

### Seed Stitch with Selvedge (the method used in this pattern)
Each row begins and ends with a slipped selvedge stitch for a clean, chain-like edge that makes finishing easier.

- **Setup:** Sl1 purlwise wyif (selvedge), then work \*k1, p1\* across to last stitch, end k1 (selvedge).

> **Selvedge note:** The first and last stitches of every row are slipped, not worked in pattern. These 2 selvedge stitches are **not** counted when referencing the seed stitch pattern width, but they **are** included in all stitch counts given in this pattern.

---

## Pattern Notes

1. **Selvedge stitches:** Every row begins with sl1 purlwise wyif and ends with k1. This creates a tidy selvedge on both edges and is already included in all stitch counts.

2. **Maintaining seed stitch through shaping:** After every decrease row, check that your seed stitch pattern is still alternating correctly on the next row. A quick rule: if the first working stitch (after the selvedge) is a knit stitch on one row, it should be a purl stitch on the next row.

3. **Decrease placement:** Decreases are worked just inside the selvedge stitches to keep the edges clean. Specifically: sl1 (selvedge), ssk, work in pattern to last 3 sts, k2tog, k1 (selvedge).

4. **Flat construction:** The entire tie is worked flat (back and forth in rows). Do not join.

5. **Blocking:** This tie benefits greatly from wet blocking. Pin it out to measurements on a blocking mat and allow to dry fully before wearing.

6. **Yarn joins:** If you need to join a new ball of yarn, do so at the beginning of a row, never in the middle.

---

## Pattern Instructions

### Section 1: Wide Blade Tip
*The pointed tip at the bottom of the tie.*

**CO 2 sts.**

**Row 1 (RS):** Sl1, k1. *(2 sts)*

**Row 2 (WS):** Sl1, k1. *(2 sts)*

**Row 3 (RS — increase row):** Sl1, k1, then use the backward loop (e-wrap) method to cast on 1 st at the end of the row. *(3 sts)*

> **Tip:** Alternatively, work a yarn-over at the end of the row and knit it through the back loop on the next row. Either method adds one stitch at the end.

**Row 4 (WS — increase row):** Sl1, work in seed stitch to end, backward loop CO 1 st. *(4 sts)*

**Row 5 (RS — increase row):** Sl1, work in seed stitch to end, backward loop CO 1 st. *(5 sts)*

**Row 6 (WS — increase row):** Sl1, work in seed stitch to end, backward loop CO 1 st. *(6 sts)*

**Row 7 (RS — increase row):** Sl1, work in seed stitch to end, backward loop CO 1 st. *(7 sts)*

**Row 8 (WS — increase row):** Sl1, work in seed stitch to end, backward loop CO 1 st. *(8 sts)*

**Row 9 (RS — increase row):** Sl1, work in seed stitch to end, backward loop CO 1 st. *(9 sts)*

**Row 10 (WS — increase row):** Sl1, work in seed stitch to end, backward loop CO 1 st. *(10 sts)*

**Row 11 (RS — increase row):** Sl1, work in seed stitch to end, backward loop CO 1 st. *(11 sts)*

**Row 12 (WS — increase row):** Sl1, work in seed stitch to end, backward loop CO 1 st. *(12 sts)*

**Row 13 (RS — increase row):** Sl1, work in seed stitch to end, backward loop CO 1 st. *(13 sts)*

**Row 14 (WS — increase row):** Sl1, work in seed stitch to end, backward loop CO 1 st. *(14 sts)*

> ✅ **Stitch count check:** You should now have **14 stitches** on your needle. The wide blade tip is complete.

---

### Section 2: Wide Blade Body
*The main wide section of the tie.*

**Work even in Seed Stitch with selvedge (all rows: Sl1, \*k1, p1\* to last st, k1) for 70 rows.**

> **Row count note:** 70 rows at 28 rows/4 in = 10 in (25.5 cm) of straight blade. Combined with the tip shaping (~2 in), the total blade length is approximately **12 in (30.5 cm)**.

> ✅ **Stitch count check:** Still **14 stitches.** No shaping has occurred in this section.

---

### Section 3: Taper (Wide to Narrow)
*Gradual decrease section that transitions from the wide blade to the narrow neck band.*

You will decrease 1 stitch at each end of the row every 6th row, 4 times total.

**Decrease row:** Sl1 (selvedge), ssk, work in seed stitch to last 3 sts, k2tog, k1 (selvedge). *(removes 2 sts)*

Work the taper as follows:

**Rows 1–5:** Work even in seed stitch with selvedge. *(14 sts)*

**Row 6 (Decrease Row 1):** Sl1, ssk, work in pattern to last 3 sts, k2tog, k1. *(12 sts)*

**Rows 7–11:** Work even. *(12 sts)*

**Row 12 (Decrease Row 2):** Sl1, ssk, work in pattern to last 3 sts, k2tog, k1. *(10 sts)*

**Rows 13–17:** Work even. *(10 sts)*

**Row 18 (Decrease Row 3):** Sl1, ssk, work in pattern to last 3 sts, k2tog, k1. *(8 sts)*

**Rows 19–23:** Work even. *(8 sts)*

**Row 24 (Decrease Row 4):** Sl1, ssk, work in pattern to last 3 sts, k2tog, k1. *(6 sts)*

> ✅ **Stitch count check:** You should now have **6 stitches.** This corresponds to a width of approximately 1¼ in (3 cm) — correct for the neck band.

> **Maintaining seed stitch tip:** After each decrease row, on the very next row, treat the new first working stitch (stitch 2, after the selvedge) as whichever stitch creates the alternating pattern. If the last decrease row ended with …k2tog, k1, then the next row begins Sl1 (slip), p1 (first working stitch), continuing \*k1, p1\* to last st, k1. This keeps the seed stitch correct.

---

### Section 4: Neck Band
*The long narrow section that wraps around the neck.*

**Work even in seed stitch with selvedge (all rows: Sl1, k1, p1, k1, p1, k1) for 112 rows.**

> **Row count note:** 112 rows at 28 rows/4 in = 16 in (40.5 cm) of neck band.

> **Length adjustment:** For a longer neck band, add rows in multiples of 2 (to maintain seed stitch alignment). For a shorter tie, remove rows in multiples of 2.

> ✅ **Stitch count check:** Still **6 stitches** throughout this section.

**Total length so far:** Tip (~2 in) + Blade body (~10 in) + Taper (~3.4 in) + Neck band (~16 in) = **approx. 31.4 in.** The knot tab (Section 5) will add the remaining length, reaching approximately 36 in total.

---

### Section 5: Neck Band End
*A simple straight finish at the back end of the neck band.*

**Work even for 8 more rows.** *(6 sts)*

**Bind off loosely** in pattern (k the knit sts, p the purl sts as you bind off). Cut yarn, leaving a 6 in (15 cm) tail for weaving in.

---

### Section 6: Knot Tab (worked separately)
*This piece slides behind the wide blade to simulate a knotted tie.*

The knot tab is a small rectangular piece that wraps around the back of the tie at the taper section, creating the illusion of a Windsor knot.

**CO 6 sts** using the same yarn and needles.

**Row 1 (RS):** Sl1, \*k1, p1\* to last st, k1. *(6 sts)*

**Repeat Row 1** until piece measures **2 in (5 cm)** from cast-on edge — approximately **14 rows.**

**BO loosely** in pattern. Cut yarn, leaving a 12 in (30.5 cm) tail for seaming.

> ✅ **Stitch count check:** Knot tab is 6 sts wide × 14 rows tall ✓.

---

## Finishing Instructions

### Step 1: Weave in ends
Using a tapestry needle, weave in all yarn ends securely on the wrong side of the work. Weave through at least 1 in (2.5 cm) of stitches, changing direction once, to secure.

### Step 2: Block the tie
- Fill a basin or sink with cool water and a drop of wool wash (if using a wool-blend yarn).
- Submerge the tie and gently squeeze (do not wring or agitate).
- Roll in a clean towel to remove excess water.
- Lay flat on a blocking mat and pin to measurements:
  - Wide blade: 3 in (7.5 cm) wide
  - Neck band: 1¼ in (3 cm) wide
  - Total length: 36 in (91.5 cm)
- Allow to dry completely before removing pins (12–24 hours).

### Step 3: Attach the knot tab
1. Position the knot tab horizontally across the wrong side (back) of the tie, centered at the point where the taper meets the neck band — approximately 12 in (30.5 cm) up from the wide blade tip.
2. Using the long tail and tapestry needle, seam the short ends of the knot tab closed (whipstitch or mattress stitch) so that it forms a small loop that sits snugly against the back of the tie. The loop should be just wide enough to slide the neck band through.
3. The neck band slides through this loop on the back of the tie to hold everything in place when worn.

> **Assembly diagram (text):**
> ```
> [WIDE BLADE — front]
>        |
>  [TAPER SECTION]
>        |
> [KNOT TAB LOOP ← neck band slides through here on the back]
>        |
> [NECK BAND — wraps around the neck]
> ```

### Step 4: Optional neck band closure
For easy on/off dressing (especially for young children), you may sew a small piece of ¾ in (2 cm) elastic or hook-and-eye closure to the ends of the neck band so it fastens without tying.

### Step 5: Final press
If desired, press lightly with a warm iron and pressing cloth on the wrong side to even out the seed stitch texture.

---

## Yardage Summary

| Section | Approx. Rows | Approx. Yards Used |
|---|---|---|
| Wide Blade Tip (increase section) | 14 rows | 8 yds (7 m) |
| Wide Blade Body | 70 rows | 50 yds (46 m) |
| Taper Section | 24 rows | 14 yds (13 m) |
| Neck Band + End | 120 rows | 22 yds (20 m) |
| Knot Tab | 14 rows | 4 yds (4 m) |
| **Total** | **242 rows** | **~98 yds (90 m)** |

> One standard skein of worsted weight yarn (200 yds / 183 m) is more than sufficient. You will have yarn left over for another small project or for a matching accessory.

---

## Troubleshooting & Tips

| Issue | Solution |
|---|---|
| Seed stitch looks like ribbing | You may be knitting the knit stitches and purling the purl stitches instead of the opposite. Remember: in seed stitch, knit the purls and purl the knits. |
| Tie is curling at the edges | This is normal before blocking. Block firmly and it will lie flat. The selvedge stitch also helps. |
| Decreases disrupting the seed stitch pattern | After each decrease row, recalculate which stitch comes first in the pattern. A sticky note tracking "Row X: starts with k" vs "starts with p" can help. |
| Knot tab too loose or tight | Adjust the number of rows on the knot tab — fewer rows for a tighter loop, more rows for a looser loop. |
| Tie is too short or too long | Add or remove rows in multiples of 2 from the Neck Band section only, as this has the least impact on the overall look. |

---

## Pattern at a Glance (Quick Reference)

```
CO 2 sts → increase to 14 sts (Section 1, 14 rows)
Work even at 14 sts for 70 rows (Section 2)
Decrease from 14 sts to 6 sts over 24 rows (Section 3)
Work even at 6 sts for 120 rows (Section 4 & 5)
BO 6 sts.

Knot Tab: CO 6 sts, work 14 rows, BO.
Seam knot tab to back of tie at taper junction.
Block. Weave ends. Done!
```

---

*Pattern designed for personal use. Please do not sell finished items from this pattern without permission.*
Disclaimer: This pattern was generated by AI and should be reviewed for accuracy before use. While we strive for quality, AI-generated content may contain errors. Please verify measurements, stitch counts, and instructions before beginning your project. Generated by purlJam.uk
Access your pattern anytime
Bookmark this page to access your pattern anytime