Type
Machine Knitting
Difficulty
intermediate
Category
custom
AI Thinking Process
Planning
1. **Design Strategy**:
- Creating a circular lacy Christening shawl for baby using DK yarn
- Circular construction suggests working from center outward or as a large square/rectangular shawl
- For beginner level, choosing a simple lace pattern suitable for punchcard or manual selection
- Using a classic feather-and-fan or Old Shale lace pattern which works well on machines
- Target finished size: approximately 36" x 36" (91cm x 91cm) square, suitable for wrapping baby
- Lacy effect achieved through transfer lace technique on standard gauge machine
2. **Construction Plan**:
- Working flat in four identical triangular panels, then seaming to create square shawl
- Each panel worked from center point outward with increases
- Alternative: work as single rectangular piece with lace pattern throughout
- For beginner simplicity: single rectangular piece with decorative lace border
- Cast on with ravel cord for flexibility in finishing
- Use every-needle arrangement with periodic transfers for lace pattern
- Bind off with latch tool for stretchy edge that accommodates lace blocking
3. **Quality Assurance**:
- Ensure transfer pattern repeats are clearly marked for beginner success
- Provide RC checkpoints every major section
- Include detailed transfer instructions with needle positions
- Address common issues: yarn weight for lace, blocking requirements, edge finishing
- Clear instructions for creating open lacy fabric without being too loose
- Reminder about gentle handling for Christening garment
4. **Final Calculations**:
- DK yarn on standard gauge at T6-7 = approximately 24 sts and 32 rows per 4" (10cm)
- For 36" (91cm) width: 216 stitches
- For 36" (91cm) length: 288 rows
- Lace pattern repeat: 12-stitch repeat x 18 repeats = 216 stitches (perfect fit)
- Border: 24 rows (3") at each end
- Main body: 240 rows (30")
Verification
[PRE-FLIGHT CHECKS]
1. **Completeness**: ✓ Pattern includes title, materials, gauge, abbreviations, notes, instructions with RC checkpoints, and finishing
2. **Consistency**: ✓ 216 sts ÷ 6 sts/inch = 36" width; 288 rows ÷ 8 rows/inch = 36" length
3. **Constraints**: ✓ DK yarn, circular (square) shawl, lacy design, beginner-appropriate techniques, Christening purpose
4. **Safety**: ✓ Math verified: 12-st repeat x 18 = 216; border calculations confirmed; RC progression logical
Pattern
<pattern>
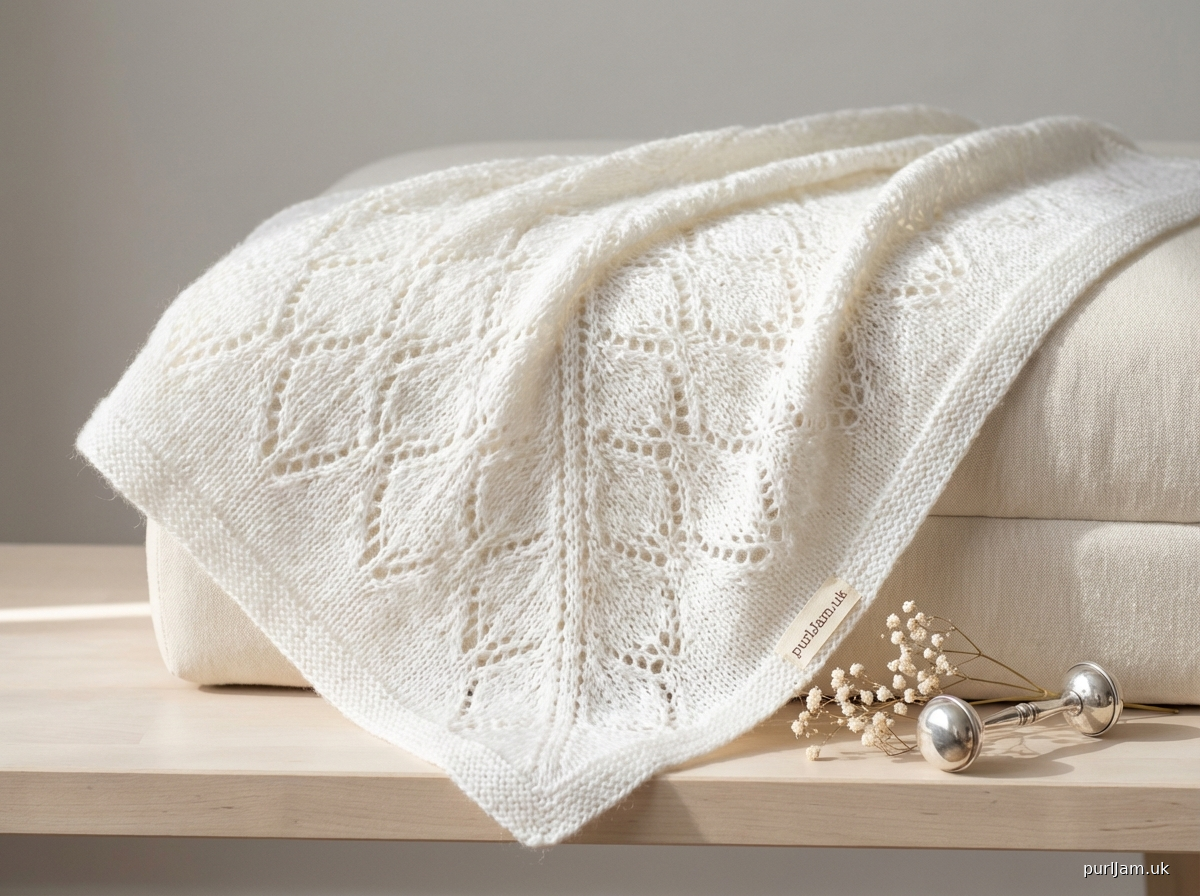
# HEIRLOOM LACE CHRISTENING SHAWL
**A delicate lacy DK-weight square shawl perfect for baby's special day**
## FINISHED MEASUREMENTS
36" x 36" (91cm x 91cm) square after blocking
## MATERIALS
**Yarn**: 800-900 yards (730-820m) DK weight yarn in white, ivory, or pale pastel
- Suggested: Baby-friendly fiber such as mercerized cotton, bamboo blend, or soft superwash merino
- Avoid mohair or highly textured yarns for baby safety
**Machine**: Standard gauge (4.5mm) knitting machine
- Compatible with: Brother/KnitKing, Silver Reed/Studio/Singer, Toyota
- Works on punchcard or electronic machines
- No ribber required
**Notions**:
- Ravel cord (smooth waste yarn)
- Cast-on comb and weights (approximately 6-8 claw weights)
- Transfer tools (2-3 prong and single prong)
- Latch tool for bind-off
- Tapestry needle for seaming/weaving ends
- Blocking wires or pins
- Blocking surface (foam mats or blocking board)
## GAUGE/TENSION
**Tension Dial**: T6 (adjust based on your machine and desired drape)
**Gauge**: 24 stitches and 32 rows = 4" (10cm) in stocking stitch before blocking
**Gauge**: 22 stitches and 30 rows = 4" (10cm) in lace pattern after blocking
**IMPORTANT**: Swatch and block your sample! Lace patterns bloom significantly when blocked.
## ABBREVIATIONS & TERMS
- **RC** = Row Counter
- **COL** = Carriage on Left
- **COR** = Carriage on Right
- **T** = Tension dial setting
- **WY** = Waste Yarn
- **MY** = Main Yarn (your DK yarn)
- **HP** = Hold Position (hold lever/button engaged)
- **NWP** = Needles in Working Position (B position on Brother, full forward)
- **OOW** = Out of Work (A position on Brother, fully back)
- **Transfer L** = Transfer stitch to left needle
- **Transfer R** = Transfer stitch to right needle
- **St(s)** = Stitch(es)
- **Carr** = Carriage
## PATTERN NOTES
1. **Lace Pattern**: This shawl uses a simple transfer lace creating a feather-and-fan effect. The 12-stitch repeat creates gentle scallops perfect for a Christening shawl.
2. **Blocking is Essential**: Like all lace knitting, this shawl must be blocked to open up the lace pattern. Plan for approximately 10-15% growth in dimensions.
3. **Tension**: T6 is recommended starting point. If fabric is too tight, increase to T7. If too loose, decrease to T5. The fabric should have drape but not be so loose that stitches are difficult to work.
4. **Yarn Considerations**: Choose soft, baby-safe yarn. Avoid wool that may felt or irritate sensitive skin unless specifically labeled "superwash" or "baby soft."
5. **Lace Repeat**: 12 stitches x 16 rows
- Rows 1-8: Transfer pattern creates draws
- Rows 9-16: Stockinette allows fabric to stabilize
6. **Working Method**: All transfers are done with carriage at right (COR) before knitting the row.
## STITCH PATTERN CHART
**12-Stitch Lace Repeat** (performed 18 times across width):
Starting needle positions (example for first repeat): Needles 1-12
```
Row 1 (RC 1): Transfer stitches to create gathers
Row 5 (RC 5): Transfer stitches to open lace
Rows 9-16: Plain knitting
```
**Detailed Transfer Instructions** (for each 12-st repeat):
Needles are numbered 1-12 for each repeat. Repeat this pattern across all 18 repeats (216 needles total).
**RC 1** (COR before knitting):
- Transfer st from needle 2 to needle 1
- Transfer st from needle 3 to needle 4
- Transfer st from needle 5 to needle 4
- Transfer st from needle 7 to needle 6
- Transfer st from needle 8 to needle 9
- Transfer st from needle 10 to needle 9
- Transfer st from needle 11 to needle 12
- Knit 1 row COL (empty needles will pick up yarn)
- RC now reads 1
**RC 2-4**: Knit 3 rows plain (RC reads 4)
**RC 5** (COR before knitting):
- Transfer st from needle 1 to needle 2
- Transfer st from needle 4 to needle 3
- Transfer st from needle 4 to needle 5
- Transfer st from needle 6 to needle 7
- Transfer st from needle 9 to needle 8
- Transfer st from needle 9 to needle 10
- Transfer st from needle 12 to needle 11
- Knit 1 row COL
- RC now reads 5
**RC 6-16**: Knit 11 rows plain (RC reads 16)
**Repeat RC 1-16** for pattern.
---
## INSTRUCTIONS
### MACHINE SETUP
1. Push 216 needles to NWP (needle positions: 108L to 108R for centered work, or adjust as preferred)
2. Thread carriage with waste yarn
3. Set tension dial to T8-9 for waste yarn
4. Set carriage for plain knitting (no slip, tuck, or hold)
5. Ensure row counter is set to 000
### CAST-ON
**RC 000** (COR)
1. Using waste yarn at T8-9, cast on using preferred method:
- **Method 1** (recommended): Ravel cord cast-on
- Lay ravel cord across needles below latches
- Bring needles to hold position to secure cord
- Return to NWP
- **Method 2**: E-wrap by hand
2. Knit 8-10 rows with waste yarn (RC 008-010)
3. Hang cast-on comb evenly across all stitches
4. Distribute 6-8 claw weights evenly across comb
5. Knit 2 more rows waste yarn
**RC 010** (COR)
6. Change to main yarn (MY), change tension to T6
7. Knit 2 rows MY to establish base (RC 012)
### BORDER SECTION 1 (Bottom Edge)
**RC 012** (COR)
Set row counter to 000 for easier tracking
**RC 000-023**: Knit 24 rows plain stocking stitch at T6 (RC reads 024)
- Move weights up every 20-30 rows as fabric advances
- Check tension is even across all needles
- Fabric should have nice drape, not too tight
### MAIN LACE BODY
You will now work the 16-row lace repeat 15 times total = 240 rows
**LACE REPEAT 1**
**RC 024** (COR - before knitting this row)
*For each of the 18 twelve-stitch repeats across the bed, perform these transfers:*
Using 3-prong transfer tool (or single-prong, working carefully):
- **Gather transfers** (creating the drawn-in sections):
- Transfer needle 2→1, creating empty needle at 2
- Transfer needle 3→4
- Transfer needle 5→4, creating empty needle at 5
- Transfer needle 7→6, creating empty needle at 7
- Transfer needle 8→9
- Transfer needle 10→9, creating empty needle at 10
- Transfer needle 11→12, creating empty needle at 11
After all transfers across all 18 repeats, verify you have created the empty needle pattern.
**RC 024**: Knit 1 row COL (T6) - empty needles will catch yarn and form new stitches
- Watch that yarn feeds evenly into empty needles
- RC now reads 025
**RC 025-027**: Knit 3 rows plain (RC reads 028)
**RC 028** (COR - before knitting this row)
*For each 12-stitch repeat, perform these transfers:*
- **Spread transfers** (creating the openwork):
- Transfer needle 1→2, creating empty needle at 1
- Transfer needle 4→3
- Transfer needle 4→5, creating empty needle at 4
- Transfer needle 6→7, creating empty needle at 6
- Transfer needle 9→8
- Transfer needle 9→10, creating empty needle at 9
- Transfer needle 12→11, creating empty needle at 12
**RC 028**: Knit 1 row COL (T6) - empty needles form new stitches
- RC now reads 029
**RC 029-039**: Knit 11 rows plain (RC reads 040)
**LACE REPEAT 2-15**
**RC 040-263**: Repeat the 16-row lace pattern (RC 024-039 instructions) 14 more times
- Continue moving weights up as needed
- Check for even knitting; adjust tension if necessary
- Each complete repeat = 16 rows
- After 15 total repeats, RC reads 264
**Checkpoints for accuracy:**
- After 5 repeats: RC should read 104
- After 10 repeats: RC should read 184
- After 15 repeats: RC should read 264
### BORDER SECTION 2 (Top Edge)
**RC 264-287**: Knit 24 rows plain stocking stitch at T6 (RC reads 288)
- This mirrors the bottom border
- Keep tension consistent
### BIND-OFF
**RC 288** (COR or COL)
**Latch Tool Bind-Off Method** (recommended for stretchy edge):
1. Remove weights and comb carefully
2. Starting at one end (right or left):
- Using latch tool, remove first stitch from needle onto tool (latch open)
- Remove second stitch from needle, pass first stitch through second (like hand crochet chain)
- Continue across all 216 stitches
- When you reach last stitch, cut yarn leaving 10" (25cm) tail
- Pull tail through final loop to secure
3. Remove work from machine
4. Carefully remove waste yarn by pulling ravel cord (if used) or unpicking waste rows
5. Thread yarn tail on tapestry needle and secure bind-off end by weaving through several stitches
### FINISHING
**Weaving in Ends**:
1. Thread each yarn end onto tapestry needle
2. Weave through several stitches on wrong side of work
3. For extra security, weave in opposite direction for 1"
4. Trim excess carefully
**Blocking** (ESSENTIAL for lace):
1. Fill spray bottle with lukewarm water (or use wool wash solution for wool yarns)
2. Lay shawl on blocking surface (foam mats, blocking board, or clean carpet with towels)
3. Spray shawl evenly until damp but not soaked
- Alternative: Soak in basin for 10 minutes, gently squeeze out excess water, roll in towel
4. Gently stretch shawl to 36" x 36" square shape
5. Pin edges using blocking wires (recommended) or rust-proof pins every 1-2 inches
- Pay special attention to corners - ensure they are square
- Gently pull out scallops along edges to emphasize lace pattern
6. Allow to dry completely (24-48 hours depending on humidity)
- Do not move or unpin until fully dry
7. Once dry, remove pins/wires
8. Steam lightly with iron on appropriate setting (hover, don't press) if needed to set shape
**Care Instructions for Gift Tag**:
"Hand wash in cool water with gentle soap. Roll in towel to remove excess water. Block flat to original dimensions. Do not wring or machine dry."
---
## TROUBLESHOOTING
**Issue**: Transfers are difficult to complete
- **Solution**: Work at T7 for slightly looser stitches that transfer more easily
**Issue**: Empty needles don't catch yarn properly
- **Solution**: Ensure needles are fully forward (NWP). Manually check each needle has caught yarn before moving carriage
**Issue**: Lace pattern not visible
- **Solution**: This is normal before blocking! The pattern will open up beautifully when blocked
**Issue**: Edges rolling
- **Solution**: Normal for stockinette. Will be resolved during blocking when pinned flat
**Issue**: Tension varies across width
- **Solution**: Check that weights are distributed evenly. Adjust individual stitch size if your machine has this feature
**Issue**: Yarn breaks during knitting
- **Solution**: Check tension isn't too tight. Ensure yarn feeds smoothly from ball/cone. May need to increase tension dial setting
---
## DESIGN VARIATIONS
**Size Adjustments**:
- **Smaller** (30" x 30"): Cast on 180 sts (15 repeats of 12-st pattern), work 12 lace repeats instead of 15
- **Larger** (42" x 42"): Cast on 252 sts (21 repeats), work 18 lace repeats
**Border Variations**:
- Add picot edge: Before final bind-off, work transfer lace pattern one more time for decorative edge
- Deeper borders: Increase border rows to 32-40 rows (4-5 inches)
**Color Options**:
- Traditional white or ivory
- Pale pastels: soft pink, blue, lemon, mint
- Modern neutrals: soft gray, warm beige
**Lace Density**:
- More open
Disclaimer: This pattern was generated by AI and should be reviewed for accuracy before use. While we strive for quality, AI-generated content may contain errors. Please verify measurements, stitch counts, and instructions before beginning your project. Generated by purlJam.uk
Access your pattern anytime
Bookmark this page to access your pattern anytime