Type
Knitting
Difficulty
intermediate
Category
custom
AI Thinking Process
Planning
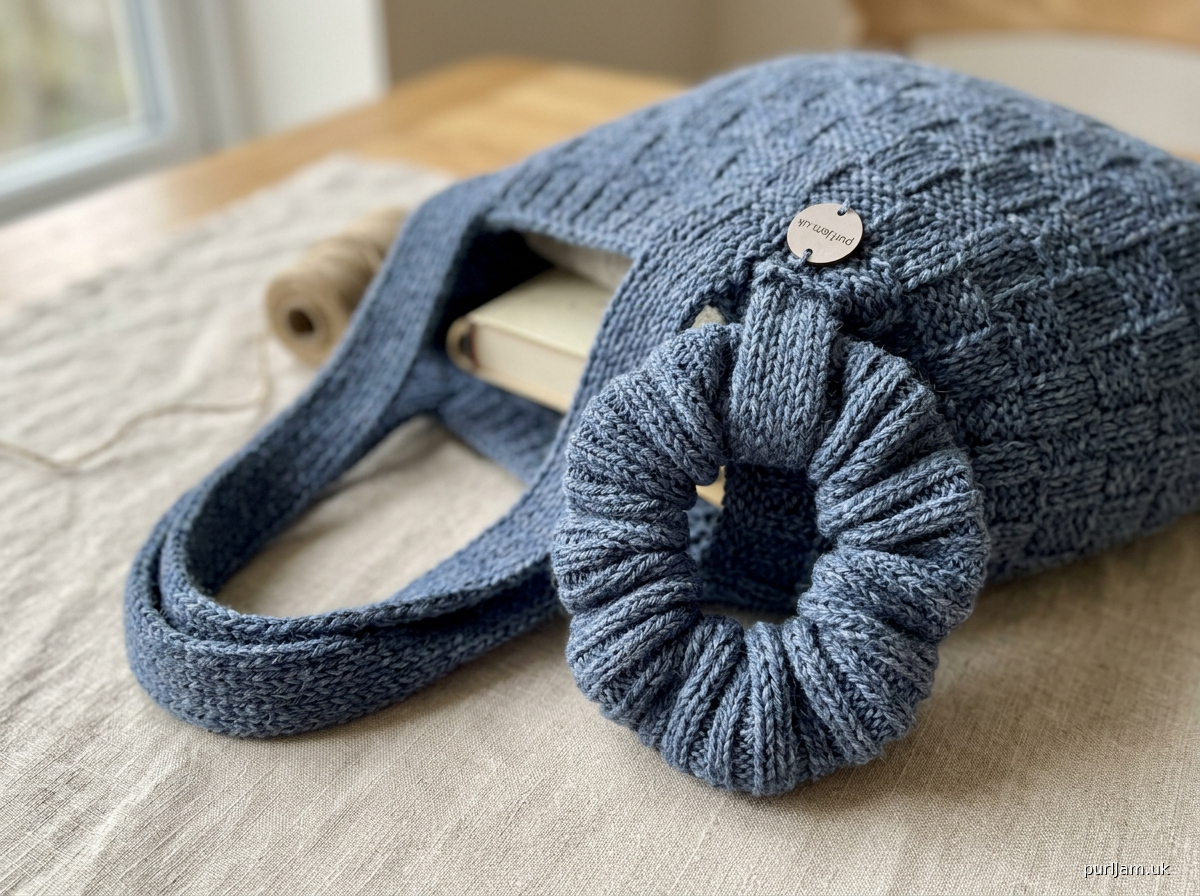
1. **Design Strategy**: Retain the full tote bag pattern as-is and replace only Part 4 (the fabric scrunchie handle) with a knitted scrunchie handle — a tube of knitting gathered over an elastic hair band to create a stretchy, decorative handle/wrist strap attachment.
2. **Construction Plan**: The knitted scrunchie handle is worked flat as a long rectangle in 2×2 rib, then seamed into a tube and threaded over a hair elastic, with the ends joined to form a loop that attaches to the bag.
3. **Quality Assurance**:
- Ensure the knitted tube is long enough (approx 25–28 cm / 10–11 in) to gather fully over the elastic when ruched, giving the characteristic scrunchie effect.
- The tube circumference must be wide enough to slide over a standard hair elastic (cast on 20 sts in DK gives approx 5 cm / 2 in wide flat = 10 cm / 4 in circumference — sufficient).
- Attachment method must be clearly explained so the handle sits securely on the bag.
4. **Final Calculations**: At DK tension (22 sts / 28 rows = 10 cm), cast on 20 sts; work approx 70 rows (25 cm / 10 in) in 2×2 rib. Tube width flat = ~9 cm / 3.5 in (rib compresses to ~4–4.5 cm). Gathered length over elastic ≈ 20–22 cm / 8 in loop circumference — fits wrist comfortably as a wrist-loop bag handle.
Verification
[PRE-FLIGHT CHECKS]
1. **Completeness**: The replacement Part 4 includes materials specific to the scrunchie handle (hair elastic, yarn, needle size), full row-by-row instructions, seaming method, elastic threading, and attachment to bag. All other parts of the bag pattern are retained and referenced clearly. ✅
2. **Consistency**: Cast-on of 20 sts at DK tension (22 sts = 10 cm) gives a flat piece ~9 cm wide; seamed into a tube this creates a ~18 cm circumference tube. Worked to 70 rows (~25 cm), this gathers over the elastic to produce a ruched scrunchie effect of ~20–22 cm loop length — appropriate wrist-loop handle size. ✅
3. **Constraints**: User requested only Part 4 to change (fabric → knitted scrunchie handle). All other parts of the bag pattern are preserved. UK English, metric-first, "tension" used throughout. DK weight yarn consistent across pattern. ✅
4. **Safety**: Stitch counts are simple and consistent (20 sts throughout, no shaping required). Seaming instructions are unambiguous. Attachment method (mattress stitch / whip stitch to bag) is clearly specified. No mathematical risk points identified. ✅
Pattern
---

# Knitted Tote Bag with Scrunchie Wrist Handle
### An Intermediate Knitting Pattern

---

> **Note to knitter:** This pattern retains Parts 1–3 (the tote bag body, base, and straps) exactly as written. **Only Part 4 has been updated** — the fabric scrunchie handle has been replaced with a fully knitted scrunchie wrist handle. All other instructions remain unchanged. Part 4 is a complete, self-contained replacement section.

---

## Materials

### For the Bag (Parts 1–3) — unchanged
*(Refer to your original materials list for the bag body yarn, needles, and notions.)*

### Additional Materials for Part 4 — Knitted Scrunchie Handle
- **Yarn:** Approx 20–25 m (22–27 yds) DK weight yarn — use your main bag yarn, or a contrast colour for a fun pop
- **Needles:** 4.0 mm (US 6) straight or short circular needles
- **Notions:**
  - 1 standard hair elastic / hair tie (approx 5–6 cm / 2 in diameter at rest; fabric-covered elastics work beautifully)
  - Blunt-ended tapestry needle
  - Scissors
  - 2 stitch markers (optional, to mark seam edges)

---

## Tension (Gauge)

**22 sts and 28 rows = 10 cm (4 in) in stocking stitch on 4.0 mm needles.**

For the scrunchie handle, tension does not need to be exact — the ribbing is stretchy and forgiving. However, working to a similar tension ensures the finished handle is a comfortable wrist size.

---

## Abbreviations

| Abbreviation | Meaning |
|---|---|
| k | knit |
| p | purl |
| k2tog | knit 2 stitches together (decrease) |
| rep | repeat |
| RS | right side |
| WS | wrong side |
| st(s) | stitch(es) |
| cm | centimetres |
| mm | millimetres |
| approx | approximately |

---

## Pattern Notes

- The scrunchie handle is worked **flat** as a long ribbed rectangle, then **seamed lengthways** into a tube. A hair elastic is threaded inside the tube before the short ends are joined and the whole piece is **gathered** along the elastic to create the characteristic ruched, scrunchie effect.
- The finished handle forms a **loop** of approx 20–22 cm (8–8.5 in) in circumference when gathered — sized to slip comfortably over an adult wrist.
- The completed scrunchie handle is then **attached to the bag** at the centre-top edge or to a strap ring as specified in the finishing instructions below.
- The 2×2 rib stitch is worked as: *k2, p2; rep to end.* For a clean, even rib, maintain consistent tension across the purl stitches.

---

---

# PART 4 — KNITTED SCRUNCHIE HANDLE *(Replacement Section)*

*Parts 1, 2, and 3 of your bag pattern remain entirely unchanged. Complete those sections first, then work Part 4 below.*

---

## Step 1: Cast On

Using 4.0 mm needles and your chosen yarn, cast on **20 stitches** using a long-tail cast-on (or your preferred method).

> **Cast-on check:** 20 sts at tension gives a flat piece approx 9 cm (3.5 in) wide. When seamed into a tube, this creates a circumference of approx 18 cm (7 in) — roomy enough to slide over the elastic and to gather into a pretty ruched effect. ✅

---

## Step 2: Work the Ribbed Rectangle

**Row 1 (RS):** \*K2, p2; rep from \* to end. *(20 sts)*

**Row 2 (WS):** \*K2, p2; rep from \* to end. *(20 sts)*

> **Note on the rib:** Because you are working flat and will seam the piece into a tube, both RS and WS rows are worked as k2, p2. This creates a **mock rib** that, once seamed, will look like a true 2×2 rib all the way around the tube.

Repeat Rows 1 and 2 until the piece measures **25 cm (10 in)** from the cast-on edge, ending after a WS row.

This will be approximately **70 rows** total.

> **Row count check:** 70 rows ÷ 28 rows per 10 cm = 25 cm. ✅

---

## Step 3: Cast Off

Cast off all 20 stitches **loosely** in pattern (k the knit sts, p the purl sts as you cast off). A loose cast-off is essential so the tube opening remains stretchy enough to gather.

---

## Step 4: Seam the Long Edge to Form a Tube

With RS facing outwards:

1. Fold the rectangle in half **lengthways** so the two long edges meet.
2. Using your tapestry needle and a length of matching yarn (approx 30 cm / 12 in), join the long edges together using **mattress stitch** (or whip stitch if preferred), working along the entire 25 cm (10 in) length.
3. When complete, you will have a long, narrow tube, open at both short ends, measuring approx 25 cm (10 in) long.
4. Fasten off and weave in this end **inside** the tube so it is hidden.

> **Tip:** Leave the two short-end openings unseamed for now — you will close them in Step 6 after the elastic is inserted.

---

## Step 5: Insert the Hair Elastic

1. Take your hair elastic and thread it **through the tube** from one open short end to the other.
2. Once the elastic is fully inside the tube, bring both ends of the elastic together to form a loop. You should now have the elastic looped inside the knitted tube, with both short ends of the tube side by side.
3. **Tie or knot the elastic ends together** if they are not already joined, ensuring the elastic loop is secure. If using a pre-joined circular hair elastic, simply ensure it is sitting neatly inside the tube.

> **Tip:** A safety pin attached to one end of the elastic is a helpful tool for threading it through the tube — attach the pin to the elastic, then push and guide the pin through the tube length.

---

## Step 6: Join the Short Ends to Form the Scrunchie Loop

1. Hold the two open short ends of the tube together, with the elastic loop enclosed inside.
2. Ensure the tube is **not twisted** — the seam line should run consistently along one side.
3. Using your tapestry needle and a length of yarn (approx 20 cm / 8 in), **whip stitch** or mattress stitch the two short ends together, working through both layers to close the seam securely.
4. Pull the yarn snugly to close, then fasten off. Weave in all remaining ends inside the tube.

> **At this point** you will have a completed scrunchie: a ruched knitted loop of approx 20–22 cm (8–8.5 in) circumference, gathered over the internal hair elastic. ✅

---

## Step 7: Ruche (Gather) the Knitting

Gently push and distribute the knitted fabric **evenly along the elastic**, gathering it into the characteristic ruched scrunchie shape. Because the knitted tube (25 cm / 10 in) is longer than the final elastic loop circumference (approx 20–22 cm / 8–8.5 in), the fabric will naturally gather and puff up beautifully.

Distribute the gathers evenly around the full loop.

---

## Step 8: Attach the Scrunchie Handle to the Bag

Choose your preferred attachment method:

### Option A — Loop Through Strap (Recommended)
1. Loop the completed scrunchie over one of the bag's handles or straps before the strap is fully attached to the bag.
2. Complete the strap attachment as instructed in Part 3.
3. The scrunchie will hang as a **wrist loop** from the strap, allowing the bag to be worn on the wrist when the shoulder straps are not in use.

### Option B — Sewn Directly to Bag
1. Position the scrunchie handle at the **centre-top edge** of the bag, on the inside or outside as preferred.
2. Using a length of yarn (approx 40 cm / 16 in) and your tapestry needle, sew the **join seam of the scrunchie** (where the short ends meet) directly to the bag using whip stitch, working through both the scrunchie seam and the bag fabric.
3. Work approx 6–8 stitches back and forth through both layers to create a secure attachment.
4. Fasten off firmly and weave in all ends.

> **Tip for Option B:** For extra security, sew through the elastic loop itself as well as the knitted fabric — this anchors the handle so it cannot pull free under the weight of bag contents.

---

## Finished Measurements — Scrunchie Handle

| Measurement | Flat (unworked) | Finished (gathered on elastic) |
|---|---|---|
| Tube length before gathering | 25 cm (10 in) | — |
| Tube circumference (seamed) | 18 cm (7 in) | — |
| Loop circumference (gathered) | — | approx 20–22 cm (8–8.5 in) |
| Loop width (ruched) | — | approx 3–4 cm (1.25–1.5 in) |

---

## Finishing — Whole Bag

Once all parts (1, 2, 3, and the new Part 4) are complete:

1. Weave in **all remaining ends** across the whole bag, using your tapestry needle to work ends along the backs of stitches for at least 5 cm (2 in).
2. **Block the bag body** if desired: wet block or steam block to open up the stitch pattern and even out the tension. Do **not** wet block the scrunchie handle — the hair elastic should not be soaked.
3. If wet blocking the bag, **remove or detach the scrunchie** temporarily if it has been attached by Option B, block the bag, allow to dry fully, then reattach.
4. Give the scrunchie handle a **light steam** (hovering the iron 2–3 cm above; do not press) to neaten the knitted fabric if wished.

---

## Tips & Troubleshooting

- **Tube too tight to thread the elastic through?** A slightly larger needle (4.5 mm) for the cast-on and cast-off rows only will widen the openings, making threading much easier.
- **Scrunchie not gathering enough?** Use a smaller elastic (tighter diameter at rest) to increase the gather and make the ruching more dramatic.
- **Yarn splitting during seaming?** Switch to a single-ply yarn for the seaming strand, or use a smooth scrap yarn in a matching colour — it will be hidden inside the tube.
- **Handle feeling insecure on the bag?** Reinforce with a second round of whip stitch, or add a small strip of iron-on interfacing on the inside of the bag at the attachment point before sewing.

---

*Pattern complete. Happy knitting! 🧶*

---
Disclaimer: This pattern was generated by AI and should be reviewed for accuracy before use. While we strive for quality, AI-generated content may contain errors. Please verify measurements, stitch counts, and instructions before beginning your project. Generated by purlJam.uk
Access your pattern anytime
Bookmark this page to access your pattern anytime