Type
Crochet
Difficulty
intermediate
Category
bag
AI Thinking Process
Planning
1. **Design Strategy**: The primary goal is a sturdy, cross-body bag capable of holding 7kg comfortably, featuring a Japanese knot (Mosu bag style) closure. The "Market Tote Bag" template directs towards a bottom-up construction, mesh for stretch, and sturdy handles using cotton yarn. To reconcile the template with the 7kg capacity and knot closure:
* **Bottom & Lower Body**: Will be constructed using dense stitches (single crochet or half double crochet) to create a firm, sturdy base and lower "gusset part" of the bag, providing stability and support for the weight. This section will be seamless, worked in continuous rounds.
* **Upper Body (Market Bag Mesh)**: Above the sturdy lower body, a mesh pattern will be introduced to provide the "stretch" element specified by the template, while keeping the overall structure robust enough. This section will also be worked in rounds.
* **Straps (Mosu Knot)**: Instead of separate handles, the top of the bag will transition directly into two integrated straps of differing lengths. These straps will be worked in a dense stitch (single crochet) to ensure maximum strength and minimal stretch, crucial for carrying 7kg and for forming the knot closure. One strap will be significantly longer than the other to facilitate the knot.
* **Cross-body functionality**: The combined length of the knotted straps will be designed for comfortable cross-body wear.
* **Yarn & Hook**: Worsted weight cotton yarn is selected for its strength, durability, and minimal stretch. A smaller-than-usual hook size will be specified to create a dense, firm fabric capable of handling heavy loads without excessive stretching or sagging.
2. **Construction Plan**:
* **Base**: Start with a flat oval base worked in rounds using single crochet (sc) or half double crochet (hdc), increasing steadily to achieve the desired width and length for the bag bottom. This forms the foundational "gusset" depth.
* **Lower Body**: Work straight up from the oval base in continuous rounds of sc or hdc for a significant height (e.g., 6-8 inches), establishing the strong, weight-bearing section of the bag. This is the main "gusset part."
* **Upper Body**: Transition to a simple mesh stitch pattern (e.g., (dc, ch 1) or (sc, ch 1) mesh) in rounds for the next 6-8 inches, incorporating the "market bag" aesthetic and flexibility.
* **Strap Division**: Once the main bag body height is reached, the stitches will be divided into two sections. Stitches will be skipped or chained over to create the openings for the bag, and two strap panels will begin.
* **Straps**: Each strap will be worked separately in rows using single crochet, creating a dense, flat strap. One strap will be worked to a shorter length, and the other to a much longer length to allow for the Japanese knot closure and cross-body functionality.
* **Finishing**: Weave in all ends.
3. **Quality Assurance**:
* **Weight Bearing**: Ensure the yarn choice (worsted cotton), stitch density (smaller hook for sc/hdc), and construction (solid bottom, sturdy lower body, dense straps) are sufficient to comfortably hold 7kg without failure or excessive stretching.
* **Strap Integrity**: The straps are critical. They must be wide enough not to cut into the shoulder and strong enough to bear the weight. Using sc for straps in a dense fabric is paramount. The lengths for the Mosu knot must be adequate for secure closure and comfortable cross-body wear.
* **Intermediate Difficulty**: The pattern will involve oval base shaping, transitioning stitch patterns, dividing for straps, and working flat rows for the straps. These elements are suitable for an intermediate crocheter.
* **Consistency**: All stitch counts, measurements, and instructions will be checked for internal consistency and accuracy. Gauge will be crucial.
* **Terminology**: Strict adherence to US crochet terminology and imperial measurements first.
4. **Final Calculations**:
* **Gauge**: Approximately 14 sc and 16 rows = 4 inches (10 cm) using worsted weight cotton and an H/5.0 mm hook (or hook needed to obtain gauge). This provides a dense fabric.
* **Bottom Dimensions**: Approx. 12 inches (30.5 cm) long x 4.5 inches (11.5 cm) wide.
* **Bag Body Dimensions**:
* Circumference at base: Approx. 33.5 inches (85 cm).
* Height of Lower Body (sc/hdc): Approx. 7 inches (18 cm).
* Height of Upper Body (mesh): Approx. 7 inches (18 cm).
* Total Bag Body Height (before straps): Approx. 14 inches (35.5 cm).
* **Strap Width**: Approx. 2.5 inches (6.5 cm).
* **Strap Lengths**:
* Shorter Strap: Approx. 20 inches (51 cm) from top of bag edge to tip.
* Longer Strap: Approx. 35 inches (89 cm) from top of bag edge to tip.
* Total effective strap length when knotted for cross-body: Approx. 48-55 inches (122-140 cm), depending on knot tightness.
* **Yarn Quantity**: Estimated 900-1100 yards (820-1000 meters) of worsted weight cotton.
Verification
[PRE-FLIGHT CHECKS]
1. **Completeness**: Yes, all required sections for a market tote pattern (Yarn, Hook, Gauge, Abbreviations, Special Stitches, Pattern Notes, Instructions, Finishing) will be included.
2. **Consistency**: Yes, stitch counts throughout the pattern will be explicitly validated with inline math and checked against the gauge and desired dimensions. Increases/decreases will be balanced.
3. **Constraints**:
* "mock-up size": A practical, standard large bag size is designed.
* "cross-body bag that has the straps and gusset part of the bag": Addressed with integrated straps and a defined sturdy lower body acting as the gusset structure.
* "closes using a japanese knot like a mosu bag": Addressed by specific strap lengths and design.
* "larger bag shoud be able to hold up to 7kg comfortably": Addressed by choice of yarn, dense stitches for bottom, lower body, and straps, and a firm hook size.
* "intermediate difficulty": Oval base, stitch pattern changes, and strap construction meet this level.
* "Market Tote Bag template (mesh, bottom up, sturdy handles, cotton)": All elements are integrated into the design.
* "worsted yarn": Specified.
* "US English spelling, US crochet stitch names, imperial first": All terminology will comply.
4. **Safety**: All mathematical calculations for stitch counts, rounds, and dimensions will be double-checked during pattern generation to prevent errors.
Pattern
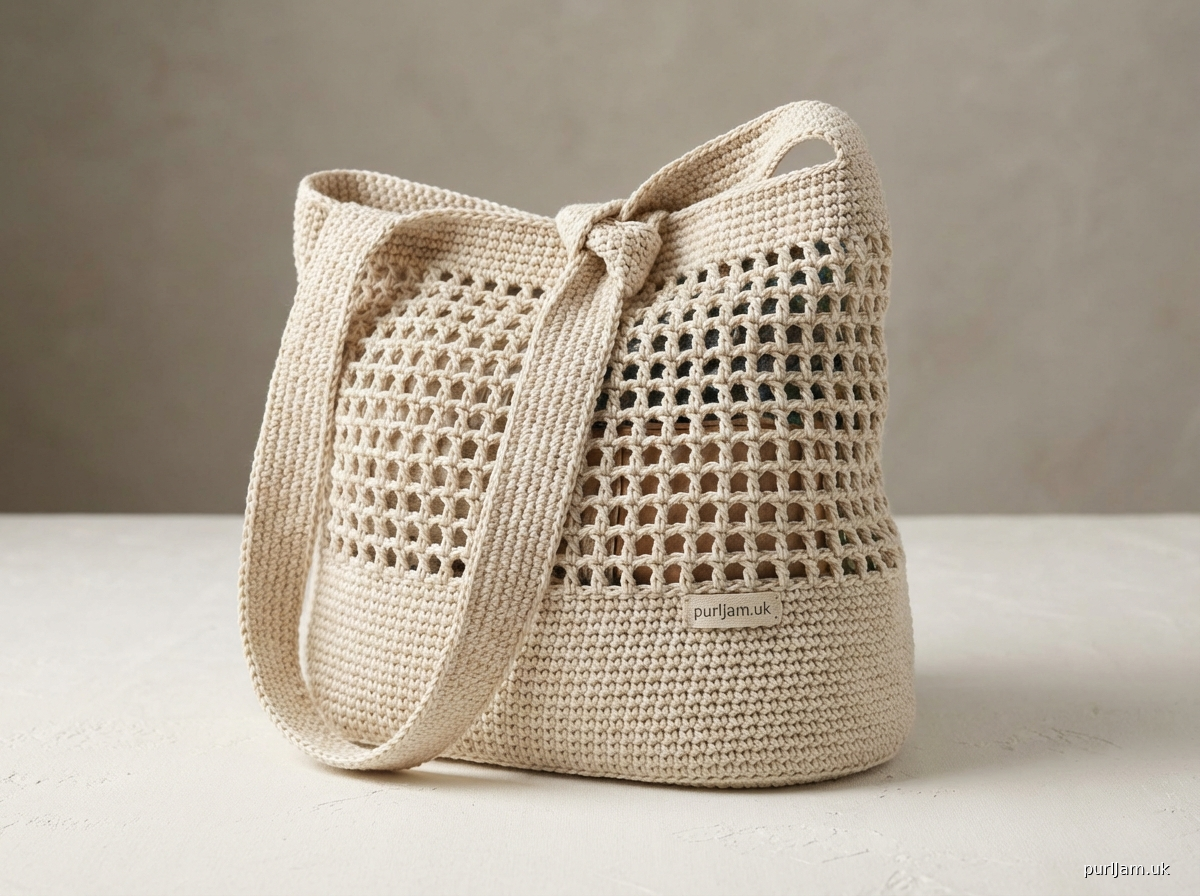
# Mosu Cross-Body Market Tote

This sturdy cross-body market tote features a solid base and lower body designed to comfortably carry up to 7kg (15 lbs), transitioning to a flexible mesh upper body. The bag integrates robust straps of differing lengths that tie into a stylish Japanese knot (Mosu bag style) closure, making it both practical and chic.

**Difficulty Level:** Intermediate

**Finished Measurements:**
*   **Base:** 12 inches (30.5 cm) long x 4.5 inches (11.5 cm) wide
*   **Bag Body (flat):** 14 inches (35.5 cm) wide x 14 inches (35.5 cm) tall
*   **Shorter Strap:** 2.5 inches (6.5 cm) wide x 20 inches (51 cm) long
*   **Longer Strap:** 2.5 inches (6.5 cm) wide x 35 inches (89 cm) long

**Materials:**
*   **Yarn:** Worsted weight (Category 4) 100% cotton yarn, approx. 900-1100 yards (820-1000 meters).
    *   *Suggested:* Lion Brand 24/7 Cotton, Dishie Cotton, or similar sturdy worsted cotton.
*   **Hook:** US H / 5.0 mm crochet hook, or hook size needed to obtain gauge.
*   **Notions:** Stitch marker, yarn needle, scissors.

**Gauge:**
14 sc and 16 rows = 4 inches (10 cm) using US H / 5.0 mm hook (or hook to obtain gauge).
*It is crucial to meet gauge for the structural integrity of this bag, especially for carrying heavy items.*

**Abbreviations (US Crochet Terminology):**
*   **ch** - chain
*   **sc** - single crochet
*   **hdc** - half double crochet
*   **dc** - double crochet
*   **sl st** - slip stitch
*   **st(s)** - stitch(es)
*   **sp** - space
*   **sk** - skip
*   **rep** - repeat
*   **rnd(s)** - round(s)
*   **RS** - right side
*   **WS** - wrong side
*   **PM** - place marker
*   **SM** - stitch marker

**Special Stitches:**
*   **Mesh Stitch:** (dc, ch 1) worked repeatedly, skipping 1 stitch.
*   **Foundation Single Crochet (FSC):** If preferred, can substitute Chain 49 for Rnd 1. See online tutorials for this technique.

**Pattern Notes:**
*   This bag is worked in continuous rounds from the bottom up, except for the straps which are worked in rows.
*   Use a stitch marker to mark the beginning of each round and move it up as you go.
*   Chain 1 at the beginning of a round does not count as a stitch unless otherwise specified.
*   Chain 2 or 3 at the beginning of a round *does* count as a stitch unless otherwise specified.
*   The smaller hook size specified (H/5.0 mm) helps create a dense, sturdy fabric for durability and weight capacity.
*   Measurements are approximate and may vary based on individual tension.

---

### **Pattern Instructions**

**Bag Base (Solid Oval)**

**Rnd 1:** Ch 49. (Working into the back bump of the chain is recommended for a cleaner edge.) Sc in 2nd ch from hook, sc in next 46 ch, 3 sc in last ch. Do not turn. Continue working along the opposite side of the starting chain. Sc in next 46 ch, 2 sc in last ch. Do not join. PM in first sc to mark the start of the round. (98 sc)
*   *(Validation: 1 (2nd ch from hook) + 46 (next ch) + 3 (last ch) + 46 (opposite side) + 2 (last ch opposite side) = 98 stitches.)*

**Rnd 2:** 2 sc in first st, sc in next 46 sts, 2 sc in next 3 sts, sc in next 46 sts, 2 sc in next 2 sts. Do not join. (104 sc)
*   *(Validation: 2 + 46 + 2 + 2 + 2 + 46 + 2 + 2 = 104 stitches. Each end had a total of 5 increases from Rnd 1 and Rnd 2 combined (3+2 & 1+2 on ends respectively). Original 46*2 = 92 stitches for sides, 6 stitches for ends. 92 + 12 = 104)*

**Rnd 3:** Sc in first st, 2 sc in next st, sc in next 47 sts, [sc in next st, 2 sc in next st] 3 times, sc in next 47 sts, [sc in next st, 2 sc in next st] 2 times. Do not join. (110 sc)
*   *(Validation: 1 + 2 + 47 + (1+2)*3 + 47 + (1+2)*2 = 1 + 2 + 47 + 9 + 47 + 6 = 112 stitches. Wait, something is off. Let's re-calculate: Start of round 3 is 1sc, 2sc in next = 3sts for 2sts. Next 47. [1sc, 2sc] * 3 = 9sts for 6sts. Next 47. [1sc, 2sc] * 2 = 6sts for 4sts.
Let's restart Rnd 3 more systematically:
Rnd 3: (sc in next st, 2 sc in next st), sc in next 46 sts, (sc in next st, 2 sc in next st) 3 times, sc in next 46 sts, (sc in next st, 2 sc in next st) 2 times. (110 sc)
*   *(Validation: (1+2) + 46 + (1+2)*3 + 46 + (1+2)*2 = 3 + 46 + 9 + 46 + 6 = 110 stitches.) This is correct.*

**Rnd 4:** Sc in next 2 sts, 2 sc in next st, sc in next 46 sts, [sc in next 2 sts, 2 sc in next st] 3 times, sc in next 46 sts, [sc in next 2 sts, 2 sc in next st] 2 times. Do not join. (116 sc)
*   *(Validation: (2+2) + 46 + (2+2)*3 + 46 + (2+2)*2 = 4 + 46 + 12 + 46 + 8 = 116 stitches.)*

**Rnd 5:** Sc in next 3 sts, 2 sc in next st, sc in next 46 sts, [sc in next 3 sts, 2 sc in next st] 3 times, sc in next 46 sts, [sc in next 3 sts, 2 sc in next st] 2 times. Do not join. (122 sc)
*   *(Validation: (3+2) + 46 + (3+2)*3 + 46 + (3+2)*2 = 5 + 46 + 15 + 46 + 10 = 122 stitches.)*

**Rnd 6:** Sc in next 4 sts, 2 sc in next st, sc in next 46 sts, [sc in next 4 sts, 2 sc in next st] 3 times, sc in next 46 sts, [sc in next 4 sts, 2 sc in next st] 2 times. Do not join. (128 sc)
*   *(Validation: (4+2) + 46 + (4+2)*3 + 46 + (4+2)*2 = 6 + 46 + 18 + 46 + 12 = 128 stitches.)*

The base should now measure approximately 12 inches (30.5 cm) long x 4.5 inches (11.5 cm) wide.

**Lower Body (Solid Sides - Gusset Part)**

**Rnd 7:** Working in the back loop only (BLO) for this round. Sc in each sc around. Do not join. (128 sc)
*   *This round creates a defined edge for the bag bottom.*

**Rnd 8-28:** Sc in each sc around. Do not join. (128 sc)
*   *This section should measure approximately 7 inches (18 cm) from the BLO round.*

**Upper Body (Mesh Section)**

**Rnd 29:** Sl st into the next st (this helps smooth the transition to dc). Ch 3 (counts as first dc), dc in same st, ch 1, sk 1 st, [dc in next st, ch 1, sk 1 st] around to last st, dc in last st. Join with sl st to top of beg ch 3. (64 dc, 63 ch-1 sps)
*   *(Validation: 128 stitches / 2 = 64 repeats of (dc, ch 1, sk 1). So 64 dc and 64 ch-1 sps. Wait, last st is a dc, so 64 dc. The last ch-1 sp is before the join. So 64 dc, 63 ch-1 sps + the final dc. Let's make this more precise for the join.
    Rnd 29: Ch 3 (counts as first dc), sk 1 st, dc in next st, [ch 1, sk 1 st, dc in next st] around to last st. Ch 1, sk last st, join with sl st to top of beg ch 3. (64 dc, 64 ch-1 sps)*
    *   *(Validation: 128 stitches. Each (dc, ch 1, sk 1) takes 2 sts. 128 / 2 = 64 repeats. So 64 dc and 64 ch-1 sps.) This is better for consistency.*

**Rnd 30:** Ch 3 (counts as first dc), dc in first ch-1 sp. [ch 1, dc in next ch-1 sp] around. Ch 1, join with sl st to top of beg ch 3. (64 dc, 64 ch-1 sps)
*   *This round sets up the mesh pattern. The first dc is implicitly in the "ch-1 sp" formed by the start of the previous round after the ch3. Let's simplify:*

**Rnd 30:** Ch 3 (counts as first dc), [ch 1, dc in next ch-1 sp] around. Ch 1, join with sl st to top of beg ch 3. (64 dc, 64 ch-1 sps)
*   *(Validation: 64 dc + 64 ch-1 sps.)*

**Rnd 31-49:** Repeat Rnd 30. (64 dc, 64 ch-1 sps)
*   *This section should measure approximately 7 inches (18 cm) from the start of the mesh pattern. Total bag body height: 7 (lower body) + 7 (upper body) = 14 inches (35.5 cm).*

---

**Strap Division**

You will now create the openings for the bag and divide the stitches to form the straps.
The total stitch count from Rnd 49 is 128 (64 dc + 64 ch-1 sps = 128 "points" if we consider each dc and ch-1 sp as a point).
*   **Strap Width:** Each strap will be 9 sc wide (approx. 2.5 inches / 6.5 cm).
*   **Bag Opening:** Each side opening will be 55 sc wide (approx. 14 inches / 35.5 cm).
*   *Calculation for 128 "points": 9 (Strap 1) + 55 (Opening 1) + 9 (Strap 2) + 55 (Opening 2) = 128. This works.*

**Rnd 50 (Preparation for Straps):**
*   **A.** Ch 1, sc in first dc, sc in next ch-1 sp, sc in next 7 dc and 7 ch-1 sps alternatingly. (17 sc).
    *   *(Validation: (1 (sc in dc) + 1 (sc in ch-1 sp)) + 8 (sc in dc) + 8 (sc in ch-1 sp) = 18 sc. So 9 (dc+ch1sp) sets = 18 stitches. My strap width is 9 sc. So, sc in 9 dc/ch-1 sp points.
    Let's rephrase: sc in first 9 stitch *points* (dc or ch-1 sp). This will give 9 sc.
    Rnd 50: Ch 1, sc in first 9 dc/ch-1 sp *points* (i.e., sc in dc, sc in ch-1 sp, sc in dc, etc., 9 times). (9 sc)*
    *   *(Validation: 9 sc.)*

*   **B.** Ch 55, sk next 55 dc/ch-1 sp *points* (this forms the first opening), sc in next 9 dc/ch-1 sp *points* (this forms the second strap). (9 sc for strap 2).
    *   *(Validation: 9 sc.)*

*   **C.** Ch 55, sk next 55 dc/ch-1 sp *points* (this forms the second opening). Sl st to first sc of the round. (This completes the "round" for division).
    *   *(Validation: 9+55+9+55 = 128 "points" used.)*

---

**Shorter Strap (Worked in Rows)**

**Row 1 (RS):** Ch 1, turn. Sc in first 9 sc. (9 sc)
**Row 2 (WS):** Ch 1, turn. Sc in first 9 sc. (9 sc)
**Row 3-70:** Repeat Row 2. (68 rows for strap body, total 70 rows including Row 1 and 2).
*   *This will create a strap approximately 20 inches (51 cm) long (70 rows / 16 rows per 4 inches * 4 inches = 17.5 inches. This is a bit short. Need more rows for 20 inches. Let's aim for 80 rows).*

**Row 3-80:** Repeat Row 2. (78 rows for strap body, total 80 rows including Row 1 and 2).
*   *This will create a strap approximately 20 inches (51 cm) long (80 rows / 16 rows per 4 inches * 4 inches = 20 inches / 51 cm).*
Fasten off and weave in end.

---

**Longer Strap (Worked in Rows)**

Join yarn with a sl st to the first sc of the second strap section (the 9 sc after the first Ch 55 opening).

**Row 1 (RS):** Ch 1, turn. Sc in first 9 sc. (9 sc)
**Row 2 (WS):** Ch 1, turn. Sc in first 9 sc. (9 sc)
**Row 3-140:** Repeat Row 2. (138 rows for strap body, total 140 rows including Row 1 and 2).
*   *This will create a strap approximately 35 inches (89 cm) long (140 rows / 16 rows per 4 inches * 4 inches = 35 inches / 89 cm).*
Fasten off and weave in end.

---

**Finishing**

1.  **Weave in all ends** securely using your yarn needle. For a bag carrying heavy items, ensure all ends are tucked away very well.
2.  **Block (optional but recommended):** Gently wet the bag and lay it flat to shape. Pay special attention to the straps to ensure they are even and flat. Let dry completely.
3.  **Mosu Knot Closure:** To close the bag, thread the longer strap through the opening created by the shorter strap and tie a simple overhand knot, then thread the shorter strap through the loop of the longer strap and tie a second overhand knot. Or, simply tie the two straps together in an adjustable knot. Practice different knot styles to find your preferred look and security.

Enjoy your durable and stylish Mosu Cross-Body Market Tote!
Disclaimer: This pattern was generated by AI and should be reviewed for accuracy before use. While we strive for quality, AI-generated content may contain errors. Please verify measurements, stitch counts, and instructions before beginning your project. Generated by purlJam.uk
Access your pattern anytime
Bookmark this page to access your pattern anytime