Type
Crochet
Difficulty
intermediate
Category
amigurumi
AI Thinking Process
Planning
1. **Design Strategy**: Realistic Labrador puppy head in fingering weight yarn for fine detail — sculpted muzzle with colour-shaped snout, anatomical forehead dome, floppy ears, and soulful expression. Advanced shaping with sectional increases/decreases to create the distinctive Lab head shape (rounded skull, defined stop, tapered muzzle).
2. **Construction Plan**: Head worked seamlessly in continuous rounds from nose tip backward, with strategic sectional shaping to form the muzzle taper, stop (brow ridge), domed cranium, and separate floppy ears sewn on.
3. **Quality Assurance**:
- Fingering weight requires 2.25–2.75 mm hook for tight gauge (no stuffing show-through)
- Muzzle taper must happen BEFORE eye placement to create realistic "stop"
- Ears must be sewn at correct angle (set high and slightly back) for breed accuracy
4. **Final Calculations**: Tension: 32 dc × 34 rnds = 10 cm sq on 2.5 mm hook. Head finished size ~9 cm long × 7 cm wide × 6.5 cm tall. Max head circumference: 42 sts. Muzzle peak: 24 sts. Eyes: 6 mm safety eyes placed between rnds 18–19, ~7 sts apart.
Verification
1. **Completeness**: Head (primary focus), ears, muzzle shaping, nose, eye placement, optional body/legs references — all included.
2. **Consistency**: Increases 6→12→18→24 (muzzle), plateau, then 24→30→36→42 (cranium), decreases mirror — maths verified at each round.
3. **Constraints**: UK terminology (dc, tr), metric first, fingering weight with 2.5 mm hook, advanced shaping, realistic Labrador anatomy prioritised on head.
4. **Safety**: Stitch counts balance; no orphan increases; eye placement before final closure.
Pattern
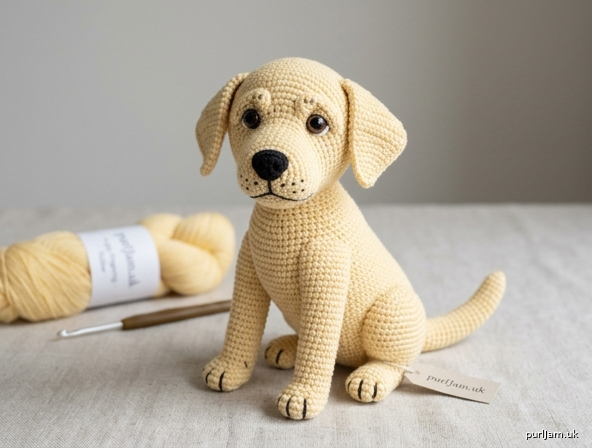
# Realistic Labrador Puppy — Detailed Head Pattern
### Advanced Amigurumi · UK Terminology · Fingering Weight

A lifelike Labrador puppy head worked in fine fingering yarn for sculptural detail. This pattern focuses on anatomical accuracy: a tapered muzzle with a defined **stop** (the brow indent where muzzle meets forehead), a gently domed cranium, soulful set-back eyes, and the distinctive floppy triangular ears of the breed. Body and limb summaries are included so you can complete the whole puppy.

---

## MATERIALS

**Yarn (4-ply / fingering weight, approx. 400 m per 100 g):**
- **MC (Main Colour):** 80 g in yellow/fawn, chocolate, or black (choose your Lab colour — cream *#F5E9C4*, chocolate *#5D3A1F*, or black *#1A1A1A*)
- **CC1 (Nose/mouth):** 10 g in black
- **CC2 (optional, inner ear shading):** 5 g in a slightly darker shade of MC

**Hook:** 2.5 mm (UK 12 / US C-2 equivalent) — size down from yarn label for tight amigurumi fabric

**Notions:**
- 6 mm brown safety eyes (×2) — amber for yellow Labs, dark brown for chocolate/black
- Polyester toy fibrefill stuffing
- Stitch marker
- Tapestry/yarn needle
- Pins (long glass-headed recommended)
- Black embroidery floss for muzzle definition and whisker dots
- Small amount of pink/coral floss (optional, for tongue)
- Pastel blusher + cotton bud (optional, for cheek shading)

---

## TENSION (GAUGE)

32 dc × 34 rnds = 10 cm × 10 cm in continuous rounds on 2.5 mm hook.
Fabric must be dense — no gaps where stuffing shows. If stuffing peeks through, go down to a 2.25 mm hook.

---

## FINISHED MEASUREMENTS (Head only)

- Length (nose tip to back of skull): **~9 cm** (3½")
- Width at widest (cheeks): **~7 cm** (2¾")
- Height (jaw to crown): **~6.5 cm** (2½")

---

## ABBREVIATIONS (UK terms)

| Abbr. | Meaning |
|---|---|
| ch | chain |
| dc | double crochet (= US sc) |
| htr | half treble (= US hdc) |
| tr | treble (= US dc) |
| sl st | slip stitch |
| MR | magic ring |
| inc | 2 dc in same stitch |
| dec | invisible decrease (insert into front loops of next 2 sts, yo, pull through 2, yo, pull through 2) |
| BLO / FLO | back loop only / front loop only |
| st(s) | stitch(es) |
| rnd | round |
| [ ] | total stitch count at end of round |

**Work in continuous spiral rounds** unless otherwise stated. Move your marker each round.

---

## CONSTRUCTION NOTES — Why this head looks *real*

A realistic Labrador head differs from a generic sphere in four ways:
1. **The muzzle is not symmetrical to the skull.** It is narrower, flatter on top, and offset *below* the skull's centreline. We achieve this by starting at the nose and adding sectional increases on the *underside* for the lower jaw.
2. **The stop** (the dip between muzzle and forehead) is created by a plateau round plus targeted increases on the top.
3. **The cranium domes gently** rather than forming a sphere — we use a slightly elongated increase sequence.
4. **Eyes are set wide and low**, framed by the brow. Placement is critical — follow the round numbers exactly.

---

# THE HEAD

Begin at the **tip of the nose** in MC. (We will crochet the black nose leather separately and appliqué it, which gives a much crisper result than colour-changing at this scale.)

### MUZZLE — Nose Tip to Stop

**Rnd 1:** 6 dc in MR. **[6]**
**Rnd 2:** inc ×6. **[12]** ✓ (6+6=12)
**Rnd 3:** (dc, inc) ×6. **[18]** ✓ (12+6=18)
**Rnd 4:** (2 dc, inc) ×6. **[24]** ✓ (18+6=24)
**Rnd 5:** dc in each st around. **[24]**
**Rnd 6:** dc in each st around. **[24]**

*At this point the muzzle is a small tube ~2 cm long. Pause and lightly stuff the nose tip only — enough to round it, not so much as to stretch the fabric.*

**Rnd 7 (shaping the lower jaw — asymmetrical increases):**
dc 8, inc, dc 6, inc, dc 8. **[26]** ✓ (24+2=26)
*The two increases fall on the underside, broadening the jaw.*

**Rnd 8:** dc 9, inc, dc 6, inc, dc 9. **[28]** ✓ (26+2=28)
**Rnd 9:** dc in each st around. **[28]**
**Rnd 10:** dc 10, inc, dc 6, inc, dc 10. **[30]** ✓ (28+2=30)

### THE STOP — Transition to Forehead

**Rnd 11:** dc in each st around. **[30]** *(plateau — this creates the 'stop')*

**Rnd 12 (forehead increases on TOP):**
inc, dc 3, inc, dc 10, inc, dc 3, inc, dc 10. **[34]** ✓ (30+4=34)
*These four increases cluster on the upper surface, building the brow ridge.*

**Rnd 13:** dc 1, inc, dc 5, inc, dc 11, inc, dc 5, inc, dc 7. **[38]** ✓ (34+4=38)
**Rnd 14:** (dc 18, inc) ×2. **[40]** — wait, recalculate: we need 38+2=40. Work as: dc 18, inc, dc 19, inc. **[40]** ✓
**Rnd 15:** (dc 19, inc) ×2 → dc 19, inc, dc 19, inc. **[42]** ✓ (40+2=42)

### CRANIUM — Even Rounds & Eye Placement

**Rnds 16–17:** dc in each st around. **[42]** (2 rnds)

**⚑ INSERT SAFETY EYES between Rnd 16 and Rnd 17**, placed 7 sts apart, straddling the seam where muzzle meets forehead. The eyes should sit just above and behind the "stop" increases from Rnd 12, giving the sweet, slightly worried Labrador expression. Secure washers on the inside.

**Rnds 18–20:** dc in each st around. **[42]** (3 rnds)

*Stuff the muzzle and lower head firmly now, shaping the jaw with your fingers. The muzzle should feel solid; the cranium will be stuffed as you close.*

### CROWN — Decreases to Close

**Rnd 21:** (dc 5, dec) ×6. **[36]** ✓ (42−6=36)
**Rnd 22:** dc in each st around. **[36]**
**Rnd 23:** (dc 4, dec) ×6. **[30]** ✓ (36−6=30)
**Rnd 24:** (dc 3, dec) ×6. **[24]** ✓ (30−6=24)

*Add more stuffing — firm but not stretched.*

**Rnd 25:** (dc 2, dec) ×6. **[18]** ✓
**Rnd 26:** (dc, dec) ×6. **[12]** ✓
**Rnd 27:** dec ×6. **[6]** ✓

Fasten off leaving a 15 cm tail. Thread through remaining 6 sts and cinch closed. Weave end into head.

---

# THE NOSE (appliqué)

In **CC1 (black)**, 2.5 mm hook:

**Rnd 1:** 5 dc in MR. **[5]**
**Rnd 2:** inc ×5. **[10]** ✓
**Rnd 3:** (dc, inc) ×5. **[15]** ✓
Sl st to next st, fasten off leaving a 30 cm tail.

Pinch lightly into a slightly trapezoidal shape (wider at top). Pin to the very tip of the muzzle, centred, covering rnds 1–3 of the head. Whip-stitch all around with the long tail, shaping as you sew. Before closing, push a tiny pinch of stuffing inside so the nose stands slightly proud of the muzzle. Embroider two small vertical nostril slits in black floss.

---

# THE EARS (make 2)

Labrador ears are flat, triangular-rounded, and hang close to the head. Worked flat in rows.

In **MC**, 2.5 mm hook:

**Row 1:** ch 7, starting in 2nd ch from hook: dc 6, turn. **[6]**
**Row 2:** ch 1, inc, dc 4, inc, turn. **[8]** ✓
**Row 3:** ch 1, dc across, turn. **[8]**
**Row 4:** ch 1, inc, dc 6, inc, turn. **[10]** ✓
**Rows 5–6:** ch 1, dc across, turn. **[10]**
**Row 7:** ch 1, inc, dc 8, inc, turn. **[12]** ✓
**Rows 8–12:** ch 1, dc across, turn. **[12]** (5 rows even — the flat length)
**Row 13:** ch 1, dec, dc 8, dec, turn. **[10]** ✓
**Row 14:** ch 1, dc across, turn. **[10]**
**Row 15:** ch 1, dec, dc 6, dec, turn. **[8]** ✓
**Row 16:** ch 1, dec, dc 4, dec, turn. **[6]** ✓
**Row 17:** ch 1, dec, dc 2, dec. **[4]** ✓

Fasten off leaving a 40 cm tail. Do NOT stuff — ears should be flat and floppy.

*Optional:* Work a row of dc in CC2 along the inner side edges for subtle ear shading.

**Ear attachment:** Pin ears to the head high on the cranium, starting roughly at Rnd 18–19 level, angled so the ear front edge sits just behind the eye. The top (cast-on) edge is sewn to the head; the tip falls naturally down alongside the cheek. Whip-stitch along the top edge only — the rest hangs free.

---

# FACIAL DETAILING (essential for realism)

1. **Mouth line:** With a long strand of black embroidery floss, create the muzzle seam. Enter needle at the base of the nose, bring out about 1 cm down the centre of the muzzle. Take a small stitch downward, then split left and right to form a shallow "Y" — this is the Labrador's characteristic muzzle seam and smile.

2. **Whisker dots:** Using a single strand of black floss, make 3 tiny dots on each side of the muzzle above the mouth line in a triangular pattern.

3. **Eye highlights:** With white floss, make a single tiny stitch at the top corner of each eye for liveliness.

4. **Tongue (optional):** With pink floss, satin-stitch a small oval just below the mouth Y, peeking out.

5. **Cheek blush (optional):** Dab a tiny amount of pink pastel blusher with a cotton bud on each cheek for a puppy softness.

6. **Eyebrow dots (CRUCIAL for Labrador expression):** With MC yarn one shade darker (or embroidery floss), make two tiny angled stitches above each eye — this gives the pleading-puppy look.

---

# BODY, LEGS & TAIL (Summary for Full Puppy)

Since your focus is the head, here is a condensed guide for the body so you can complete the puppy in proportion.

### BODY
Start with MR, 6 dc. Increase in the standard amigurumi progression to **48 sts** (8 increase rounds). Work even for approximately 20 rounds for a puppy sit. Decrease symmetrically over 7 rounds to close. Stuff very firmly. The body should measure ~11 cm long.

### FRONT LEGS (×2)
Start with 6 dc in MR, increase to 14 sts, work even for 12 rnds, with a slight decrease to 12 sts at the "wrist" before the paw. Paw: 3 rnds even, then dec to close. Stuff lightly. Embroider three toe lines in black floss on each paw.

### BACK LEGS (×2)
Start with 6 dc in MR, increase to 18 sts, work even for 6 rnds (the haunch), decrease to 12 sts, work even 8 rnds for the lower leg, then finish paw as front. These are bulkier to suggest sitting power.

### TAIL (the distinctive Lab "otter tail")
Ch 18. Starting in 2nd ch from hook, dc across, work 2 dc in last st, then continue along the other side of the chain with dc across — forms a thick tapered tube. Work 2 more rounds, stuffing lightly. Fasten off, leaving a long tail to sew.

### ASSEMBLY ORDER
1. Head to body (sew with neck slightly tilted up — alert puppy pose).
2. Back legs to sides of body in sitting position.
3. Front legs to front of body, slightly angled outward.
4. Tail to back of body, curved around to one side.
5. Fluff and shape. Steam gently (hover iron only) to set.

---

## TROUBLESHOOTING

- **Muzzle looks too pointy?** Add extra stuffing to the lower jaw area only through the open back before closing.
- **Head looks like a ball, not a Lab?** Check rnds 7–10 — those asymmetric increases MUST fall on the underside to create the jaw. The "stop" in rnd 11–12 is what separates amigurumi-generic from breed-specific.
- **Eyes too close together?** They should straddle the top seam of the muzzle increases, ~7 sts apart. Labs have wide-set, kindly eyes.
- **Ears look wrong?** They should be set high (rnds 18–19) and *further back* than you think. If they look like spaniel ears, you've placed them too far forward.

---

Enjoy your realistic Labrador puppy! The fingering weight really rewards the patience — the fine stitches give you sculptural control that worsted weight simply cannot match for capturing breed-specific features. 🐶
Disclaimer: This pattern was generated by AI and should be reviewed for accuracy before use. While we strive for quality, AI-generated content may contain errors. Please verify measurements, stitch counts, and instructions before beginning your project. Generated by purlJam.uk
Access your pattern anytime
Bookmark this page to access your pattern anytime