Type
Crochet
Difficulty
intermediate
Category
custom
AI Thinking Process
Planning
Verification
Pattern
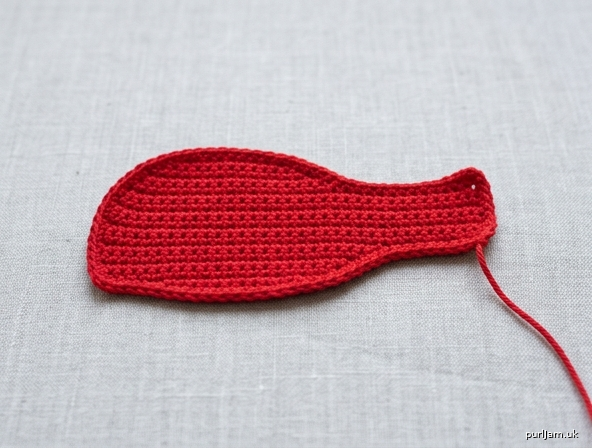
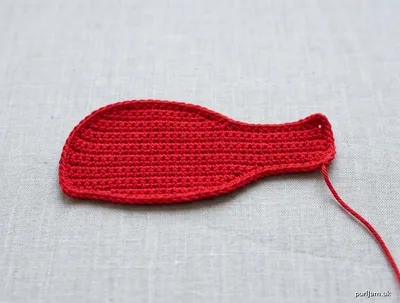
Red Curved Wave Strip Appliqué
(Lay’s-Style Swoosh Background – 4¼″ × 2¼″ / 11 × 5.7 cm)
A flat, single-piece crochet appliqué that reproduces only the red curved wave/swoosh banner sitting behind the white “Lay’s” lettering. The piece is elongated, reaches maximum height at the center, tapers smoothly at both ends, and features gentle opposing curves on the upper and lower edges. It is worked entirely in single crochet with simple increases and decreases—no sewing of separate motifs required.
Difficulty: Beginner
Materials
- Worsted-weight cotton yarn, red (approx. 15 yd / 14 m)
- Crochet hook US 7 / 4.5 mm (or size needed to obtain gauge)
- Yarn needle
- Scissors
- Blocking pins and mat (recommended)
Gauge
16 sc and 18 rows = 4″ (10 cm) in single crochet
(Gauge is critical for finished size. Adjust hook up or down until you match.)
Finished Size
Approximately 4¼″ long × 2¼″ maximum height at center (11 cm × 5.7 cm), ends taper to about ¾″ (2 cm).
Abbreviations (US Terms)
- ch – chain
- sc – single crochet
- sc2tog – single crochet 2 stitches together (insert hook in next st, yo, pull up loop, insert hook in following st, yo, pull up loop, yo, pull through all 3 loops on hook)
- st(s) – stitch(es)
- RS – right side
- WS – wrong side
- beg – beginning
- rem – remaining
Pattern Notes
- The appliqué is worked flat in turned rows from one narrow end to the other.
- Chain-1 at the beginning of every row does not count as a stitch.
- Turn after every row.
- Work into both loops of every stitch unless otherwise stated.
- Stitch count at the end of each row is shown in parentheses ( ).
- Inline validation confirms the arithmetic (e.g., “+1 → 5 ✓”).
- All increases are worked on the left edge and all decreases on the right edge. This offset shaping produces the characteristic elongated swoosh with smooth opposing curves rather than a symmetrical oval or simple crescent.
- Keep tension even so the piece stays flat; it will not curl into a tube or spiral when worked as written.
Instructions
Foundation
Ch 4.
Row 1 (RS)
Sc in 2nd ch from hook and in each of next 2 ch. (3 sc)
Turn.
Row 2 (WS) – inc left edge
Sc in each of first 2 sts, 2 sc in last st. (4 sc) (+1 → 3+1=4 ✓)
Turn.
Row 3 (RS) – inc left edge
2 sc in first st, sc in each rem st across. (5 sc) (+1 → 4+1=5 ✓)
Turn.
Row 4 (WS) – inc left edge
Sc in each of first 4 sts, 2 sc in last st. (6 sc) (+1 → 5+1=6 ✓)
Turn.
Row 5 (RS) – inc left edge
2 sc in first st, sc in each rem st across. (7 sc) (+1 → 6+1=7 ✓)
Turn.
Row 6 (WS) – inc left edge
Sc in each of first 6 sts, 2 sc in last st. (8 sc) (+1 → 7+1=8 ✓)
Turn.
Row 7 (RS) – inc left edge
2 sc in first st, sc in each rem st across. (9 sc) (+1 → 8+1=9 ✓)
Turn.
Rows 8–14 – even (maintain maximum height)
Ch 1, sc in each st across. (9 sc)
Turn after each row.
(Row 8 WS, 9 RS, 10 WS, 11 RS, 12 WS, 13 RS, 14 WS)
Row 15 (RS) – dec right edge
Sc in each of first 7 sts, sc2tog over last 2 sts. (8 sc) (−1 → 9-1=8 ✓)
Turn.
Row 16 (WS) – dec right edge
Sc2tog over first 2 sts, sc in each rem st across. (7 sc) (−1 → 8-1=7 ✓)
Turn.
Row 17 (RS) – dec right edge
Sc in each of first 5 sts, sc2tog over last 2 sts. (6 sc) (−1 → 7-1=6 ✓)
Turn.
Row 18 (WS) – dec right edge
Sc2tog over first 2 sts, sc in each rem st across. (5 sc) (−1 → 6-1=5 ✓)
Turn.
Row 19 (RS) – dec right edge
Sc in each of first 3 sts, sc2tog over last 2 sts. (4 sc) (−1 → 5-1=4 ✓)
Turn.
Row 20 (WS) – dec right edge
Sc2tog over first 2 sts, sc in each of last 2 sts. (3 sc) (−1 → 4-1=3 ✓)
Fasten off, leaving a 12″ (30 cm) tail for sewing.
Finishing
- Weave in the starting tail securely on the WS.
- Block the piece firmly: pin it into a smooth elongated wave 4¼″ (11 cm) long and 2¼″ (5.7 cm) high at the center, exaggerating the gentle opposing curves of the upper and lower edges. Steam or wet-block and allow to dry completely. Blocking softens the stepped shaping into the continuous swoosh.
- Using the ending tail and yarn needle, sew the appliqué onto your crochet bag (or other project) with small whip-stitches around the entire outer edge. Keep stitches snug but not tight enough to distort the wave.
- Weave in any remaining ends on the WS.
Your red curved wave strip is now complete and ready to sit proudly behind any logo or lettering you choose to add!
Disclaimer: This pattern was generated by AI and should be reviewed for accuracy before use. While we strive for quality, AI-generated content may contain errors. Please verify measurements, stitch counts, charts, and instructions before beginning your project. Generated by purlJam.uk
Love this pattern?
Save this pattern to your free PurlJam libraryAccess your pattern anytime
Bookmark this page to access your pattern anytime