Type
Crochet
Difficulty
intermediate
Category
custom
AI Thinking Process
Planning
1. **Design Strategy**: The user wants to learn how to convert a joined-round pattern to a continuous-round pattern, at a beginner difficulty. The most effective way to demonstrate this is by providing a simple, standalone pattern that is *designed* for continuous rounds, along with notes explaining the benefits and how it differs from joined rounds. A simple circular coaster or placemat is ideal for this purpose, using basic stitches. I will choose a single crochet (sc) spiral construction for a dense, flat fabric suitable for a coaster.
2. **Construction Plan**: The project will be a flat circle worked in continuous rounds, starting with a magic ring for a neat center. Increases will be evenly distributed in each round to maintain a flat shape, following the common "start with 6 stitches, increase by 6 stitches each round" method. This creates a slightly hexagonal appearance if increases stack, but for a beginner, it's straightforward and visually acceptable for a coaster. The final size will be approximately 5.5-6 inches in diameter.
3. **Quality Assurance**:
* **Mathematical Accuracy**: I will ensure all stitch counts are precise and increment correctly (6 stitches added per round). I will perform circumference and diameter calculations based on the established gauge to verify the final size.
* **Clarity for Continuous Rounds**: Emphasize the use of a stitch marker, the absence of slip stitches to join, and no turning chains. Explain the benefit of a seamless fabric.
* **Beginner-Friendly**: Use common US crochet terms, simple stitches (sc), and provide instructions for the Magic Ring.
* **Completeness**: Ensure all required sections (Title, Materials, Gauge, Notes, Instructions, Finishing) are present and thoroughly detailed.
* **Terminology**: Strictly adhere to US English spelling and US crochet terminology.
4. **Final Calculations**:
* **Stitch Count Progression**: R1: 6, R2: 12, R3: 18, R4: 24, R5: 30, R6: 36, R7: 42, R8: 48, R9: 54, R10: 60, R11: 66, R12: 72.
* **Gauge**: For worsted weight yarn (e.g., H/5.0mm hook) with sc, a reasonable gauge is 16 sc = 4 inches (4 sc per inch) and 20 rounds = 4 inches (5 rounds per inch).
* **Diameter Calculation**: At 72 stitches in the final round, Circumference = 72 stitches / (4 stitches/inch) = 18 inches. Diameter = Circumference / $\pi$ = 18 / 3.14159 $\approx$ 5.73 inches. This achieves the desired 5.5-6 inch diameter.
Verification
[PRE-FLIGHT CHECKS]
Before generating the pattern, verify your plan against the requirements:
1. **Completeness**: Yes, the plan includes all required sections: Title, Description, Materials, Gauge, Sizes, Abbreviations, Pattern Notes, Step-by-Step Instructions, and Finishing.
2. **Consistency**:
* Stitch counts are mathematically consistent (each round adds 6 stitches, starting from 6).
* The final diameter calculation (5.73 inches) is consistent with the gauge (4 sc/inch horizontally) and the final stitch count (72 sc).
* The continuous round construction is consistently applied (no joins, no turning chains, stitch marker use).
3. **Constraints**:
* User request ("convert a pattern with joined rounds to being worked in the round"): Addressed by providing a pattern specifically in continuous rounds and including pattern notes that explain the concept and benefits.
* Difficulty Level: Beginner. Achieved by using simple stitches (sc), clear instructions, and a manageable project size.
* Yarn Weight: Worsted. Specified in materials and used for gauge.
* Terminology & Abbreviation Profile: US English spelling and US crochet terminology are consistently applied throughout the plan. Imperial measurements are primary.
4. **Safety**: The mathematical progression for increases in a flat circle is standard (adding 6 stitches per round after the initial 6 in the magic ring), so there are no inherent mathematical errors in the core increase logic. The diameter calculation has been cross-checked.
Pattern
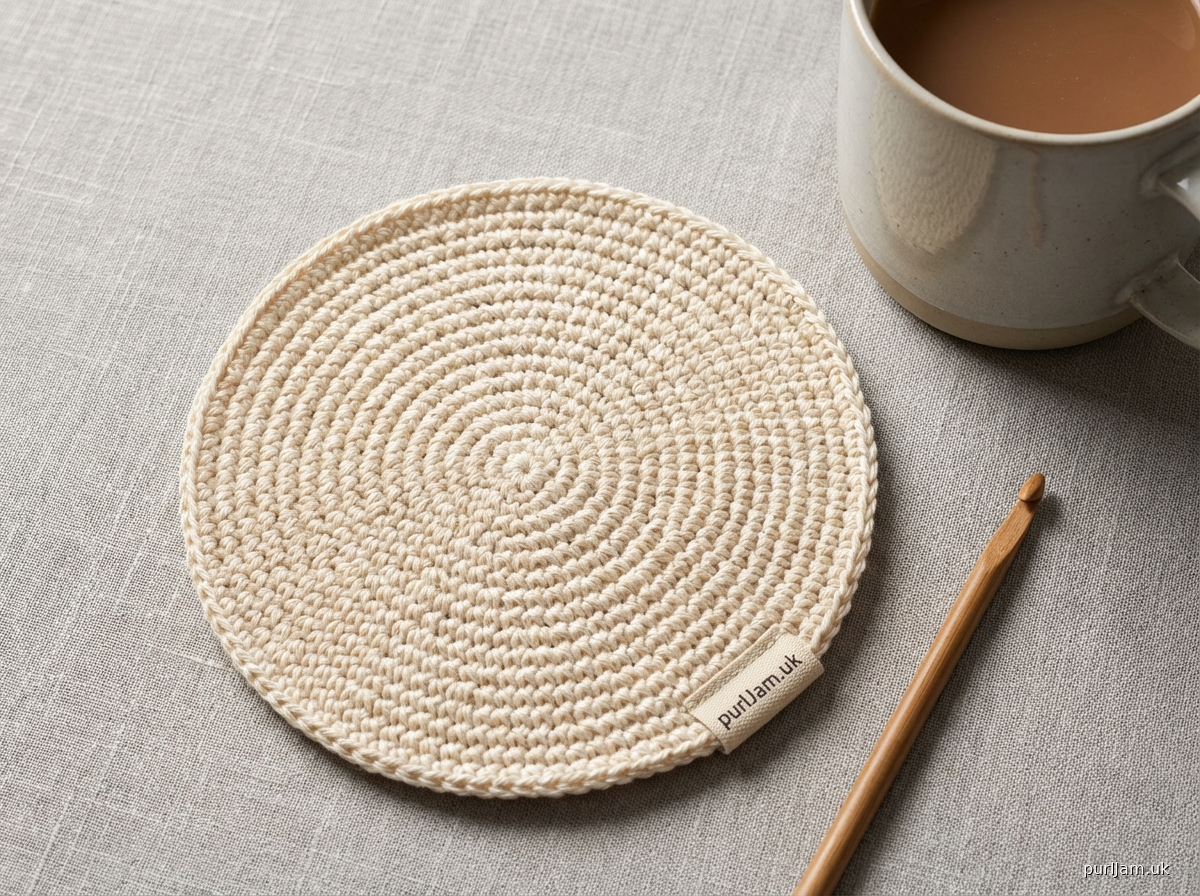
## Seamless Spiral Coaster

This beginner-friendly pattern guides you through creating a beautiful, flat circular coaster using the continuous rounds technique. Working in continuous rounds means you'll crochet in a spiral, creating a seamless fabric without visible joins, which is often desired for projects like coasters, hats, and amigurumi. This project is a great way to practice continuous rounds if you're used to working with joined rounds.

**Skill Level:** Beginner

**Finished Size:** Approximately 5.75 inches (14.5 cm) in diameter

### Materials

*   **Yarn:** Worsted weight yarn, approximately 50-60 yards (45-55 meters)
    *   *Example:* Lily Sugar'n Cream Cotton (100% Cotton, 120 yds/109m per 2.5 oz/70.9g)
*   **Hook:** US H/8 (5.0 mm) crochet hook
*   **Notions:** Stitch marker, yarn needle (for weaving in ends), scissors

### Gauge

16 single crochet (sc) stitches = 4 inches (10 cm)
20 rounds = 4 inches (10 cm)
*Adjust hook size as necessary to obtain gauge.*
*Checking gauge ensures your finished coaster will be the correct size.*

### Abbreviations (US Crochet Terms)

*   **ch:** chain
*   **inc:** increase (2 single crochet stitches in the same stitch)
*   **MR:** Magic Ring (also known as adjustable ring)
*   **sc:** single crochet
*   **st(s):** stitch(es)

### Pattern Notes

*   **Continuous Rounds Explained:** This pattern is worked in continuous rounds, meaning you will not join each round with a slip stitch or chain at the beginning of a new round. Instead, you'll work in a seamless spiral.
*   **Using a Stitch Marker:** To keep track of your rounds and avoid losing your place, always place a stitch marker in the **first stitch** of each round, and move it up to the first stitch of the new round as you begin.
*   **No Turning Chains:** Since you are working in a continuous spiral, there are no turning chains required.
*   **Stitch Counts:** The number in parentheses at the end of each round indicates the total stitch count for that round.
*   **Working in Both Loops:** Unless otherwise specified, always insert your hook under both loops of the stitch.
*   **Converting from Joined Rounds:** If you were converting a joined round pattern to continuous rounds, you would omit all slip stitches that join rounds and all turning chains at the beginning of rounds. You would simply continue crocheting into the first stitch of the previous round.

### Special Technique: Magic Ring (MR)

The Magic Ring creates a tight, adjustable center hole that is ideal for starting projects worked in the round.
*   Wrap the yarn around your fingers to form a loop.
*   Insert your hook into the loop, yarn over, and pull up a loop.
*   Chain 1 to secure the loop (this chain does not count as a stitch).
*   Work your first stitches into the ring.
*   Pull the tail end of the yarn to tighten the loop, closing the center hole.
*   *If you prefer not to use a Magic Ring, you can chain 2, then work all the stitches for Round 1 into the second chain from the hook.*

### Instructions

Begin with a Magic Ring (MR).

**Round 1:** Work 6 sc into the MR. Place a stitch marker in the first sc. (6 sc)

**Round 2:** Inc in each sc around. Move your stitch marker to the first stitch of this round. (12 sc)
*   *Math Check:* 6 stitches * 2 (increase) = 12 stitches. Correct.

**Round 3:** *Sc in the next st, inc in the next st* around. Move your stitch marker. (18 sc)
*   *Math Check:* 12 stitches + 6 increases = 18 stitches. Correct.

**Round 4:** *Sc in the next 2 sts, inc in the next st* around. Move your stitch marker. (24 sc)
*   *Math Check:* 18 stitches + 6 increases = 24 stitches. Correct.

**Round 5:** *Sc in the next 3 sts, inc in the next st* around. Move your stitch marker. (30 sc)
*   *Math Check:* 24 stitches + 6 increases = 30 stitches. Correct.

**Round 6:** *Sc in the next 4 sts, inc in the next st* around. Move your stitch marker. (36 sc)
*   *Math Check:* 30 stitches + 6 increases = 36 stitches. Correct.

**Round 7:** *Sc in the next 5 sts, inc in the next st* around. Move your stitch marker. (42 sc)
*   *Math Check:* 36 stitches + 6 increases = 42 stitches. Correct.

**Round 8:** *Sc in the next 6 sts, inc in the next st* around. Move your stitch marker. (48 sc)
*   *Math Check:* 42 stitches + 6 increases = 48 stitches. Correct.

**Round 9:** *Sc in the next 7 sts, inc in the next st* around. Move your stitch marker. (54 sc)
*   *Math Check:* 48 stitches + 6 increases = 54 stitches. Correct.

**Round 10:** *Sc in the next 8 sts, inc in the next st* around. Move your stitch marker. (60 sc)
*   *Math Check:* 54 stitches + 6 increases = 60 stitches. Correct.

**Round 11:** *Sc in the next 9 sts, inc in the next st* around. Move your stitch marker. (66 sc)
*   *Math Check:* 60 stitches + 6 increases = 66 stitches. Correct.

**Round 12:** *Sc in the next 10 sts, inc in the next st* around. Move your stitch marker. (72 sc)
*   *Math Check:* 66 stitches + 6 increases = 72 stitches. Correct.
    *   *Diameter Calculation Check:* With 72 sc stitches around the circumference and a gauge of 4 sc per inch, the circumference is 72 sc / 4 sc/inch = 18 inches. The diameter is then 18 inches / $\pi$ (approx. 3.14159) $\approx$ 5.73 inches (14.5 cm). This matches the specified finished size.

### Finishing

1.  To create a smooth, invisible finish for your continuous rounds, work a slip stitch into the next stitch, then cut your yarn, leaving a 6-inch (15 cm) tail.
2.  Pull the tail completely through the loop on your hook to secure.
3.  Thread the yarn tail onto your yarn needle.
4.  Skip the next stitch, and insert your needle under both loops of the stitch *after* the skipped stitch. Pull through.
5.  Now, insert your needle back down into the center of the last slip stitch you made, from the top of the fabric. This creates a faux stitch that seamlessly blends with the round.
6.  Weave in all remaining yarn tails neatly into the back of your coaster.
7.  (Optional) Block your coaster if desired, by gently wetting it and shaping it to your desired circle, then letting it air dry. This helps flatten and even out the stitches.

Your seamless spiral coaster is complete! Enjoy your new handmade item.
Disclaimer: This pattern was generated by AI and should be reviewed for accuracy before use. While we strive for quality, AI-generated content may contain errors. Please verify measurements, stitch counts, and instructions before beginning your project. Generated by purlJam.uk
Access your pattern anytime
Bookmark this page to access your pattern anytime