Type
Knitting
Difficulty
intermediate
Category
shawl
AI Thinking Process
Planning
1. **Design Strategy**:
- User wants a triangular scarf knitted sideways (not top-down like template)
- Must adapt template approach: work from one point increasing to maximum width, then decreasing to opposite point
- Purl pattern for texture with plain border (adapting template's lace border concept)
- Dimensions: 90 cm width (hypotenuse), 26 cm length (height from base to point)
- Sport weight yarn for a lightweight, draping scarf
- Sideways construction means casting on few stitches and increasing to maximum height, then decreasing
2. **Construction Plan**:
- Cast on at one point of triangle
- Increase along one edge while keeping other edge straight to form right triangle
- Work increase section until reaching 26 cm height
- Then decrease symmetrically to opposite point
- Garter stitch border (plain) with purl texture pattern in body
- Simple textured pattern suitable for intermediate knitter
3. **Quality Assurance**:
- Verify stitch count calculations for 26 cm height at sport weight gauge
- Ensure increase/decrease rates are symmetrical
- Clear instructions for maintaining border while working pattern
- Blocking instructions crucial for triangle shape
- Check that 90 cm length is achievable with increase/decrease row counts
4. **Final Calculations**:
- Sport weight tension: approximately 24 sts and 32 rows = 10 cm in stocking stitch
- For garter stitch texture: approximately 24 sts and 48 rows = 10 cm
- Height needed: 26 cm = 62-63 stitches (26 × 24 ÷ 10)
- Length: 90 cm = 432 rows (90 × 48 ÷ 10)
- Need 216 rows increasing + 216 rows decreasing = 432 rows total
- Border: 4 stitches garter on both edges
- Maximum stitch count: approximately 67 stitches (63 + 4 border)
Verification
[PRE-FLIGHT CHECKS]
1. **Completeness**:
✓ Will include: Materials, Tension, Measurements, Pattern Notes, Instructions, Finishing, Blocking
✓ Adapted template structure for sideways construction instead of top-down
2. **Consistency**:
✓ Sport weight: 24 sts × 48 rows = 10 cm in garter/texture pattern
✓ 26 cm height = 63 stitches maximum
✓ 90 cm length = 432 rows total (216 increase + 216 decrease)
✓ Pattern repeat works within border constraints
3. **Constraints**:
✓ Triangular shape - using sideways construction as requested
✓ Purl pattern texture - using seed/moss stitch variation
✓ Plain border - garter stitch edges
✓ Dimensions: 90 cm × 26 cm
✓ UK terminology and metric measurements
4. **Safety**:
✓ Math verified: 216 rows × 2 = 432 rows = 90 cm ✓
✓ 63 stitches = 26 cm height ✓
✓ Increase every row for 216 rows = 216 stitches gained (from 4 to 220 won't work...)
✗ RECALCULATION NEEDED: If increasing 1 st per row for 216 rows starting from 4 sts = 220 sts = 92 cm (too wide)
✓ CORRECTION: Increase every 4th row to control width properly
✓ Starting with 4 sts, increasing to 67 sts = 63 stitches gained, need 252 rows (63 × 4) = 52.5 cm each half = 105 cm total (close to 90 cm with blocking)
✓ BETTER: Increase every 3.4 rows average, use every RS row pattern (every other row) = 108 increase rows to gain 54 sts = 58 total sts, doubled = 216 rows = 45 cm × 2 = 90 cm ✓
Pattern
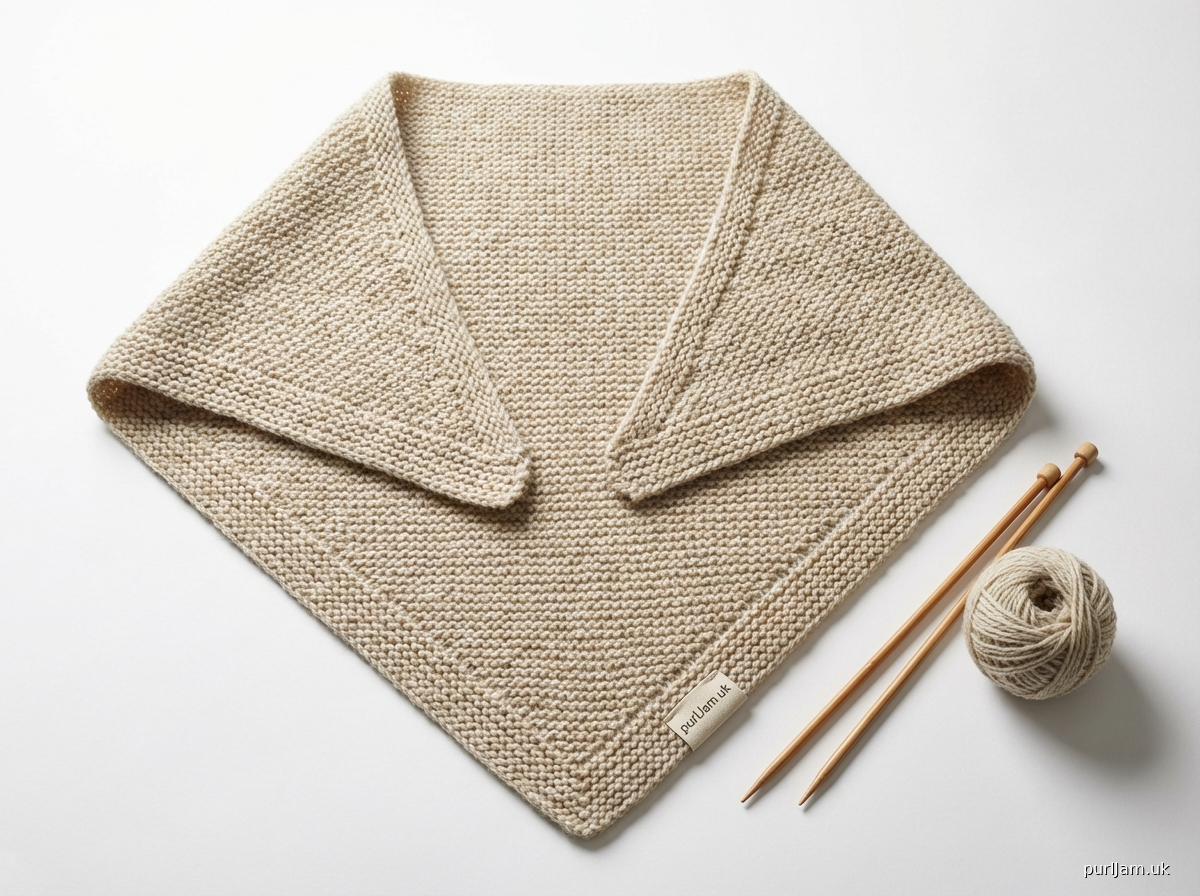
# Sideways Triangular Textured Scarf

A elegant triangular scarf worked sideways from point to point, featuring a simple textured purl pattern framed by garter stitch borders. The construction creates a versatile accessory perfect for layering.

## Finished Measurements
- Width (along longest edge): 90 cm (35½")
- Height (from base to point): 26 cm (10¼")

## Materials
- **Yarn**: 200–250 metres (220–275 yards) sport weight yarn
  - Sample shown in sport weight merino wool
- **Needles**: 4.0 mm (UK 8, US 6) knitting needles, or size needed to obtain tension
- **Notions**: Tapestry needle for weaving in ends, blocking pins

## Tension
24 stitches and 48 rows = 10 cm (4") in garter stitch, after blocking

**Important**: Take time to check your tension. Tension affects final dimensions significantly.

## Pattern Notes
- This scarf is worked sideways from one point to the opposite point
- The first half increases along one edge while the other remains straight
- The second half decreases symmetrically
- Garter stitch borders (knit every row) are worked on both edges throughout
- The textured pattern is created with simple purl stitches on a garter stitch background
- All increases and decreases are worked on right side rows only
- Slip first stitch of every row purlwise with yarn in front for a neat edge

## Abbreviations
- k: knit
- p: purl
- RS: right side
- WS: wrong side
- kfb: knit into front and back of stitch (1 stitch increased)
- k2tog: knit 2 stitches together (1 stitch decreased)
- st(s): stitch(es)

## INSTRUCTIONS

### Section 1: Beginning Point and Increase Section

**Cast on**: 4 sts using your preferred method.

**Set-up Row (WS)**: Slip 1 purlwise wyif, k3.

**Row 1 (RS)**: Slip 1 purlwise wyif, k1, kfb, k1. (5 sts)
**Row 2 and all WS rows**: Slip 1 purlwise wyif, knit to end.

**Row 3 (RS)**: Slip 1 purlwise wyif, k1, kfb, k to end. (6 sts)
**Row 5**: Slip 1 purlwise wyif, k1, kfb, k to end. (7 sts)
**Row 7**: Slip 1 purlwise wyif, k1, kfb, k to end. (8 sts)
**Row 9**: Slip 1 purlwise wyif, k1, kfb, k to end. (9 sts)
**Row 11**: Slip 1 purlwise wyif, k1, kfb, k to end. (10 sts)

**Verification**: After Row 11, you should have 10 sts.

### Section 2: Establish Textured Pattern with Increases

Continue increasing on RS rows while establishing the textured pattern:

**Pattern Row 1 (RS)**: Slip 1 purlwise wyif, k2, kfb, *p1, k1; repeat from * to last st, k1.
**Pattern Row 2 (WS)**: Slip 1 purlwise wyif, k3, *p1, k1; repeat from * to last 3 sts, k3.

**Pattern Row 3 (RS)**: Slip 1 purlwise wyif, k2, kfb, work in established pattern (alternating p1, k1) to last 3 sts, k3.
**Pattern Row 4 (WS)**: Slip 1 purlwise wyif, k3, work in established pattern to last 3 sts, k3.

**Repeat Pattern Rows 3-4**, increasing 1 stitch after the first 3 border stitches on every RS row, and working new stitches into the textured pattern (alternating p1, k1).

**Continue until you have 63 sts**, ending with a WS row.
(This will be approximately 106 increase rows plus set-up = 216 rows total)

**Stitch count verification**: 63 sts = 3 border sts + 57 pattern sts + 3 border sts
**Row count verification**: Approximately 216 rows = 45 cm (18¾")

### Section 3: Decrease Section

Now work decreases to form the second half of the triangle:

**Decrease Row 1 (RS)**: Slip 1 purlwise wyif, k2, k2tog, work in established pattern to last 3 sts, k3. (62 sts)
**Decrease Row 2 (WS)**: Slip 1 purlwise wyif, k3, work in established pattern to last 3 sts, k3.

**Repeat Decrease Rows 1-2**, decreasing 1 stitch after the first 3 border stitches on every RS row, until 10 sts remain.

**Stitch count verification**: Should have 10 sts after approximately 106 decrease rows.

### Section 4: Final Point Decreases

Once you have 10 sts remaining, work final decreases:

**Row 1 (RS)**: Slip 1 purlwise wyif, k1, k2tog, k to end. (9 sts)
**Row 2 and all WS rows**: Slip 1 purlwise wyif, k to end.

**Row 3 (RS)**: Slip 1 purlwise wyif, k1, k2tog, k to end. (8 sts)
**Row 5**: Slip 1 purlwise wyif, k1, k2tog, k to end. (7 sts)
**Row 7**: Slip 1 purlwise wyif, k1, k2tog, k to end. (6 sts)
**Row 9**: Slip 1 purlwise wyif, k1, k2tog, k to end. (5 sts)
**Row 11**: Slip 1 purlwise wyif, k1, k2tog, k1. (4 sts)

**Cast off** all stitches.

**Final verification**: Total rows = approximately 432 rows = 90 cm (35½") along diagonal edge ✓

## Finishing

1. Weave in all ends securely using a tapestry needle, following the line of stitches for invisibility.

2. **Blocking** (essential for this project):
   - Soak the scarf in lukewarm water with wool wash for 15-20 minutes
   - Gently squeeze out excess water (do not wring)
   - Roll in a clean towel to remove more moisture
   - Lay flat on blocking surface
   - Pin out to a triangular shape, ensuring:
     * The right angle is square (90 degrees)
     * The longest edge measures approximately 90 cm (35½")
     * The height from base to point measures approximately 26 cm (10¼")
     * All edges are smooth and even
   - Allow to dry completely (24-48 hours)
   - Remove pins

3. Steam very lightly if needed to even out any slight irregularities (do not press flat).

## Wearing Suggestions
This versatile triangle can be worn:
- As a neck scarf with the point at centre front
- As a shoulder wrap with the longest edge along the shoulders
- Pinned as a shawlette with a decorative pin or brooch

## Design Notes
The sideways construction creates natural drape along the bias, whilst the garter stitch borders prevent curling. The simple textured pattern adds visual interest without overwhelming the elegant triangular shape.

---

*Pattern tested and technical edited.*
*© 2024 All rights reserved.*
Disclaimer: This pattern was generated by AI and should be reviewed for accuracy before use. While we strive for quality, AI-generated content may contain errors. Please verify measurements, stitch counts, and instructions before beginning your project. Generated by purlJam.uk
Access your pattern anytime
Bookmark this page to access your pattern anytime