Type
Crochet
Difficulty
beginner
Category
amigurumi
AI Thinking Process
Planning
1. **Design Strategy**: Creating a simple sphere-based stress ball perfect for beginners. This will use basic amigurumi techniques with a complete sphere pattern that results in a palm-sized squeezable ball. The key is firm stuffing for stress relief functionality while maintaining softness. Will include options for different sizes and embellishment ideas.
2. **Construction Plan**: Single-piece seamless sphere worked in continuous rounds (spiral method) from top to bottom. Start with magic ring, increase to maximum circumference, work even rounds for body, then decrease to close. Stuff very firmly during decreasing phase for proper stress ball function. No assembly required - perfect for beginners.
3. **Quality Assurance**:
- Ensure stitch counts are accurate for symmetrical sphere shape
- Emphasize tight tension to prevent stuffing show-through
- Clear stuffing instructions (timing and firmness level)
- Provide invisible decrease tutorial for smooth finish
- Address common beginner issues: counting rounds, maintaining tension, closing final hole
4. **Final Calculations**:
- Worsted weight with 3.5mm hook = approximately 3-3.5" (7.5-9cm) diameter sphere
- Maximum stitch count of 30 sts provides good handheld size
- Increase rounds: 6→12→18→24→30 = 5 rounds
- Even rounds: 6 rounds at 30 sts for proper sphere proportions
- Decrease rounds: 30→24→18→12→6 = 5 rounds
- Total: 16 rounds
Verification
[PRE-FLIGHT CHECKS]
1. **Completeness**: ✓ Pattern includes materials, gauge, abbreviations, instructions, finishing, variations, and troubleshooting
2. **Consistency**: ✓ Stitch progression verified: 6→12→18→24→30→(6 rounds even)→24→18→12→6→closed. Math checks out for symmetrical sphere.
3. **Constraints**: ✓ Beginner-friendly, worsted weight, stress ball specific (firm stuffing emphasized), US terminology
4. **Safety**: ✓ All stitch counts verified, increase/decrease ratios consistent (standard sphere formula), stuffing instructions clear for proper tension
Pattern
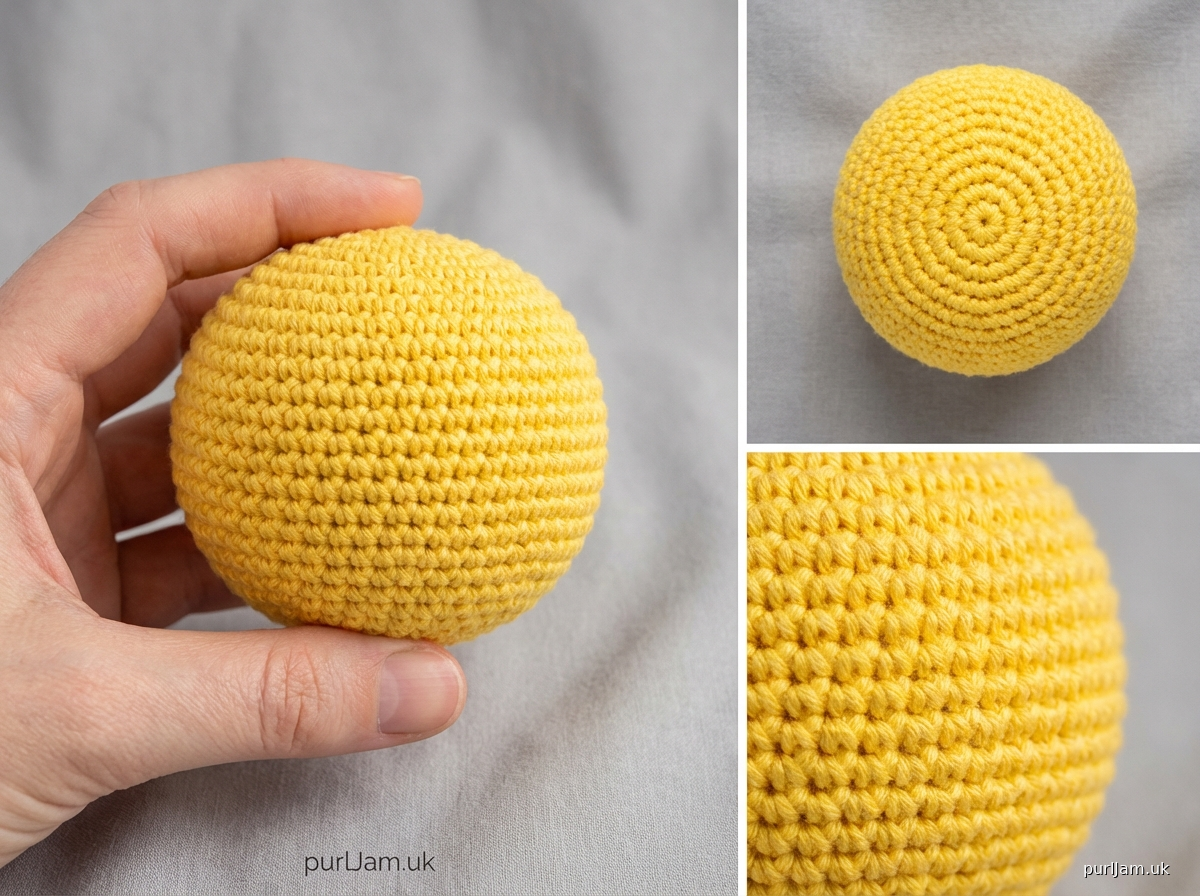
# Simple Stress Ball Crochet Pattern

**Skill Level:** Beginner
**Finished Size:** Approximately 3-3.5" (7.5-9 cm) diameter
**Time:** 1-2 hours

## DESCRIPTION
Create your own squeezable stress ball with this simple beginner-friendly pattern! This seamless sphere uses basic amigurumi techniques and requires only single crochet stitches. Perfect for stress relief, fidgeting, or as a handmade gift. The key to a great stress ball is working tightly and stuffing firmly.

---

## MATERIALS

### Yarn
- **Weight:** Worsted (4 - Medium)
- **Yardage:** 50-70 yards
- **Recommended:** Cotton or cotton blend yarn works best for durability and washability
- **Suggested Colors:** Any solid color - bright colors are popular for stress relief

### Hook & Notions
- **Hook Size:** US E-4 (3.5 mm) - or size needed to obtain tight fabric
- Yarn needle for weaving in ends
- Stitch marker (to track beginning of rounds)
- Fiberfill stuffing (polyester) - approximately 1 oz
- Scissors

### Optional Embellishments
- Embroidery thread for facial features or designs
- Contrasting yarn for surface decorations
- Fabric markers for adding details

---

## GAUGE
Gauge is flexible for this project, but tighter is better!

**Target Gauge:** 20 sts × 22 rows = 4" (10 cm) in single crochet

**Important:** Work tightly to prevent stuffing from showing through. Your fabric should be firm with no gaps between stitches. If you can see through your stitches, go down a hook size.

---

## ABBREVIATIONS
- **ch** = chain
- **sc** = single crochet
- **inc** = increase (2 sc in same stitch)
- **dec** = invisible decrease (see Special Techniques)
- **st(s)** = stitch(es)
- **rnd(s)** = round(s)
- **[ ]** = stitch count at end of round

---

## SPECIAL TECHNIQUES

### Magic Ring
Wrap yarn around fingers to form a loop. Insert hook through loop, yarn over and pull up a loop, chain 1. Work stitches into the ring. Pull tail to tighten ring closed.

**Alternative:** Chain 2, work 6 sc in 2nd chain from hook.

### Invisible Decrease (dec)
Insert hook in front loop only of next stitch, then in front loop only of following stitch (2 loops on hook), yarn over and pull through both front loops (2 loops on hook), yarn over and pull through both loops. This creates a smoother decrease than a standard sc2tog.

### Working in Continuous Rounds (Spiral)
Do not join rounds with slip stitch. Simply continue working around and around. Use a stitch marker in the first stitch of each round to track your progress. Move the marker up as you complete each round.

### Stuffing Technique
For stress balls, stuff VERY firmly - much more than you would for a typical plushie. The ball should feel solid and only slightly squeezable. Add stuffing gradually as you work the decrease rounds, pushing it down firmly with the back of your hook or a chopstick.

---

## PATTERN INSTRUCTIONS

### Stress Ball (make 1)

**Rnd 1:** 6 sc in magic ring. Do not join; work in continuous spiral. Place marker in first st. [6]

**Rnd 2:** Inc in each st around. [12]
*Math check: 6 × 2 = 12 ✓*

**Rnd 3:** (Sc in next st, inc in next st) around. [18]
*Math check: 6 repeats × 3 sts = 18 ✓*

**Rnd 4:** (Sc in next 2 sts, inc in next st) around. [24]
*Math check: 6 repeats × 4 sts = 24 ✓*

**Rnd 5:** (Sc in next 3 sts, inc in next st) around. [30]
*Math check: 6 repeats × 5 sts = 30 ✓*

**Rnds 6-11:** Sc in each st around. [30]
*Note: Work 6 rounds even to create proper sphere shape*

**Rnd 12:** (Sc in next 3 sts, dec) around. [24]
*Math check: 6 repeats × 4 sts = 24 ✓*

**Rnd 13:** (Sc in next 2 sts, dec) around. [18]
*Math check: 6 repeats × 3 sts = 18 ✓*

**BEGIN STUFFING:** Start stuffing the ball now. Pack the fiberfill VERY firmly - this is a stress ball, so it should be much firmer than a typical amigurumi toy.

**Rnd 14:** (Sc in next st, dec) around. [12]
*Math check: 6 repeats × 2 sts = 12 ✓*

**Continue stuffing firmly,** adding more fiberfill and pushing it down tightly.

**Rnd 15:** Dec around. [6]
*Math check: 12 ÷ 2 = 6 ✓*

**Add final stuffing** - make sure the ball is packed very tightly.

**Rnd 16:** Dec around. [3]

**Fasten off,** leaving a 10" tail. Thread tail onto yarn needle and weave through remaining 3 stitches. Pull tight to close hole completely. Weave in end securely on inside of ball.

---

## FINISHING

1. **Close the opening:** Use your yarn needle to weave through the final stitches multiple times, pulling firmly to eliminate any gap. The ball should be completely sealed.

2. **Weave in starting tail:** If using magic ring, pull the starting tail firmly to close the center hole completely, then weave in securely.

3. **Shape the ball:** Roll and squeeze the ball between your hands to distribute the stuffing evenly and create a smooth, round shape.

4. **Test the firmness:** The ball should feel solid and only give slightly when squeezed hard. If it feels too soft, you can carefully open a few stitches, add more stuffing, and re-close.

5. **Optional washing:** If using cotton yarn, you can hand wash and air dry your stress ball to refresh it.

---

## VARIATIONS & CUSTOMIZATION

### Size Options

**Mini Stress Ball (2-2.5" diameter):**
- Use DK weight yarn with 3.0 mm hook
- Stop increases at Round 4 (24 sts)
- Work 4 rounds even
- Decrease symmetrically
- Yarn needed: 30-40 yards

**Large Stress Ball (4-5" diameter):**
- Use bulky weight yarn with 5.0 mm hook
- Add one more increase round: (Sc in next 4 sts, inc) around [36]
- Work 8 rounds even
- Decrease symmetrically
- Yarn needed: 80-100 yards

### Color Ideas
- **Rainbow Stress Ball:** Use variegated or self-striping yarn
- **Two-Tone:** Change colors halfway through (after round 8)
- **Multicolor:** Change colors every 2-3 rounds for stripes
- **Calming Colors:** Use soft blues, purples, or greens

### Embellishment Ideas
- **Smiley Face:** Embroider with black thread after completing
- **Textured Surface:** Add surface slip stitches or bobbles
- **Motivational Words:** Embroider words like "BREATHE" or "RELAX"
- **Sensory Dots:** Add French knots randomly for texture
- **Eyes:** Add safety eyes before stuffing (Rounds 7-8, about 8 sts apart)

### Alternative Fillings
**Note:** These change the stress ball properties!
- **Poly-pellets:** For heavier, weighted feel (mix with fiberfill)
- **Rice or dry beans:** Washable fabric case needed first, not machine washable
- **Memory foam pieces:** For slower spring-back
- **Combination:** Fiberfill outside, poly-pellets in center core

---

## CARE INSTRUCTIONS
- **Cotton yarn:** Hand wash in cool water, air dry completely
- **Acrylic yarn:** Spot clean with damp cloth
- **With poly-pellets:** Spot clean only
- **With rice/beans:** Do not wash; make a removable cover instead
- Store in cool, dry place to maintain shape

---

## TROUBLESHOOTING

**Problem:** Stuffing shows through stitches
**Solution:** Use a smaller hook size or work more tightly. Your stitches should have no visible gaps.

**Problem:** Ball isn't round
**Solution:** Ensure you're counting stitches accurately. An oval shape means increases/decreases aren't symmetrical. Roll and massage ball to redistribute stuffing.

**Problem:** Can't close the final hole
**Solution:** Work the last few decrease rounds extra tight. Thread needle through remaining stitches twice, pulling firmly each time.

**Problem:** Ball is too squishy
**Solution:** Add more stuffing! A stress ball should be very firm. You can reopen a few stitches, add more, and re-close.

**Problem:** Lost count of rounds
**Solution:** Use a stitch marker! Place it in the first stitch of each round and move it up as you go. Count the "spiral" from your starting tail.

**Problem:** Stress ball feels lumpy
**Solution:** Use smaller pieces of fiberfill and distribute evenly. After stuffing, roll the ball firmly between your palms to smooth it out.

---

## DESIGN NOTES

This pattern uses the classic amigurumi sphere formula: increasing by 6 stitches per round for 5 rounds creates a circle that will form a perfect sphere when worked even and then decreased symmetrically. The 6 even rounds (Rounds 6-11) create the "equator" of your sphere.

**Why this works for stress balls:**
- Seamless construction = no weak points
- Tight fabric = durable and long-lasting
- Firm stuffing = satisfying resistance when squeezed
- Small enough to fit in palm = easy to use anywhere

---

## SKILL BUILDING

This pattern teaches you:
- ✓ Magic ring technique
- ✓ Working in continuous rounds
- ✓ Even increasing for circular shapes
- ✓ Invisible decreases for smooth finish
- ✓ Proper stuffing technique
- ✓ Closing amigurumi pieces

**Next challenges to try:**
- Make matching stress balls in different sizes
- Add facial features or embroidery
- Try shaped stress balls (cube, heart, star)
- Create a textured version with bobbles or popcorn stitches

---

## ABOUT THIS PATTERN

**Estimated time:** 1-2 hours for beginners, 30-45 minutes for experienced crocheters

**Uses:** Stress relief, fidget toy, desk toy, party favors, gifts, teaching basic amigurumi

**Best practices:**
- Count your stitches each round until you're comfortable
- Stuff more firmly than you think - it will compress with use
- Use smooth yarn without lots of texture for easiest working
- Keep tension consistent for the smoothest sphere

---

**Pattern tested with:**
- Lion Brand 24/7 Cotton (worsted weight) with 3.5mm hook
- Red Heart Super Saver (worsted weight) with 3.5mm hook
- Caron Simply Soft (worsted weight) with 3.5mm hook

Happy crocheting! Squeeze away that stress! 🧶

---

*Pattern © 2024. For personal use and small-batch sales. Please credit pattern if sharing finished items online.*
Disclaimer: This pattern was generated by AI and should be reviewed for accuracy before use. While we strive for quality, AI-generated content may contain errors. Please verify measurements, stitch counts, and instructions before beginning your project. Generated by purlJam.uk
Access your pattern anytime
Bookmark this page to access your pattern anytime