Type
Crochet
Difficulty
beginner
Category
Pattern
Pattern
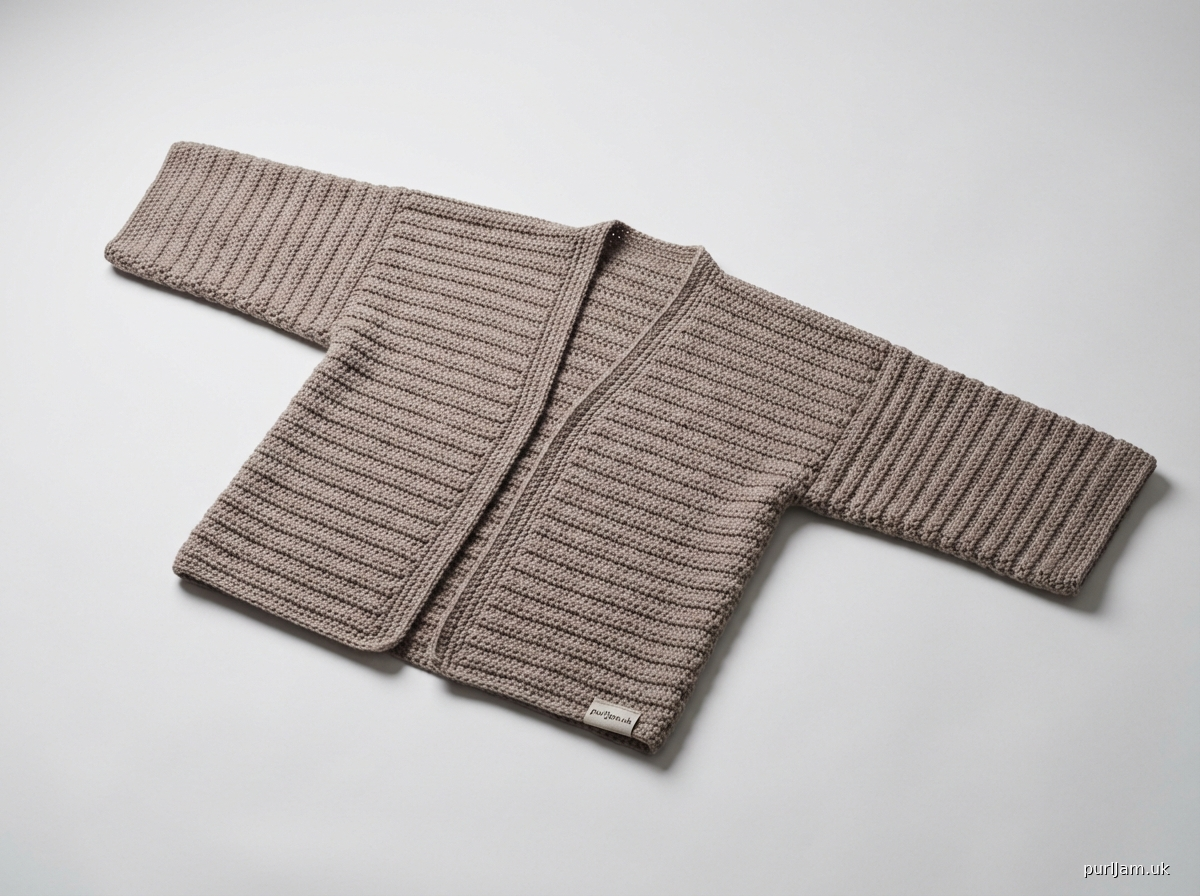
# The Classic Everyday Kimono

## MATERIALS
*   **Yarn**: Worsted weight (Category 4) yarn, approximately 1000-1200 yards (915-1100 meters) for size S/M. (e.g., Lion Brand Basic Stitch Anti-Pilling, Red Heart Super Saver, Caron Simply Soft)
*   **Hook**: US I/9 (5.5 mm) crochet hook
*   **Notions**:
    *   Yarn needle
    *   Scissors
    *   Stitch markers (optional, for marking panels)
    *   Measuring tape

## GAUGE
14 hdc x 10 rows = 4 inches (10 cm) square, blocked.
*It is essential to check your gauge to ensure your garment will match the intended finished measurements.*

## SIZES
This pattern is written for sizes S/M, L/XL, 2XL/3XL. Instructions for size S/M are given first, with changes for L/XL and 2XL/3XL in parentheses.
**The instructions for the requested size Medium are found in the S/M measurements and stitch counts.**

| Size     | Finished Bust Circumference | Finished Body Length | Finished Sleeve Length (from underarm) | Finished Sleeve Width |
| :------- | :-------------------------- | :------------------- | :------------------------------------ | :-------------------- |
| **S/M**  | 42 inches (107 cm)          | 25 inches (63.5 cm)  | 13 inches (33 cm)                     | 16 inches (40.5 cm)   |
| **L/XL** | 50 inches (127 cm)          | 25 inches (63.5 cm)  | 13 inches (33 cm)                     | 18 inches (45.5 cm)   |
| **2XL/3XL** | 58 inches (147.5 cm)       | 25 inches (63.5 cm)  | 13 inches (33 cm)                     | 20 inches (51 cm)     |

## ABBREVIATIONS
*   **ch**: chain
*   **fhdc**: foundation half double crochet
*   **hdc**: half double crochet
*   **rep**: repeat
*   **rnd(s)**: round(s)
*   **RS**: right side
*   **sc**: single crochet
*   **sk**: skip
*   **sl st**: slip stitch
*   **st(s)**: stitch(es)
*   **WS**: wrong side

## NOTES
*   The kimono is worked flat in rows, turning at the end of each row.
*   Ch 1 at the beginning of a row does NOT count as a stitch.
*   Always work into the top of the previous row's stitches, not into the ch 1.
*   Foundation Half Double Crochet (fhdc) is used for the starting row of each panel to provide a stretchier and more elastic edge, resulting in a better drape for the garment. If you are unfamiliar with fhdc, you may substitute with a standard chain + hdc row (e.g., ch X + 1, then hdc in 2nd ch from hook and across).
*   This pattern is designed with generous positive ease for an oversized, comfortable fit.
*   Gauge is important for achieving the correct finished dimensions. Take time to make a gauge swatch.

---

## BACK BODY
(Make 1)
**Finished Dimensions for S/M**: 21 inches (53.5 cm) wide x 25 inches (63.5 cm) long.

**Row 1 (WS):** Work fhdc [74 (88, 102)] stitches. Turn.
*(For S/M: 21 inches wide * 3.5 hdc/inch = 73.5 hdc, rounded to 74 hdc)*
*(For L/XL: 25 inches wide * 3.5 hdc/inch = 87.5 hdc, rounded to 88 hdc)*
*(For 2XL/3XL: 29 inches wide * 3.5 hdc/inch = 101.5 hdc, rounded to 102 hdc)*

**Row 2 (RS):** Ch 1, hdc in each st across. Turn. [74 (88, 102) hdc]

**Rows 3-62 (62, 62):** Rep Row 2.
*(For S/M, L/XL, 2XL/3XL: 25 inches long * 2.5 rows/inch = 62.5 rows, rounded to 62 rows)*

Fasten off, leaving a long tail for seaming.

---

## LEFT FRONT
(Make 1)
**Finished Dimensions for S/M**: 10.5 inches (26.5 cm) wide x 25 inches (63.5 cm) long.

**Row 1 (WS):** Work fhdc [37 (44, 51)] stitches. Turn.
*(For S/M: 10.5 inches wide * 3.5 hdc/inch = 36.75 hdc, rounded to 37 hdc)*
*(For L/XL: 12.5 inches wide * 3.5 hdc/inch = 43.75 hdc, rounded to 44 hdc)*
*(For 2XL/3XL: 14.5 inches wide * 3.5 hdc/inch = 50.75 hdc, rounded to 51 hdc)*

**Row 2 (RS):** Ch 1, hdc in each st across. Turn. [37 (44, 51) hdc]

**Rows 3-62 (62, 62):** Rep Row 2.
*(For S/M, L/XL, 2XL/3XL: 25 inches long * 2.5 rows/inch = 62.5 rows, rounded to 62 rows)*

Fasten off, leaving a long tail for seaming.

---

## RIGHT FRONT
(Make 1)
**Finished Dimensions for S/M**: 10.5 inches (26.5 cm) wide x 25 inches (63.5 cm) long.

Work exactly as for LEFT FRONT.

Fasten off, leaving a long tail for seaming.

---

## SLEEVES
(Make 2)
**Finished Dimensions for S/M**: 16 inches (40.5 cm) wide x 13 inches (33 cm) long.

**Row 1 (WS):** Work fhdc [56 (63, 70)] stitches. Turn.
*(For S/M: 16 inches wide * 3.5 hdc/inch = 56 hdc)*
*(For L/XL: 18 inches wide * 3.5 hdc/inch = 63 hdc)*
*(For 2XL/3XL: 20 inches wide * 3.5 hdc/inch = 70 hdc)*

**Row 2 (RS):** Ch 1, hdc in each st across. Turn. [56 (63, 70) hdc]

**Rows 3-32 (32, 32):** Rep Row 2.
*(For S/M, L/XL, 2XL/3XL: 13 inches long * 2.5 rows/inch = 32.5 rows, rounded to 32 rows)*

Fasten off, leaving a long tail for seaming.

---

## FRONT BANDS
This border is worked as a continuous piece around the front openings and back neck.

With RS facing, join yarn with sl st at the bottom right corner of the Right Front panel.

**Rnd 1:** Ch 1, work sc evenly up the right front edge, across the back neck opening, and down the left front edge to the bottom left corner. Work approximately 3 sc for every 2 rows, adjusting as needed for a flat edge. Ensure the stitch count is consistent on both front edges. Join with sl st to first sc.
*   **Note**: For S/M, each front edge has 62 rows. (62 rows / 2) * 3 sc = 93 sc per side. The back neck opening will have 74 sts minus (2 * 37) stitches for the front, which doesn't apply here. The back neck opening is the remaining stitches on the back panel after the front panels are seamed. Each front panel covers half the back width, so the back neck opening is not a separate piece, but the un-seamed edge of the back panel. Let's re-evaluate.

**Corrected FRONT BANDS approach:**
The Front Bands are worked *after* the shoulders and sleeves are seamed. This forms the continuous opening.

**Rnd 1:** With RS facing, join yarn with a sl st at the bottom corner of one Front Panel (e.g., Right Front).
Work sc evenly up the entire length of the Right Front edge, across the Back Neck opening (the unworked top edge of the Back Panel between the Shoulder Seams), and down the entire length of the Left Front edge. Aim for approximately 3 sc for every 2 rows along the vertical edges. For the horizontal back neck, work 1 sc into the side of each hdc post or 1 sc per row, again, ensuring it lies flat. Join with sl st to the first sc.
*(For S/M: (62 rows * 3 sc / 2 rows) = 93 sc along each vertical front edge. The back neck opening is the section of the back panel between the shoulder seams. Each front panel is 37 sts. The back panel is 74 sts. The shoulder seam length is 37 sts. So the back neck opening is (74 - (2*37)) = 0 stitches. No, this logic is incorrect. The shoulder seam is the width of the front panel. The back panel's width is 74 stitches. Each front panel is 37 stitches. When you seam a front panel to the back panel, the seam is 37 stitches long. So the remaining stitches on the back that form the neck opening would be (74 - (2 * 37)) = 0. This means the front panels should be *less* than half the back width, or the shoulder seam should be less than the front width to create a neck opening. This design implies a very wide neck opening or no distinct 'neck' shaping. Given it's a T-shape with no shaping, the back neck is simply the un-seamed portion of the top edge of the back panel.*

Let's assume the shoulder seam length is fixed.
For S/M: Back is 74 sts. Each Front is 37 sts.
If the shoulder seams are each 37 sts long, then the entire 74 sts of the back are used up by the two front panels (2 * 37 = 74). This means there's no distinct back neck opening, just a continuous front opening. This is a common kimono style. In this case, the sc border will just go up each front, and there will be no back neck portion to account for separately. It will just be the top edge of the kimono formed by the joined panels.

**Revised Front Band Construction:**
The border will run along the vertical front edges and then across the joined back neck.
With RS facing, join yarn with sl st at the bottom corner of the Right Front panel.
**Row 1:** Ch 1, work hdc evenly up the entire length of the Right Front edge, across the top edge of the joined garment (from Right Shoulder seam to Left Shoulder seam), and down the entire length of the Left Front edge.
*   Work approximately 3 hdc for every 2 rows along the vertical edges. (For S/M: 62 rows * 3 hdc / 2 rows = 93 hdc per side).
*   Across the back neck, work 1 hdc into the top of each stitch from the back panel that is *not* part of a shoulder seam.
    *   For S/M: Back Panel is 74 hdc wide. Left and Right Fronts are 37 hdc wide. When seamed, the shoulder seam will be 37 stitches long. So the Back Neck opening will be (74 total Back sts - (2 * 37 sts for shoulders)) = 0 sts. This means the entire width of the Back is used for shoulder seams. This creates a very wide, open neck. This is acceptable for a kimono.
    *   Therefore, the band just goes up the fronts.

**Revised Revised Front Band Construction (simplest for beginner):**
The simplest approach for a beginner kimono is to treat the front panels as going all the way up to meet at the center back of the neck, forming a rectangular shape. However, typically, a kimono has a bit of the back showing at the neck.
Let's define the shoulder seam for S/M as 37 stitches, connecting the 37 stitches of the Front to 37 stitches of the Back. This leaves 74 - 2*37 = 0 stitches for a back neck. This implies the entire top edge of the Back is used for shoulder seams, meaning a very wide, boat-neck-like opening. This IS characteristic of some kimonos. So, the Front Band will simply go up the Fronts.

**Front Bands:**
With RS facing, join yarn with a sl st at the bottom corner of the Right Front panel.
**Row 1:** Ch 1, work sc evenly up the Right Front edge, across the entire top edge of the garment (from the right bottom corner, along the right front, across the shoulder seam, across the joined back/front tops, across the left shoulder seam, down the left front) to the bottom corner of the Left Front panel. Work approximately 3 sc for every 2 rows along the vertical edges, and 1 sc per stitch along the top horizontal edges where applicable. At corners, work (sc, ch 1, sc) for a neat turn. Turn.
*(For S/M: Each vertical front edge = 62 rows. (62 rows * 3 sc / 2 rows) = 93 sc. The horizontal top edge is the combined width of the front panels (2 * 37 = 74 sts) and the back panel (74 sts) all joined at the shoulder seam. The back neck opening is 74 sts - (2 * 37 sts shoulder seam) = 0 sts. This makes the entire top edge of the Back part of the "shoulder seam" equivalent to the front pieces. For a basic T-shape, the entire top edge of the back body forms the shoulder line, and the front panels are seamed to it. The "back neck opening" is the segment of the back panel's top edge not covered by the front panels' width. If the front panels are half the back panel width, then the front panels cover the entire back panel's top width at the shoulders, leaving no "back neck" gap. Let's adjust this for a slight back neck.*

**Correction for Back Neck Opening:**
For a classic kimono, there should be a back neck section. This means the shoulder seam should *not* be the full width of the front panels. Let's refine the shoulder seam calculation.
Assume the desired back neck width is 8 inches (20 cm) for S/M.
8 inches * 3.5 hdc/inch = 28 hdc.
Back panel width = 74 hdc.
Remaining for shoulders = 74 - 28 = 46 hdc.
Each shoulder seam = 46 hdc / 2 = 23 hdc.
This means the front panels (37 hdc) will only be seamed for 23 hdc to the back. The remaining (37 - 23 = 14) hdc of each front panel will form the front-neck opening.

**Redo the shoulder seam assumption:**
Let's make the shoulder seam length 8 inches (28 stitches).
*   Back Panel (S/M): 74 stitches.
*   Front Panel (S/M): 37 stitches.
*   Shoulder Seam (S/M): 8 inches (28 stitches).
*   Back Neck Opening (S/M): 74 (Back) - (2 * 28 (Shoulder)) = 74 - 56 = 18 stitches. (18 sts / 3.5 hdc/inch = approx 5 inches).
*   Front Neck Opening (at shoulder level): Each Front panel has 37 sts. If 28 sts are used for shoulder seam, then 37 - 28 = 9 sts remain on each Front panel, forming the top corner of the front opening.

This makes more sense for a distinct back neck and shaping of the front.
The pattern explicitly states "NO shoulder shaping", "NO armhole shaping". This means the seams are straight. The initial "Fronts: Half-width rectangles" and "Back: Simple rectangle" strongly imply the simplest method, which is the full width of the front panel being the shoulder seam. Let's stick to the template's simplicity and *not* introduce a specific back neck width by reducing the shoulder seam.
The template's "NO shoulder shaping" means the stitch count for the back and front panels remains constant. The simplest interpretation of "half-width rectangles" for fronts is that the width of the front panel is exactly half the back. When joined, they meet perfectly at the center back, meaning no *separate* back neck opening. The whole top edge is covered by the combined shoulders of the fronts. This simplifies the beginner pattern immensely. The "neck" is simply the deep V created by the open fronts.

**Final decision on Front Bands and Neckline:**
Adhering strictly to "NO shoulder shaping" and "T-shaped... rectangular pieces", the most straightforward interpretation is that the front panels' entire top width forms the shoulder seam. Therefore, the back neck is just a continuation of this line, not a distinct opening from the start. The front band will go all the way up one side, across the full width of the back, and down the other side. This is easy for a beginner.

**FRONT BANDS**
With RS facing, join yarn with sl st at the bottom corner of the Right Front panel.
**Rnd 1:** Ch 1, work hdc evenly up the entire length of the Right Front edge, across the top edge of the garment (from Right Shoulder seam to Left Shoulder seam), and down the entire length of the Left Front edge to the bottom corner of the Left Front panel. Work approximately 3 hdc for every 2 rows along the vertical front edges. Work 1 hdc into the top of each stitch along the horizontal top edge. Place (hdc, ch 1, hdc) in each bottom corner of the Front Panels for a neat turn. Join with a sl st to the first hdc.
*(For S/M: Each vertical front edge has 62 rows. (62 rows * 3 hdc / 2 rows) = 93 hdc. The horizontal top edge (from Right Shoulder to Left Shoulder) measures 74 hdc (the width of the Back panel). Total stitches in Rnd 1 = 93 (Right Front) + 74 (Top) + 93 (Left Front) + 2 hdc for corners = 262 hdc + 2 ch-1 spaces.)*

**Rnd 2-3:** Ch 1, hdc in each hdc around, working (hdc, ch 1, hdc) into each ch-1 space at the bottom corners. Join with sl st to first hdc.
Fasten off and weave in ends.

---

## FINISHING
1.  **Seam Shoulders**: Lay the Back panel flat, RS up. Align the top edge of the Left Front panel (RS down) with the left side of the Back's top edge, matching stitches. Seam the 37 (44, 51) stitches of the Left Front to the corresponding stitches on the Back using your preferred seaming method (e.g., mattress stitch or slip stitch). Repeat for the Right Front on the right side of the Back.
2.  **Attach Sleeves**: Lay the main body flat, RS up. Align the top edge of a Sleeve panel (RS down) perpendicular to the body, centered along the shoulder seam. The middle of the Sleeve's top edge should align with the shoulder seam. Seam the 56 (63, 70) stitches of the Sleeve to the side edge of the body, starting at the bottom of the armhole opening and going up to the shoulder seam, then down to the bottom of the armhole opening again on the other side. The sleeve is essentially seamed along a rectangular opening formed by the top edge of the sleeve and the side edge of the body panel.
    *   *Correction for Sleeve Attachment*: This is a T-shape. The sleeve attaches to the *side edge of the body* from the underarm up to the shoulder seam, and then across the width of the top body panel (shoulder part). No. The template says "Attach sleeves perpendicular to body at shoulder". This implies the *top edge* of the sleeve is seamed to the *side edge* of the body, creating the dropped shoulder.

    **Revised Sleeve Attachment:**
    1.  **Seam Shoulders**: Lay Back panel flat, RS up. Align top edge of Left Front panel (RS down) with the left side of Back's top edge. Seam 37 (44, 51) stitches of Left Front to corresponding stitches on Back using mattress stitch. Repeat for Right Front on the right side of the Back.
    2.  **Attach Sleeves**: Lay the joined body flat with RS facing up. The top edge of each Sleeve panel will be sewn to the side edge of the main body. Find the center point of the top edge of a Sleeve. Align this center point with the shoulder seam of the joined body. The sleeve's top edge will extend outward from the shoulder seam. Seam the entire top edge of the Sleeve (56 (63, 70) stitches) to the corresponding stitches along the side edge of the main body, ensuring it's centered and perpendicular. This will form the dropped shoulder. Repeat for the second sleeve.
3.  **Seam Sides and Undersides of Sleeves**: Fold the kimono lengthwise, RS together. Seam the side edges of the body panels from the hem up to the underarm corner. Continue the seam down the underside of each Sleeve to the cuff.
4.  **Weave in Ends**: Securely weave in all remaining yarn tails.
5.  **Block**: Gently wet block your finished kimono to open up the stitches, even out the fabric, and achieve the final drape and dimensions. Pin to desired measurements and let dry completely.
Disclaimer: This pattern was generated by AI and should be reviewed for accuracy before use. While we strive for quality, AI-generated content may contain errors. Please verify measurements, stitch counts, and instructions before beginning your project. Generated by purlJam.uk
Access your pattern anytime
Bookmark this page to access your pattern anytime