Type
Crochet
Difficulty
intermediate
Category
bag
AI Thinking Process
Planning
Verification
Pattern
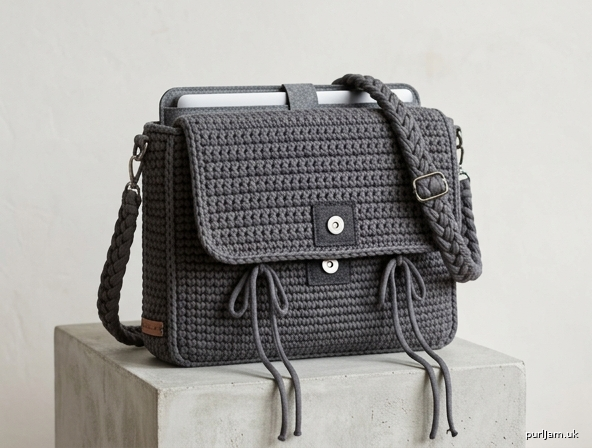
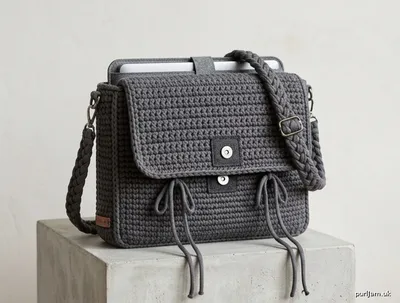
Boxy T-Shirt Yarn Laptop Messenger Bag
Structured Rectangular Flap Bag — 13–14" Laptop
Skill level: Intermediate / advanced assembly
Terminology: US crochet
Finished size (main pattern): 12¼" wide × 9½" high × 3¼" deep (31 × 24 × 8 cm), to fit a 13–14" laptop in a slim sleeve plus a few small items.
This is not a folded envelope or a slouchy market tote. Six separate panels are seamed into a true rectangular box so the corners stay square.
1. Materials and Tools
- Bulky / super bulky T-shirt yarn (recycled jersey tape), about 2–4 mm thick and ⅝–¾" (1.5–2 cm) wide
- Crochet hook US M/N-13 (9 mm), plus US L-11 (8 mm) if you need a denser fabric to match gauge
- 2 metal D-rings, 1" (25 mm)
- 1 metal triglide slider, 1" (25 mm), for an adjustable strap
- 1 magnetic snap, ¾" (18 mm), sew-in or prong style
- Large-eye yarn needle
- 8 stitch markers
- Sharp scissors
- Steam iron
- Optional lining: ½ yd (0.5 m) cotton fabric; matching sewing thread; 3 mm craft felt or ⅛" foam; 2 felt squares 2 × 2" (5 × 5 cm) for snap and strap reinforcement
- Optional flap stiffener: 1 piece stiff felt or plastic canvas 11½ × 5" (29 × 13 cm), corners rounded
- Books or a small cardboard box 12 × 9½ × 3" (30 × 24 × 8 cm) for shaping
Color: Any solid T-shirt yarn. Dark gray, black, sand, or olive reads closest to a classic structured messenger.
2. Yarn Requirements
- Main size: 34–39 oz / 2.1–2.4 lb (960–1100 g), about 300–340 yd (275–310 m)
- Buy a full extra cone if your tape is thin or you add the double-layer flap
- 14" laptop mod: add ~3 oz (80 g)
- 15–16" laptop mod: add ~10–12 oz (280–340 g)
T-shirt yarn varies by stretch. Weigh leftover after the gauge swatch; if 4 × 4" (10 × 10 cm) used more than 0.6 oz (18 g), buy extra.
3. Crochet Hook Size
- Gauge hook: US M/N-13 (9 mm)
- If the swatch is looser than gauge (bag will slouch), switch to US L-11 (8 mm) and recast the swatch
- Do not go larger than US N/P-15 (10 mm) for this project — large holes will not support a laptop
4. Abbreviations (US)
| Abbr. | Meaning |
|---|---|
| ch | chain |
| sc | single crochet |
| sc2tog | single crochet 2 stitches together (decrease) |
| sl st | slip stitch |
| st(s) | stitch(es) |
| RS | right side |
| WS | wrong side |
| BLO | back loop only |
| yo | yarn over |
| rep | repeat |
| pm | place marker |
Special stitches
- Sc2tog: Insert hook in next st, yo, pull up a loop (2 loops on hook); insert hook in following st, yo, pull up a loop (3 loops on hook); yo, draw through all 3 loops.
- Sc join: Hold two panels WS together (RS outside). Insert hook through both edge stitches, yo, complete 1 sc. This is the structural seam used for the box.
Turning ch-1 does not count as a stitch. Always work the first sc in the first st of the row.
5. Gauge
9 sc and 10 rows = 4 × 4" (10 × 10 cm) in single crochet with US M/N-13 (9 mm), blocked.
Swatch (do not skip): Ch 12. Row 1: Sc in 2nd ch from hook and in each ch across (11 sc). Rows 2–12: Ch 1, turn, sc in each st. Measure the inner 9 sts × 10 rows. They must equal 4 × 4" (10 × 10 cm).
- Too few stitches in 4" = fabric too loose → smaller hook
- Too many stitches in 4" = fabric too stiff/small → larger hook, but not above 10 mm
Dense fabric is the whole point. You should not see the work surface through the stitches.
6. Finished Measurements
Main size (13–14" laptop)
| Inches | cm | |
|---|---|---|
| Width | 12¼" | 31 cm |
| Height | 9½" | 24 cm |
| Depth | 3¼" | 8 cm |
| Flap length (from back top edge) | 5½" | 14 cm |
| Flap drop on front | 2–2¾" | 5–7 cm |
| Strap (after braiding) | 43" | 110 cm |
| Strap width (braided) | 1½–2" | 4–5 cm |
Fits a 13–14" laptop in a slim sleeve, plus a phone, charger, and small pouch. It is a relatively flat messenger, not a deep tote.
7. Construction Diagram
Work six flat pieces, then seam them into a box. Flap is sewn on last.
Panel net (wrong side up, before seaming)
                    +---------------------------+
                    |                           |
                    |     FLAP  28 sts x 14     |
                    |   (lower corners rounded  |
                    |    with border decreases) |
                    +-------------+-------------+
                                  | sew to TOP of BACK
                                  v
    +--------+--------------------+--------+
    |        |                    |        |
    |  SIDE  |       BACK         |  SIDE  |
    | 7 x 24 |     28 sts x 24    | 7 x 24 |
    |  rows  |       rows         |  rows  |
    +--------+--------------------+--------+
             |                    |
             |      BOTTOM        |
             |    28 sts x 8 rows |
             +--------------------+
             |                    |
             |       FRONT        |
             |    28 sts x 24     |
             +--------------------+
Assembled 3-D box (side view)
         flap
      __________
     /          /|  <- flap folds over the 3¼" (8 cm) opening
    /__________/ |     and drops 5–7 cm down the front
    |          | |
    |   FRONT  | | BACK
    |  9½"     | |
    |          | |
    |__________|/  <- bottom 3¼" (8 cm) deep
         12¼"
What each seam must match
| Seam | Piece A | Piece B | Count |
|---|---|---|---|
| Front lower edge | Front, 28 sts | Bottom, long edge, 28 sts | 28 = 28 ✓ |
| Back lower edge | Back, 28 sts | Bottom, long edge, 28 sts | 28 = 28 ✓ |
| Front side edge | Front, 24 rows | Side, 24 rows | 24 = 24 ✓ |
| Back side edge | Back, 24 rows | Side, 24 rows | 24 = 24 ✓ |
| Bottom short edge | Bottom, 8 rows | Side, 7 sts | ease 8 rows onto 7 sts ✓ |
| Top opening | Front 28 + side 7 + back 28 + side 7 | — | 70 sc ✓ |
8. Front Panel — Row by Row
With US M/N-13 (9 mm) and T-shirt yarn:
Foundation: Ch 29.
Row 1 (RS): Sc in 2nd ch from hook and in each ch across. (28 sc ✓ — 29 ch − 1 turning ch = 28)
Row 2: Ch 1, turn, sc in each of 28 sc. (28 sc)
Rows 3–24: Rep Row 2. (22 more rows → 2 + 22 = 24 rows total ✓)
Fasten off, leaving a 24" (61 cm) tail for seaming. Mark Row 1 as the lower edge and Row 24 as the top edge. Panel should measure about 12½ × 9½" (31.5 × 24 cm).
9. Back Panel — Row by Row
Work exactly as Front Panel, Rows 1–24. (28 sc, 24 rows ✓)
Fasten off, leaving a 24" (61 cm) tail. Mark Row 1 lower edge, Row 24 top edge (flap attachment edge).
10. Bottom and Side Gussets — Row by Row
Bottom panel
Foundation: Ch 29.
Row 1: Sc in 2nd ch from hook and in each ch across. (28 sc ✓)
Row 2: Ch 1, turn, sc in each of 28 sc. (28 sc)
Rows 3–8: Rep Row 2. (6 more rows → 2 + 6 = 8 rows total ✓)
Fasten off, leaving a 30" (76 cm) tail. Piece measures about 12½ × 3¼" (31.5 × 8 cm). Mark both long edges (join to front and back) and both short edges (join to sides).
Side gusset (make 2)
Foundation: Ch 8.
Row 1: Sc in 2nd ch from hook and in each ch across. (7 sc ✓ — 8 ch − 1 = 7)
Row 2: Ch 1, turn, sc in each of 7 sc. (7 sc)
Rows 3–24: Rep Row 2. (22 more rows → 2 + 22 = 24 rows total ✓)
Fasten off, leaving a 24" (61 cm) tail. Each side measures about 3⅛ × 9½" (7.9 × 24 cm). Mark Row 1 as the lower edge (joins the bottom panel) and the 7-st width as the depth of the bag.
11. Joining the Panels (Square-Corner Box)
Work with RS facing out so the sc-join ridge sits on the outside like a piped edge, or with WS facing out for a hidden seam. The photos of this style usually show a clean outside, so the pattern uses WS-together, RS-out, sc join. Use the 8 mm hook for joining if the 9 mm hook makes a bulky ridge.
Set-up. Lay front, bottom, and back in a straight line, lower edges of front and back against the long edges of the bottom. Side gussets sit on the short ends of the bottom.
Seam 1 — Front to bottom (long edge)
Pin front Row 1 to one long edge of the bottom, 28 to 28. Sc join 28 sts. (28 = 28 ✓) Fasten off.
Seam 2 — Back to bottom (long edge)
Pin back Row 1 to the remaining long edge of the bottom. Sc join 28 sts. (28 = 28 ✓) Fasten off.
You now have a long C-shaped piece: front + bottom + back.
Seam 3 — First side to bottom (short edge)
Pin the 7-st lower edge of one side gusset to one 8-row short edge of the bottom. The counts differ by 1. Ease as follows: join 3 sts, skip no st on the side but work 2 sc into 2 rows then 1 sc into 1 row twice more, then join the last 2 sts — in practice, work 7 sc joins, catching 8 bottom-row-ends by working 1 join through 2 row-ends at the center. (8 rows eased onto 7 sc ✓) Fasten off.
Seam 4 — Second side to bottom
Repeat Seam 3 on the other short edge.
Seams 5–8 — Vertical walls
For each of the four vertical edges (front-left, front-right, back-left, back-right): pin 24 row-ends of the body panel to 24 row-ends of the side gusset, 1:1. Sc join 24 sts. (24 = 24 ✓)
Square-corner lock (do this at all 4 bottom corners)
Thread a 12" (30 cm) length of yarn. At the exact corner where front/side/bottom (or back/side/bottom) meet, take 3 small stitches through all three panels, pull snug, and weave in. This stops the corner from collapsing into a curve.
Top opening reinforcement
Join yarn at the left front top corner. Work 1 round of sc around the entire mouth of the bag, living in each st and each row-end:
- Front top: 28 sc
- Right side: 7 sc
- Back top: 28 sc
- Left side: 7 sc
(28 + 7 + 28 + 7 = 70 sc ✓) Join with sl st to first sc. Fasten off. This round is what keeps the mouth rectangular.
Stand the bag up and insert the shaping box or a stack of books. The body must look like a shallow rectangular tray, not a canoe.
12. Flap — Row by Row
The flap is worked as a rectangle, then a border rounds the two lower corners and stops curl.
Foundation: Ch 29.
Row 1 (RS, attachment edge): Sc in 2nd ch from hook and in each ch across. (28 sc ✓)
Row 2: Ch 1, turn, sc in each of 28 sc. (28 sc)
Rows 3–14: Rep Row 2. (12 more rows → 2 + 12 = 14 rows total ✓)
Do not fasten off.
Border round (rounds the lower corners, kills curl)
Ch 1, do not turn. Work around three free sides, leaving Row 1 (the 28 foundation sc) free to sew to the back:
- Right edge: Work 14 sc evenly down the 14 row-ends. (14 sc ✓)
- Lower right corner: Sc2tog over the corner st and the first bottom st. (decrease 1 ✓)
- Lower edge: Sc in each of the next 24 sc. (28 bottom sc − 2 corner sts already used = 26, minus the 2 that will be eaten by the second decrease: work 24 sc ✓)
- Lower left corner: Sc2tog over the last bottom st and the first left-edge row-end. (decrease 1 ✓)
- Left edge: Work 13 sc evenly up the remaining 13 row-ends. (14 row-ends − 1 already in the sc2tog = 13; 13 + 1 corner = 14 matching the right edge ✓)
- Sl st to the first st of Row 1. Fasten off, leaving a 24" (61 cm) tail.
Lower edge is now gently rounded; the top (Row 1) stays a straight 28 sc for seaming.
Make the flap lie flat
- Keep tension even; a tight foundation chain is the usual cause of upward curl — if Row 1 draws in, redo it with a 10 mm hook, then switch back.
- The border round is mandatory; a raw sc rectangle will taco-curl.
- Steam-block the flap flat now, before sewing (see Section 20).
- Optional structure: cut stiff felt ½" (1 cm) smaller than the flap, round the lower corners, and whipstitch it to the WS. This is the single best way to keep a T-shirt-yarn flap board-flat.
13. Flap Attachment
- Place the bag upright. The back panel’s top edge (the 28 sc of the mouth round that sit on the back) is the attachment line.
- Pin flap Row 1 to that back top edge, RS of flap facing the RS of the back (when the flap is closed, its RS will face out/front).
- Width must match: 28 flap sts to 28 back sts. (28 = 28 ✓)
- With yarn needle, mattress-stitch or whipstitch through the back loops of flap Row 1 and the mouth-round stitches on the back only. Do not catch the front panel.
- Work a second pass of whipstitch for a laptop-weight hinge.
- Fold the flap forward over the opening. It should cross the 3¼" (8 cm) depth and sit 2–2¾" (5–7 cm) down the front. If it is short, you missed rows; if it is long, the bag depth has collapsed — restuff with the shaping box and restitch the corners.
14. Decorative Cords
Make 4 matching cords from the same T-shirt yarn.
One cord
Ch 50. Sl st in 2nd ch from hook and in each ch across. (49 sl st ✓) Fasten off, leaving an 8" (20 cm) tail at each end. Cord measures about 18–20" (46–51 cm).
Make 4.
Where they go
On the front panel, 2" (5 cm) down from the top edge (so they start under the closed flap and hang visibly below it). Attach at stitches 7, 12, 17, and 22 of the 28-st width.
Check: 7, 12, 17, 22 are symmetric — 6 sts from each side, then groups of 5 sts between cords. (6 + 1 + 5 + 1 + 5 + 1 + 5 + 1 + 6 = 28 ✓)
How to attach
Pull both tails of a cord to the WS at the marked stitch, square-knot them on the WS, and weave each tail 2" (5 cm) in opposite directions. Tack the knot with 2 sewing stitches so it cannot pull through.
The four cords hang 14–16" (36–41 cm) below the flap. Trim even. Optional: tie the two center cords in a loose bow, leave the outer two hanging straight — that is the look closest to a decorative-tie messenger.
15. Braided Shoulder Strap
Do not use a single chain. Three flat sc strips, braided, give the thick strap in the reference style.
One strip (make 3)
Ch 5.
Row 1: Sc in 2nd ch from hook and in each ch across. (4 sc ✓)
Row 2: Ch 1, turn, sc in each of 4 sc. (4 sc)
Rows 3–130: Rep Row 2. (128 more rows → 2 + 128 = 130 rows ✓)
130 rows × 0.4" = 52" (132 cm) ✓
Fasten off, leaving a 12" (30 cm) tail. Make 3 strips of identical length.
Braid
- Lay the 3 strips WS down. Overlap the top 1½" (4 cm) and sew them together with yarn, end-on, so they cannot slide.
- Braid tightly (left over center, right over center) for the full length. Keep the RS out and the edges aligned; do not twist a strip onto its side.
- Sew the remaining 1½" (4 cm) of ends together the same way.
- Braiding shortens the work by about 15%: 52" × 0.85 = 44" (112 cm) ✓ — within the 39–47" (100–120 cm) target. Trim or add rows on a remake if you need a precise length.
Adjustable hardware
Thread one finished end through a triglide slider, then through the bag’s right D-ring, then back through the slider (standard backpack path). The other end is sewn permanently around the left D-ring (Section 16). To shorten, pull the slider.
16. D-Ring Attachments and Reinforcement
Crochet 2 inner patches and 2 outer tabs.
Inner patch (make 2)
Ch 8. Row 1: Sc in 2nd ch from hook and in each ch (7 sc). Rows 2–8: Ch 1, turn, sc 7. (7 sc × 8 rows ✓) Fasten off.
Outer tab (make 2)
Same as the inner patch: 7 sc × 8 rows.
Assembly, one side (repeat on the other)
- From the inside of the bag, center an inner patch at the top of the side gusset, wrapping ¾" (2 cm) onto the front and ¾" (2 cm) onto the back so the load is not on the 7-st wall alone. Pin.
- From the outside, fold an outer tab through one D-ring (ring at the fold, like a belt loop). Place this folded tab over the same spot, D-ring sitting just above the mouth of the bag.
- With yarn, sew through outer tab + side wall + inner patch in a 1" (2.5 cm) box, then an X inside the box, then a second box on top. No fewer than 16 passes of yarn. This is what stops a 3–4 lb (1.5–2 kg) laptop from ripping the side gusset.
- Optional but strongly recommended: glue or stitch a 2 × 2" (5 × 5 cm) felt square over the inner patch so hardware cannot scuff the laptop.
Do both sides at the same height. Attach the braided strap as in Section 15. Load the empty bag, lift by the strap, and watch the D-ring points; if the wall puckers, add more passes.
17. Magnetic Snap Closure
Position
- Flap half: centered on the WS of the flap, 1" (2.5 cm) up from the lower (rounded) edge.
- Body half: centered on the RS of the front panel, 1½" (4 cm) down from the top edge.
When the flap is closed, these two points meet. (Flap drops ~2¼–2½" / 5.5–6.5 cm; snap 1" from flap edge aligns with ~1½" on the front ✓)
Sew-in snap: Stitch through the snap’s holes and through a 2 × 2" (5 × 5 cm) felt square on the opposite face of the fabric so the metal cannot print through or scratch a laptop.
Prong snap: Cut tiny slits, push prongs through, open prongs over the washer, cover the washer with felt.
Do not skip the felt cover on the inside of the front panel — bare prongs will mark a laptop.
The snap is optional. The flap’s own weight plus the decorative cords will hold the bag shut for light carry; use the snap if you commute.
18. Optional Laptop Lining
The lining is inside only. It must not stretch the crochet box.
Inner measurements to cut (no seam allowance yet)
Cut felt or foam ½" (1 cm) smaller than the inside of the finished bag:
| Piece | Cut size |
|---|---|
| Front felt | 11¾ × 9" (30 × 23 cm) |
| Back felt | 11¾ × 9" (30 × 23 cm) |
| Bottom felt | 11¾ × 2¾" (30 × 7 cm) |
| Side felt (make 2) | 2¾ × 9" (7 × 23 cm) |
Tack each felt piece to the WS of its matching wall with 4–5 hidden yarn stitches at the corners only. Do not sew all the way around or the crochet will pucker.
Sewn fabric lining (optional upgrade)
Cut with ½" (1.3 cm) seam allowance:
- Front and back: 12¾ × 10" (32.5 × 25.5 cm) — cut 2
- Bottom: 12¾ × 3¾" (32.5 × 9.5 cm) — cut 1
- Sides: 3¾ × 10" (9.5 × 25.5 cm) — cut 2
Sew sides to front, bottom, and back in the same order as the crochet box. Press seams toward the bottom. Drop the lining into the bag, WS of lining against WS of crochet. Turn the top seam allowance in and whipstitch the lining to the inside loops only of the 70-sc mouth round so no stitches show on the outside. Leave a ¼" (6 mm) gap at each D-ring so the reinforcement patches stay free.
A thin padded laptop sleeve can now slide in; the 3¼" (8 cm) depth is enough for a 13–14" machine in a 7–10 mm sleeve plus a notebook.
19. Final Assembly (checklist)
- Front, back, bottom, two sides seamed; four corners locked.
- 70-sc mouth round complete.
- Flap sewn to back top edge.
- Four decorative cords attached at front sts 7, 12, 17, 22.
- Inner patches + outer D-ring tabs sewn.
- Strap braided, one end sewn to left D-ring, other end run through slider and right D-ring.
- Magnetic snap set and felt-covered.
- Lining / felt insert tacked in.
- All tails woven at least 3" (8 cm) through dense sc on the WS. T-shirt yarn slips — weave extra.
20. Blocking and Shaping
T-shirt yarn is cotton jersey. It grows if soaked and can stay slouchy if dried empty.
- Insert the cardboard box or a stack of books wrapped in a towel, filling the bag so all four walls and the bottom are pressed out to 12¼ × 9½ × 3¼" (31 × 24 × 8 cm).
- Fold the flap down over the front and pin it flat.
- Hover a steam iron 1–2" (2.5–5 cm) above each wall. Do not mash the iron onto the yarn or you will glaze it.
- Let the bag dry stuffed, overnight.
- Remove the form. The rectangle should hold. If a wall caves in, run a line of surface sl st in matching yarn up the inside corner and restuff to dry again.
Why this stitch
The reference fabric is a dense, chunky, horizontal-ridged cloth with no mesh. US single crochet in rows is the closest practical stitch in T-shirt yarn: each turned row makes a visible horizontal bar, the fabric is nearly solid, and at 9 sc = 4" it is stiff enough to stay boxy. Half double crochet is faster but softer and will slouch with a laptop. Thermal stitch is stiffer still, but it eats yarn, fights T-shirt tape, and is not needed if gauge is honest. If you want even more ridge, work every row BLO; the bag will be slightly stretchier, so drop to an 8 mm hook.
Size modifications
Keep the same gauge. Change only stitch and row counts. Depth stays 3¼" (8 cm) for 13–14"; it becomes 3½" (9 cm) for 15–16".
13" laptop (snug — this is the main pattern)
Use the numbers already written:
- Front/back: 28 sts × 24 rows
- Bottom: 28 sts × 8 rows
- Sides: 7 sts × 24 rows
- Flap: 28 sts × 14 rows
- Mouth round: 70 sc
- Inner laptop space: about 11¾ × 9 × 2¾" (30 × 23 × 7 cm)
14" laptop (recommended if you use a thick sleeve)
Finished about 13¼" × 10¼" × 3¼" (33.5 × 26 × 8 cm)
- Front/back: 30 sc × 26 rows (30 sc × 4 / 9 = 13.33" ✓; 26 rows × 0.4" = 10.4" ✓)
- Bottom: 30 sc × 8 rows
- Sides: 7 sc × 26 rows
- Flap: 30 sc × 15 rows (15 × 0.4" = 6"; 3.2" across opening + 2.8" drop ✓)
- Mouth round: 30 + 7 + 30 + 7 = 74 sc ✓
- Cords at sts 8, 13, 18, 23 of 30
- Strap unchanged
- Lining felt: front/back 12¾ × 9¾" (32.5 × 25 cm)
15–16" laptop
Finished about 15" × 11¼" × 3½" (38 × 28.5 × 9 cm)
- Front/back: 34 sc × 28 rows (34 × 4 / 9 = 15.11" ✓; 28 × 0.4" = 11.2" ✓)
- Bottom: 34 sc × 9 rows (9 × 0.4" = 3.6" ✓)
- Sides: 8 sc × 28 rows (8 × 4 / 9 = 3.56" ✓)
- Flap: 34 sc × 16 rows (16 × 0.4" = 6.4"; 3.6" across + 2.8" drop ✓)
- Mouth round: 34 + 8 + 34 + 8 = 84 sc ✓
- Cords at sts 8, 14, 21, 27 of 34
- Strap: same 4-sc strips, 150 rows each (60" before braid ≈ 51" / 130 cm after) if you want a longer carry on a heavier machine
- Yarn: 44–48 oz (1250–1350 g)
- Lining felt: front/back 14½ × 10¾" (37 × 27 cm); bottom 14½ × 3" (37 × 8 cm); sides 3 × 10¾" (8 × 27 cm)
- Reinforce D-rings with two inner patches stacked, not one — a 15–16" laptop is a real load
Pattern math recap (main size)
| Piece | Stitches | Rows | Check |
|---|---|---|---|
| Front | 28 | 24 | 28 × 4 / 9 = 12.44"; 24 × 0.4" = 9.6" ✓ |
| Back | 28 | 24 | same ✓ |
| Bottom | 28 | 8 | 8 × 0.4" = 3.2" ✓ |
| Side (×2) | 7 | 24 | 7 × 4 / 9 = 3.11" ✓ |
| Flap | 28 | 14 | 14 × 0.4" = 5.6" ✓ |
| Mouth | 70 | — | 28+7+28+7 = 70 ✓ |
| Strap strip (×3) | 4 | 130 | 130 × 0.4" = 52"; × 0.85 braid = 44" ✓ |
| Cords (×4) | ch 50 | — | 4 cords at sts 7, 12, 17, 22 ✓ |
Work the gauge swatch first. If 9 sc do not equal 4" (10 cm), the laptop will not fit and the box will not be square. Everything else in this pattern assumes that one number is true.
Disclaimer: This pattern was generated by AI and should be reviewed for accuracy before use. While we strive for quality, AI-generated content may contain errors. Please verify measurements, stitch counts, charts, and instructions before beginning your project. Generated by purlJam.uk
Love this pattern?
Save this pattern to your free PurlJam libraryAccess your pattern anytime
Bookmark this page to access your pattern anytime