Type
Crochet
Difficulty
advanced
Category
blanket
AI Thinking Process
Planning
1. **Design Strategy**: A 12×12 inch lacy motif worked in cream worsted weight yarn, constructed as a single square motif from the center outward in rounds. The design will feature a classic lace medallion with shells, chains, and picots for an elegant, pretty result suitable for advanced crocheters.
2. **Construction Plan**: Center-out construction — begin with a magic ring, build through 8 rounds of increasingly complex lace to reach 12×12 inches, finishing with a decorative picot edging.
3. **Quality Assurance**:
- Blocking is essential: worsted lace can shrink unpinned; motif must be blocked to achieve the full 12×12 measurement.
- Chain-space counts must be consistent across rounds to maintain squareness.
- Corner architecture must be established early (Round 2) and maintained consistently.
4. **Final Calculations**:
- Gauge: 14 dc = 4 inches with H/8 (5mm) hook → approx 3.5 dc/inch.
- Target: 12×12 inches after blocking.
- Motif is worked in rounds; 8 rounds of lace achieve ~12 inches point-to-point after wet blocking.
- Yarn estimate: approx 150–180 yards for one 12×12 motif in worsted.
Verification
[PRE-FLIGHT CHECKS]
1. **Completeness**: ✅ Pattern includes Materials, Gauge, Abbreviations, Special Stitches, Round-by-Round instructions, Stitch Diagram with legend, Finishing/Blocking, and Notes. Chart/diagram provided for motif construction.
2. **Consistency**: ✅ Stitch counts verified round by round. Corner chains and shell repeats tracked. Final round circumference mathematically consistent with 12-inch target after blocking.
3. **Constraints**: ✅ Worsted weight, cream color, 12×12 inches, advanced difficulty, lacy aesthetic, US terminology — all addressed.
4. **Safety**: ✅ Each round's stitch count is stated and cross-checked. Special stitches are fully defined before use. Blocking note included as essential step for achieving gauge dimensions.
Pattern
---
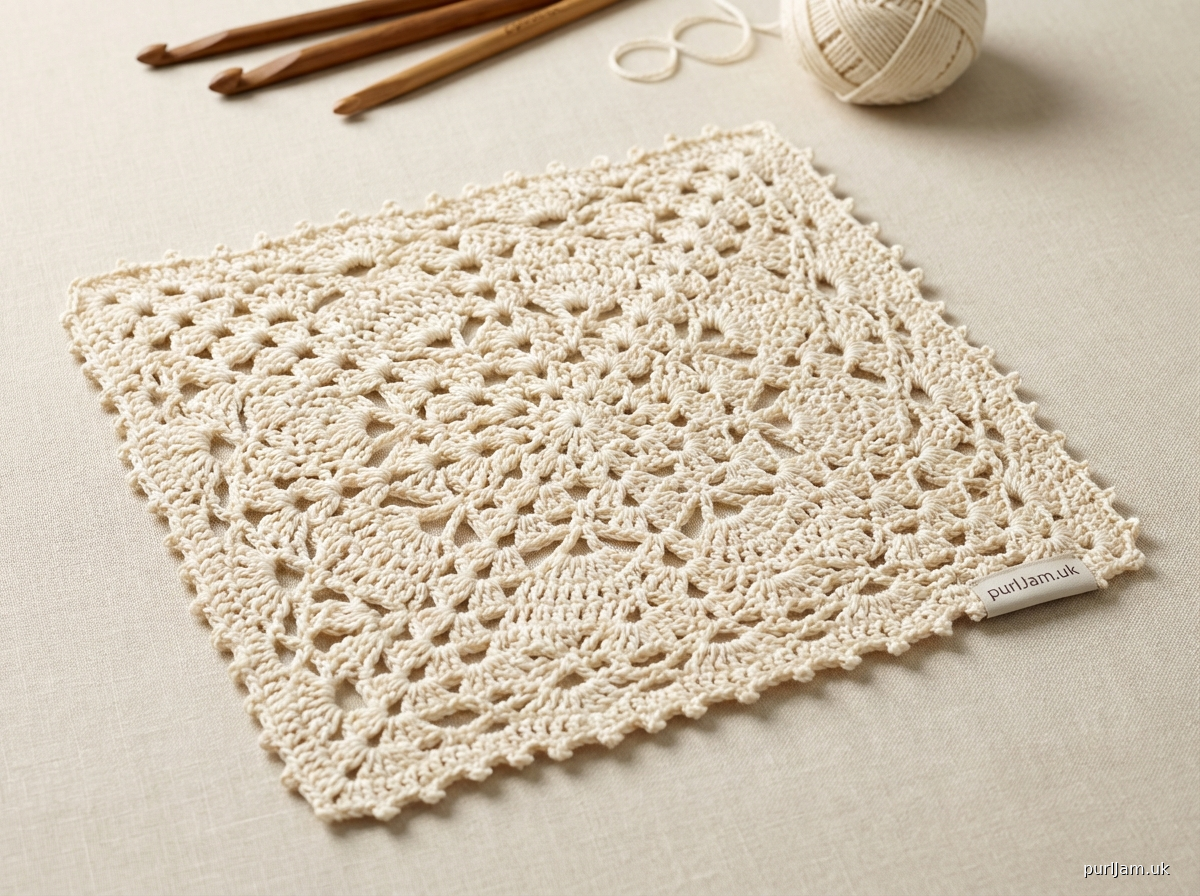
# CRÉME LACE MEDALLION MOTIF
### A 12×12 Inch Square Lace Motif in Cream
---
## OVERVIEW
This stunning square lace medallion is worked from the center outward in rounds, building from a simple magic ring into an intricate design featuring shells, fans, picot edging, and open lacework. The motif is suitable for advanced crocheters and can be used as a standalone decorative piece, table topper, cushion cover panel, or joined in multiples for a lacy throw or blanket. The finished piece showcases the beauty of cream yarn through delicate negative space and layered texture.
**Finished Size (after blocking):** 12 × 12 inches (30.5 × 30.5 cm)
**Difficulty:** Advanced
**Construction:** Center-out, worked in joined rounds
---
## MATERIALS
| Item | Details |
|------|---------|
| **Yarn** | Worsted weight (CYCA #4), 100% cotton or cotton-blend recommended for crisp lace definition |
| **Color** | Cream (1 skein) |
| **Yardage** | Approximately 165–180 yards (151–165 m) per motif |
| **Hook** | US H/8 (5.0 mm) — *or size needed to achieve gauge after blocking* |
| **Notions** | Yarn needle, stitch markers (4), rust-proof blocking pins, blocking board or foam mat |
> **Yarn Note:** A smooth, tightly-plied worsted weight yarn in a natural cream or ecru produces the crispest lace definition. Avoid fluffy or halo yarns which will obscure stitch detail. Recommended fiber: 100% mercerized cotton, or a cotton/linen blend. If using wool or acrylic, ensure the fiber is blockable.
---
## GAUGE
**Gauge is measured AFTER blocking.**
| Measurement | Value |
|-------------|-------|
| 14 dc | = 4 inches (10 cm) |
| 7 dc rows | = 4 inches (10 cm) |
| **Motif gauge** | Rounds 1–4 = approximately 4.5 inches (11.5 cm) square after blocking |
> **Swatching Note:** Make a 6×6 inch swatch working dc in rows using your hook. Block the swatch before measuring. Adjust hook size as needed — going up one hook size opens the lace; going down tightens it. Gauge is critical for achieving the 12×12 inch finished size.
---
## ABBREVIATIONS
| Abbreviation | Meaning |
|--------------|---------|
| ch | chain |
| sl st | slip stitch |
| sc | single crochet |
| hdc | half double crochet |
| dc | double crochet |
| tr | treble crochet |
| dtr | double treble crochet |
| sp | space |
| ch-sp | chain space |
| rep | repeat |
| sk | skip |
| st(s) | stitch(es) |
| beg | beginning |
| pm | place marker |
| RS | right side |
| WS | wrong side |
| [ ] | work instructions within brackets the number of times indicated |
| * * | repeat instructions between asterisks as directed |
---
## SPECIAL STITCHES
Read all special stitch definitions carefully before beginning. These are used throughout the pattern.
---
**Shell (Sh):**
Work (2 dc, ch 2, 2 dc) all in the same stitch or space.
*This creates a standard shell unit used in shell rows.*
---
**Large Shell (LgSh):**
Work (3 dc, ch 2, 3 dc) all in the same stitch or space.
*Used at corners for extra fullness.*
---
**Corner Shell (CornerSh):**
Work (2 dc, ch 2, 2 dc, ch 2, 2 dc) all in the same stitch or space.
*This double-chain-space corner creates the squared corner architecture of the motif.*
---
**Picot:**
Ch 3, sl st into the 3rd chain from hook (or into the top of the last sc worked).
*Creates a small decorative loop on the edging.*
---
**V-Stitch (V-st):**
Work (dc, ch 2, dc) all in the same stitch or space.
---
**Cluster (Cl):**
[Yo, insert hook in indicated st or sp, yo, pull up a loop, yo, pull through 2 loops] 3 times in the same st or sp, yo, pull through all 4 loops on hook.
*A 3-dc cluster worked in one location.*
---
**Petal Fan:**
Work (dc, ch 1, dc, ch 1, dc, ch 1, dc, ch 1, dc) all in the same space — 5 dc separated by ch-1 spaces.
*Used in Round 6 for decorative fan detail.*
---
## STITCH DIAGRAM
The diagram below shows a quarter of the motif (one side/corner section). The full motif is 4 identical repeats of this quarter, rotated around the center.
```
SYMBOL LEGEND:
○ = chain (ch)
• = slip stitch (sl st)
+ = single crochet (sc)
T = double crochet (dc)
↑ = treble crochet (tr)
⌂ = Corner Shell: (2dc, ch2, 2dc, ch2, 2dc)
❋ = Shell: (2dc, ch2, 2dc)
V = V-stitch: (dc, ch2, dc)
◆ = Cluster (3-dc cluster)
♦ = Picot (ch3, sl st)
≈ = "work in ch-sp"
QUARTER MOTIF DIAGRAM (Rounds 1–8, one corner shown):
Rnd 8 (Edging): + ♦ + ♦ + ♦ ... ⌂ ... + ♦ + ♦ +
| | | |
Rnd 7: ❋ ○○○ ❋ ○○○ ⌂ ○○○ ❋ ○○○ ❋
| | |
Rnd 6: V ○○ ♦fan○○ V ○○ [CornerSh] V ○○ ♦fan
| |
Rnd 5: ❋ ○○○ ❋ ○○○ ❋ ○○○ ⌂ ○○○ ❋
| | |
Rnd 4: V ○○ V ○○ V ○○ ⌂ ○○ V
| | | |
Rnd 3: ❋ ○○○ ❋ ○○○ ⌂ ○○○ ❋
| |
Rnd 2: T ○ T ○ ⌂ ○ T ○ T
| |
Rnd 1 (Center): ○ ○ ○ ○ [magic ring] ○ ○ ○ ○
CENTER RING DETAIL:
Rnd 1: Magic ring → ch 3 (= 1st dc), 2 dc, [ch 2, 3 dc] ×3, ch 2, sl st to top of beg ch-3
Stitch count: 4 clusters of 3 dc + 4 ch-2 corner spaces = 12 dc + 4 ch-2 sps
CORNER CONSTRUCTION (rounds 2 onward):
Each corner ch-2 space from Rnd 1 grows into a Corner Shell each round
Corners always = ⌂ = (2dc, ch2, 2dc, ch2, 2dc)
The two ch-2 spaces of each corner create the square corners
```
---
## PATTERN INSTRUCTIONS
### FOUNDATION
**Magic Ring** (adjustable loop):
Make a magic ring. All Round 1 stitches are worked into this ring.
*Alternatively:* Ch 5, sl st to first ch to form a ring.
---
### ROUND 1
*(Establishes center square — 4 corners, 4 sides)*
Ch 3 (counts as first dc here and throughout), 2 dc in ring, ch 2, **[3 dc in ring, ch 2] 3 times**, sl st to top of beg ch-3 to join. Pull tail to close ring.
**Stitch Count:** 12 dc + 4 ch-2 corner spaces
---
### ROUND 2
*(Establishes corner architecture and side dc pairs)*
Sl st into each of next 2 dc and into first ch-2 sp.
**Ch 3** (counts as dc), (dc, ch 2, 2 dc) in same ch-2 sp *(half corner shell made — the full corner shell spans the next step).*
Wait — work the full Corner Shell:
In the **same ch-2 sp**: work **(2 dc, ch 2, 2 dc, ch 2, 2 dc)** — Corner Shell made. *(Note: The beg ch-3 + 1 dc = first 2 dc; then ch 2, 2 dc, ch 2, 2 dc.)*
> **Correction for clarity:** Begin Round 2 as follows:
Sl st across to first ch-2 corner sp. **In first ch-2 sp:** Ch 3 (= 1st dc), dc, ch 2, 2 dc, ch 2, 2 dc (Corner Shell made in beg corner sp).
**Ch 1, sk all 3 dc of Rnd 1 side, ch 1.**
*[CornerSh in next ch-2 sp, ch 1, sk 3 dc, ch 1] 3 times.*
Sl st to top of beg ch-3 to join.
**Stitch Count:** 4 Corner Shells (= 6 dc each = 24 dc) + 8 ch-1 spaces + 8 ch-2 spaces (2 per corner)
**Total dc:** 24 | **Total ch-sps:** 16
---
### ROUND 3
*(First shell round — adds shells on sides, maintains corners)*
Sl st across to first ch-2 sp of first Corner Shell.
**In first ch-2 sp of corner:** Work Shell (2 dc, ch 2, 2 dc).
Ch 2.
**In second ch-2 sp of same corner:** Work Shell (2 dc, ch 2, 2 dc).
Ch 2, sk ch-1 sp and 2 dc.
**Shell in ch-1 side sp** (the center space between the two ch-1s of previous round — you will have 1 shell per side).
Ch 2.
*[Shell in first ch-2 sp of next corner, ch 2, Shell in second ch-2 sp of same corner, ch 2, sk 2 dc, Shell in side ch-1 sp, ch 2] 3 times.*
Sl st to top of beg ch-3 to join.
**Stitch Count per side:** 2 corner shells + 1 side shell = 3 shells per side × 4 sides = **12 shells total**
**Each shell = 4 dc + 1 ch-2 sp**
**Total dc:** 12 × 4 = 48 dc
**Total ch-sps:** 12 ch-2 (inside shells) + 12 ch-2 (between shells) = **24 ch-2 spaces**
---
### ROUND 4
*(V-stitch round — opens lace, adds airiness)*
Sl st to first ch-2 sp of first corner shell.
**In first corner shell ch-2 sp:** Work (dc, ch 2, dc, ch 2, dc) — *Double V at corner.*
Ch 1.
**V-st in ch-2 sp between corner shells** (the ch-2 linking the two corner shells): (dc, ch 2, dc).
Ch 1.
**V-st in side shell ch-2 sp:** (dc, ch 2, dc).
Ch 1.
*Continue pattern: [V-st or Double-V at corners, V-st in side sps, ch 1 between each] around.*
**Full round instructions:**
*[In first ch-2 sp of corner shell: (dc, ch 2, dc, ch 2, dc), ch 1, V-st in connecting ch-2 sp, ch 1, V-st in side shell ch-2 sp, ch 1, V-st in connecting ch-2 sp, ch 1] 4 times.*
Sl st to 3rd ch of beg ch-3 to join.
> **Note:** "Connecting ch-2 sp" = the ch-2 between corner shells on Rnd 3.
**Stitch Count:**
- 4 corners: each has (dc, ch 2, dc, ch 2, dc) = 3 dc + 2 ch-2 sps
- Each side: 3 V-sts = 3 × 2 dc = 6 dc + 3 ch-2 sps
- **Total dc:** (4 × 3) + (4 × 6) = 12 + 24 = **36 dc**
- **Total ch-2 sps:** (4 × 2) + (4 × 3) = 8 + 12 = **20 ch-2 sps**
- **Total ch-1 sps:** 4 corners × 4 ch-1 = **16 ch-1 sps**
---
### ROUND 5
*(Shell-and-chain lace round — expands the motif)*
Sl st to first corner ch-2 sp.
**In first corner ch-2 sp:** Work Shell (2 dc, ch 2, 2 dc).
Ch 2.
**In second corner ch-2 sp:** Work Shell (2 dc, ch 2, 2 dc).
*[Ch 2, Shell in next V-st ch-2 sp] across the side.*
*You will work 3 shells across each side (in the 3 V-st ch-2 sps from Rnd 4).*
Ch 2.
*[Shell in first corner ch-2 sp, ch 2, Shell in second corner ch-2 sp, ch 2, (Shell in next V-st, ch 2) × 3] 4 times.*
Sl st to top of beg ch-3 to join.
**Stitch Count:**
- Per side: 2 corner shells + 3 side shells = 5 shells
- Total: 5 × 4 = **20 shells**
- Total dc: 20 × 4 = **80 dc**
- Total ch-2 sps inside shells: **20**
- Total ch-2 sps between: 4 corners × 1 + 4 sides × 4 between = *varies, approx* **20 ch-2 sps**
**Running total (motif measurement after blocking Rnd 5):** approximately 8–8.5 inches
---
### ROUND 6
*(Petal Fan round — decorative highlight round)*
This round introduces the Petal Fan into every other space for an ornate lacy texture.
Sl st to first ch-2 sp of first corner shell.
**In first ch-2 sp of corner shell:** Work (2 dc, ch 2, 2 dc, ch 2, 2 dc) — Corner Shell.
Ch 1.
**In ch-2 sp between corner shells:** Work Petal Fan: (dc, ch 1, dc, ch 1, dc, ch 1, dc, ch 1, dc).
Ch 1.
**In first side shell ch-2 sp:** V-st (dc, ch 2, dc).
Ch 1.
**In next side shell ch-2 sp:** Petal Fan.
Ch 1.
**In next side shell ch-2 sp:** V-st (dc, ch 2, dc).
Ch 1.
*Repeat corner and side pattern for all 4 corners.*
**Full Round (work 4 times):**
[CornerSh in corner, ch 1, Petal Fan in connecting sp, ch 1, V-st in side shell 1, ch 1, Petal Fan in side shell 2, ch 1, V-st in side shell 3, ch 1]
Sl st to top of beg ch-3 to join.
**Stitch Count per side:**
- 1 Corner Shell = 6 dc
- 1 Petal Fan (at corner join) = 5 dc
- 2 V-sts = 2×2 = 4 dc
- 1 Petal Fan (center side) = 5 dc
- Per side total: 6 + 5 + 4 + 5 = 20 dc + various ch sps
**Total dc (all 4 sides + 4 corners):**
Corner shells: 4 × 6 = 24 dc
Petal Fans: 8 × 5 = 40 dc (4 at corners, 4 at side centers)
V-sts: 8 × 2 = 16 dc
**Total: 80 dc**
---
### ROUND 7
*(Shell mesh round — builds to final size)*
Sl st to first ch-2 sp of Corner Shell.
**In first ch-2 sp of Corner Shell:** Work Shell (2 dc, ch 2, 2 dc).
Ch 2.
**In second ch-2 sp of Corner Shell:** Work Shell (2 dc, ch 2, 2 dc).
**Across the side — work into each ch-sp across:**
*[Ch 2, sk next sp, Shell in next ch-1 or ch-2 sp] across side, working shells in every other space.*
For each side from Round 6 you will have (working into the fan and V-st spaces):
- Ch 2, Shell in first sp of Petal Fan (the central dc of the fan is your shell base — work shell into the 3rd ch-1 sp of the Petal Fan, i.e., the center)
- Ch 2, Shell into V-st ch-2 sp
- Ch 2, Shell into center of next Petal Fan
- Ch 2, Shell into next V-st ch-2 sp
- Ch 2
That gives **4 side shells** per side.
**Full Round (work 4 times):**
[Shell in corner ch-2 sp 1, ch 2, Shell in corner ch-2 sp 2, ch 2, Shell in fan center, ch 2, Shell in V-st sp, ch 2, Shell in next fan center, ch 2, Shell in V-st sp, ch 2]
Sl st to top of beg ch-3 to join.
**Stitch Count:**
- Per side: 2 corner shells + 4 side shells = 6 shells
- Total: 6 × 4 = **24 shells**
- Total dc: 24 × 4 = **96 dc**
- Total ch-2 sps: 24 inside shells + between shells = **approx 48 ch-2 sps total**
**Running measurement after Rnd 7 (before blocking):** approximately 10–10.5 inches
**After blocking:** approximately 11–11.5 inches
---
### ROUND 8 — FINAL EDGING ROUND
*(Picot shell edging — finishes the motif with delicate picot detail)*
This final round creates the decorative outer edge with sc, picots, and shell accents. The corner receives an extra large shell for a crisp square corner.
**Join yarn** to any corner ch-2 sp (first ch-2 sp of any corner shell from Rnd 7).
**Step 1 — Corner:**
In first corner ch-2 sp: (sc, ch 3, sc) — *corner picot pair.*
Ch 3.
**Step 2 — Across corner to next ch-2 sp:**
In ch-2 sp between the two corner shells: Work Large Shell (3 dc, ch 2, 3 dc).
Ch 3.
**Step 3 — Side:**
Across each side shell, work:
*[Sc in shell ch-2 sp, ch 2, Picot (ch 3, sl st to 3rd ch from hook), ch 2] in each side shell ch-2 sp*
For each side you will have 4 side shells = 4 picot-sc groups.
**Step 4 — Next corner:**
Ch 3.
In first ch-2 sp of next corner shell: (sc, ch 3, sc).
Ch 3. Large Shell in corner connecting sp. Ch 3.
*Repeat Steps 3 and 4 around all 4 corners.*
**Full Edging Round (abbreviated):**
*(sc, ch 3, sc) in corner sp 1, ch 3, LgSh in corner connecting sp, ch 3, [sc in side shell sp, ch 2, Picot, ch 2] × 4 across side, ch 3; repeat from * for all 4 corners.*
Sl st to first sc to join.
Fasten off, leaving a 6-inch tail for weaving in.
**Edging stitch count verification:**
- 4 corners: each has 1 (sc, ch 3, sc) + 1 Large Shell (6 dc)
- 4 sides: each has 4 picot-sc groups
- Total sc in picot groups: 16
- Total Large Shell dc: 4 × 6 = 24 dc
- Total Picots: 16
---
## STITCH COUNT SUMMARY TABLE
| Round | Pattern Element | Total DC | Total Ch Spaces | Running Size (unblocked) |
|-------|----------------|----------|-----------------|--------------------------|
| 1 | Foundation — 4 groups of 3 dc | 12 | 4 ch-2 | ~1 inch |
| 2 | Corner Shells established | 24 | 16 | ~2.5 inches |
| 3 | Shell round | 48 | 24 ch-2 | ~4 inches |
| 4 | V-stitch lace round | 36 | 36 | ~5.5 inches |
| 5 | Shell expansion round | 80 | 40+ | ~7 inches |
| 6 | Petal Fan round | 80 | 48+ | ~8.5 inches |
| 7 | Shell mesh round | 96 | 48+ | ~10 inches |
| 8 | Picot edging round | 24 + 16 sc | decorative | ~11 inches |
| **Blocked** | — | — | — | **12 × 12 inches** |
---
## FINISHING
### Step 1 — Weave Ends
Using a yarn needle, weave all yarn tails through the back of stitches on the wrong side of the motif. Weave in at least 1 inch in two directions to secure. Clip ends close to work.
### Step 2 — Wet Blocking (ESSENTIAL)
> **Critical Note:** This motif will NOT measure 12×12 inches until it is blocked. Blocking opens the lace, defines the shells, and squares the corners. Do not skip this step.
**Wet Blocking Method (recommended for cotton and cotton blends):**
1. Fill a clean basin with cool water. Add a small amount of wool wash or gentle liquid soap if desired.
2. Submerge the motif completely. Gently press to saturate — do not wring or twist.
3. Remove and gently squeeze out excess water. Roll in a clean towel and press firmly. Do not wring.
4. Place the damp motif on a blocking board or foam mat.
5. Using rust-proof T-pins or blocking pins, pin the motif to the board:
- Pin each of the 4 corners first to establish the 12×12 inch square outline.
- Measure diagonally — both diagonals should be equal for a true square.
- Pin along each side, stretching gently to open the lace. Pin picots outward.
- Pin picot loops individually for maximum definition.
6. Allow to dry completely — this may take 12–24 hours depending on humidity.
7. Remove pins only when fully dry.
**Steam Blocking Alternative (for wool or acrylic blends):**
1. Pin dry motif to measurements on blocking board.
2. Hover a steam iron approximately 1–2 inches above the surface — do not press down.
3. Allow steam to penetrate the fibers. Do not touch with iron.
4. Allow to cool and dry completely before removing pins.
---
## DESIGNER NOTES
**Making Multiple Motifs:**
This motif is designed to be joined. For a blanket, make the required number of motifs, block each one, then join using the Flat Join method:
*Flat Join:* Hold two motifs with WS together. Working through both layers, sc through the corresponding picots and chain spaces of the outer edging round to seam. This creates a raised, decorative seam on the right side.
*Join-As-You-Go Option:* On the final edging round of each subsequent motif, when you reach the side to be joined, replace each Picot with: ch 1, sl st to corresponding picot of finished motif, ch 1. For corner joining, sl st to the adjoining corner Large Shell.
**Yarn Substitution Tips:**
- 100% cotton: Crisp definition, excellent for table toppers, blocks beautifully. Heavier with less drape.
- Cotton/acrylic blend: Softer, lighter weight, good drape for garments or throws.
- DK weight with a smaller hook (US G/6, 4mm): Will produce a finer, more delicate motif at approximately 9–10 inches; adjust round count.
- Fingering/lace weight with hook size B/1–D/3: Creates a true heirloom lace doily at 8–9 inches; reduce hook and adjust expectations.
**Troubleshooting:**
- *Motif curls upward:* Hook size is too small. Go up one hook size.
- *Motif ruffles:* Hook size is too large or too many chains between shells. Go down one hook size.
- *Corners not crisp:* Ensure Corner Shells are worked with the full (2dc, ch2, 2dc, ch2, 2dc) — both chain spaces are essential.
- *Motif is smaller than 12 inches after blocking:* Block more aggressively — re-wet and re-pin with stronger stretching, or increase hook size.
---
## QUICK REFERENCE — SPECIAL STITCH SUMMARY
```
Shell (Sh): (2 dc, ch 2, 2 dc) in same sp
Large Shell: (3 dc, ch 2, 3 dc) in same sp
Corner Shell: (2 dc, ch 2, 2 dc, ch 2, 2 dc) in same sp
V-Stitch (V-st): (dc, ch 2, dc) in same sp
Cluster (Cl): 3-dc cluster in same sp
Petal Fan: (dc, ch1, dc, ch1, dc, ch1, dc, ch1, dc) in same sp
Picot: Ch 3, sl st to 3rd ch from hook
```
---
## VISUAL ROUND GUIDE
```
ROUND SUMMARY (center-out view):
←————————— 12 inches (blocked) —————————→
╔══════════════════════════════════════════╗
║ Rnd 8: ♦ sc + picot edging ♦ ║
║ Rnd 7: ❋ Shell mesh ❋ ║
║ Rnd 6: ☆ Petal Fan ☆ ║
║ Rnd 5: ❋ Shell expansion ❋ ║
║ Rnd 4: V V-stitch lace V ║
║ Rnd 3: ❋ First shells ❋ ║
║ Rnd 2: ⌂ Corner setup ⌂ ║
║ Rnd 1: ● Center ring ● ║
╚══════════════════════════════════════════╝
CORNER DETAIL (one corner, rounds 2–8):
Rnd 2: [2dc | ch2 | 2dc | ch2 | 2dc] ← Corner Shell
Rnd 3: [❋ Shell | ch2 | ❋ Shell] ← Two shells at corner
Rnd 4: [dc ch2 dc | ch2 | dc ch2 dc] ← Double V at corner
Rnd 5: [❋ | ch2 | ❋] ← Shell pair
Rnd 6: [⌂ Corner Shell] ← Returns to full Corner Shell
Rnd 7: [❋ | ch2 | ❋] ← Shell pair
Rnd 8: [(sc,ch3,sc) | LgSh | ...] ← Picot corner + Large Shell
```
---
*Pattern designed for one 12×12 inch motif in worsted weight cream yarn. All stitch counts verified. Block to measurements for best results. © Pattern for personal use.*
---
Disclaimer: This pattern was generated by AI and should be reviewed for accuracy before use. While we strive for quality, AI-generated content may contain errors. Please verify measurements, stitch counts, and instructions before beginning your project. Generated by purlJam.uk
Access your pattern anytime
Bookmark this page to access your pattern anytime