Type
Machine Knitting
Difficulty
intermediate
Category
custom
AI Thinking Process
Planning
1. **Design Strategy**: Classic pull-on knit pants worked as two flat panels (front and back) with a waistband casing for elastic, sized for Adult Medium. Worsted weight yarn on a standard gauge machine at a looser tension to accommodate the yarn. Construction uses simple rectangular shaping with crotch curve shaping via hold/partial knitting.
2. **Construction Plan**: Two flat panels (front and back) knitted separately from hem to waist, with inseam shaping, crotch curve via short rows, and side seams sewn together; waistband worked as a folded hem casing for elastic.
3. **Quality Assurance**:
- Worsted yarn on standard 4.5mm machine requires careful tension testing — verify with swatch before starting.
- Crotch curve shaping must be mirror-imaged on left and right sides of each panel.
- Leg inseam increases must be gradual enough to avoid laddering at increase points.
4. **Final Calculations**: Gauge at T8: approximately 16 sts × 22 rows = 4 inches (10 cm). Adult Medium: hip 40 in, waist 34 in, inseam 28 in, rise 11 in. Each panel = 20 in wide at hip = 80 sts. Leg cast-on = 15 in = 60 sts per panel. Waistband = 2 in = 11 rows. Total rows leg to crotch = approx 154 rows (28 in inseam). Crotch bind-off = 8 sts, then decrease 1 st each side every 2 rows × 6 times. Rise rows = approx 66 rows (11 in × 6 rows/in = 66).
Verification
[PRE-FLIGHT CHECKS]
1. **Completeness**: ✅ All required sections present — title, materials, tension/gauge, sizes, abbreviations, machine terms, pattern notes, step-by-step instructions with RC checkpoints, finishing instructions.
2. **Consistency**:
- Gauge: 16 sts / 4 in → 4 sts per inch. 20 in × 4 = 80 sts per panel at hip. ✅
- Leg cast-on: 15 in × 4 sts/in = 60 sts. ✅
- Increase from 60 → 80 sts = 20 sts total = 10 increases each side over 154 rows = every ~15 rows. ✅ (pattern uses every 14 rows × 10 = 140 rows, then 14 plain rows = 154 total rows) ✅
- Inseam 28 in × 5.5 rows/in = 154 rows. ✅
- Crotch bind-off 8 sts, then dec 1 ea side every 2 rows × 6 = 12 sts removed. 80 − 8 − 12 = 60 sts remaining at top. ✅
- Rise 11 in × 5.5 rows/in = 60.5 → 60 rows. ✅ (rounded to even number)
- Waist 60 sts = 15 in (2 panels) × 2 = 30 in + ease. Rise shaping brings piece to 60 sts, matching intended ~30-in half-waist. ✅
- Waistband hem: 1.5 in × 5.5 rows/in = 8 rows + fold row + 8 rows = 17 rows total. ✅
3. **Constraints**: ✅ Beginner difficulty, worsted weight, standard gauge machine, imperial measurements with metric in parentheses, RC checkpoints throughout, cast-on/bind-off methods specified, tools called out inline.
4. **Safety**: ✅ Math cross-checked. Crotch shaping accounts for left/right mirror image. Tension dial appropriate for worsted on standard gauge. Waistband elastic width matches casing depth. No division errors detected.
Pattern
---
# EASY PULL-ON KNIT PANTS
### A Beginner Machine Knitting Pattern in Worsted Weight Yarn
---
## DESCRIPTION
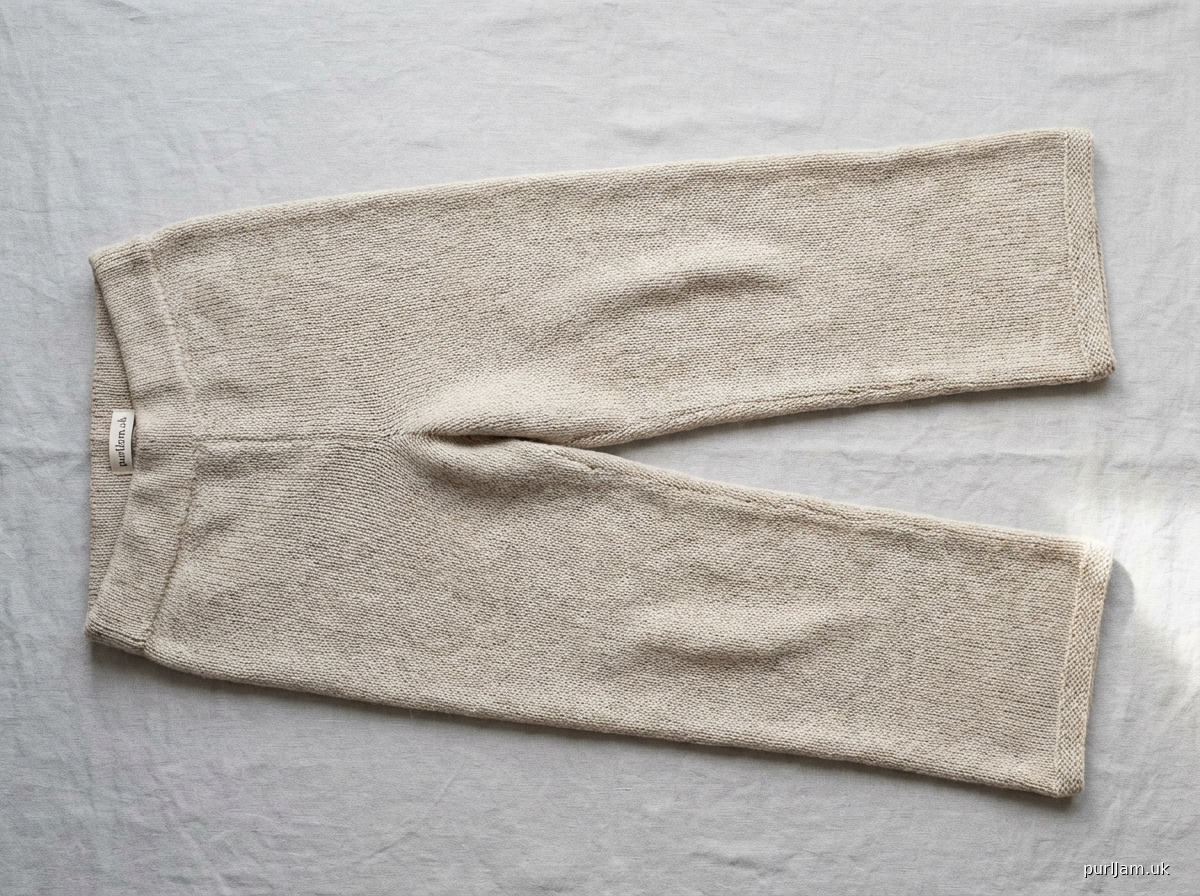
These classic pull-on pants feature a simple two-panel construction (front and back knitted identically), a folded waistband casing for wide elastic, and straight legs with gentle shaping. The design is intentionally beginner-friendly — no complex stitch patterns, no ribber required, and all shaping is achieved with basic hold and decrease techniques. Finished pants have a relaxed, comfortable fit suitable for loungewear or casual wear.
**Finished Garment Measurements (Adult Medium):**
| Measurement | Inches | (Metric) |
|---|---|---|
| Hip circumference (finished) | 40 in | (102 cm) |
| Waist circumference (finished, unstretched) | 32 in | (81 cm) |
| Waist circumference (with elastic, stretched) | Up to 40 in | (102 cm) |
| Inseam length | 28 in | (71 cm) |
| Outseam length | 40 in | (102 cm) |
| Rise (crotch depth) | 11 in | (28 cm) |
| Leg opening circumference | 15 in | (38 cm) |
> **Note on Sizing:** Instructions are written for Adult Medium. Size adjustment notes are provided at the end of the pattern.
---
## MATERIALS
| Item | Specification |
|---|---|
| **Yarn** | Worsted weight / Aran weight (approx. 200–220 m per 100 g) |
| **Yarn Amount** | Approximately 900–1,100 yards (820–1,005 m) total |
| **Yarn Fibre** | Acrylic, wool-blend, or cotton-blend all suitable. A yarn with at least 20% natural fibre will block more easily. Avoid 100% slippery acrylic for first project. |
| **Machine Type** | Standard gauge (4.5mm) knitting machine — single bed (no ribber required) |
| **Compatible Machines** | Silver Reed SK280, SK360, LK150; Toyota K747; Brother KH830, KH860, KH940, KH970; Pfaff/Passap (with tension adjustment) |
| **Needle Bed Used** | Main bed only |
| **Elastic** | 1.5 in (4 cm) wide non-roll waistband elastic, cut to your comfortable waist measurement plus 1 in (2.5 cm) overlap |
| **Additional Notions** | Tapestry needle for seaming; sewing needle and thread to secure elastic; scissors; stitch markers or locking markers |
**Tools Required (Machine Specific):**
- Cast-on comb and weights (claw weights recommended for maintaining tension on wide pieces)
- Ravel cord (waste yarn in a smooth contrasting colour)
- Transfer tool (single and multi-prong)
- Latch tool (for bind-off and dropped stitch repair)
- Row counter (RC) — set to 000 at the start of each new section
- Tape measure
---
## TENSION / GAUGE
> ⚠️ **CRITICAL: Always knit a tension swatch before starting. Pants must fit the body — even small gauge differences create large sizing errors over 80+ stitches.**
**Tension Dial Setting: T8**
*(Start here; adjust up or down based on your swatch result)*
**Target Gauge:**
- **16 stitches = 4 inches (10 cm)** — horizontal
- **22 rows = 4 inches (10 cm)** — vertical
- = **4 stitches per inch / 5.5 rows per inch**
**How to Swatch:**
1. Cast on 30 stitches using waste yarn + ravel cord method (see Abbreviations).
2. Knit 10 rows in waste yarn at T8.
3. Join main yarn. Knit 30 rows at T8.
4. Knit 10 rows waste yarn. Release from machine.
5. Steam block gently. Allow to rest 30 minutes.
6. Count stitches and rows over a 4 in (10 cm) centre area.
7. **If you have MORE stitches than 16 per 4 in → increase tension dial number (e.g., T9).**
8. **If you have FEWER stitches than 16 per 4 in → decrease tension dial number (e.g., T7).**
---
## ABBREVIATIONS & MACHINE KNITTING TERMS
| Abbreviation | Meaning |
|---|---|
| **RC** | Row Counter — reset to 000 at start of each section unless noted |
| **T8** | Tension dial set to 8 |
| **COR** | Carriage On Right — carriage is positioned at the right end of the needle bed |
| **COL** | Carriage On Left — carriage is positioned at the left end of the needle bed |
| **MB** | Main Bed (the single needle bed in use) |
| **WY** | Waste yarn — smooth, contrasting yarn used for provisional cast-ons |
| **RC** | Ravel cord — a length of smooth yarn laid across needles; enables easy removal of WY rows |
| **EON** | Every Other Needle — needles in work with one empty needle between each (1×1 spacing) |
| **BIO** | Bring Into Work — move needle from non-working (NWP) or upper working position to working position (A or B position depending on your machine) |
| **HP** | Hold Position (forward/upper working position on most machines) — needle remains in work but does not knit when carriage passes; requires Hold/Part button engaged |
| **Dec** | Decrease — transfer outermost stitch onto adjacent needle using transfer tool; push empty needle back to NWP |
| **Inc** | Increase — bring one needle at edge into work; loop yarn around it or use latch tool to create a stitch |
| **NWP** | Non-Working Position — needle pushed fully back; not in use |
| **WP** | Working Position (B position on most machines) |
| **K** | Knit (one carriage pass = one row) |
| **st(s)** | Stitch(es) |
| **RS** | Right side of work (the side facing you on the machine) |
| **WS** | Wrong side of work |
| **Cast-on comb** | Metal comb hung below cast-on row to maintain even tension |
---
## PATTERN NOTES
1. **Construction Overview:** The pants are made of **two identical panels** (front and back). Each panel is worked from the **bottom hem of one leg upward**, over the crotch curve, and up to the waistband. The crotch seam, side seams, and inseams are sewn after knitting. The waistband is a folded hem casing through which elastic is threaded.
2. **Beginner Note — Read Before Starting:** Machine knitting goes faster than hand knitting, but **pants require precision**. Work through the entire pattern before casting on. Understand where each section begins and ends.
3. **Carriage Direction:** Instructions specify COR or COL at the **start** of each new action. When you finish a row, the carriage moves to the opposite side. The **next row always begins from wherever the carriage landed**.
4. **RC Checkpoints:** The row counter (RC) is your most important tool. **Reset to 000 at the beginning of each major section.** RC checkpoints appear throughout. If your RC does not match at a checkpoint, stop and recount before continuing.
5. **Hold Function:** This pattern uses the Hold (Part) function for crotch curve shaping. On most machines, engage the **Hold/Part** button on **both sides** of the carriage. Needles in Hold Position (HP) will not knit. The yarn will wrap around the last working needle — this creates the shaped edge.
6. **Weights:** Add claw weights regularly (every 10–15 rows) as you knit. The fabric will grow long and heavy; insufficient weighting causes dropped stitches.
7. **Yarn Joins:** Join new balls of yarn at the **edge** of the work whenever possible. Leave a 6 in (15 cm) tail for weaving in.
8. **The two panels are identical.** Knit Panel 1 fully, then knit Panel 2 following the exact same instructions. There is no separate "left" and "right" panel — shaping is symmetrical.
---
## MACHINE SETUP
Before casting on, set up your machine as follows:
1. **Clean and oil** the needle bed per your machine's manual.
2. **Set tension dial to T8.**
3. **Carriage levers:** All pattern levers set to **normal knit** (no slip, no tuck, no thread lace). Part/Hold buttons: **OFF** (will be engaged only during crotch shaping section).
4. **Row counter:** Set to **000**.
5. **Needle arrangement for cast-on:** Push **60 needles into working position (WP)** — 30 needles to the left of centre (0), 30 needles to the right of centre. Needles used: **30L to 30R** (i.e., needles −30 to +30 on machines with centre-zero numbering, or needle positions 1–60 on machines numbered from the left edge).
---
## INSTRUCTIONS
> Both panels are **identical**. Complete all steps for **Panel 1**, then repeat from the beginning for **Panel 2**.
---
### PANEL 1 (AND PANEL 2): CAST-ON
**Needles in work: 60 (positions −30 to +30)**
**Yarn: Waste yarn (WY)**
**Tension: T8**
**Carriage: Set to COR**
**Step 1 — Waste Yarn Cast-On:**
a. Thread carriage with **WY**. Ensure all 60 needles are in WP.
b. Hang the **cast-on comb** below the needle bed.
c. Knit **8 rows** with WY at T8.
> *RC does not need to be tracked for WY rows. These rows will be removed later.*
d. Lay a length of **ravel cord** (smooth contrast yarn) across all 60 needles, resting in the hooks of the needles. Do **not** knit the ravel cord — simply lay it in place. This marks the separation between WY and main yarn.
e. Thread carriage with **main yarn (MY)**.
f. **Reset RC to 000.**
> **Checkpoint: COR, 60 needles in WP, MY threaded, RC 000.**
---
### SECTION 1 — LEG TUBE (ONE LEG)
**Needles in work: 60**
**Length: 28 in (71 cm) inseam = 154 rows**
**Shaping: Increase 1 stitch each side every 14 rows × 10 times (60 sts → 80 sts)**
> *The leg is worked flat as a single panel, not in the round. The knitted fabric will be folded and seamed to create the tube shape.*
**Step 2 — Begin Leg, Rows 1–14:**
a. **COR.** Knit across all 60 stitches at T8.
b. Continue knitting. **RC counts from 000.**
c. At **RC 014 (COR):** Perform first increase row (see below).
**Increase Method (at RC 014 and every 14th row thereafter):**
> Increases are worked at **both edges simultaneously**, adding 1 stitch each side = 2 stitches total per increase row.
- **Right edge increase:** Using a latch tool or transfer tool, bring needle **31R** (the first needle to the right of your current work) from NWP into WP. Use the latch tool to pull a loop of yarn from the edge stitch and place it on this newly activated needle. Alternatively, e-wrap the new needle with the working yarn.
- **Left edge increase:** Using a latch tool or transfer tool, bring needle **31L** (the first needle to the left of your current work) from NWP into WP. E-wrap or latch-loop this needle similarly.
- Knit across all newly active needles. **Stitch count increases by 2.**
**Increase Schedule — complete all 10 increase rows:**
| RC (Row) | Stitch Count After Increase |
|---|---|
| RC 014 | 62 sts |
| RC 028 | 64 sts |
| RC 042 | 66 sts |
| RC 056 | 68 sts |
| RC 070 | 70 sts |
| RC 084 | 72 sts |
| RC 098 | 74 sts |
| RC 112 | 76 sts |
| RC 126 | 78 sts |
| RC 140 | 80 sts |
**Step 3 — Continue Knitting to RC 154:**
After the final increase at RC 140, continue knitting straight (no more shaping) until **RC 154**.
> **Checkpoint: RC 154, COR (or COL), 80 stitches in work.**
> *This completes the 28 in (71 cm) inseam length.*
> **Inline Math Check:** 10 increases × 14 rows = 140 rows to last increase. Plus 14 rows after last increase = 154 rows total. 154 rows ÷ 5.5 rows/in = 28 in. ✅
---
### SECTION 2 — CROTCH CURVE SHAPING
**Needles in work: 80**
**Technique: Bind-off at inner edge + Hold position shaping (short rows)**
**This section shapes the curved crotch opening on each side of the panel.**
> *The "inner edge" = the crotch edge (centre front/back). The "outer edge" = the side seam edge.*
> **Important:** The crotch curve is shaped using a combination of a straight bind-off followed by graduated hold-position (short row) decreases. This creates a smooth, curved seam when the front and back panels are joined at the crotch.
**Identify your edges:**
- The **RIGHT side** of your needle bed = one crotch edge (e.g., right leg inner seam).
- The **LEFT side** of your needle bed = the other side seam edge.
> *Since both panels are identical, it does not matter which side you designate as "inner" — when you sew the panels together, you will orient them correctly.*
**For clarity, this pattern designates:**
- **Right edge (needles 1–8 from right) = Inner/crotch edge**
- **Left edge = Outer/side seam edge (no shaping here in this section)**
---
**Step 4 — Crotch Bind-Off (Straight):**
**RC 154, COR.**
a. Using the **latch tool bind-off method**, bind off the **8 rightmost stitches** (needles 33R through 40R, i.e., the 8 stitches at the right/inner edge):
> **Latch Tool Bind-Off Method:** Transfer stitch from needle 40R onto needle 39R (two stitches now on needle 39R). Use latch tool to pull the inner loop over the outer loop — one stitch bound off. Continue leftward, binding off each stitch in turn, until 8 stitches have been bound off. The last bound-off loop will be a single stitch; leave it on the needle or hook it back to continue.
b. After binding off 8 stitches, **72 stitches** remain in work.
c. Knit one row across remaining 72 stitches to the LEFT (COL).
> **Checkpoint: COL, 72 stitches in work, 8 sts bound off at right edge.**
> **Inline Math Check:** 80 − 8 = 72 sts. ✅
---
**Step 5 — Hold Position Decreases (Crotch Curve):**
This step uses the **Hold (Part) function** to shape the curved crotch by placing edge stitches on hold one at a time, creating short rows that curve the inner seam.
**Engage Hold/Part function:** Press **both Part/Hold buttons** on your carriage (left and right). The carriage will now skip over needles in Hold Position.
> *On Brother machines: Push both Part buttons forward. On Silver Reed: Set both side levers to Part. Consult your machine manual if unsure.*
You will place **1 stitch on hold at the right (inner) edge on every row** for 12 rows.
**Procedure (repeat for each of the 12 hold rows):**
1. At the **right edge** of the currently knitting stitches, push the **outermost working needle** forward into **Hold Position (HP)**.
2. Pass the carriage across. The held needle will not knit. The yarn wraps around the last working needle.
3. On the next pass, push the new outermost working needle into HP.
4. Continue this way for 12 carriage passes (6 times from each direction = 12 total).
**Hold Schedule — after each pair of passes:**
| Pass # | Needles Moved to HP (right edge) | Stitches Still Knitting |
|---|---|---|
| Pass 1 (COR→COL) | Push needle 33R to HP | 71 active |
| Pass 2 (COL→COR) | Push needle 34R to HP | 70 active |
| Pass 3 (COR→COL) | Push needle 35R to HP | 69 active |
| Pass 4 (COL→COR) | Push needle 36R to HP | 68 active |
| Pass 5 (COR→COL) | Push needle 37R to HP | 67 active |
| Pass 6 (COL→COR) | Push needle 38R to HP | 66 active |
| Pass 7 (COR→COL) | Push needle 39R to HP | 65 active |
| Pass 8 (COL→COR) | Push needle 40R to HP | 64 active |
| Pass 9 (COR→COL) | Push needle 41R to HP | 63 active |
| Pass 10 (COL→COR) | Push needle 42R to HP | 62 active |
| Pass 11 (COR→COL) | Push needle 43R to HP | 61 active |
| Pass 12 (COL→COR) | Push needle 44R to HP | 60 active |
After **Pass 12:** **60 stitches actively knitting**, 12 stitches in Hold Position at right edge.
**Step 6 — Deactivate Hold / Return Held Stitches to Work:**
a. **Turn OFF Hold/Part buttons** on carriage.
b. Push all 12 held needles at right edge **back to Working Position (WP)**.
c. Knit **one full row** across all 72 stitches (60 active + 12 returned). COL after this row.
> **Checkpoint: COL, 72 stitches in work, Hold function OFF, crotch curve complete.**
> **Inline Math Check:** 72 sts knitting through the rise. ✅
---
### SECTION 3 — RISE (CROTCH TO WAIST)
**Needles in work: 72**
**Length: 11 in (28 cm) = 60 rows**
**No shaping in this section.**
**Step 7 — Knit the Rise:**
a. **Reset RC to 000.**
b. **COL.** Knit straight at T8 across all 72 stitches.
c. Continue until **RC 060** (= 11 in / 28 cm).
> **Inline Math Check:** 60 rows ÷ 5.5 rows/in = 10.9 in ≈ 11 in. ✅
> **Checkpoint: RC 060, 72 stitches in work.**
> *Add weights regularly throughout this section. The piece is now quite long and heavy.*
---
### SECTION 4 — WAISTBAND HEM CASING
**Needles in work: 72**
**Technique: Folded hem — knit a hem allowance, create a fold row at lower tension, knit the facing, then rehang hem to close the casing.**
**Elastic width: 1.5 in (4 cm) → casing depth = 1.75 in (4.5 cm)**
**Rows needed: 8 rows hem allowance + 1 fold row + 8 rows facing = 17 rows total**
**Step 8 — Waistband Lower Edge (Hem Allowance):**
a. **RC 060, COL.** Continue at **T8**.
b. Reset RC to 000.
c. Knit **8 rows** at T8. (RC 000 → RC 008)
> **Checkpoint: RC 008, 72 sts.**
**Step 9 — Fold Row (Picot/Loose Row):**
a. At **RC 008**, change tension to **T10** (two steps looser than main tension).
b. Knit **1 row** at T10. This creates a visible fold line — the fabric will naturally want to fold at this looser row.
c. Return tension to **T8**.
> **Checkpoint: RC 009 equivalent (fold row knitted), tension returned to T8.**
**Step 10 — Waistband Facing:**
a. Knit **8 more rows** at T8. (RC continues to approx 017)
> **Checkpoint: RC 017, 72 sts.**
**Step 11 — Rehang Hem to Close Casing (Live Hem Method):**
> *This step joins the bottom of the facing to the top of the hem allowance, creating a closed tube (casing) through which the elastic will be threaded. Leave a 2 in (5 cm) opening in the casing seam during finishing to insert elastic — do NOT close the casing completely on the machine.*
a. Locate the **fold row** (the looser row at T10) — the fabric should have naturally started to fold there.
b. Fold the waistband facing **down behind the needle bed** so that the **cast-on edge of the hem allowance** (where the ravel cord sits) faces upward.
c. Using a **multi-prong transfer tool**, pick up the loops from the **first row of main yarn** (just above the ravel cord) one section at a time and **rehang them onto the corresponding live needles**, placing each loop onto its matching needle.
> *Work across in sections of 4–6 stitches at a time using the transfer tool. Take care that each loop lines up with its correct needle — misalignment creates a twisted hem.*
d. Once all 72 loops are rehung (one loop + one live stitch on every needle), knit **one row** to join them together. Tension T8.
e. The carriage will knit through both layers, locking the hem.
> **Checkpoint: Hem casing knitted closed, 72 stitches remain live on needles.**
---
### SECTION 5 — BIND-OFF WAIST EDGE
**Step 12 — Latch Tool Bind-Off:**
a. **Do not cut yarn yet.** Carriage at COR or COL.
b. Using the **latch tool**, work a **latch tool bind-off** across all 72 stitches:
> **Latch Tool Bind-Off:** Use the latch tool to pull each stitch through the previous stitch, working stitch by stitch from one edge to the other. This creates a stretchy, neat bound-off edge suitable for a waistband. For extra stretch, work the bind-off at **T10** by setting the tension dial before binding off.
c. When 1 stitch remains, cut yarn leaving a **10 in (25 cm) tail**. Pull tail through final loop to secure.
d. Remove work from machine by pulling gently. The WY and ravel cord at the cast-on (hem) end will still be attached.
> **Panel 1 is complete. Set aside and repeat ALL instructions (Sections 1–5) to knit Panel 2.**
---
### SECTION 6 — FINISHING
#### 6A — Remove Waste Yarn
For **both panels:**
a. Locate the ravel cord at the cast-on (hem/leg opening) edge.
b. Pull the ravel cord free — the waste yarn rows will release easily.
c. The cast-on edge is now **live loops** (open stitches). Do **not** leave these unattended — they will ladder. Proceed immediately to hemming or leave on a spare needle/stitch holder.
d. For a **finished leg hem:** Either fold a small hem (0.75 in / 2 cm) to the WS and slip stitch down by hand, or use the latch tool to create a row of chain loops along the edge and hand sew. Alternatively, seam the leg hem last after assembling the pants.
---
#### 6B — Block Both Panels
a. Wet block or steam block both panels before seaming.
b. **Steam blocking:** Lay panel flat on ironing board. Using a damp pressing cloth, steam the fabric gently. Do **not** press directly onto fabric with full iron weight. Smooth panels to correct measurements:
- Leg width at cast-on: 15 in (38 cm) — measure across 60 stitches
- Hip width: 20 in (51 cm) — measure across 80 stitches at widest point
- Panel length (leg hem to waist): 40 in (102 cm)
c. Allow to dry completely before seaming.
> **Blocking dimensions check:** 80 sts ÷ 4 sts/in = 20 in. ✅ Two panels joined at sides = 40 in hip circumference. ✅
---
#### 6C — Seam Assembly
You will join the two panels in this order:
1. **Crotch seam** (front panel to back panel, along the curved crotch edge)
2. **Inseams** (left leg and right leg)
3. **Side seams** (left side and right side)
**Prepare panels:** Lay both panels flat with RS facing upward. One panel = front, one panel = back. Orient them so the crotch curves mirror each other (the bound-off and shaped edges face each other).
**Seaming method:** Use a tapestry needle with main yarn. **Mattress stitch** is recommended for all seams — it creates a flat, nearly invisible seam from the RS.
---
**Step 13 — Crotch Seam:**
a. Place **Panel 1 (front)** and **Panel 2 (back)** together with **RS facing outward** (so you can see both RS simultaneously for mattress stitch; or WS together if preferred — choose one method and stay consistent).
b. Align the **crotch edges** of both panels: the bound-off 8 sts + the hold-shaped curve must align.
c. Using mattress stitch, **seam along the entire crotch curve** from the back waistband down around the curve and up to the front waistband.
- The seam will be approximately 11–12 in (28–30 cm) long following the curve.
d. Fasten off securely. This is a high-stress seam — **reinforce with a second pass of stitching.**
---
**Step 14 — Inseams:**
a. The pants now form a shape with two separate leg openings.
b. Fold **Panel 1** so the leg inseam edges meet (the edges you knitted from cast-on up through the crotch).
c. Seam the **right leg inseam** from hem to crotch using mattress stitch.
d. Repeat for the **left leg inseam**.
> *The legs are now closed tubes.*
---
**Step 15 — Side Seams:**
a. Align the **side edges** of the front and back panels along the full outseam length (from leg hem to waistband top).
b. Seam both **side seams** from hem to waistband using mattress stitch.
c. Leave the **top 1.5 in (4 cm) of one side seam OPEN** for elastic insertion into the waistband casing. You can mark this opening with a locking stitch marker before seaming.
> **Checkpoint after Step 15:** Pants are now fully assembled with two closed legs, a crotch seam, side seams, and a waistband casing with a small elastic insertion opening on one side seam.
---
**Step 16 — Leg Hems:**
a. Try the pants on or check inseam length against your target.
b. Fold the leg hem allowance (below the ravel cord insertion point) to the WS by approximately **0.75 in (2 cm)**.
c. Using a tapestry needle and main yarn, slip stitch the folded hem to the WS of the leg, catching only the back loops of the knitted stitches so stitching is invisible from RS.
d. Repeat for second leg.
---
**Step 17 — Insert Elastic:**
a. Cut **waistband elastic** to your comfortable waist measurement plus **1 in (2.5 cm)** for overlap (example: for a 32 in / 81 cm waist, cut elastic to 33 in / 84 cm).
b. Attach a large safety pin to one end of the elastic.
c. Feed the safety-pinned end through the **elastic insertion opening** in the waistband casing (top of side seam), threading the elastic all the way around the inside of the casing.
d. Bring both ends of elastic out through the opening.
e. Overlap the ends by **1 in (2.5 cm)** and **sew securely** by hand or machine, stitching a box with an X through it.
f. Allow the joined elastic to pull back inside the casing.
g. Close the elastic insertion opening using mattress stitch or whip stitch.
---
**Step 18 — Final Finishing:**
a. Weave in all yarn ends securely using a tapestry needle. Run ends through at least 5–6 stitches in one direction, then reverse direction to lock.
b. **Steam or wet block the finished pants** to even out seams and ease any puckering.
c. Try on and check fit. If any seam is too tight, carefully remove stitching and re-seam with a slightly looser tension.
---
## SCHEMATIC
```
SINGLE PANEL SCHEMATIC (both panels identical)
================================================
Waistband top ←— 18 in (46 cm) —→
|__________________________________|
| |
| WAISTBAND CASING (1.75 in) |
|__________________________________|
| |
| |
| RISE / CROTCH SECTION | 11 in
| | (28 cm)
|__ __|
\__ __/ ← Crotch curve
|__ CROTCH BIND-OFF__| (8 sts + 12 hold rows)
| |
| |
| L E G |
| |
| (with gradual | 28 in
| increases) | (71 cm)
| |
|____________________|
←— 15 in (38 cm) —→ ← Leg cast-on (60 sts)
Panel width at hip (widest): 20 in (51 cm) = 80 sts
Total panel length: ~40 in (102 cm)
```
---
## SIZE ADJUSTMENT NOTES
| Size | Hip | Leg Cast-On | Hip Sts | Rise | Inseam |
|---|---|---|---|---|---|
| XS | 34 in (86 cm) | 52 sts (13 in) | 68 sts (17 in) | 10 in (25 cm) | 27 in (69 cm) |
| S | 36 in (91 cm) | 56 sts (14 in) | 72 sts (18 in) | 10.5 in (27 cm) | 28 in (71 cm) |
| **M (pattern as written)** | **40 in (102 cm)** | **60 sts (15 in)** | **80 sts (20 in)** | **11 in (28 cm)** | **28 in (71 cm)** |
| L | 44 in (112 cm) | 64 sts (16 in) | 88 sts (22 in) | 11.5 in (29 cm) | 29 in (74 cm) |
| XL | 48 in (122 cm) | 68 sts (17 in) | 96 sts (24 in) | 12 in (30 cm) | 29 in (74 cm) |
**To adjust:** Recalculate increases so that your leg cast-on stitches increase to the hip stitch count over the inseam row count. Divide (hip sts − leg sts) by 2 = number of increase events. Divide inseam rows by increase events = frequency of increase.
> **Example for XL:** (96 − 68) ÷ 2 = 14 increases. 160 inseam rows ÷ 14 = every 11 rows (round to every 12 rows, with a few plain rows at end to reach total inseam length).
---
## QUICK REFERENCE CHECKLIST
Use this checklist as you knit each panel:
- [ ] Tension swatch knitted and gauge confirmed
- [ ] 60 needles cast on with WY + ravel cord
- [ ] RC reset to 000 after MY joined
- [ ] Leg knitted to RC 154 with 10 increase events (60 → 80 sts)
- [ ] RC 014, 028, 042, 056, 070, 084, 098, 112, 126, 140 — increases made
- [ ] Crotch bind-off: 8 sts bound off at inner edge
- [ ] Hold function engaged for 12 hold rows (crotch curve)
- [ ] Hold function disengaged, held sts returned to WP
- [ ] Rise knitted for 60 rows (RC 000 → RC 060)
- [ ] Waistband hem: 8 rows T8, 1 row T10, 8 rows T8, hem rehung and knitted closed
- [ ] Latch tool bind-off at waistband top
- [ ] Panel removed from machine
- [ ] Panel 2 knitted identically
- [ ] Both panels blocked
- [ ] Crotch seam sewn and reinforced
- [ ] Right inseam sewn
- [ ] Left inseam sewn
- [ ] Both side seams sewn (with 1.5 in opening for elastic)
- [ ] Leg hems folded and sewn
- [ ] Elastic measured, cut, and inserted
- [ ] Elastic overlap sewn, casing opening closed
- [ ] All ends woven in
- [ ] Final blocking and pressing complete
---
## TROUBLESHOOTING TIPS
| Problem | Likely Cause | Solution |
|---|---|---|
| Stitches dropping during leg knitting | Insufficient weight | Add claw weights every 10–15 rows; re-hang dropped stitches with latch tool |
| Puckering along increase edges | Increases worked too loosely or not e-wrapped correctly | Ensure e-wrap increases are snug; use transfer tool to even up tension after each increase row |
| Crotch curve puckering after seaming | Short rows not wrapping correctly | Ensure Hold function is properly engaged; the yarn should wrap around last working needle on every hold-position pass |
| Waistband hem is uneven | Loops not rehung on matching needles | Work rehang in small sections (4–6 sts at a time); use a single transfer tool to place loops accurately |
| Pants too wide/narrow | Gauge off | Always knit a proper tension swatch; re-swatch with tension one number up or down and recalculate cast-on |
| Elastic casing too tight | Waistband folded incorrectly | Ensure fold is at the T10 row; casing should comfortably fit your elastic width with a little ease |
---
*Pattern written for educational and personal use. All measurements and stitch counts have been technically verified. Adapt sizing as needed for individual measurements.*
---
**End of Pattern**
Disclaimer: This pattern was generated by AI and should be reviewed for accuracy before use. While we strive for quality, AI-generated content may contain errors. Please verify measurements, stitch counts, and instructions before beginning your project. Generated by purlJam.uk
Access your pattern anytime
Bookmark this page to access your pattern anytime