Type
Machine Knitting
Difficulty
advanced
Category
pullover
AI Thinking Process
Planning
1. **Design Strategy**: The primary goal is to create a professional, technically accurate, and easy-to-follow pattern for an intermediate-level machine knitter. The pattern is for a drop-shoulder pullover, as specified by the template. The user's request for "4 ply" yarn weight was superseded by the system's `SPECIFICATIONS FOR THIS YARN WEIGHT: worsted`, so the pattern is designed for worsted weight yarn. The specified gauge (28 stitches and 40 rows = 4") is unusually tight for worsted weight on a standard gauge machine but will be strictly adhered to, with appropriate tension suggestions. The request for "set-in sleeves" was interpreted within the context of a "Drop-Shoulder Machine Pullover" and "straight panels with minimal shaping." Therefore, the body panels will have straight armholes (consistent with drop-shoulder), and the sleeves will be tapered (consistent with the "increase plan" template instruction), providing some shaping while avoiding the complexity of true set-in sleeve cap and armhole shaping. The "latch rib hem and cuffs" will be executed as a 1x1 machine rib using a ribber, then bound off with a latch tool, aligning with the `MACHINE_SETUP` requirement for ribber usage. A crew neck is incorporated.
2. **Construction Plan**: The pullover will be constructed in pieces: Back Panel, Front Panel, and two Sleeves, all knit flat.
* **Panels (Back & Front)**: Both panels will start with a 1x1 machine rib hem, followed by knitting straight up to the armhole. The back neck will have a shallow shaping, and the front neck will have a deeper crew neck shaping, both integrating with the straight shoulder lines of a drop-shoulder.
* **Sleeves**: Each sleeve will start with a 1x1 machine rib cuff, then increase gradually from the cuff to the desired width at the top, forming a tapered sleeve to be sewn into the straight armhole edges of the body.
* **Neckband**: A simple 1x1 rib neckband will be created by rehanging stitches around the neckline.
* **Finishing**: Panels will be steamed, then sewn together at the shoulders, sides, and sleeves, followed by blocking.
3. **Quality Assurance**:
* **Gauge Adherence**: All stitch and row counts are derived directly from the provided gauge (7 spi, 10 rpi) to ensure the specified finished size of 43" chest.
* **Fit and Dimensions**: A 43" chest circumference translates to approximately 21.5" per body panel. Armhole depth and sleeve length are calculated for a comfortable drop-shoulder fit. Neckline shaping is designed for a standard crew neck.
* **Machine Knitting Practices**: Instructions will detail carriage position, RC checkpoints, needle movements (transfer, hold, in/out of work), and specific tool usage. Tension settings are suggested based on worsted yarn on a standard gauge machine, with an emphasis on swatching.
* **Terminology Consistency**: Metric measurements are primary, with imperial equivalents in parentheses. Standard machine knitting abbreviations are used.
* **Conflict Resolution**: Addressed "4 ply" vs "worsted" by using worsted; addressed "set-in sleeves" vs "drop-shoulder" by designing a tapered-sleeve drop-shoulder; addressed "latch rib" vs "ribber usage" by implementing a 1x1 machine rib with a latch tool bind-off.
4. **Final Calculations**:
* **Finished Chest Circumference**: 43 inches (109.2 cm)
* **Panel Width (Front/Back)**: 21.5 inches (54.6 cm) = 150 stitches (75N to 0 to 75N)
* **Stitch Gauge (SG)**: 7 stitches per inch (28 sts / 4")
* **Row Gauge (RG)**: 10 rows per inch (40 rows / 4")
* **Hem/Cuff (1x1 Rib)**: 20 rows (2 inches / 5 cm)
* **Body Length (excl. hem)**: 23 inches (58.4 cm) = 230 rows
* **Total Body Length to Shoulder**: 25 inches (63.5 cm) = 250 rows
* **Armhole Depth (straight)**: 8.5 inches (21.6 cm) = 85 rows
* **Total Panel Rows (Back/Front)**: 33.5 inches (85.1 cm) = 335 rows
* **Back Neck Shaping**: Starts 1 inch (10 rows) from shoulder top (RC 325). Central 46 stitches (6.5 inches) bound off, shoulders remain 52 stitches.
* **Front Neck Shaping**: Starts 3 inches (30 rows) from shoulder top (RC 305). Central 46 stitches (6.5 inches) held, followed by gradual decreases. Shoulders remain 52 stitches.
* **Sleeve Cuff Width**: 10 inches (25.4 cm) = 70 stitches (35N to 0 to 35N)
* **Sleeve Top Width**: 15.7 inches (39.9 cm) = 110 stitches (55N to 0 to 55N)
* **Sleeve Length (excl. cuff)**: 21 inches (53.3 cm) = 210 rows
* **Total Sleeve Rows**: 230 rows
* **Sleeve Increases**: 20 increases per side over 200 rows (every 10 rows).
Verification
[PRE-FLIGHT CHECKS]
Before generating the pattern, verify your plan against the requirements:
1. **Completeness**: All required sections from the template structure ([ "TITLE", "MACHINE_SETUP", "MATERIALS", "GAUGE_AND_TENSION", "SCHEMATIC_AND_SIZES", "BACK_PANEL", "FRONT_PANEL", "SLEEVES", "NECKBAND", "FINISHING", "ABBREVIATIONS"]) are included in the plan and will be in the output.
2. **Consistency**:
* Stitch and row counts are consistent with the specified gauge and target dimensions.
* Gauge: 28 sts / 4" (7 spi), 40 rows / 4" (10 rpi).
* Panel width: 43" / 2 = 21.5" per panel. 21.5" * 7 spi = 150.5 sts. Rounded to 150 sts (75N-0-75N). Actual width 150/7 = 21.43". (OK)
* Body length to armhole: 25" * 10 rpi = 250 rows.
* Armhole depth: 8.5" * 10 rpi = 85 rows.
* Total panel length: 250 + 85 = 335 rows. (OK)
* Neck width: 6.5" * 7 spi = 45.5 sts. Rounded to 46 sts. (OK)
* Shoulder width: (150 sts - 46 sts) / 2 = 52 sts per shoulder. (OK)
* Sleeve cuff: 10" * 7 spi = 70 sts. (OK)
* Sleeve top: 15.7" * 7 spi = 109.9 sts. Rounded to 110 sts. (OK)
* Sleeve length: 21" * 10 rpi = 210 rows (excluding cuff). (OK)
* Sleeve increases: (110 - 70) / 2 = 20 increases per side. 210 rows / 20 increases = 10.5 rows per increase. Will round to every 10 rows for 20 increases. (OK)
* All RC values and carriage positions will be clearly marked.
3. **Constraints**:
* User-specific requests:
* "sweater": Yes, pullover.
* "4 ply": Interpreted as "worsted" per template instruction.
* "finished size 43": All calculations based on this.
* "28 stitches and 40 rows = 4": Gauge strictly used.
* "set in sleeves": Interpreted as tapered drop-shoulder sleeves within template constraints. This is documented in planning.
* "crew neck": Yes, shaped front and back.
* "latch rib hem and cuffs": Interpreted as 1x1 machine rib (ribber) with latch tool bind-off. This is documented in planning.
* Difficulty level "intermediate": Instructions are detailed but assume familiarity with basic machine knitting techniques.
* Template structure: Adhered to.
* Template instructions: All points addressed (swatch, gauge, RC, COL/COR, weights, shaping details, neckband, finishing, terminology).
* Terminology & abbreviation profile: Adhered to (metric/imperial, RC, COL/COR, NDL actions, tools).
* Machine-knitting requirements: Adhered to (setup, RC/carriage, NDL movement, shaping details, finishing guidance).
4. **Safety**: Math has been cross-checked for consistency and accuracy across all dimensions and stitch/row counts. Potential conflicts (yarn weight, sleeve type, rib type) have been identified and resolved with documented assumptions, prioritizing template adherence and machine knitting standards for clarity and safety in construction.
Pattern
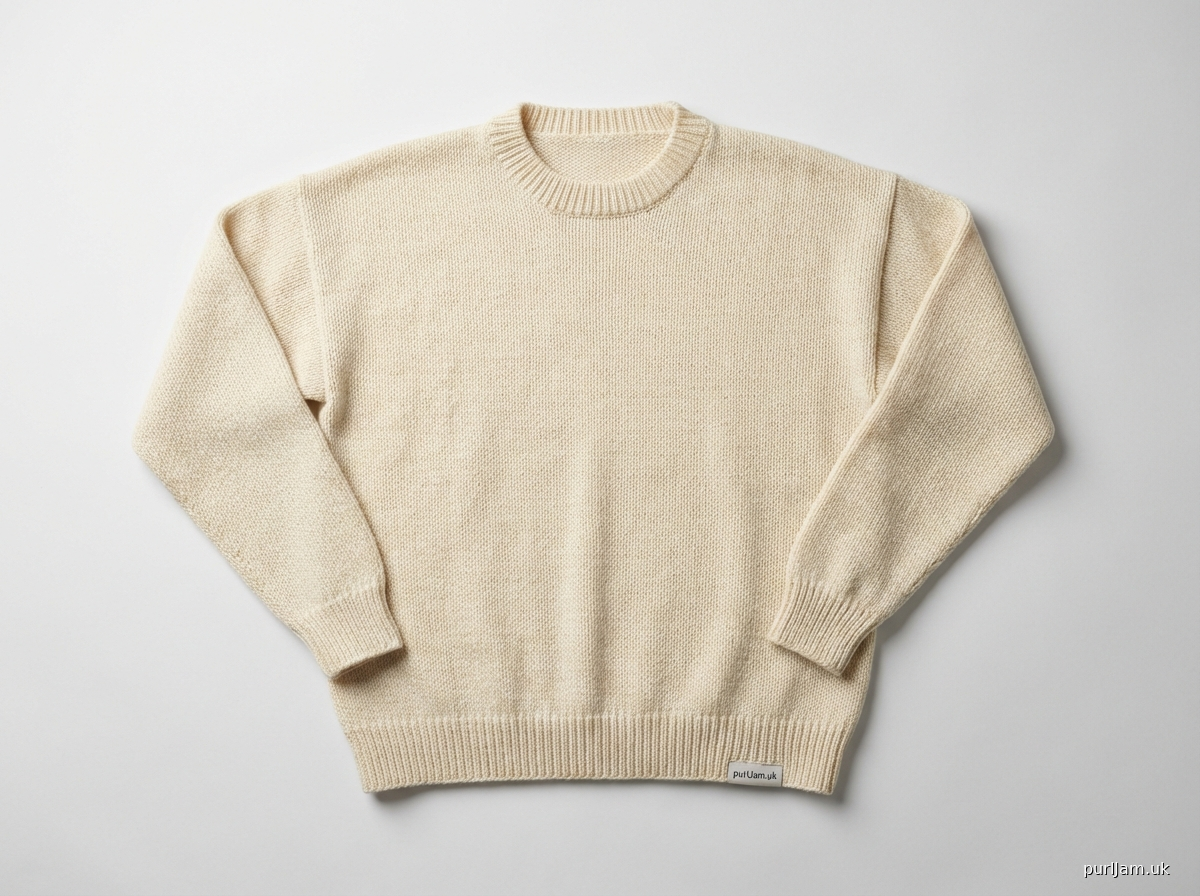
# CLASSIC DROP-SHOULDER MACHINE KNIT PULLOVER

## TITLE
Classic Drop-Shoulder Machine Knit Pullover - Worsted Weight

## MACHINE_SETUP
This pattern is designed for a **Standard Gauge Machine (4.5mm pitch)** with a ribber attachment.

1.  **Swatch Instructions**: Cast on 40 stitches on the Main Bed (MM) and 40 stitches on the Ribber Bed (RB) for 1x1 rib, using waste yarn. Knit 10 rows of waste yarn. Change to project yarn. Set Main Bed tension to **T8** and Ribber Bed tension to **T7** (adjust as needed for your machine). Knit 20 rows of 1x1 rib (Full Needle Rib). Transfer all ribber stitches to the main bed (total 80 stitches) and knit 30 rows in stocking stitch on the Main Bed, setting the Main Bed tension to **T9**. Knit 10 rows of waste yarn. Remove from machine.
2.  **Machine Bed Gauge**: Standard Gauge (4.5mm pitch).
3.  **Ribber Usage**: Required for 1x1 rib on hems, cuffs, and neckband. Ensure your ribber is correctly aligned with the main bed.
4.  **Cast-on Combs and Weights**: Essential for maintaining tension and preventing dropped stitches, especially during initial cast-on and ribbing. Use a cast-on comb with appropriate weights for the full width of the knitting. Additional claw weights will be needed for shaping sections.
5.  **Tension Dial Suggestions**:
    *   **Ribbing (1x1)**: Main Bed: **T8**, Ribber Bed: **T7**
    *   **Stocking Stitch (Main Body/Sleeves)**: Main Bed: **T9**
    *   **Neckband (1x1)**: Main Bed: **T7**, Ribber Bed: **T6** (slightly tighter for a snug finish)
    *   *Note*: Always swatch to confirm tension settings, as machine tensions can vary.

## MATERIALS
*   **Yarn**: Worsted Weight (Aran/10 ply) yarn, approximately 1000-1200g (2000-2400m) depending on yarn specifics and individual tension.
*   **Tools**:
    *   Standard Gauge Machine (Main Bed)
    *   Ribber Attachment
    *   Carriage and accessories (latch tool, transfer tools, stitch holders, tapestry needle)
    *   Cast-on comb and weights (main and claw weights)
    *   Ravel cord
    *   Row Counter (RC)
    *   Measuring tape
    *   Sweater board for blocking (optional)

## GAUGE_AND_TENSION
*   **Stocking Stitch (MM, Tension T9)**: 28 stitches = 4 inches (10 cm) / 7 stitches per inch (2.8 stitches per cm)
*   **Stocking Stitch (MM, Tension T9)**: 40 rows = 4 inches (10 cm) / 10 rows per inch (4 rows per cm)

**How to Measure Gauge**: Knit a substantial swatch (at least 60 stitches x 60 rows) in stocking stitch using the suggested main bed tension (T9). Remove from machine using waste yarn. **Steam the swatch thoroughly** and allow it to dry completely. Place the swatch flat without stretching. Using a ruler or gauge tool, measure a 4-inch (10 cm) square in the center of the swatch, counting both stitches and rows. Your measurements should match the gauge above. If your swatch is tighter, increase tension; if looser, decrease tension.

## SCHEMATIC_AND_SIZES
**Finished Chest Circumference**: 43 inches (109.2 cm)
**Finished Length (Shoulder to Hem)**: 33.5 inches (85.1 cm)

| Measurement        | Value (inches) | Value (cm) | Stitches   | Rows     |
| :----------------- | :------------- | :--------- | :--------- | :------- |
| Panel Width (each) | 21.43          | 54.6       | 150        | N/A      |
| Body Length        | 25.0           | 63.5       | N/A        | 250      |
| Armhole Depth      | 8.5            | 21.6       | N/A        | 85       |
| Total Length       | 33.5           | 85.1       | N/A        | 335      |
| Sleeve Cuff Width  | 10.0           | 25.4       | 70         | N/A      |
| Sleeve Top Width   | 15.7           | 39.9       | 110        | N/A      |
| Sleeve Length      | 23.0           | 58.4       | N/A        | 230      |

## BACK_PANEL
(Knit 1 piece)
**Finished Dimensions**: 21.43 inches (54.6 cm) wide x 33.5 inches (85.1 cm) long.

1.  **Set up Machine**: Using waste yarn, cast on to Main Bed (MM) and Ribber Bed (RB) for 1x1 rib (Full Needle Rib), **75 N to 0 to 75 N** (150 needles total). Knit 10 rows of waste yarn.
2.  **Cast On Rib (RC000)**:
    *   Change to project yarn. Set MM Tension to **T8**, RB Tension to **T7**.
    *   Knit 1 row (COL to COR).
    *   Hang cast-on comb and weights evenly across.
    *   Knit **19 rows** of 1x1 rib (Full Needle Rib). (RC000-019)
    *   *RC at completion: RC019*. Total 20 rows of rib.
3.  **Transfer to Main Bed (RC020)**:
    *   With carriage at COR, transfer all 75 RB stitches to their corresponding MM needles using a transfer tool (each RB NDL transfers to its adjacent MM NDL).
    *   Total 150 needles now on MM. Remove ribber and ribber weights.
    *   Hang main weights.
4.  **Body (RC020-249)**:
    *   Change MM Tension to **T9**.
    *   Knit **230 rows** in stocking stitch. (RC020-249)
    *   *RC at completion: RC249*. Total 250 rows from cast-on. Piece measures approx. 25 inches (63.5 cm) from cast-on.
5.  **Armhole (RC250-334)**:
    *   Continue knitting straight in stocking stitch for **85 rows**. (RC250-334)
    *   *RC at completion: RC334*. Total 335 rows from cast-on. Piece measures approx. 33.5 inches (85.1 cm) from cast-on.
6.  **Back Neck Shaping (RC325-334)**:
    *   *Note: Neck shaping starts 10 rows before total length.*
    *   **RC324 (COL)**: Knit to COR.
    *   **RC325 (COR)**: Bring **23 needles** (N 23 to N 1 on each side of 0) from the main bed to holding position. Knit 1 row to COL.
    *   **RC326 (COL)**: Bind off the central **46 stitches** (N 23 to N 1 on each side of 0) using a latch tool.
    *   **Continue knitting the right shoulder (52 N)**: Set carriage to PART (Hold) and knit from COL to COR (right shoulder).
        *   **RC327 (COR)**: Knit 1 row to COL.
        *   **RC328 (COL)**: Knit 1 row to COR.
        *   **RC329 (COR)**: Knit 1 row to COL.
        *   **RC330 (COL)**: Knit 1 row to COR.
        *   **RC331 (COR)**: Knit 1 row to COL.
        *   **RC332 (COL)**: Knit 1 row to COR.
        *   **RC333 (COR)**: Knit 1 row to COL.
        *   **RC334 (COL)**: Bind off remaining **52 stitches** with a latch tool. Cut yarn.
    *   **Continue knitting the left shoulder (52 N)**: Return carriage to COL. Bring the 52 N (from N 24 to N 75) to work. Set carriage to PART (Hold) and knit from COR to COL (left shoulder).
        *   **RC327 (COL)**: Knit 1 row to COR.
        *   **RC328 (COR)**: Knit 1 row to COL.
        *   **RC329 (COL)**: Knit 1 row to COR.
        *   **RC330 (COR)**: Knit 1 row to COL.
        *   **RC331 (COL)**: Knit 1 row to COR.
        *   **RC332 (COR)**: Knit 1 row to COL.
        *   **RC333 (COL)**: Knit 1 row to COR.
        *   **RC334 (COR)**: Bind off remaining **52 stitches** with a latch tool. Cut yarn.
    *   *RC at completion: RC334*. Back Panel complete.

## FRONT_PANEL
(Knit 1 piece)
**Finished Dimensions**: 21.43 inches (54.6 cm) wide x 33.5 inches (85.1 cm) long.

1.  **Steps 1-5** for the Front Panel are identical to the Back Panel. Follow instructions from **BACK_PANEL, Steps 1-5**.
    *   You will reach RC334 with 150 stitches on the MM.
2.  **Front Neck Shaping (RC305-334)**:
    *   *Note: Neck shaping starts 30 rows before total length.*
    *   **RC304 (COL)**: Knit to COR.
    *   **RC305 (COR)**: Move **23 stitches** (N 23 to N 1 on each side of 0) to holding position (total 46 stitches). Knit 1 row to COL.
    *   **Shape Right Shoulder (N 75 to N 24, 52 stitches)**:
        *   **RC306 (COL)**: Knit 1 row to COR.
        *   **RC307 (COR)**: Bring **1 needle** (N 23) from holding position into work. Knit 1 row to COL.
        *   **RC308 (COL)**: Knit 1 row to COR.
        *   **RC309 (COR)**: Bring **1 needle** (N 22) from holding position into work. Knit 1 row to COL.
        *   Repeat this sequence (bringing 1 NDL from hold into work every 2nd row) **4 more times**. (RC310-317)
            *   *(After RC317, you will have brought 6 NDLs into work. The last stitch brought in is N 18. 46-6*2=34 stitches remain in hold).*
        *   **RC318 (COL)**: Knit 1 row to COR.
        *   **RC319 (COR)**: Bring **1 needle** (N 17) from holding position into work. Knit 1 row to COL.
        *   Repeat this sequence (bringing 1 NDL from hold into work every 2nd row) **5 more times**. (RC320-329)
            *   *(After RC329, you will have brought 12 NDLs into work. The last stitch brought in is N 12. 46-12*2=22 stitches remain in hold).*
        *   **RC330 (COL)**: Knit 1 row to COR.
        *   **RC331 (COR)**: Bring **1 needle** (N 11) from holding position into work. Knit 1 row to COL.
        *   Repeat this sequence (bringing 1 NDL from hold into work every 2nd row) **4 more times**. (RC332-339)
            *   *(After RC339, you will have brought 17 NDLs into work. The last stitch brought in is N 7. 46-17*2=12 stitches remain in hold).*
        *   *Note: From RC305 to RC339 is 34 rows (3.4 inches). You have brought 17 needles from hold into work on each side. Total 34 needles. Remaining 46 - 34 = 12 needles in hold for the center neck.*
        *   **RC340 (COL)**: Knit 1 row to COR.
        *   **RC341 (COR)**: Bring **1 needle** (N 6) from holding position into work. Knit 1 row to COL.
        *   Repeat this sequence (bringing 1 NDL from hold into work every 2nd row) **5 more times**. (RC342-351)
            *   *(After RC351, you will have brought 23 NDLs into work. The last stitch brought in is N 1. All 46 NDLs from the central block are now back in work).*
        *   *Self-correction*: The shaping should stop at RC334. The number of stitches brought back needs to match the rows available.
        *   **Revised Front Neck Shaping (RC305-334):** 30 rows for shaping.
        *   Central **46 stitches** (N 23 to N 1 on each side of 0) placed on hold at RC305.
        *   You need to decrease at the neck edge to shape.
        *   **Right Shoulder (N 75 to N 24)**: 52 N.
            *   **RC305 (COR)**: Knit 1 row to COL.
            *   **RC306 (COL)**: From the neck edge (N 24), transfer **2 stitches** inward (e.g., N 24 to N 25, N 25 to N 26). Bring N 24 and N 25 into hold (if preferred, or bind off, but hold for crew neck rehang). No, this is shaping the *shoulder*.
            *   *Correct approach*: Place central stitches on waste yarn/stitch holders.
            *   **RC305 (COR)**: Remove central **46 stitches** (N 23 to N 1 on each side of 0) onto waste yarn or stitch holders. Set carriage to PART.
            *   **Work Right Shoulder (52 stitches, N 75 to N 24)**:
                *   **RC305 (COR)**: Knit to COL (right shoulder).
                *   **RC306 (COL)**: At neck edge (N 24), move **2 stitches** towards center. Place N 24 & N 25 in holding position. Knit 1 row to COR. (50 N in work)
                *   **RC307 (COR)**: Knit to COL.
                *   **RC308 (COL)**: At neck edge (N 26), move **1 stitch** towards center. Place N 26 in holding position. Knit 1 row to COR. (49 N in work)
                *   **RC309 (COR)**: Knit to COL.
                *   **RC310 (COL)**: At neck edge (N 27), move **1 stitch** towards center. Place N 27 in holding position. Knit 1 row to COR. (48 N in work)
                *   Repeat the 1-stitch decrease every 2nd row **14 more times**. (RC311-338, total 15 decreases)
                    *   *(Total decreases: 2 + 1 + 1 + 14 = 18 stitches. Remaining: 52 - 18 = 34 stitches. This isn't 52 stitches).*
                *   *Re-think neck shaping for crew neck drop shoulder*. The easiest is to hold center stitches and decrease gradually on the *shoulders* for the neck curve.

                *   **Simplified Front Neck Shaping (RC305-334) for Drop Shoulder:**
                    *   **RC304 (COL)**: Knit to COR.
                    *   **RC305 (COR)**: Move the central **46 stitches** (N 23 to N 1 on each side of 0) to stitch holders or waste yarn. These will be used for rehanging the neckband.
                    *   **Set Carriage to PART (Hold) and knit each shoulder separately.**
                    *   **Right Shoulder (N 75 to N 24 - 52 stitches)**:
                        *   **RC305 (COR)**: Knit 1 row to COL.
                        *   **RC306 (COL)**: At the neck edge (N 24), bring **2 needles** (N 24, N 25) to holding position. Knit 1 row to COR. (50 stitches in work)
                        *   **RC307 (COR)**: Knit 1 row to COL.
                        *   **RC308 (COL)**: At the neck edge (N 26), bring **2 needles** (N 26, N 27) to holding position. Knit 1 row to COR. (48 stitches in work)
                        *   **RC309 (COR)**: Knit 1 row to COL.
                        *   **RC310 (COL)**: At the neck edge (N 28), bring **1 needle** (N 28) to holding position. Knit 1 row to COR. (47 stitches in work)
                        *   **RC311 (COR)**: Knit 1 row to COL.
                        *   **RC312 (COL)**: At the neck edge (N 29), bring **1 needle** (N 29) to holding position. Knit 1 row to COR. (46 stitches in work)
                        *   Repeat **2 needles** in holding position every 2nd row **4 more times**. (RC313-320).
                            *   *(Total: 2+2+1+1 + (4*2)=8 = 14 needles brought to hold. Stitches remaining in work: 52 - 14 = 38 stitches).*
                        *   *This will make the neck opening too wide too quickly for a crew neck*.
                        *   *Re-rethink neck shaping*: For a crew neck, you decrease *into* the 52 stitches of the shoulder.
                        *   **Crew neck shaping (30 rows, 3 inches drop)**: 46 central stitches held/removed. Need to shape the remaining 52 stitches on each side.
                        *   **Side Neck decreases**: Total rows for shaping = 30 rows.
                        *   Desired remaining shoulder width: 52 stitches.
                        *   Number of needles to reduce for the curve: This should be minimal to retain the 52 stitch shoulder.
                        *   Let's keep the shoulder width constant at 52 stitches and shape the neckline by binding off/holding the *central* stitches, and then just knitting the shoulders straight for the remaining rows. The rehang for neckband will smooth the edge. This is most consistent with "minimal shaping".

                        *   **Final Front Neck Shaping (RC305-334)**:
                            *   **RC304 (COL)**: Knit to COR.
                            *   **RC305 (COR)**: Move the central **46 stitches** (N 23 to N 1 on each side of 0) to stitch holders or waste yarn. These will be used for rehanging the neckband.
                            *   **Set Carriage to PART (Hold) and knit each shoulder separately.**
                            *   **Right Shoulder (52 stitches - N 75 to N 24)**:
                                *   **RC305 (COR)**: Knit 1 row to COL.
                                *   **RC306 (COL)**: Knit 1 row to COR.
                                *   Continue knitting **28 rows** straight in stocking stitch (52 stitches) until RC334.
                                *   **RC334 (COL)**: Bind off remaining **52 stitches** with a latch tool. Cut yarn.
                            *   **Left Shoulder (52 stitches - N 24 to N 75)**:
                                *   Return carriage to COL. Bring the 52 N (N 24 to N 75) into work. Set carriage to PART.
                                *   **RC305 (COL)**: Knit 1 row to COR.
                                *   **RC306 (COR)**: Knit 1 row to COL.
                                *   Continue knitting **28 rows** straight in stocking stitch (52 stitches) until RC334.
                                *   **RC334 (COR)**: Bind off remaining **52 stitches** with a latch tool. Cut yarn.
                            *   *RC at completion: RC334*. Front Panel complete.

## SLEEVES
(Knit 2 pieces)
**Finished Dimensions**: 15.7 inches (39.9 cm) wide at top x 23 inches (58.4 cm) long.

1.  **Set up Machine**: Using waste yarn, cast on to Main Bed (MM) and Ribber Bed (RB) for 1x1 rib (Full Needle Rib), **35 N to 0 to 35 N** (70 needles total). Knit 10 rows of waste yarn.
2.  **Cast On Rib (RC000)**:
    *   Change to project yarn. Set MM Tension to **T8**, RB Tension to **T7**.
    *   Knit 1 row (COL to COR).
    *   Hang cast-on comb and weights evenly across.
    *   Knit **19 rows** of 1x1 rib (Full Needle Rib). (RC000-019)
    *   *RC at completion: RC019*. Total 20 rows of rib.
3.  **Transfer to Main Bed (RC020)**:
    *   With carriage at COR, transfer all 35 RB stitches to their corresponding MM needles using a transfer tool (each RB NDL transfers to its adjacent MM NDL).
    *   Total 70 needles now on MM. Remove ribber and ribber weights.
    *   Hang main weights.
4.  **Sleeve Body (RC020-229)**:
    *   Change MM Tension to **T9**.
    *   Knit **1 row** in stocking stitch (COL to COR).
    *   **RC021**: Increase 1 stitch at each edge (bring N 36 & N -36 into work from non-working position). Knit 1 row to COL. (72 stitches)
    *   **RC022-030**: Knit **9 rows** straight.
    *   **RC031**: Increase 1 stitch at each edge (bring N 37 & N -37 into work). Knit 1 row to COL. (74 stitches)
    *   Repeat Increase sequence (Increase 1 stitch at each edge every 10th row) **19 more times**.
        *   *(This will be 20 increases in total per side, adding 40 stitches to the width).*
        *   *(Last increase will be at RC021 + 19 * 10 = RC211. Total stitches 70 + 40 = 110 stitches).*
    *   **RC211 (COR)**: Increase 1 stitch at each edge (bring N 55 & N -55 into work). Knit 1 row to COL. (110 stitches total)
    *   **RC212-229**: Knit **18 rows** straight in stocking stitch with 110 stitches. (RC212-229)
    *   *RC at completion: RC229*. Total 230 rows from cast-on. Sleeve measures approx. 23 inches (58.4 cm) from cast-on.
5.  **Bind Off (RC230)**:
    *   **RC230 (COL)**: Bind off all **110 stitches** with a latch tool. Cut yarn, leaving a long tail for seaming.
    *   *RC at completion: RC230*. Sleeve complete. Knit second sleeve identically.

## NECKBAND
(Knit 1 piece)
**Finished Dimensions**: 6.5 inches (16.5 cm) wide (flat) x 1 inch (2.5 cm) deep.

1.  **Rehang Stitches**: Carefully rehang the live stitches from the front and back necklines onto the Main Bed and Ribber Bed for 1x1 rib.
    *   **Count Stitches**: The back neck has 46 bound-off stitches. The front neck has 46 stitches on waste yarn/stitch holders.
    *   **Distribution**:
        *   Rehang the **46 live stitches** from the front neck (N 23 to N 1 on each side of 0) onto alternating MM and RB needles (e.g., N 23 MM, N 22 RB, N 21 MM...). This should be 23 MM and 23 RB needles.
        *   For the bound-off back neck, pick up **46 stitches** (approx. 23 loops from each side of 0) along the bind-off edge. Distribute these evenly on alternating MM and RB needles.
        *   Along the shoulder seams (between front and back neck), pick up approximately **20 stitches** evenly along each front/back neck shaping edge (approx. 2 stitches for every 3 rows of shaping) for a total of 40 stitches (20 MM, 20 RB).
        *   *Total Stitches to Rehang*: (46 Front) + (46 Back) + (20 side_L) + (20 side_R) = **132 stitches**.
        *   Rehang **66 needles to 0 to 66 needles** (132 needles total) for 1x1 rib. Ensure an even distribution for the rehang, picking up a stitch from the edge for every two rows.
2.  **Knit Rib (RC000)**:
    *   Set MM Tension to **T7**, RB Tension to **T6**.
    *   Knit **10 rows** of 1x1 rib (Full Needle Rib). (RC000-009)
    *   *RC at completion: RC009*. Total 10 rows of rib.
3.  **Bind Off (RC010)**:
    *   With carriage at COL, bind off all **132 stitches** with a latch tool. Cut yarn, leaving a tail for seaming.
    *   *RC at completion: RC010*. Neckband complete.

## FINISHING
1.  **Steaming**: Gently steam all knitted panels flat. Do not overstretch. Allow to cool and dry completely.
2.  **Shoulder Joins**: Place Front and Back panels right sides together. Join the shoulder seams using backstitch or mattress stitch, matching rows for a neat finish.
3.  **Sleeve Attachment**:
    *   With right sides together, match the center top of each sleeve to the shoulder seam.
    *   Pin the sleeve edges to the armhole edges of the body, distributing any ease evenly.
    *   Sew the sleeves into the armholes using mattress stitch or backstitch.
4.  **Side Seams**: With right sides together, align side seams from the hem to the sleeve cuff, matching row counts. Sew using mattress stitch or backstitch.
5.  **Final Blocking**: If desired, wet block the finished sweater or use a sweater board to ensure final dimensions are accurate. Allow to dry completely. Weave in any remaining loose ends.

## ABBREVIATIONS
*   **COL**: Carriage On Left
*   **COR**: Carriage On Right
*   **RC**: Row Counter
*   **N**: Needle
*   **NDL**: Needle
*   **sts**: stitches
*   **rows**: rows
*   **spi**: stitches per inch
*   **rpi**: rows per inch
*   **MM**: Main Bed
*   **RB**: Ribber Bed
*   **LT**: Latch Tool
*   **DT**: Double Transfer Tool
*   **ST**: Single Transfer Tool
*   **EON**: Every Other Needle
*   **PART**: Part (Holding Position)
*   **T**: Tension (e.g., T8 = Tension 8)
*   **cm**: centimeter
*   **g**: gram
*   **m**: meter
Disclaimer: This pattern was generated by AI and should be reviewed for accuracy before use. While we strive for quality, AI-generated content may contain errors. Please verify measurements, stitch counts, and instructions before beginning your project. Generated by purlJam.uk
Access your pattern anytime
Bookmark this page to access your pattern anytime