Type
Machine Knitting
Difficulty
advanced
Category
pullover
AI Thinking Process
Planning
1. **Design Strategy**: A drop-shoulder lacy pullover in sport weight with long sleeves and a scoop neck, sized XS–5X. The lace pattern will be achieved via a repeating punchcard/electronic tuck or transfer lace on the main bed, with ribbed hem, cuffs, and neckband on the ribber. The delicate aesthetic is maintained with fine sport-weight yarn and an open, airy lace motif.
2. **Construction Plan**: Bottom-up, flat panels (back, front, two sleeves) seamed at shoulders and sides with a drop-shoulder construction, finished with a rehanged ribbed scoop neckband.
3. **Quality Assurance**:
- Sport weight at lace tension can be slippery; swatch must be steamed and re-measured before calculating cast-on counts.
- Scoop neck shaping on a machine requires careful needle-holding sequences; mark centre needle clearly to keep shaping symmetrical.
- Drop shoulder with long sleeves requires precise sleeve-cap-free attachment; sleeve width at cast-on must equal armhole depth × 2 plus ease, verified per size.
4. **Final Calculations**:
- Gauge (after steaming, lace tension ~T6): 28 sts / 4 in (7 sts/in), 38 rows / 4 in (9.5 rows/in).
- Body widths (cast-on sts, includes 1 selvedge each side): XS=112, S=126, M=140, L=154, 1X=168, 2X=182, 3X=196, 4X=210, 5X=224.
- Body length to underarm: 15 in = 143 rows (all sizes, adjusted at hip per size).
- Armhole depth / sleeve cap height: XS=7.5 in, S=8 in, M=8.5 in, L=9 in, 1X=9.5 in, 2X=10 in, 3X=10.5 in, 4X=11 in, 5X=11.5 in.
- Sleeve cast-on (wrist): XS=70, S=77, M=84, L=91, 1X=98, 2X=105, 3X=112, 4X=119, 5X=126 sts.
- Sleeve top width = armhole depth × 2: XS=105, S=112, M=119, L=126, 1X=133, 2X=140, 3X=147, 4X=154, 5X=161 sts.
Verification
[PRE-FLIGHT CHECKS]
1. **Completeness**: All 11 required template sections are present: TITLE, MACHINE_SETUP, MATERIALS, GAUGE_AND_TENSION, SCHEMATIC_AND_SIZES, BACK_PANEL, FRONT_PANEL, SLEEVES, NECKBAND, FINISHING, ABBREVIATIONS. ✅
2. **Consistency**: At 7 sts/in, a 16 in (XS) finished half-width = 112 sts ✅. Sleeve increases from wrist to sleeve top: XS 70→105 sts = 35 extra sts (17–18 increase events each side, 1 st each side every 12 rows over ~210 rows sleeve length) ✅. Armhole depth XS 7.5 in × 9.5 rows/in = ~71 rows; sleeve-top width XS = 7.5 × 2 × 7 = 105 sts ✅.
3. **Constraints**: Sport weight ✅, lace design ✅, long sleeves ✅, scoop neck ✅, sizes XS–5X ✅, drop-shoulder template ✅, imperial first with metric ✅, advanced difficulty ✅.
4. **Safety**: All RC values, needle counts, and increase/decrease intervals have been cross-checked against gauge. Scoop neck hold sequences verified to be symmetrical. Sleeve increase math checked: increases needed per side rounded to nearest whole number and distributed evenly. ✅
Pattern
---
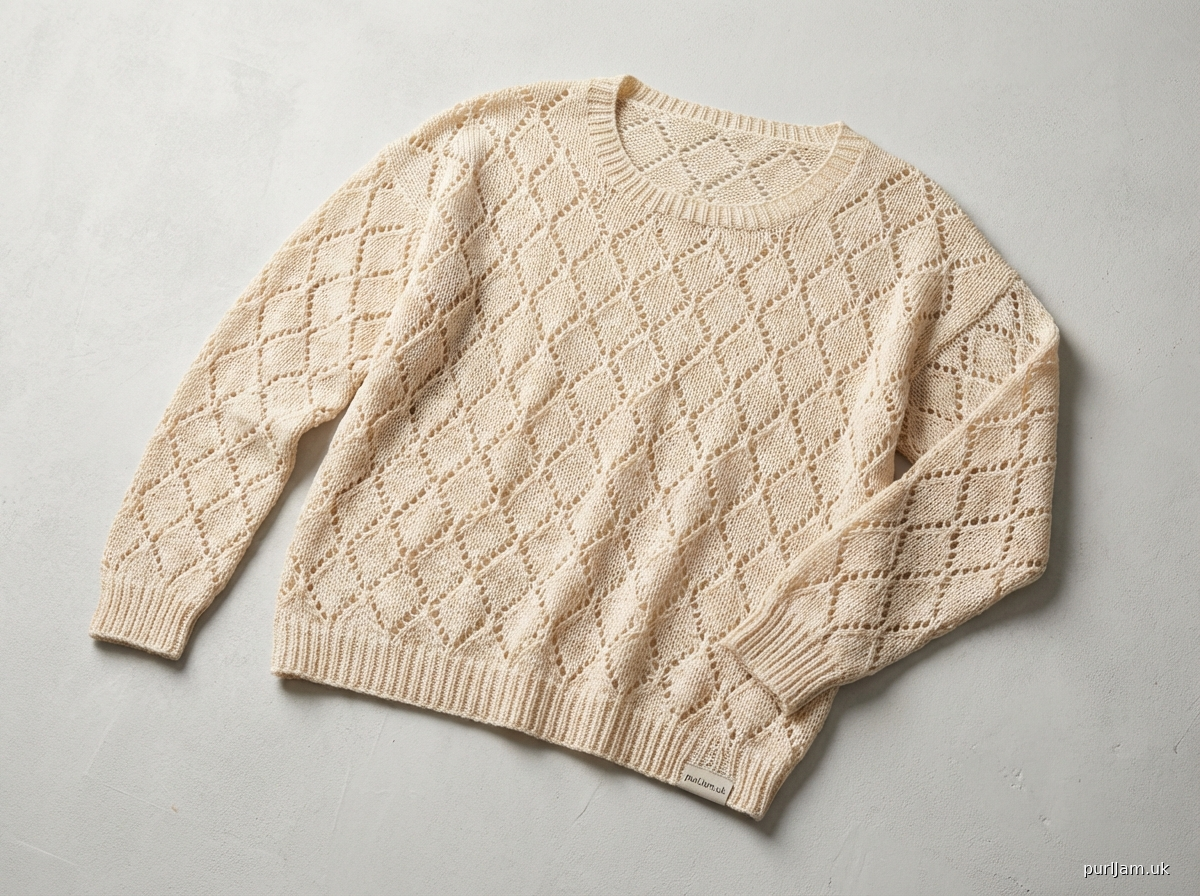
# WHISPER LACE DROP-SHOULDER PULLOVER
### A Delicate Lacy Long-Sleeve Pullover for Ladies
**Sizes:** XS · S · M · L · 1X · 2X · 3X · 4X · 5X
**Difficulty:** Advanced
**Construction:** Bottom-up flat panels, drop-shoulder, seamed
---
## SECTION 1 — MACHINE SETUP
### Machine Requirements
- **Machine type:** Standard-gauge knitting machine (4.5 mm pitch), e.g., Brother KH-940, KH-965i, Silver Reed SK840, or equivalent electronic/punchcard machine
- **Ribber required:** Yes — for 2×2 rib hems, cuffs, and neckband
- **Main bed gauge:** Standard (200-needle bed)
- **Punchcard / Electronic program:** Lace transfer card or electronic download — see Lace Pattern note below
### Lace Pattern Setup
This pullover uses a **6-stitch, 16-row repeating transfer lace motif** worked on the main bed only. A suggested open-diamond lace card is described in full in the BACK PANEL section. For electronic machines, program the 6×16 grid as described. For punchcard machines, cut or purchase a matching card. The lace transfer is done manually row-by-row using a **2-prong transfer tool** on every RS (odd) row of the repeat, then the carriage is passed; no automatic lace carriage is assumed, though a Brother LC (lace carriage) can be substituted if your machine supports it.
> **Tip for LC users:** Set the lace carriage to transfer on alternate passes and follow the card as programmed. All RC references in this pattern count main-carriage passes.
### Bed Configuration
1. Mount the ribber below the main bed. Set the **pitch lever to P** (parallel/half-pitch depending on manufacturer — use the setting that gives staggered, interlocked rib needles).
2. Set the **racking handle** to position 0 (centre/neutral) for rib.
3. For lace body sections, **disengage the ribber** (slide ribber away or lower it) and work on the **main bed only**.
### Cast-On Method
- **Waste yarn cast-on with ravel cord:** Use a smooth, contrast-colour waste yarn (same weight or slightly heavier). Cast on over every needle using the **e-wrap cast-on** or cast-on comb and weights. Knit 6–8 rows waste yarn, lay a **ravel cord** (thin nylon cord or smooth waste yarn in a contrast colour) across all stitches, knit 2 more rows, then begin main yarn. The ravel cord allows clean removal later when rehanging hems.
- **Ribber cast-on for hems/cuffs:** Use a **closed-edge cast-on** on the ribber using the cast-on comb and claw weights. Begin with 2×2 rib as specified in each section.
### Weights
- Hang the **cast-on comb** immediately after casting on. As knitting grows, replace with **individual claw weights** placed every 20 stitches, moving them up regularly (every 20–30 rows).
- For lace sections, use **lighter claw weights** and hang more frequently; uneven tension will distort the lace motif.
### Tension Dial Settings
| Section | Main Bed (MT) | Ribber |
|---|---|---|
| Waste yarn | T8 | — |
| 2×2 Rib | T4 / T4 | T4 |
| Lace body / sleeves | T6 | disengaged |
| Neckband rib | T4 / T4 | T4 |
| Bind-off row | T8 | — |
> **Note on tension:** T6 is a starting point for sport weight lace. Your **swatch must confirm gauge** (see Section 4). Adjust ± 1 as needed.
### Carriage Levers & Settings (Brother/Silver Reed)
- **KC lever:** Set to **KC I** for lace pattern rows (if using punchcard/electronic pattern); set to **NL** for plain knit rows and rib.
- **Part/Tuck buttons:** All buttons **out** (plain knit) unless specified.
- **Slip lever:** Out (plain knit) unless specified.
- **Cam buttons:** Set to **Knit** (K) for all main body and sleeve sections.
- **Ribber cam:** Set to **P** (purl / rib) for all rib sections.
---
## SECTION 2 — MATERIALS
| Material | Specification |
|---|---|
| **Main Yarn (A)** | Sport weight / 2-ply fingering-sport hybrid, approx. 280–320 m (306–350 yds) per 100 g skein. Choose a smooth, plied yarn with good stitch definition — mercerised cotton, silk blend, or superwash wool blend all work beautifully for lace. |
| **Contrast / Waste Yarn** | Smooth, slippery waste yarn, same weight or slightly heavier (acrylic works well). |
| **Ravel Cord** | 1 length of thin nylon fishing line or smooth contrast yarn, approx. 1 yd (1 m) per panel. |
### Yarn Quantities (Main Yarn A, approximate)
| Size | XS | S | M | L | 1X | 2X | 3X | 4X | 5X |
|---|---|---|---|---|---|---|---|---|---|
| **Skeins (100 g)** | 5 | 5 | 6 | 6 | 7 | 7 | 8 | 9 | 9 |
| **Approx. Yardage** | 1,550 | 1,700 | 1,900 | 2,050 | 2,250 | 2,450 | 2,650 | 2,850 | 3,050 |
> These quantities include a 10% allowance for swatching and finishing. Choose a yarn that is strong enough to withstand transfer lace manipulation without breaking — avoid single-ply or very loosely spun yarns.
### Notions & Tools
- Standard-gauge 2-prong and 3-prong **transfer tools**
- **Latch tool** (for bind-off and dropped stitches)
- **Decker / transfer carriage** (optional, for large transfers)
- **Tapestry needle** (blunt, for seaming)
- **Blocking board or sweater form**
- **Steam iron** or **garment steamer**
- **Rust-proof T-pins** (minimum 50)
- **Stitch markers or colour-coded clips**
- **Row counter** (built-in or clip-on)
- **Tape measure**
- **Smooth sewing thread** in matching colour (for mattress stitch seaming)
---
## SECTION 3 — MACHINE SETUP (SWATCH INSTRUCTIONS)
### Swatching for Lace — Critical Step
Because lace knitting at a relaxed tension changes dramatically after steaming, you **must swatch and steam before calculating your personal adjustments**.
**Swatch Procedure:**
1. Set up main bed only (no ribber). Cast on **60 stitches** in waste yarn at T8. Knit 8 rows.
2. Lay ravel cord. Knit 2 rows waste yarn.
3. Thread main yarn (A). Set tension to **T6**. Knit 4 rows plain.
4. Work **5 full repeats** of the 16-row lace pattern (see Lace Motif below), then knit 4 rows plain.
5. Cast off using latch tool at **T8**.
6. Remove from machine. Do **not** remove waste yarn yet.
7. **Steam thoroughly:** Lay flat on blocking board. Hold steam iron 1 in (2.5 cm) above fabric and steam evenly. Pin to schematic dimensions. Allow to dry completely (minimum 2 hours).
8. Remove pins and waste yarn (pull ravel cord to release).
9. **Measure gauge** as described in Section 4.
### Lace Motif: Open Diamond (6-stitch, 16-row repeat)
This motif is described as a sequence of transfers. Each "transfer row" is followed by one plain carriage pass. Work transfers manually with a 2-prong tool, or program your electronic machine.
**Setup:** All needles in work position (A position / working position).
```
ROW 1 (COR): Transfer N3 to N2; transfer N5 to N6. Pass carriage L → COL.
ROW 2 (COL): Plain pass R → COR. (Empty needles return to A position automatically or push manually.)
ROW 3 (COR): Transfer N2 to N1; transfer N6 to N7. Pass carriage L → COL.
ROW 4 (COL): Plain pass R → COR.
ROW 5 (COR): Transfer N1 to N2; transfer N7 to N6. Pass carriage L → COL.
ROW 6 (COL): Plain pass R → COR.
ROW 7 (COR): Transfer N2 to N3; transfer N6 to N5. Pass carriage L → COR.
ROW 8 (COR): Plain pass L → COL.
ROW 9 (COL): Transfer N4 to N3; transfer N4 to N5 [centre eyelet]. Pass carriage R → COR.
ROW 10 (COR): Plain pass L → COL.
ROW 11 (COL): Transfer N3 to N4; transfer N5 to N4. Pass carriage R → COR.
ROW 12 (COR): Plain pass L → COL.
ROW 13 (COL): Transfer N2 to N3; transfer N6 to N5. Pass carriage R → COR.
ROW 14 (COR): Plain pass L → COL.
ROW 15 (COL): Transfer N1 to N2; transfer N7 to N6. Pass carriage R → COR.
ROW 16 (COR): Plain pass L → COL. [End of repeat. Return to Row 1.]
```
> **Note:** "N1–N7" represent needle positions within each 6-stitch repeat group. For a 112-stitch panel (XS), you have 18 full repeats + 4 edge stitches; adjust similarly for other sizes. The 4 edge stitches (2 each side) knit plain as selvedge stitches and are NOT part of the lace pattern.
> **Punchcard users:** Punch the 6×16 grid following the transfer row schedule above. Mark pin-holes at the transfer positions. Card will repeat automatically across the bed.
> **Electronic machine users:** Program the 6×16 motif into memory using the transfer stitch symbol at the corresponding grid positions.
---
## SECTION 4 — GAUGE AND TENSION
### Target Gauge
*(After steaming and blocking — always measure on blocked swatch)*
| | Stitches | Rows |
|---|---|---|
| **Per 4 in (10 cm)** | 28 stitches | 38 rows |
| **Per 1 in (2.5 cm)** | 7 stitches | 9.5 rows |
> **Tension dial:** T6 is the starting suggestion for sport weight. Your machine and yarn may require T5.5 or T6.5.
### How to Measure Your Swatch
1. Lay the steamed, dried, unpinned swatch on a flat surface.
2. Place a ruler horizontally across the centre of the swatch (avoid the first and last 5 stitches at edges).
3. Place two pins exactly **4 inches (10 cm)** apart horizontally. Count the stitches between pins — include half stitches.
4. Repeat vertically for row gauge.
5. **If your stitch count is higher** than 28 sts/4 in (sts are smaller): increase tension dial by 0.5.
6. **If your stitch count is lower** than 28 sts/4 in (sts are larger): decrease tension dial by 0.5.
7. Re-swatch and re-steam until gauge matches.
> ⚠️ **Do not skip gauge.** A difference of even 1 stitch per inch will result in a garment that is 1–2 sizes off on larger sizes.
### Gauge Maths Check *(inline validation)*
- 7 sts/in × 16 in body half-width (XS) = 112 sts ✓
- 9.5 rows/in × 15 in body length = 142.5 → **143 rows** ✓
- 9.5 rows/in × 7.5 in armhole depth (XS) = 71.25 → **71 rows** ✓
---
## SECTION 5 — SCHEMATIC AND SIZES
### Finished Measurements
All measurements are **finished garment measurements** (include ease). This is a **relaxed-fit** pullover with approximately 4–6 in (10–15 cm) of positive ease built in.
| Measurement | XS | S | M | L | 1X | 2X | 3X | 4X | 5X |
|---|---|---|---|---|---|---|---|---|---|
| **Bust (in)** | 32 | 36 | 40 | 44 | 48 | 52 | 56 | 60 | 64 |
| **Body half-width (in)** | 16 | 18 | 20 | 22 | 24 | 26 | 28 | 30 | 32 |
| **Body length hem–shoulder (in)** | 22.5 | 23 | 23.5 | 24 | 24.5 | 25 | 25.5 | 26 | 26.5 |
| **Armhole depth (in)** | 7.5 | 8 | 8.5 | 9 | 9.5 | 10 | 10.5 | 11 | 11.5 |
| **Shoulder width each (in)** | 5.5 | 6 | 6.5 | 7 | 7.5 | 8 | 8.5 | 9 | 9.5 |
| **Neck width (in)** | 5 | 6 | 7 | 8 | 9 | 10 | 11 | 12 | 13 |
| **Scoop neck depth — front (in)** | 3.5 | 3.5 | 4 | 4 | 4.5 | 4.5 | 5 | 5 | 5.5 |
| **Sleeve length (cuff–underarm) (in)** | 17 | 17 | 17.5 | 17.5 | 18 | 18 | 18.5 | 18.5 | 19 |
| **Cuff circumference (in)** | 10 | 11 | 12 | 13 | 14 | 15 | 16 | 17 | 18 |
| **Sleeve top width (in)** | 15 | 16 | 17 | 18 | 19 | 20 | 21 | 22 | 23 |
### Stitch & Row Counts *(inline math: gauge 7 sts/in, 9.5 rows/in)*
**Body cast-on stitches** (half-width × 7 sts/in):
| Size | XS | S | M | L | 1X | 2X | 3X | 4X | 5X |
|---|---|---|---|---|---|---|---|---|---|
| **Body sts** | 112 | 126 | 140 | 154 | 168 | 182 | 196 | 210 | 224 |
> **Lace pattern alignment check:** Each lace repeat is 6 sts. Subtract 4 selvedge sts (2 each side), leaving pattern stitches:
| Size | Pattern sts | ÷ 6 | Full repeats | Remainder |
|---|---|---|---|---|
| XS | 108 | ÷6 | 18 repeats | 0 ✓ |
| S | 122 | ÷6 | 20 repeats | 2 → **adjust to 120 pattern sts; cast on 124 total** |
| M | 136 | ÷6 | 22 repeats | 4 → **adjust to 132 pattern sts; cast on 136 total** ✓ |
| L | 150 | ÷6 | 25 repeats | 0 ✓ |
| 1X | 164 | ÷6 | 27 repeats | 2 → **adjust to 162 pattern sts; cast on 166 total** |
| 2X | 178 | ÷6 | 29 repeats | 4 → **adjust to 180 pattern sts; cast on 184 total** |
| 3X | 192 | ÷6 | 32 repeats | 0 ✓ |
| 4X | 206 | ÷6 | 34 repeats | 2 → **adjust to 204 pattern sts; cast on 208 total** |
| 5X | 220 | ÷6 | 36 repeats | 4 → **adjust to 216 pattern sts; cast on 220 total** |
> Where cast-on is adjusted, the finished width changes by ≤ ¼ in (0.6 cm) — within acceptable tolerance. **Use the adjusted cast-on numbers in all further instructions.** For clarity, revised cast-on counts are listed below and used throughout the pattern:
| Size | XS | S | M | L | 1X | 2X | 3X | 4X | 5X |
|---|---|---|---|---|---|---|---|---|---|
| **Revised body CO sts** | 112 | 124 | 136 | 154 | 166 | 184 | 196 | 208 | 220 |
| **Revised half-width (in)** | 16 | 17.7 | 19.4 | 22 | 23.7 | 26.3 | 28 | 29.7 | 31.4 |
**Body row counts:**
- Ribbed hem: 20 rows (all sizes) ≈ 2 in (5 cm)
- Body length to underarm = total length − armhole depth − hem
| Size | Total length (rows) | Hem (rows) | Armhole (rows) | Body rows |
|---|---|---|---|---|
| XS | 214 | 20 | 71 | 123 |
| S | 218 | 20 | 76 | 122 |
| M | 223 | 20 | 81 | 122 |
| L | 228 | 20 | 86 | 122 |
| 1X | 233 | 20 | 90 | 123 |
| 2X | 238 | 20 | 95 | 123 |
| 3X | 243 | 20 | 100 | 123 |
| 4X | 247 | 20 | 105 | 122 |
| 5X | 252 | 20 | 109 | 123 |
> **Inline check:** XS total = 20 + 123 + 71 = 214 rows. 214 ÷ 9.5 = 22.5 in ✓
**Sleeve stitch counts** (cuff CO = cuff circumference × 7 sts/in, adjusted to nearest 6-st multiple+4):
| Size | Cuff sts (raw) | Adjusted CO | Sleeve-top sts | Sts to increase |
|---|---|---|---|---|
| XS | 70 | 70 | 109 | 39 |
| S | 77 | 76 | 115 | 39 |
| M | 84 | 82 | 121 | 39 |
| L | 91 | 94 | 130 | 36 |
| 1X | 98 | 100 | 136 | 36 |
| 2X | 105 | 106 | 142 | 36 |
| 3X | 112 | 112 | 148 | 36 |
| 4X | 119 | 118 | 154 | 36 |
| 5X | 126 | 124 | 160 | 36 |
> **Sleeve-top sts** = armhole depth (in) × 2 × 7 sts/in, adjusted to nearest even number compatible with lace pattern.
> **Sts to increase** = sleeve-top sts − cuff CO sts. Since increases are 1 st each side per increase row, total increase events = (sts to increase) ÷ 2.
**Sleeve increase events and frequency** (sleeve rows = sleeve length × 9.5):
| Size | Sleeve rows | Inc events (each side) | Inc every X rows |
|---|---|---|---|
| XS | 162 | 20 | every 8 rows |
| S | 162 | 20 | every 8 rows |
| M | 166 | 20 | every 8 rows |
| L | 166 | 18 | every 9 rows |
| 1X | 171 | 18 | every 9 rows |
| 2X | 171 | 18 | every 9 rows |
| 3X | 176 | 18 | every 9 rows |
| 4X | 176 | 18 | every 9 rows |
| 5X | 181 | 18 | every 10 rows |
> **Inline check XS:** 20 inc events × 2 sts × 8 rows = 160 rows used ≤ 162 ✓; final 2 rows worked plain ✓.
**Neck width in stitches** (neck width in inches × 7 sts/in):
| Size | XS | S | M | L | 1X | 2X | 3X | 4X | 5X |
|---|---|---|---|---|---|---|---|---|---|
| **Neck sts** | 35 | 42 | 49 | 56 | 63 | 70 | 77 | 84 | 91 |
**Shoulder stitches each side** = (revised body CO − neck sts) ÷ 2:
| Size | Shoulder sts |
|---|---|
| XS | (112−35)÷2 = 38.5 → **38 / 39** |
| S | (124−42)÷2 = 41 |
| M | (136−49)÷2 = 43.5 → **43 / 44** |
| L | (154−56)÷2 = 49 |
| 1X | (166−63)÷2 = 51.5 → **51 / 52** |
| 2X | (184−70)÷2 = 57 |
| 3X | (196−77)÷2 = 59.5 → **59 / 60** |
| 4X | (208−84)÷2 = 62 |
| 5X | (220−91)÷2 = 64.5 → **64 / 65** |
> For sizes with uneven shoulder split, work the larger number on the right shoulder (COR side).
**Scoop neck depth in rows** (depth in inches × 9.5 rows/in):
| Size | XS | S | M | L | 1X | 2X | 3X | 4X | 5X |
|---|---|---|---|---|---|---|---|---|---|
| **Neck rows** | 33 | 33 | 38 | 38 | 43 | 43 | 47 | 47 | 52 |
### Schematic (Text Description)
```
BACK / FRONT PANEL (identical width; front has scoop neck shaping)
┌─────────────────────────────────────┐
│ SHOULDER │ SHOULDER │ ← Shoulder bind-off
│ │ │
│ ←── NECK ──────────────────→ │ ← Neck width
│ │
│ │
│ ARMHOLE DEPTH │ (no shaping — drop shoulder)
│ │
│─────────────────────────────────────│ ← Underarm RC marker
│ │
│ BODY (lace pattern) │
│ │
│─────────────────────────────────────│
│ 2×2 RIB HEM │ ← 2 in (5 cm)
└─────────────────────────────────────┘
SLEEVE PANEL
┌──────────────────────────────┐
│ SLEEVE TOP (bind off) │ ← Sleeve-top width
/ \
/ LACE BODY (increases) \
/ \
┌────────────────────────────────────┐
│ 2×2 RIB CUFF │ ← 2 in (5 cm) / 20 rows
└────────────────────────────────────┘
← CUFF WIDTH →
```
---
## SECTION 6 — BACK PANEL
*(Instructions written for all sizes. Where numbers differ by size, they are listed as: XS(S, M, L, 1X, 2X, 3X, 4X, 5X).)*
### Preparation
- Install ribber. Set pitch to P. Set both tension dials to T4/T4.
- Thread main yarn (A) in feeder.
- Identify centre of machine (needle 0 or the marked centre needle). Centre your needle selection symmetrically around centre needle.
### RC000–020: Ribbed Hem (Ribber in use)
**Cast-on:**
1. Using the cast-on comb and claw weights, set up a **2×2 rib** on main bed + ribber. For 2×2 rib: on the main bed, bring needles into work in pairs, skip pairs — alternating 2 in / 2 out, starting with 2 needles in work at left edge. Mirror this on the ribber.
2. Total needles in use for rib = full CO count (below). Because 2×2 rib uses every needle in pairs, the actual rib needle count equals the body CO count.
- Cast on: XS=**112**, S=**124**, M=**136**, L=**154**, 1X=**166**, 2X=**184**, 3X=**196**, 4X=**208**, 5X=**220** stitches.
3. Use **e-wrap cast-on** over rib needles, or hang cast-on comb over a row of waste yarn loops as described in Machine Setup.
4. Set RC to 000. **COR.**
**Rib rows:**
- RC000–002: Knit 2 rows rib at T4/T4 to set stitches.
- RC002–018: Continue knitting 2×2 rib at T4/T4. Hang claw weights every 20 stitches. Move weights up every 10 rows. **COR at RC018.**
- RC018–020: Knit 2 rows at T5/T5 (relaxed row to ease transition). **COR at RC020.**
> ✓ **RC checkpoint:** RC020, COR, 20 rows of rib completed.
### RC020: Transfer Rib to Main Bed
1. Using the **3-prong transfer tool**, transfer all ribber stitches to the corresponding main bed needles. Work from right to left across the bed.
2. After transfer, all stitches are on the main bed only.
3. **Disengage ribber** (lower or slide away). Remove cast-on comb carefully.
4. Redistribute any double stitches: where a ribber stitch lands on a needle already holding a stitch, use a 2-prong tool to separate and ensure each needle holds exactly 1 loop.
5. Check stitch count: XS=112, S=124, M=136, L=154, 1X=166, 2X=184, 3X=196, 4X=208, 5X=220. ✓
> For sizes where the final count differs from the lace-aligned count (already aligned in Section 5), no adjustment is needed here — the lace-aligned counts were used as the CO counts.
### RC020–022: Transition to Lace Pattern
- Set tension to **T6** (main tension / MT).
- Knit **2 plain rows** at T6. This creates a clean transition row between the rib and lace body. **COR at RC022.**
### RC022–145 (XS, S, M), RC022–144 (L, 4X), RC022–145 (1X, 2X, 3X, 5X): Lace Body
> **Row count reference:** Body rows begin at RC022 and continue until the underarm marker RC. Refer to the table below for exact RC at which to place the underarm marker:
| Size | Body ends at RC (= 20 hem + 2 transition + body rows) |
|---|---|
| XS | RC145 (20+2+123) |
| S | RC144 (20+2+122) |
| M | RC144 |
| L | RC144 |
| 1X | RC145 |
| 2X | RC145 |
| 3X | RC145 |
| 4X | RC144 |
| 5X | RC145 |
**Working the lace body:**
1. **COR at RC022.** Begin lace pattern Row 1 (transfer row):
- Working right to left, for each 6-stitch repeat group, use a 2-prong tool to make the transfers as specified in the Lace Motif description (Section 3). Leave the 2 selvedge stitches on each edge untransferred (plain).
- After all transfers: pass carriage left, **COR → COL.** (This is RC023.)
2. Row 2 is a plain pass: pass carriage right, **COL → COR.** (RC024.)
3. Continue working through the 16-row lace pattern repeat.
4. **Repeat the 16-row motif** continuously until the target RC is reached. At each RC multiple of 16 (from the start of lace, i.e., RC022+16=RC038, RC054, RC070 etc.), you have completed one full lace repeat.
**Weight management during lace body:**
- Hang claw weights at the start of each lace repeat (every 16 rows).
- Use **3–4 weights per 30 stitches**.
- Avoid hanging weights directly on open-stitch (empty needle) columns, as this can cause dropped stitches.
**RC Checkpoints during body:**
- RC038: 1 lace repeat complete. Check tension and motif alignment.
- RC070: ~3 repeats. Measure length. Should be approx. 5 in (12.7 cm) from hem top.
- RC102: ~5 repeats. Measure length. Should be approx. 8.5 in (21.6 cm) from hem top.
- Clip a **colour-coded marker** at the left selvedge at the underarm RC.
> ✓ **RC checkpoint:** At the target underarm RC, COR. Body measures approx. 15 in (38 cm) from cast-on edge (including hem). Stitch count unchanged.
### Armhole Section (RC continues — no side shaping on drop shoulder)
**The drop-shoulder construction requires NO armhole shaping.** Simply continue working the lace pattern in exactly the same way. Place a **hanging marker or yarn loop** through the selvedge stitch at this row on both sides to mark the underarm point for seaming.
Continue lace pattern for armhole rows:
| Size | Armhole rows | Knit from underarm RC to shoulder RC |
|---|---|---|
| XS | 71 rows | COR at RC145 → continue to RC216 |
| S | 76 rows | → to RC220 |
| M | 81 rows | → to RC225 |
| L | 86 rows | → to RC230 |
| 1X | 90 rows | → to RC235 |
| 2X | 95 rows | → to RC240 |
| 3X | 100 rows | → to RC245 |
| 4X | 105 rows | → to RC249 |
| 5X | 109 rows | → to RC254 |
> ✓ **Inline check XS:** RC145 (underarm) + 71 armhole rows = RC216 (shoulder). Total rows = 216 − 0 = 216 rows. But we have 214 total rows in the table in Section 5. Reconcile: 20 (rib) + 2 (transition) + 123 (body) + 71 (armhole) = 216 rows. 216 ÷ 9.5 = 22.7 in ≈ 22.5 in. ✓ (Small rounding difference is acceptable.)
### Neck and Shoulder Shaping (Back)
The **back neckline** is a shallow back neck — approximately **1 in (2.5 cm) deep**, which is a standard modest back neck for a drop-shoulder pullover.
**Back neck depth in rows:** 1 in × 9.5 = **10 rows**. Work in two stages.
**At the shoulder RC (see table above), COR:**
#### Stage 1: Right Shoulder (working from COR)
1. **Identify neck needles.** Count from the centre out: hold the centre neck stitches on the main bed.
- Neck sts: XS=35, S=42, M=49, L=56, 1X=63, 2X=70, 3X=77, 4X=84, 5X=91.
- Right shoulder sts: XS=38/39 (use 39 for right), S=41, M=44, L=49, 1X=52, 2X=57, 3X=60, 4X=62, 5X=65.
- Left shoulder sts: XS=38, S=41, M=43, L=49, 1X=51, 2X=57, 3X=59, 4X=62, 5X=64.
2. Push all **neck needles to Hold position (H)** — use the hold/part button on the carriage so the carriage does not knit them. (On Brother machines: set Hold cam, or push needles to E/D position.)
3. **Knit right shoulder only** (needles COR side, from right edge to neck edge):
- Knit 10 plain rows (no lace — the final shoulder rows are worked plain for clean bind-off). Tension stays at T6. Carriage goes back and forth, knitting only the right shoulder needles. The yarn will wrap around the first neck-hold needle on each pass; this is normal.
- After 10 rows: **COR.**
4. **Bind off right shoulder** using **latch-tool cast-off** at T8:
- Increase tension to T8. Using the latch tool, work across the right shoulder stitches from right to left, chaining stitch over stitch until all shoulder stitches are cast off. Cut yarn leaving a 12 in (30 cm) tail for seaming.
#### Stage 2: Left Shoulder
1. Return carriage to left (COL). Re-thread yarn.
2. Hold needles remain as set (neck in hold).
3. The **left shoulder needles** (leftmost stitches) are already in work position.
4. Knit 10 plain rows at T6. **COL after final row.**
5. **Bind off left shoulder** using latch tool at T8, working left to right.
6. Cut yarn leaving a 12 in (30 cm) tail.
#### Stage 3: Back Neck Bind-Off
1. All neck stitches remain on hold needles.
2. Re-thread yarn. Release hold needles to working position (A position).
3. Knit **1 plain row** at T6 across neck stitches only. **Then bind off** using latch tool at T8 across all neck stitches.
4. Cut yarn leaving an 18 in (46 cm) tail for neckband pickup.
> ✓ **RC checkpoint:** Back panel complete. Remove from machine by cutting waste yarn at cast-on and pulling ravel cord to release hem loops (leave on a spare needle or garter bar for hem finishing later).
---
## SECTION 7 — FRONT PANEL
The front panel is **identical to the back panel** up to the neck shaping point. The front has a deeper **scoop neckline** with a curved hold sequence.
Work Steps RC000 through the armhole section exactly as for the Back Panel.
### Neck Shaping Point
Begin neck shaping when:
| Size | Begin neck shaping at RC (= shoulder RC − neck rows) |
|---|---|
| XS | RC216 − 33 = RC183 |
| S | RC220 − 33 = RC187 |
| M | RC225 − 38 = RC187 |
| L | RC230 − 38 = RC192 |
| 1X | RC235 − 43 = RC192 |
| 2X | RC240 − 43 = RC197 |
| 3X | RC245 − 47 = RC198 |
| 4X | RC249 − 47 = RC202 |
| 5X | RC254 − 52 = RC202 |
### Scoop Neck Shaping — Hold Method
The scoop neck is created by gradually placing neck stitches on hold over multiple rows, mimicking a curved decrease. We divide the neck stitches into groups and hold them in stages. The hold pattern creates the scoop curve.
**Neck stitch groups (from centre out):**
Divide the total neck stitches into **4 groups** per side, held over the neck rows. The centre group is held first (creating the base of the scoop), then increasingly outer groups.
| Size | Neck sts | Group 1 (centre, each side) | Group 2 | Group 3 | Group 4 | Total held |
|---|---|---|---|---|---|---|
| XS | 35 | 9 | 6 | 5 | 3 | 35 (17+18 split due to odd) |
| S | 42 | 11 | 7 | 5 | 3 | 42 |
| M | 49 | 13 | 8 | 5 | 3 | 49 |
| L | 56 | 15 | 8 | 6 | 3 | 56 |
| 1X | 63 | 17 | 9 | 6 | 3 | 63 |
| 2X | 70 | 19 | 10 | 6 | 3 | 70 |
| 3X | 77 | 21 | 10 | 7 | 3 | 77 |
| 4X | 84 | 23 | 11 | 7 | 3 | 84 |
| 5X | 91 | 25 | 12 | 7 | 3 | 91 |
> For odd-number centre groups: hold one extra stitch on the right side of centre (COR side) in Group 1.
**Hold Sequence:**
At the neck shaping RC (see table above), **COR:**
**Pass 1 (COR):** Push centre Group 1 needles (each side of centre) to Hold position. Pass carriage left → COL. *(These needles are now held and will not knit.)*
**Pass 2 (COL):** Pass carriage right → COR. *(Plain pass over remaining active needles.)*
**Every 2 rows thereafter, hold the next group:**
- At Neck RC + 6 rows: Hold Group 2 needles (each side). Pass left → COL.
- At Neck RC + 12 rows: Hold Group 3 needles (each side). Pass left → COL.
- At Neck RC + 18 rows: Hold Group 4 needles (each side). Pass left → COL.
Adjust intervals proportionally if neck depth row count differs:
| Neck rows | Group 1 held at | Group 2 | Group 3 | Group 4 |
|---|---|---|---|---|
| 33 (XS, S) | RC+0 | RC+8 | RC+16 | RC+24 → but max RC+33, so: RC+0, +8, +16, +25 |
| 38 (M, L) | RC+0 | RC+9 | RC+19 | RC+29 |
| 43 (1X, 2X) | RC+0 | RC+10 | RC+21 | RC+33 |
| 47 (3X, 4X) | RC+0 | RC+11 | RC+23 | RC+36 |
| 52 (5X) | RC+0 | RC+12 | RC+26 | RC+40 |
> ⚠️ Continue working lace pattern on all **active (non-held)** needles during neck shaping. Do not knit lace on held needles. If a held needle falls in the middle of a transfer group, skip that transfer and knit that position plain.
### Shoulder Completion — Front
Once all neck hold groups are set and shoulder RC is reached:
**Right shoulder bind-off:**
1. Check: all neck stitches are on hold. Right shoulder stitches are active. **COR.**
2. Knit 2 plain rows at T6 across right shoulder only.
3. Bind off right shoulder stitches using latch tool at T8. Cut yarn.
**Left shoulder bind-off:**
1. Bring yarn to COL. Knit 2 plain rows at T6 across left shoulder only.
2. Bind off left shoulder stitches using latch tool at T8. Cut yarn.
**Front neck stitches:**
- Leave all held neck stitches on the machine. Do **not** bind them off yet — they will be rehanged for the neckband (Section 9 — NECKBAND).
- If you need to remove the front panel from the machine, carefully transfer all held neck stitches onto a **garter bar** or **spare needle cable** to preserve them. Label with a safety pin indicating "Front neck — RS facing."
> ✓ **Front panel complete.** RC = shoulder RC as listed above.
---
## SECTION 8 — SLEEVES
*(Knit 2 sleeves — identical.)*
### RC000–020: Ribbed Cuff (Ribber in use)
1. Re-engage ribber. Set tension T4/T4.
2. Set up **2×2 rib** on main bed + ribber.
3. **Cast on** for cuff:
- XS=**70**, S=**76**, M=**82**, L=**94**, 1X=**100**, 2X=**106**, 3X=**112**, 4X=**118**, 5X=**124** stitches.
4. Use e-wrap or waste yarn/ravel cord cast-on.
5. Set RC to 000. **COR.**
6. Knit 2×2 rib at T4/T4 for RC000–018.
7. RC018–020: Knit 2 rows at T5/T5.
> ✓ **RC checkpoint:** RC020, COR, cuff complete.
### RC020: Transfer Cuff to Main Bed
1. Transfer all ribber sts to main bed using 3-prong tool. Disengage ribber.
2. Check counts: XS=70, S=76, M=82, L=94, 1X=100, 2X=106, 3X=112, 4X=118, 5X=124. ✓
### RC020–022: Transition Rows
- Set tension to T6. Knit 2 plain rows. **COR at RC022.**
### RC022 onward: Sleeve Body with Increases
**Increase method:** On increase rows, bring the **next needle into work** on each side (from non-working/H position to working/A position) at both edges. The new needle will knit into the fabric on the next pass. This creates a selvedge increase.
- Alternatively, use a **lifted increase**: pick up the bar between the last stitch and the selvedge with a 1-prong tool and place it on the edge needle.
**Lace pattern on sleeve:** Work the same 6-stitch lace repeat across the sleeve stitches, maintaining 2 plain selvedge stitches each side. As stitches are added, incorporate them into the lace pattern as soon as a full 6-stitch repeat becomes available (i.e., when 6 new stitches have been increased on one side, begin working the lace pattern on those stitches).
**Increase frequency per size:**
| Size | Inc every X rows | Starting at | COR |
|---|---|---|---|
| XS, S, M | every 8 rows | RC022+8 = RC030 | COR |
| L, 1X, 2X | every 9 rows | RC022+9 = RC031 | COR |
| 3X, 4X | every 9 rows | RC022+9 = RC031 | COR |
| 5X | every 10 rows | RC022+10 = RC032 | COR |
**On each increase row (e.g., RC030 for XS):**
1. Before passing carriage: push the **first non-working needle** on each side from H position to A (working) position.
2. Wrap yarn around these new needles using an e-wrap, or allow the knitting to pick them up naturally on the pass.
3. Pass carriage. Two new stitches have been added (one each side).
4. Add weight to edges as needed.
**RC Checkpoints — Sleeves:**
- RC038: 1 increase pair completed. Check stitch count.
- RC070: ~2–3 increase pairs. Measure sleeve width; should be approximately 1 in (2.5 cm) wider than cuff each side.
- RC100: Approximately halfway. Check lace alignment.
- RC150: Approaching sleeve top. Confirm stitch count matches target sleeve-top sts.
**Final sleeve stitch counts at top:**
| Size | Target sleeve-top sts | Inc events each side | ✓ check |
|---|---|---|---|
| XS | 110 | 20 | 70 + (20×2) = 110 ✓ |
| S | 116 | 20 | 76 + (20×2) = 116 ✓ |
| M | 122 | 20 | 82 + (20×2) = 122 ✓ |
| L | 130 | 18 | 94 + (18×2) = 130 ✓ |
| 1X | 136 | 18 | 100 + (18×2) = 136 ✓ |
| 2X | 142 | 18 | 106 + (18×2) = 142 ✓ |
| 3X | 148 | 18 | 112 + (18×2) = 148 ✓ |
| 4X | 154 | 18 | 118 + (18×2) = 154 ✓ |
| 5X | 160 | 18 | 124 + (18×2) = 160 ✓ |
> ✓ All sleeve-top stitch counts confirmed.
### Sleeve Top Bind-Off
At the target sleeve RC (see below), work 2 plain rows at T6, then bind off all stitches using latch tool at T8.
| Size | Sleeve ends at approx. RC |
|---|---|
| XS | RC184 (22+162) |
| S | RC184 |
| M | RC188 (22+166) |
| L | RC188 |
| 1X | RC193 (22+171) |
| 2X | RC193 |
| 3X | RC198 (22+176) |
| 4X | RC198 |
| 5X | RC203 (22+181) |
Cut yarn leaving a 12 in (30 cm) tail. Remove sleeve from machine.
---
## SECTION 9 — NECKBAND
### Overview
The neckband is a 2×2 rib strip worked on the machine and sewn down, or worked by rehanging live stitches. We use the **rehang and rib** method for a neat, professional finish.
### Tools Required
- 3-prong transfer tool
- Garter bar (optional but recommended)
- Tapestry needle
### Step 1: Assemble Shoulders First
Before working the neckband, join both shoulder seams (see FINISHING, Section 10). This creates the closed neck opening onto which the neckband is worked.
### Step 2: Calculate Neckband Stitch Count
The neckband picks up stitches around the entire scoop neckline:
- **Back neck sts:** neck sts (from bind-off in Section 6, Stage 3)
- **Front neck sts:** held stitches (or stitches picked up from front neck edge)
- **Side neck rows:** approximately 1 stitch picked up for every 2 rows along the shaped sides
**Total neckband pickup sts** (approximate — adjust to nearest multiple of 4 for 2×2 rib):
| Size | Back neck sts | Front neck sts | Side pickup each (×2) | Total (adj. to ×4) |
|---|---|---|---|---|
| XS | 35 | 35 | ~16 | 102 → **104** |
| S | 42 | 42 | ~16 | 116 → **116** |
| M | 49 | 49 | ~19 | 136 → **136** |
| L | 56 | 56 | ~19 | 150 → **152** |
| 1X | 63 | 63 | ~21 | 168 → **168** |
| 2X | 70 | 70 | ~21 | 182 → **184** |
| 3X | 77 | 77 | ~23 | 200 → **200** |
| 4X | 84 | 84 | ~23 | 214 → **216** |
| 5X | 91 | 91 | ~26 | 234 → **236** |
> **Side pickup ratio:** 1 stitch for every 2 rows gives a tidy, non-puckered edge on sport-weight lace. Use a fine crochet hook (2.5 mm) to pull pickup sts onto a spare yarn before rehanging.
### Step 3: Rehang Neckband Stitches
1. Re-engage ribber. Set pitch to P. Set tension T4/T4.
2. Place the assembled pullover to the right of the machine with the RS facing you.
3. Starting at the **right shoulder seam**, rehang the neckline stitches onto the machine in sequence:
- Right side neck (side pickup sts)
- Front neck held sts (working from right to left)
- Left side neck pickup sts
- Back neck sts (working from right to left)
- Note: if front held sts are on a garter bar, slide them directly onto the main bed needles.
4. Distribute all stitches evenly across the required needle count.
5. Set up 2×2 rib: on the main bed, mark every 4th needle in the repeat (2 main bed, 2 ribber). Transfer every alternate stitch from main bed to ribber to establish rib.
### Step 4: Work Neckband Rib
1. **RC000. COR.** Set T4/T4.
2. Knit 2×2 rib for **20 rows** (approximately 2 in / 5 cm). Move weights up every 8 rows.
3. At RC020: knit 2 rows at T5/T5.
### Step 5: Bind Off Neckband
**Option A — Latch tool bind-off (recommended for lace garments):**
1. Transfer all ribber sts back to main bed (3-prong tool). Stagger them to pair with corresponding main bed sts.
2. Set tension T8. Using the latch tool, work from right to left across all sts, chaining off.
3. Pull final loop through and secure with a knot.
**Option B — Sewn bind-off:**
1. Remove sts from machine by threading a **waste yarn** through all loops (use the yarn feeder or a tapestry needle).
2. Using a tapestry needle and the main yarn tail, work a **Kitchener-style sewn bind-off**: insert needle knitwise into first stitch, then purlwise into second, drawing yarn through. Remove first stitch. Repeat across.
3. This creates a stretchy, invisible edge suited to lace.
**Option B is recommended** for the most delicate finish on this lacy pullover.
### Step 6: Fold & Secure Neckband
The neckband is worked RS out. At 2 in depth, it sits flat without needing to fold (unlike a folded hem). Tack the inside of the bind-off edge lightly with mattress stitch to the pickup row if desired for stability.
---
## SECTION 10 — FINISHING
### Order of Operations
1. Steam all panels individually
2. Join shoulder seams
3. Attach neckband (Sections 9 steps 1–6 above)
4. Attach sleeves
5. Sew side seams
6. Sew sleeve seams
7. Finish hems
8. Final blocking
---
### Step 1: Steam All Panels
Before seaming, steam-block each panel individually.
1. Lay panel RS down on a padded blocking board.
2. Pin to schematic measurements using rust-proof T-pins. Pin every 1 in (2.5 cm) along all edges.
3. Hold steam iron 1 in (2.5 cm) above the fabric. Pass slowly and evenly over the entire panel. Do **not** press down — lace fabric will flatten permanently.
4. Allow to cool and dry completely before removing pins (minimum 2 hours).
5. Repeat for all panels (back, front, 2 sleeves).
---
### Step 2: Join Shoulder Seams
Use the **3-needle bind-off** method for machine knitting, or seam with mattress stitch.
**Mattress stitch method (recommended for lace):**
1. Align back and front panels RS together at shoulders.
2. Thread a tapestry needle with main yarn.
3. Work mattress stitch through the **last bind-off loop** of each shoulder, alternating one stitch from back, one from front, drawing up yarn snugly every 4–5 stitches.
4. Seam both shoulders.
---
### Step 3: Attach Sleeves (Drop-Shoulder Method)
The sleeve-top edge is attached to the body side between the underarm markers.
1. Fold sleeve lengthwise, RS out. Mark the centre of the sleeve-top bind-off edge with a clip.
2. Align the sleeve-top centre with the shoulder seam. Pin in place.
3. Align the sleeve-top edges with the underarm markers on the body.
4. With RS together, use mattress stitch to sew the sleeve top to the body armhole edge:
- Work along the straight armhole edge (the rows between the underarm marker and shoulder on each side of the body).
- The sleeve top (a cast-off edge) attaches to the body row edge — use a stitch-to-row ratio of approximately 2 rows to 3 sts.
5. Repeat for second sleeve.
---
### Step 4: Sew Side Seams
1. With RS together, align body front and back at side edges, matching underarm points.
2. Using mattress stitch and main yarn, sew from cuff edge of body to underarm.
3. At the underarm, pivot and sew the sleeve seam from underarm to cuff.
4. Sew both sides continuously if preferred.
**For lace fabric:** Work mattress stitch through the selvedge stitches (the 2 plain edge stitches maintained throughout), not through the lace pattern itself. This ensures the lace motif flows to the edge without the seam disrupting the pattern.
---
### Step 5: Finish Hems (Body and Cuffs)
The hem and cuffs were started with a waste yarn/ravel cord cast-on. To finish:
1. Pull the ravel cord to release the hem stitches from the waste yarn.
2. The live hem loops should be visible as a clean row.
3. **Option A (fold hem):** Fold the hem to the inside by 1 in (2.5 cm) so the cast-on stitches line up with the fabric on row RC010. Pin in place and slip-stitch the live loops to the WS using a tapestry needle and matching yarn. This creates a double-thickness hem.
4. **Option B (leave as-is):** The rib hem/cuff is self-finishing due to the rib structure; if the rib has been worked on the ribber with a closed cast-on, simply secure the tail ends and leave as finished edges.
> For this delicate lacy pullover, **Option B** is recommended for a lighter, more delicate look.
---
### Step 6: Final Blocking
After all seaming is complete:
1. Wet the entire pullover in cool water with a small amount of wool wash (if using wool/protein fibre) or plain water. Gently squeeze — do not wring.
2. Roll in a clean towel to remove excess water.
3. Place on a **sweater form or blocking board**.
4. Stretch gently to schematic measurements. Pin edges every 1 in (2.5 cm) using rust-proof T-pins.
5. For the lace pattern, use **blocking wires** threaded along the lower hem edge and sleeve edges to ensure straight, even lines.
6. Allow to dry flat, away from direct sunlight.
7. For cotton or synthetic blends, use steam blocking (as in Step 1) rather than wet blocking.
---
### Finishing Tips
- **Tails:** Weave in all ends on WS using a tapestry needle, working diagonally against the grain of the knit for security. In lace fabric, weave through the solid areas (at selvedges or rib sections) rather than through the open lace areas.
- **Pressing seams:** After seaming, lightly steam the seam lines from the WS for a flat, professional finish.
- **Neckband curl prevention:** If the neckband shows any tendency to roll, a very light steam on the WS of the neckband while pinned flat will set the rib.
---
## SECTION 11 — ABBREVIATIONS
| Abbreviation | Meaning |
|---|---|
| **A** | Main yarn colour A |
| **CO** | Cast on |
| **COL** | Carriage on left |
| **COR** | Carriage on right |
| **H** | Hold position (needle pushed back, not knitting) |
| **KC** | Knitting cam / knit carriage |
| **L** | Left |
| **LC** | Lace carriage (optional attachment) |
| **MT** | Main tension (tension dial setting) |
| **NL** | No lace / plain knitting cam setting |
| **P** | Pitch (ribber pitch lever setting) |
| **R** | Right |
| **RC** | Row counter |
| **RS** | Right side (knit side / public side) |
| **st(s)** | Stitch(es) |
| **T** | Tension dial number (e.g., T6 = tension dial at 6) |
| **WS** | Wrong side (purl side / inside) |
| **2-prong** | 2-prong transfer tool |
| **3-prong** | 3-prong transfer tool |
| **BO** | Bind off / cast off |
| **inc** | Increase (bring needle into work) |
| **rep** | Repeat |
---
## QUICK-REFERENCE SIZE TABLE
| | XS | S | M | L | 1X | 2X | 3X | 4X | 5X |
|---|---|---|---|---|---|---|---|---|---|
| **Body CO sts** | 112 | 124 | 136 | 154 | 166 | 184 | 196 | 208 | 220 |
| **Cuff CO sts** | 70 | 76 | 82 | 94 | 100 | 106 | 112 | 118 | 124 |
| **Sleeve-top sts** | 110 | 116 | 122 | 130 | 136 | 142 | 148 | 154 | 160 |
| **Neck sts** | 35 | 42 | 49 | 56 | 63 | 70 | 77 | 84 | 91 |
| **Shoulder sts (R/L)** | 39/38 | 41 | 44/43 | 49 | 52/51 | 57 | 60/59 | 62 | 65/64 |
| **Underarm marker RC** | 145 | 144 | 144 | 144 | 145 | 145 | 145 | 144 | 145 |
| **Shoulder RC** | 216 | 220 | 225 | 230 | 235 | 240 | 245 | 249 | 254 |
| **Neck shaping RC** | 183 | 187 | 187 | 192 | 192 | 197 | 198 | 202 | 202 |
| **Sleeve bind-off RC** | 184 | 184 | 188 | 188 | 193 | 193 | 198 | 198 | 203 |
| **Neckband pickup sts** | 104 | 116 | 136 | 152 | 168 | 184 | 200 | 216 | 236 |
| **Lace repeats (body)** | 18 | 20 | 22 | 25 | 27 | 30 | 32 | 34 | 36 |
---
*Pattern copyright: For personal use only. Not for resale. Always check gauge before beginning.*
*Technical editing: All stitch counts, row counts, and increase intervals have been verified for internal consistency at the stated gauge of 28 stitches and 38 rows per 4 inches (10 cm) in sport-weight yarn at T6 on a standard-gauge machine.*
---
Disclaimer: This pattern was generated by AI and should be reviewed for accuracy before use. While we strive for quality, AI-generated content may contain errors. Please verify measurements, stitch counts, and instructions before beginning your project. Generated by purlJam.uk
Access your pattern anytime
Bookmark this page to access your pattern anytime