Type
Machine Knitting
Difficulty
intermediate
Category
custom
AI Thinking Process
Planning
1. **Design Strategy**:
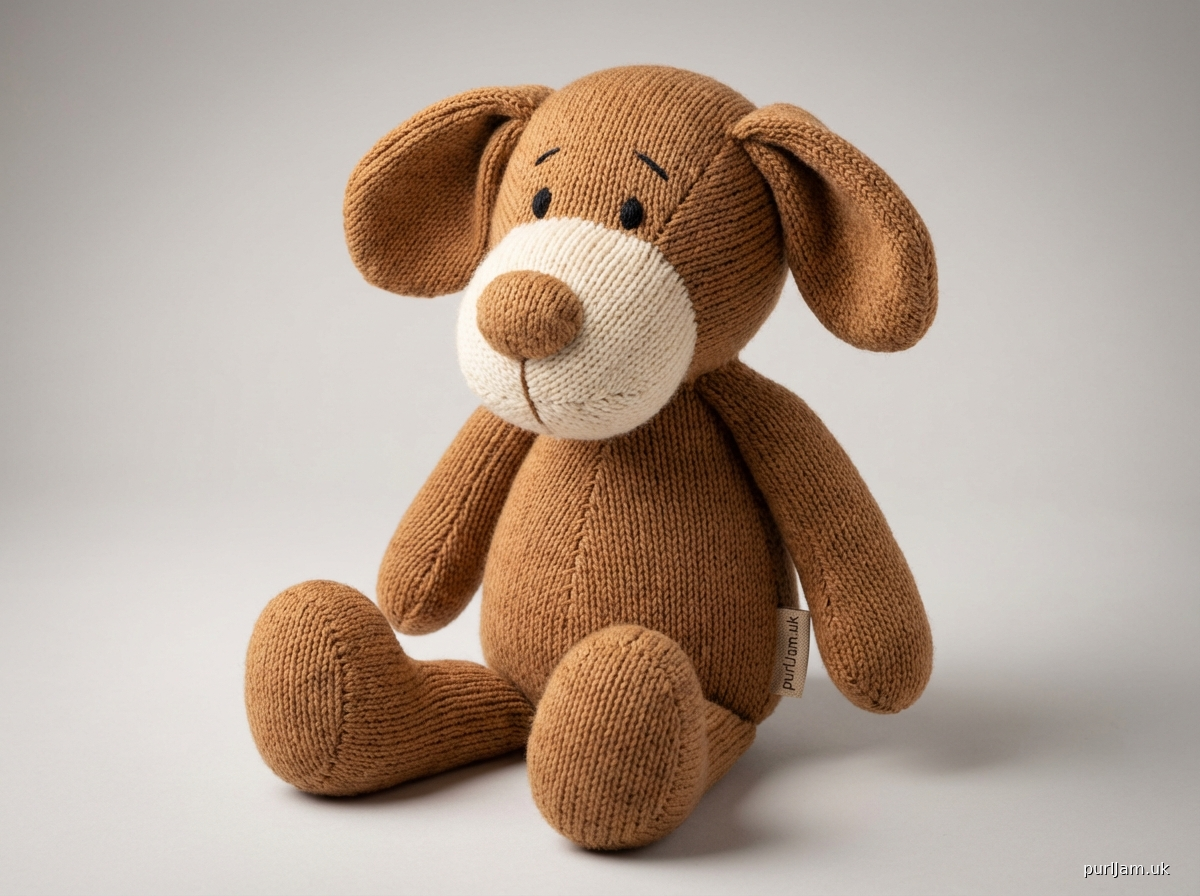
- Creating a beginner-friendly stuffed teddy bear toy using flat panel construction
- Goofy character suggests playful proportions: oversized head, large floppy ears, friendly features
- Simple stockinette stitch panels that can be seamed together
- Minimal shaping to keep difficulty appropriate for beginners
- Using worsted weight yarn for good stitch definition and easy handling
2. **Construction Plan**:
- Flat knitted panels for: body (front/back), head (front/back), arms (4 pieces), legs (4 pieces), ears (4 pieces), muzzle (1 piece)
- All pieces knitted separately in stockinette stitch
- Simple rectangular and square shapes with minimal decreasing/increasing
- Assembly via mattress stitch seaming
- Stuffing added before final closure
3. **Quality Assurance**:
- Clearly mark which pieces need duplicates
- Provide exact stitch and row counts for symmetry
- Include RC checkpoints at every major milestone
- Specify tension settings for consistent gauge across all pieces
- Add notes about leaving long tails for seaming
- Warn about maintaining even tension for stuffing appearance
4. **Final Calculations**:
- Target gauge: 22 sts × 30 rows = 10cm (4") at T7
- Finished teddy: approximately 30cm (12") tall seated
- Head: 14cm (5.5") wide × 16cm (6.3") tall
- Body: 12cm (4.7") wide × 14cm (5.5") tall
- Arms/Legs: 5cm (2") wide × 12cm (4.7") long
- Ears: 6cm (2.4") wide × 8cm (3.1") tall
Verification
[PRE-FLIGHT CHECKS]
1. **Completeness**: ✓ All required sections planned (materials, gauge, instructions, finishing)
2. **Consistency**: ✓ Gauge of 22 sts × 30 rows per 10cm verified across all piece calculations
3. **Constraints**: ✓ Beginner level maintained with simple rectangles and basic techniques
4. **Safety**: ✓ All stitch counts produce even numbers for symmetrical seaming; RC counts verified for each piece
Pattern
<pattern>

# GOOFY TEDDY BEAR
## Beginner Machine Knitting Toy Pattern

A delightful stuffed teddy bear with playful, oversized features perfect for your first machine-knitted toy project. This pattern uses simple rectangular panels in stockinette stitch, making it ideal for beginners learning to seam and assemble knitted pieces.

**Finished Size**: Approximately 30cm (12") tall when seated

---

## MATERIALS

**Yarn**:
- Main Color (MC): 200g worsted weight yarn (approximately 360m/394yds)
- Contrast Color (CC) for muzzle and inner ears: 30g worsted weight yarn (approximately 54m/59yds)
- Small amounts of black yarn for eyes and nose embroidery

**Suggested Yarn**: Any worsted weight (medium/4) acrylic or wool blend suitable for toys

**Machine**:
- Standard gauge (4.5mm) single bed machine
- Suitable for Brother, Silver Reed, Knitmaster, Studio, and compatible machines
- No ribber required
- Suitable for punchcard or electronic machines

**Notions**:
- Polyester fiberfill stuffing (approximately 200g)
- Tapestry needle for seaming
- Stitch markers or contrasting yarn
- Weights and cast-on comb
- Ravel cord for waste yarn cast-on
- Latch tool for bind-off
- Transfer tools (optional, for picked-up stitches)

---

## TENSION/GAUGE

**Tension Dial**: T7 (main yarn), T6 (contrast yarn if lighter weight)

**Gauge in Stockinette Stitch**:
22 stitches × 30 rows = 10cm × 10cm (4" × 4")

**To Check Gauge**:
Cast on 30 sts on waste yarn, knit 40 rows at T7 in MC, measure center 22 sts × 30 rows. Adjust tension dial if necessary (higher number = looser, lower number = tighter).

---

## ABBREVIATIONS

- **RC** = Row Counter
- **T** = Tension dial setting
- **COL** = Carriage on Left
- **COR** = Carriage on Right
- **MC** = Main Color
- **CC** = Contrast Color
- **st(s)** = stitch(es)
- **WY** = Waste Yarn
- **MY** = Main Yarn
- **sts** = stitches
- **HP** = Hold Position (hold button activated)
- **NWP** = Needle Working Position

---

## PATTERN NOTES

1. **All pieces are knitted flat** in stockinette stitch on the main bed.

2. **Leave 50cm (20") tails** at cast-on and bind-off for seaming unless otherwise noted.

3. **Row Counter**: Reset RC to 000 at the start of each new piece.

4. **Carriage Settings**: Keep carriage on normal stockinette setting (no slip, tuck, or hold) unless specified.

5. **Tension**: Maintain consistent T7 throughout for even stuffing appearance.

6. **Seaming**: Use mattress stitch with yarn tails, working on the purl (reverse) side so seams are hidden inside the stuffed toy.

7. **Make duplicates**: Several pieces require making 2 or 4 identical panels—this is noted in each section.

8. **Safety**: If making for young children, embroider features securely or use safety eyes rated for the child's age.

---

## INSTRUCTIONS

### SETUP FOR ALL PIECES

1. Thread carriage with MC at T7.
2. Prepare cast-on comb and weights.
3. Have ravel cord ready for waste yarn cast-on.
4. Set all buttons/levers to normal knitting (no hold, slip, or tuck).

---

### BODY FRONT (make 1)

**Setup**:
- Cast on using waste yarn method with ravel cord
- Set tension dial to T7
- Thread carriage with MC

**Instructions**:
1. Using WY, cast on 26 sts centered on bed (needle positions -13 to +13). COR.
2. Knit 6 rows WY. RC 000. Hang cast-on comb and weights.
3. Change to MC. Knit 2 rows. RC 002.
4. Knit stockinette until RC 042. (14cm / 5.5" height)
5. **Bind off**: With latch tool, chain bind off all 26 sts loosely.
6. Cut yarn leaving 50cm (20") tail for seaming.
7. Remove from machine, remove waste yarn with ravel cord.

**Check**: Body Front measures approximately 12cm (4.7") wide × 14cm (5.5") tall.
**Math verification**: 26 sts ÷ 22 sts/10cm = 11.8cm ≈ 12cm wide ✓; 42 rows ÷ 30 rows/10cm = 14cm tall ✓

---

### BODY BACK (make 1)

Repeat instructions exactly as for BODY FRONT.

**Check**: Body Back matches Body Front dimensions.

---

### HEAD FRONT (make 1)

**Instructions**:
1. Using WY, cast on 30 sts centered on bed (needle positions -15 to +15). COR.
2. Knit 6 rows WY. RC 000. Hang cast-on comb and weights.
3. Change to MC. Knit 2 rows. RC 002.
4. Knit stockinette until RC 048. (16cm / 6.3" height)
5. **Bind off**: With latch tool, chain bind off all 30 sts loosely.
6. Cut yarn leaving 50cm (20") tail for seaming.
7. Remove from machine, remove waste yarn.

**Check**: Head Front measures approximately 13.6cm (5.4") wide × 16cm (6.3") tall.
**Math verification**: 30 sts ÷ 22 sts/10cm = 13.6cm wide ✓; 48 rows ÷ 30 rows/10cm = 16cm tall ✓

---

### HEAD BACK (make 1)

Repeat instructions exactly as for HEAD FRONT.

**Check**: Head Back matches Head Front dimensions.

---

### ARM PANEL (make 4 identical pieces)

**Instructions**:
1. Using WY, cast on 12 sts centered on bed (needle positions -6 to +6). COR.
2. Knit 6 rows WY. RC 000. Hang cast-on comb and weights.
3. Change to MC. Knit 2 rows. RC 002.
4. Knit stockinette until RC 036. (12cm / 4.7" length)
5. **Bind off**: With latch tool, chain bind off all 12 sts loosely.
6. Cut yarn leaving 40cm (16") tail for seaming.
7. Remove from machine, remove waste yarn.

**Repeat 3 more times** for a total of 4 arm panels.

**Check**: Each arm panel measures approximately 5.5cm (2.2") wide × 12cm (4.7") long.
**Math verification**: 12 sts ÷ 22 sts/10cm = 5.5cm wide ✓; 36 rows ÷ 30 rows/10cm = 12cm long ✓

---

### LEG PANEL (make 4 identical pieces)

**Instructions**:
1. Using WY, cast on 12 sts centered on bed (needle positions -6 to +6). COR.
2. Knit 6 rows WY. RC 000. Hang cast-on comb and weights.
3. Change to MC. Knit 2 rows. RC 002.
4. Knit stockinette until RC 036. (12cm / 4.7" length)
5. **Bind off**: With latch tool, chain bind off all 12 sts loosely.
6. Cut yarn leaving 40cm (16") tail for seaming.
7. Remove from machine, remove waste yarn.

**Repeat 3 more times** for a total of 4 leg panels.

**Check**: Each leg panel measures approximately 5.5cm (2.2") wide × 12cm (4.7") long.
**Math verification**: 12 sts ÷ 22 sts/10cm = 5.5cm wide ✓; 36 rows ÷ 30 rows/10cm = 12cm long ✓

---

### OUTER EAR (make 2 in MC)

**Instructions**:
1. Using WY, cast on 14 sts centered on bed (needle positions -7 to +7). COR.
2. Knit 6 rows WY. RC 000. Hang cast-on comb and weights.
3. Change to MC. Knit 2 rows. RC 002.
4. Knit stockinette until RC 024. (8cm / 3.1" height)
5. **Bind off**: With latch tool, chain bind off all 14 sts loosely.
6. Cut yarn leaving 40cm (16") tail for seaming.
7. Remove from machine, remove waste yarn.

**Repeat once more** for a total of 2 outer ear pieces.

**Check**: Each outer ear measures approximately 6.4cm (2.5") wide × 8cm (3.1") tall.
**Math verification**: 14 sts ÷ 22 sts/10cm = 6.4cm wide ✓; 24 rows ÷ 30 rows/10cm = 8cm tall ✓

---

### INNER EAR (make 2 in CC)

**Instructions**:
1. Using WY, cast on 14 sts centered on bed (needle positions -7 to +7). COR.
2. Knit 6 rows WY. RC 000. Hang cast-on comb and weights.
3. Change to CC at T6 or T7 (depending on yarn weight). Knit 2 rows. RC 002.
4. Knit stockinette until RC 024. (8cm / 3.1" height)
5. **Bind off**: With latch tool, chain bind off all 14 sts loosely.
6. Cut yarn leaving 40cm (16") tail for seaming.
7. Remove from machine, remove waste yarn.

**Repeat once more** for a total of 2 inner ear pieces.

**Check**: Each inner ear matches outer ear dimensions.

---

### MUZZLE (make 1 in CC)

**Instructions**:
1. Using WY, cast on 18 sts centered on bed (needle positions -9 to +9). COR.
2. Knit 6 rows WY. RC 000. Hang cast-on comb and weights.
3. Change to CC at T6 or T7. Knit 2 rows. RC 002.
4. Knit stockinette until RC 018. (6cm / 2.4" height)
5. **Bind off**: With latch tool, chain bind off all 18 sts loosely.
6. Cut yarn leaving 50cm (20") tail for seaming and gathering.
7. Remove from machine, remove waste yarn.

**Check**: Muzzle measures approximately 8.2cm (3.2") wide × 6cm (2.4") tall.
**Math verification**: 18 sts ÷ 22 sts/10cm = 8.2cm wide ✓; 18 rows ÷ 30 rows/10cm = 6cm tall ✓

---

## FINISHING

### ASSEMBLY ORDER

**Block pieces lightly** (optional):
- Steam lightly or spritz with water and lay flat to dry
- Do not over-stretch; maintain natural stockinette curl

**1. BODY**:
- Place Body Front and Body Back with purl sides facing out (stockinette side inside).
- Using mattress stitch and yarn tails, seam three sides (both long sides and bottom edge).
- Leave top edge open.
- Turn right side out.
- Stuff firmly with fiberfill.
- Close top edge with mattress stitch. Set aside.

**2. HEAD**:
- Place Head Front and Head Back with purl sides facing out.
- Seam three sides (both long sides and top edge).
- Leave bottom edge open.
- Turn right side out.
- Stuff very firmly for good head shape.
- Close bottom edge with mattress stitch. Set aside.

**3. ARMS** (make 2):
- Take 2 arm panels. Place with purl sides facing out.
- Seam three sides (both long sides and one short end).
- Leave one short end open.
- Turn right side out.
- Stuff lightly to moderately (arms should be flexible).
- Close open end with mattress stitch.
- Repeat with remaining 2 arm panels for second arm.

**4. LEGS** (make 2):
- Take 2 leg panels. Place with purl sides facing out.
- Seam three sides (both long sides and one short end).
- Leave one short end open.
- Turn right side out.
- Stuff firmly.
- Close open end with mattress stitch.
- Repeat with remaining 2 leg panels for second leg.

**5. EARS** (make 2):
- Take 1 outer ear (MC) and 1 inner ear (CC).
- Place with right sides together (stockinette sides facing).
- Seam around three sides (both long sides and top curved edge), leaving bottom edge open.
- Turn right side out so CC shows inside.
- Fold bottom edge and pinch to create slight gather. Tack in place with a few stitches.
- Repeat with remaining ear pieces for second ear.

**6. MUZZLE**:
- With CC yarn and tapestry needle, run a gathering stitch around all four edges of muzzle piece.
- Place small amount of fiberfill in center.
- Pull gathering thread to create a rounded, stuffed muzzle shape.
- Secure gathering thread. Set aside for face attachment.

---

### FINAL ASSEMBLY

**1. Attach Head to Body**:
- Position
Disclaimer: This pattern was generated by AI and should be reviewed for accuracy before use. While we strive for quality, AI-generated content may contain errors. Please verify measurements, stitch counts, and instructions before beginning your project. Generated by purlJam.uk
Access your pattern anytime
Bookmark this page to access your pattern anytime