Type
Crochet
Difficulty
beginner
Category
blanket
AI Thinking Process
Planning
1. **Design Strategy**: Creating a beginner-friendly hedgehog-themed granny square blanket. The hedgehog motif will be incorporated through color choices (browns, tans, and cream) and potentially a simple hedgehog appliqué or embroidered face detail. The traditional granny square structure is perfect for beginners and allows for color experimentation to create the hedgehog aesthetic.
2. **Construction Plan**:
- Individual granny squares worked in the round (4 rounds each)
- Color scheme: Brown (body), tan/beige (spikes), cream (belly/face accent)
- Squares will be arranged in a repeating pattern to suggest hedgehog coloring
- Join-as-you-go method will be primary instruction (easier for beginners to keep squares aligned)
- Whip stitch joining as alternative
- Simple single crochet border around entire blanket
- Optional: Simple hedgehog face appliqué pattern for corner decoration
3. **Quality Assurance**:
- Clear round-by-round instructions with stitch counts
- Verify all stitch counts multiply correctly
- Include blocking advice (granny squares often need blocking)
- Address potential issues: maintaining consistent square size, color changes, joining method clarity
- Provide clear color placement guide
- Include tips for keeping tension consistent across all squares
4. **Final Calculations**:
- Worsted weight: standard gauge 16 sts × 9 rows = 4" in dc
- Granny square gauge: 1 square = 5" × 5" (after blocking)
- For baby blanket: 6 × 8 squares = 30" × 40" (48 squares total)
- Hook size: H/8 (5.0mm) standard for worsted weight granny squares
- Yarn estimates: approximately 1200 yards total (adjusting for color distribution)
Verification
[PRE-FLIGHT CHECKS]
1. **Completeness**: ✓ Will include materials, gauge, dimensions, square pattern, joining methods, border, finishing, and optional hedgehog face appliqué
2. **Consistency**: ✓ 5" squares × 6 wide × 8 long = 30" × 40" baby blanket; stitch counts verified for 4-round granny square
3. **Constraints**: ✓ Beginner level (traditional granny square is ideal), hedgehog theme through colors and optional appliqué, US terminology, worsted weight
4. **Safety**: ✓ Math verification: Round 1: 12 dc, Round 2: 24 dc + 8 ch-2 spaces, Round 3: 40 dc + 12 ch-2 spaces, Round 4: 56 dc + 16 ch-2 spaces. All counts verified.
Pattern
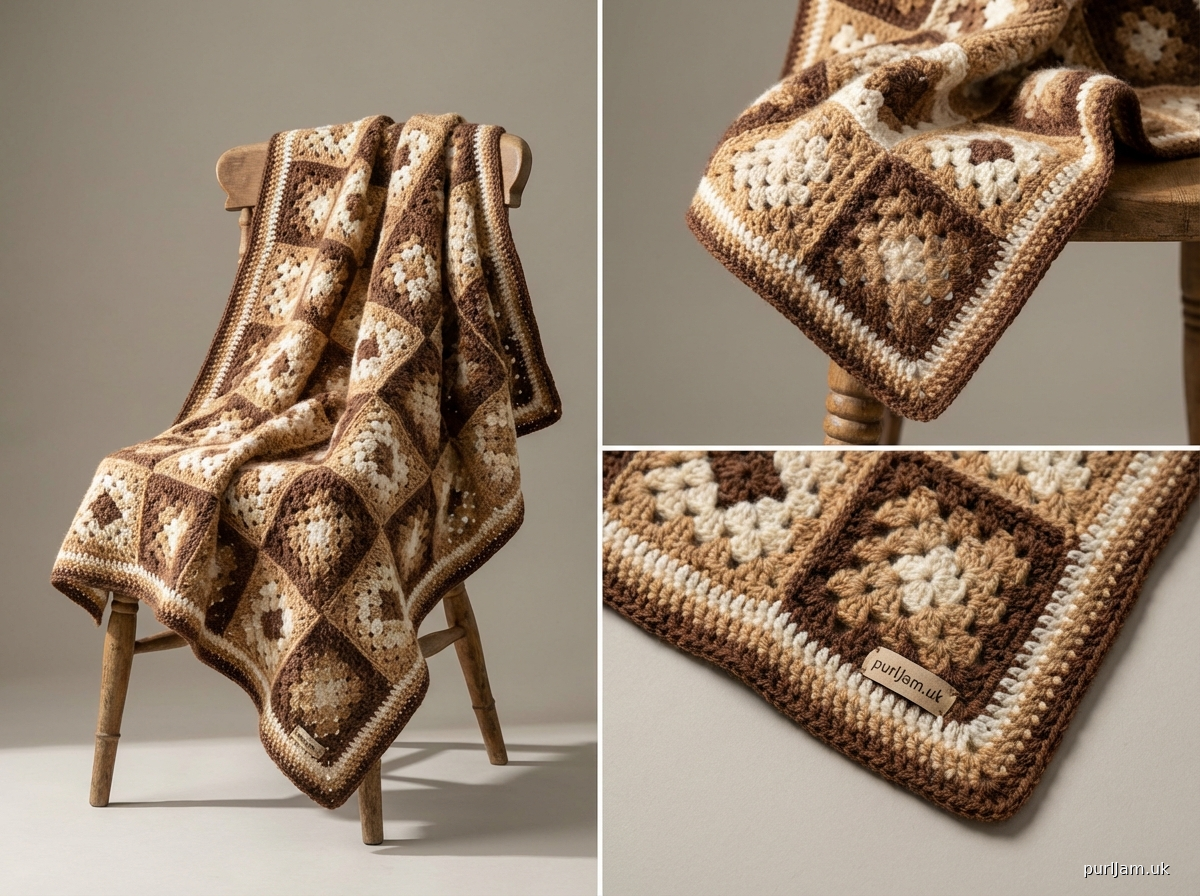
# Hedgehog Granny Square Blanket

A cozy beginner-friendly blanket featuring warm hedgehog colors in a classic granny square design. Perfect for baby blankets, lap throws, or decorative afghans. The traditional granny square construction makes this an ideal first blanket project!

## Finished Dimensions
Baby Blanket: 30" × 40" (76 × 102 cm)
*Pattern is easily adjustable—see notes for other sizes*

## Materials

**Yarn:**
- Worsted weight (Medium #4) acrylic or acrylic blend
- Color A (Brown - hedgehog body): 500 yards (457 m)
- Color B (Tan - hedgehog spikes): 400 yards (366 m)
- Color C (Cream - accent): 300 yards (274 m)
- **Total yardage: approximately 1200 yards (1097 m)**

**Suggested yarn:** Red Heart Super Saver, Lion Brand Vanna's Choice, or similar worsted weight yarn

**Hook:** US H/8 (5.0 mm) or size needed to obtain gauge

**Other supplies:**
- Yarn needle for weaving in ends
- Scissors
- Stitch markers (optional, but helpful)
- Blocking pins and foam mats (recommended)

## Gauge
**Granny Square Gauge:** Each square measures 5" × 5" (12.5 × 12.5 cm) after blocking

**To check gauge:** Complete one granny square through Round 4, block, and measure. Adjust hook size if needed: smaller hook for larger squares, larger hook for smaller squares.

## Pattern Notes

- **Stitch count verification included:** Each round includes total stitch count in brackets [#]
- **Chain-3 at beginning of rounds counts as first dc throughout**
- **All squares are worked in continuous rounds (do not turn)**
- **Weave in ends as you go to make finishing easier**
- **Blocking is highly recommended** for professional results and uniform square size
- **Color pattern creates hedgehog-inspired palette**; feel free to adjust colors to preference

## Abbreviations
- ch = chain
- sl st = slip stitch
- sc = single crochet
- dc = double crochet
- sp = space
- st(s) = stitch(es)
- rep = repeat
- RS = right side

---

## GRANNY SQUARE PATTERN

**Make 48 squares total for baby blanket size:**
- 20 squares: Brown center (Color A), Tan middle (Color B), Cream outer (Color C)
- 16 squares: Tan center (Color B), Cream middle (Color C), Brown outer (Color A)
- 12 squares: Cream center (Color C), Brown middle (Color A), Tan outer (Color B)

### Basic Granny Square (All Color Combinations)

**Round 1** (Center Color):
- Ch 4, sl st to first ch to form ring (or use magic ring)
- Ch 3 (counts as first dc), 2 dc in ring, ch 2, *3 dc in ring, ch 2; rep from * 2 more times, sl st to top of beginning ch-3 to join
- **[12 dc + 4 ch-2 corner spaces]**
- Fasten off center color

**Round 2** (Middle Color):
- Join with sl st to any ch-2 corner space
- Ch 3 (counts as first dc), (2 dc, ch 2, 3 dc) in same corner space, ch 1, *(3 dc, ch 2, 3 dc) in next corner space, ch 1; rep from * 2 more times, sl st to top of beginning ch-3 to join
- **[24 dc + 4 ch-2 corner spaces + 4 ch-1 spaces]**
- Fasten off middle color

**Round 3** (Outer Color):
- Join with sl st to any ch-2 corner space
- Ch 3 (counts as first dc), (2 dc, ch 2, 3 dc) in same corner space, ch 1, 3 dc in next ch-1 space, ch 1, *(3 dc, ch 2, 3 dc) in next corner space, ch 1, 3 dc in next ch-1 space, ch 1; rep from * 2 more times, sl st to top of beginning ch-3 to join
- **[40 dc + 4 ch-2 corner spaces + 8 ch-1 spaces]**
- Do NOT fasten off; continue to Round 4

**Round 4** (Same Outer Color):
- Sl st to corner ch-2 space
- Ch 3 (counts as first dc), (2 dc, ch 2, 3 dc) in same corner space, ch 1, [3 dc in next ch-1 space, ch 1] twice, *(3 dc, ch 2, 3 dc) in next corner space, ch 1, [3 dc in next ch-1 space, ch 1] twice; rep from * 2 more times, sl st to top of beginning ch-3 to join
- **[56 dc + 4 ch-2 corner spaces + 12 ch-1 spaces]**
- Fasten off, leaving 6" tail for weaving in

**Finishing each square:** Weave in all ends securely. Block to 5" × 5" square.

---

## ASSEMBLY

### Color Placement Guide
Arrange your 48 squares in 6 columns × 8 rows following this suggested pattern (or create your own design):

```
Row 1: A-B-C-A-B-C
Row 2: B-C-A-B-C-A
Row 3: C-A-B-C-A-B
Row 4: A-B-C-A-B-C
Row 5: B-C-A-B-C-A
Row 6: C-A-B-C-A-B
Row 7: A-B-C-A-B-C
Row 8: B-C-A-B-C-A
```
*(A = Brown center square, B = Tan center square, C = Cream center square)*

This creates a random, natural hedgehog-colored pattern.

### Joining Method 1: Join-As-You-Go (Recommended for Beginners)

**For Second Square Onward:**
When working Round 4, join to adjacent square(s) as follows:

**To join one side:**
- Work corner and first side of Round 4 as normal
- When you reach the corner that will connect to previous square: Ch 1, drop loop from hook, insert hook from front to back through corresponding corner ch-2 space of adjacent square, pick up dropped loop and pull through, ch 1, complete corner with 3 dc in corner space
- Continue along joining side: Ch 1, drop loop, insert hook through corresponding ch-1 space of adjacent square, pick up loop and pull through (joining ch made), work 3 dc in next space on current square
- Repeat joining ch for each space along side
- Join next corner same as first joined corner
- Complete round normally, sl st to join

**Layout tip:** Join squares in rows, completing each row before starting the next.

### Joining Method 2: Whip Stitch (Alternative)

- Lay two squares RS together, matching stitches
- Thread yarn needle with 24" of matching yarn
- Working through back loops only of both squares, whip stitch along edge
- Secure ends and weave in

**Continue joining** all squares according to your layout plan.

---

## BORDER

**Round 1** (Color A - Brown):
- With RS facing, join Color A with sl st to any corner ch-2 space
- Ch 1, 3 sc in same corner space, *sc evenly along edge (approximately 1 sc in each dc and 1 sc in each ch-1 space across square sides, 1 sc in each seam between squares), 3 sc in next corner space; rep from * around entire blanket, sl st to first sc to join
- **Note:** Adjust sc count to keep edges flat and avoid puckers. Blanket should have approximately 30 sc per 5" square edge.

**Round 2** (Color A):
- Ch 1, sc in same st, sc in each st around, working 3 sc in center sc of each corner, sl st to first sc to join

**Round 3** (Color B - Tan):
- Change to Color B; ch 1, sc in same st, sc in each st around, working 3 sc in center sc of each corner, sl st to first sc to join

**Round 4** (Color C - Cream):
- Change to Color C; ch 1, sc in same st, sc in each st around, working 3 sc in center sc of each corner, sl st to first sc to join
- Fasten off

Weave in all remaining ends.

---

## OPTIONAL: HEDGEHOG FACE APPLIQUÉ

Add a sweet hedgehog face to one corner of your blanket!

**Materials needed:**
- Small amounts of black and pink yarn
- Embroidery needle

**Nose (Black):**
- Magic ring, ch 1, 6 sc in ring, pull tight, sl st to join
- Fasten off, leaving long tail for sewing

**Ears (make 2, Brown or Tan):**
- Ch 3, 3 dc in 3rd ch from hook, fasten off

**Assembly:**
- Position nose in one corner square
- Sew ears above nose, spaced 1" apart
- With black yarn, embroider two French knots for eyes above nose
- With pink yarn, embroider small mouth below nose
- Optional: Add tiny pink sc circles for cheek blush

---

## FINISHING

1. **Block entire blanket:** Pin to finished dimensions, spray with water or use steam, allow to dry completely
2. **Weave in any remaining ends** securely on wrong side
3. **Final check:** Inspect all joins for security

## Care Instructions

Machine wash cold on gentle cycle or hand wash. Lay flat to dry or tumble dry low. Do not bleach. Acrylic yarns are durable and easy-care, perfect for baby items and frequently-used blankets.

---

## Size Modifications

**Lap Blanket (40" × 50"):** Make 80 squares (8 wide × 10 long)
- Color A: 32 squares
- Color B: 27 squares
- Color C: 21 squares
- Yardage: approximately 2000 yards total

**Throw Blanket (50" × 60"):** Make 120 squares (10 wide × 12 long)
- Color A: 48 squares
- Color B: 40 squares
- Color C: 32 squares
- Yardage: approximately 3000 yards total

**General formula:**
- Squares needed = (desired width ÷ 5") × (desired length ÷ 5")
- Approximate yardage = 25 yards per square

---

## Skill Building Tips for Beginners

1. **Practice first:** Make 2-3 practice squares before starting your blanket to get comfortable with the pattern
2. **Count your stitches:** Use the stitch counts provided to verify each round
3. **Maintain tension:** Try to keep consistent tension across all squares for uniform size
4. **Block as you go:** Block squares in batches to make assembly easier
5. **Color changes:** When fastening off colors, leave 6" tails—longer tails are easier to weave in
6. **Take breaks:** This is a large project! Work in manageable sessions

---

## Troubleshooting

**Squares aren't the same size?**
- Check your tension—try to crochet with consistent tightness
- Block all squares to standardize size
- Use stitch markers to track corners and count stitches

**Edges are wavy?**
- You may be working too many stitches; try counting more carefully
- Adjust border by working fewer sc in Round 1

**Running out of yarn?**
- Granny squares are very forgiving—substitute a similar color
- Add an extra border round in available color
- The mixed color pattern accommodates yarn changes well

---

## Design Credits & Copyright

Pattern designed by [Designer Name]
© [Year] All rights reserved

This pattern is for personal use only. Finished items may be sold in small quantities with credit to designer. Please do not reproduce, share, or sell this pattern.

---

**Enjoy your cozy hedgehog blanket!** Share your finished project on social media with #HedgehogGrannyBlanket
Disclaimer: This pattern was generated by AI and should be reviewed for accuracy before use. While we strive for quality, AI-generated content may contain errors. Please verify measurements, stitch counts, and instructions before beginning your project. Generated by purlJam.uk
Access your pattern anytime
Bookmark this page to access your pattern anytime