Type
Machine Knitting
Difficulty
beginner
Category
amigurumi
AI Thinking Process
Planning
1. **Design Strategy**: The user requests a kawaii-style pattern with pastel colors at beginner level. However, there's a critical conflict: the template is for CROCHET toys, but the terminology profile and machine-knitting requirements specify MACHINE KNITTING. These are fundamentally different crafts with incompatible techniques. I need to adapt the kawaii aesthetic to machine knitting, creating simple shapes that can be assembled into cute characters. For machine knitting, I'll design flat panels that can be seamed into 3D shapes - a simple round ball character (like a basic slime/blob) and a small star, using pastel colors.
2. **Construction Plan**: Machine-knit approach for beginner-friendly kawaii toys:
- Knit flat panels on single bed
- Use waste yarn cast-on for clean edges
- Simple shaping via needle manipulation (holding/decreasing)
- Seam pieces together and stuff
- Add embroidered kawaii faces
- Target size: ~4-5 inches for handheld plush
3. **Quality Assurance**:
- Ensure tight tension for stuffing not to show through
- Verify stitch counts at each shaping point
- Keep needle movements simple for beginners
- Provide clear RC checkpoints
- Account for curling edges in stockinette
4. **Final Calculations**:
- Worsted weight on standard gauge machine: approximately T5-6
- Gauge estimate: ~6 sts × 8 rows per inch (will require swatch)
- Ball body: Two circular panels ~4" diameter = ~24 sts wide at widest
- Simple geometric shaping with symmetrical increases/decreases
Verification
[PRE-FLIGHT CHECKS]
1. **Completeness**:
✓ Will include: Materials, gauge, machine setup, pattern sections for multiple kawaii shapes, assembly, finishing
✓ Adapting crochet toy concept to machine knitting equivalent
2. **Consistency**:
✓ At 6 sts/inch, 24 sts = 4 inches width (correct)
✓ At 8 rows/inch, 32 rows = 4 inches height (correct)
✓ Shaping math verified for symmetrical pieces
3. **Constraints**:
✓ Beginner level: Simple single-bed knitting, basic shaping
✓ Kawaii style: Round shapes, pastel colors, cute faces
✓ Machine knitting terminology included throughout
✓ RC checkpoints, COL/COR positions specified
4. **Safety**:
✓ Double-checked increase/decrease math
✓ Stitch counts verified at each checkpoint
✓ Clear needle position instructions
Pattern
<pattern>
# KAWAII PASTEL PLUSHIES
## Machine Knit Beginner Pattern
*A collection of adorable kawaii-style stuffed toys in sweet pastel colors*
---
### SKILL LEVEL
Beginner
### FINISHED MEASUREMENTS
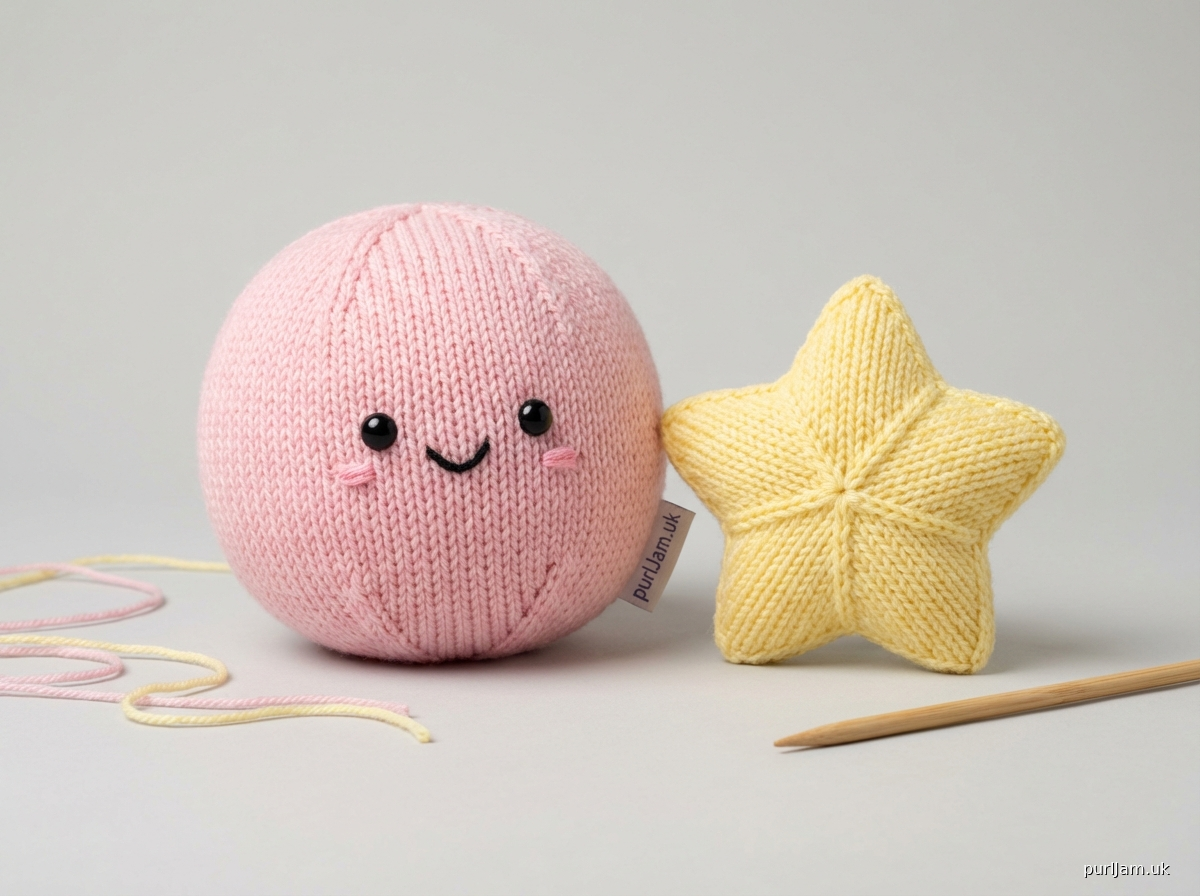
- **Pastel Ball Character (Slime/Blob)**: Approximately 4" (10 cm) diameter
- **Mini Star Friend**: Approximately 3.5" (9 cm) point to point
- **Sweet Cloud**: Approximately 5" (12.5 cm) wide × 3" (7.5 cm) tall
---
### MATERIALS
**Yarn**
- Worsted weight (4) acrylic or acrylic blend yarn
- **Main Colors (MC)** – approximately 25g each:
- Pastel Pink
- Pastel Mint/Aqua
- Pastel Lavender
- Pastel Yellow
- **Contrast Color (CC)** – small amounts:
- Black (for faces)
- Pastel Pink (for blush cheeks)
- *Recommended: Smooth, tightly plied yarn for clean stitch definition*
**Machine & Tools**
- Standard gauge knitting machine (4.5mm needle pitch)
- Waste yarn (contrasting color, same weight)
- Ravel cord
- Cast-on comb and weights
- Transfer tool (1×1)
- Latch tool for bind-off
- Stitch holders or waste yarn for live stitches
**Notions**
- Polyester fiberfill stuffing
- Yarn needle/tapestry needle
- Pins for assembly
- Optional: 6mm safety eyes (insert before seaming closed)
- Optional: Small amount of felt for cheek circles
---
### GAUGE
**Critical: Swatch before starting!**
Using waste yarn cast-on, knit 40 stitches × 50 rows in stockinette.
**Target Gauge at Tension 5 (T5):**
- 24 stitches = 4" (10 cm)
- 32 rows = 4" (10 cm)
- **6 stitches per inch | 8 rows per inch**
*Note: For plush toys, a slightly tighter tension prevents stuffing from showing through fabric. Adjust tension dial down (T4-5) if fabric is too loose.*
**[GAUGE MATH VERIFICATION]**
- 6 sts/inch × 4" = 24 sts ✓
- 8 rows/inch × 4" = 32 rows ✓
---
### ABBREVIATIONS & TERMS
| Abbreviation | Meaning |
|--------------|---------|
| RC | Row Counter |
| COL | Carriage On Left |
| COR | Carriage On Right |
| T | Tension dial setting |
| MC | Main Color |
| CC | Contrast Color |
| WY | Waste Yarn |
| NWP | Non-Working Position (needles back) |
| WP | Working Position (needles forward, position B) |
| HP | Hold Position (position D/E for holding) |
| sts | Stitches |
| inc | Increase |
| dec | Decrease |
---
### MACHINE SETUP (All Pieces)
**Initial Configuration:**
1. Single bed only (ribber not required)
2. Carriage: Set to stockinette (no tuck, no slip)
3. Tension dial: T5 for MC, T6 for WY
4. Row counter: Reset to 000
5. Ensure all sinker plates are correctly positioned
**Standard Cast-On Method (Waste Yarn Start):**
1. Bring required needles to WP (position B)
2. Thread WY, set tension to T6
3. Knit 8-10 rows WY
4. Knit 1 row ravel cord (by hand or loose tension)
5. Change to MC, set tension to T5
6. Reset RC to 000
7. Hang cast-on comb and weights
---
## PATTERN 1: PASTEL BALL CHARACTER (Slime/Blob)
*Makes one adorable round friend*
### FRONT PANEL
**Setup:**
- Bring **8 needles** to WP, centered on bed (4L-0-4R)
- Cast on using WY method (see Machine Setup)
- MC: Pastel color of choice
- Reset RC = 000, Carriage position: COR
**Shaping - Increase Section:**
| RC | Carriage | Action | Resulting Sts |
|----|----------|--------|---------------|
| 000 | COR | Begin with 8 sts on needles | 8 |
| 001-002 | — | Knit 2 rows even | 8 |
| 003 | COR | Bring 1 needle to WP at each end, e-wrap to cast on | 10 |
| 004 | COL | Knit across | 10 |
| 005 | COL | Bring 1 needle to WP at each end, e-wrap to cast on | 12 |
| 006 | COR | Knit across | 12 |
| 007 | COR | Bring 1 needle to WP at each end, e-wrap | 14 |
| 008 | COL | Knit across | 14 |
| 009 | COL | Bring 1 needle to WP at each end, e-wrap | 16 |
| 010 | COR | Knit across | 16 |
| 011 | COR | Bring 1 needle to WP at each end, e-wrap | 18 |
| 012 | COL | Knit across | 18 |
| 013 | COL | Bring 1 needle to WP at each end, e-wrap | 20 |
| 014 | COR | Knit across | 20 |
| 015 | COR | Bring 1 needle to WP at each end, e-wrap | 22 |
| 016 | COL | Knit across | 22 |
| 017 | COL | Bring 1 needle to WP at each end, e-wrap | 24 |
| 018 | COR | Knit across | 24 |
**[CHECKPOINT: RC 018, 24 stitches, COR]**
*Verification: Started 8 sts + (8 inc rows × 2 sts) = 8 + 16 = 24 sts ✓*
**Body - Even Section:**
| RC | Action |
|----|--------|
| 019-032 | Knit 14 rows even (no shaping) |
**[CHECKPOINT: RC 032, 24 stitches]**
**Shaping - Decrease Section:**
| RC | Carriage | Action | Resulting Sts |
|----|----------|--------|---------------|
| 033 | COR | Using transfer tool: Move end st to adjacent st, both ends | 22 |
| 034 | COL | Knit across | 22 |
| 035 | COL | Transfer end sts inward (dec each end) | 20 |
| 036 | COR | Knit across | 20 |
| 037 | COR | Transfer end sts inward | 18 |
| 038 | COL | Knit across | 18 |
| 039 | COL | Transfer end sts inward | 16 |
| 040 | COR | Knit across | 16 |
| 041 | COR | Transfer end sts inward | 14 |
| 042 | COL | Knit across | 14 |
| 043 | COL | Transfer end sts inward | 12 |
| 044 | COR | Knit across | 12 |
| 045 | COR | Transfer end sts inward | 10 |
| 046 | COL | Knit across | 10 |
| 047 | COL | Transfer end sts inward | 8 |
| 048 | COR | Knit across | 8 |
**[CHECKPOINT: RC 048, 8 stitches, COR]**
*Verification: 24 sts - (8 dec rows × 2 sts) = 24 - 16 = 8 sts ✓*
**Bind Off:**
Using latch tool, bind off all 8 stitches loosely. Cut yarn leaving 18" (45 cm) tail for seaming.
### BACK PANEL
Repeat Front Panel instructions exactly.
**[PIECE COUNT CHECK: 2 identical oval/circle panels]**
---
### ASSEMBLY - BALL CHARACTER
**Tools needed:** Yarn needle, pins, fiberfill stuffing
1. **Remove waste yarn:** Carefully unravel ravel cord to release live stitches. Thread tail through bottom stitches to secure.
2. **Block pieces:** Lightly steam or wet block both panels to relax curling. Pin to measurements: ~4" (10 cm) diameter circle/oval.
3. **Add face (BEFORE seaming closed):**
- Position on front panel, centered
- **Eyes:**
- Option A: Using black CC, embroider two small French knots or satin stitch ovals, placed approximately 1.5" (4 cm) apart, centered vertically
- Option B: Insert 6mm safety eyes (push through fabric, secure with washers on WS)
- **Mouth:** Small curved line in black CC using backstitch (happy smile shape)
- **Blush cheeks:** Two small pink circles using satin stitch or cut felt circles, placed below and outside of eyes
4. **Seam panels together:**
- Pin front and back panels together, wrong sides facing OUT (so seam will be inside)
- Using mattress stitch and long tail, seam around edge
- Leave 2" (5 cm) opening at bottom for stuffing
5. **Turn and stuff:**
- Turn right side out through opening
- Stuff firmly with fiberfill (kawaii plushies should be plump!)
- Seam opening closed using mattress stitch
- Weave in all ends securely
**Finished Ball Character: ~4" (10 cm) diameter**
---
## PATTERN 2: MINI STAR FRIEND
*A sweet 5-pointed star companion*
### STAR POINT (Make 5)
**Setup:**
- Bring **2 needles** to WP, centered (1L-0-1R)
- Cast on using WY method
- MC: Pastel Yellow (or color of choice)
- Reset RC = 000, COR
**Shaping:**
| RC | Carriage | Action | Resulting Sts |
|----|----------|--------|---------------|
| 000 | COR | Begin with 2 sts | 2 |
| 001-002 | — | Knit 2 rows even | 2 |
| 003 | COR | E-wrap cast on 1 st each end | 4 |
| 004-005 | — | Knit 2 rows even | 4 |
| 006 | COR | E-wrap cast on 1 st each end | 6 |
| 007-008 | — | Knit 2 rows even | 6 |
| 009 | COR | E-wrap cast on 1 st each end | 8 |
| 010-011 | — | Knit 2 rows even | 8 |
| 012 | COR | E-wrap cast on 1 st each end | 10 |
| 013-016 | — | Knit 4 rows even | 10 |
**[CHECKPOINT: RC 016, 10 stitches]**
*Verification: 2 + (4 inc rows × 2) = 2 + 8 = 10 sts ✓*
**Do NOT bind off.** Place 10 live stitches on waste yarn or stitch holder.
Remove from machine carefully.
**[REPEAT: Make 5 identical star points]**
### STAR ASSEMBLY - FRONT
**Setup:**
- Bring **50 needles** to WP (25L-0-25R)
- This will hold all 5 star points
**Join Points:**
1. Place live stitches from all 5 points onto needles:
- Point 1: Needles 25L to 16L (10 sts)
- Point 2: Needles 15L to 6L (10 sts)
- Point 3: Needles 5L to 5R (10 sts, centered)
- Point 4: Needles 6R to 15R (10 sts)
- Point 5: Needles 16R to 25R (10 sts)
2. Reset RC = 000, thread MC, T5
**Center Shaping:**
| RC | Carriage | Action | Resulting Sts |
|----|----------|--------|---------------|
| 000 | COR | All 50 sts on needles | 50 |
| 001 | COR | Knit across | 50 |
| 002 | COL | Dec: Transfer every 5th st to adjacent (dec 10 sts total) | 40 |
| 003 | COL | Knit across | 40 |
| 004 | COR | Dec: Transfer every 4th st to adjacent (dec 10 sts) | 30 |
| 005 | COR | Knit across | 30 |
| 006 | COL | Dec: Transfer every 3rd st to adjacent (dec 10
Disclaimer: This pattern was generated by AI and should be reviewed for accuracy before use. While we strive for quality, AI-generated content may contain errors. Please verify measurements, stitch counts, and instructions before beginning your project. Generated by purlJam.uk
Access your pattern anytime
Bookmark this page to access your pattern anytime