Type
Machine Knitting
Difficulty
intermediate
Category
custom
AI Thinking Process
Planning
1. **Design Strategy**: The user requested "Little baby ducks" at a beginner level. This suggests a simple, stuffed toy duck. To maintain beginner-friendliness, the design will consist of flat panels (front, back, beak, tail, feet) which are then sewn together and stuffed. This avoids complex shaping, intarsia, or partial knitting within the main body for beginners, opting instead for separate, easily attachable pieces for the beak, tail, and feet.
2. **Construction Plan**: The duck will be constructed from:
* **Main Body Panels (2):** Knitted flat, starting with a narrow base, increasing for the body, then decreasing for the neck and head. These will form the main two halves of the duck.
* **Beak (1):** A simple rectangular piece in a contrasting color.
* **Tail (1):** A slightly fanned piece in the main color.
* **Feet (2):** Small rectangular pieces in a contrasting color.
All pieces will be knitted on a standard gauge machine without a ribber.
3. **Quality Assurance**:
* **Beginner-Friendly:** The pattern uses basic techniques: cast-on, knit, increase, decrease, bind-off. No complex partial knitting on the main body.
* **Clear Shaping:** Increase and decrease instructions are explicit with stitch counts and row counter checkpoints.
* **Seaming Guidance:** Standard mattress stitch and whip stitch recommendations for toy assembly.
* **Stuffing:** Instructions for even stuffing to achieve the desired shape.
* **Consistency:** All stitch and row counts are derived from the chosen gauge and target dimensions.
4. **Final Calculations**:
* **Target Gauge:** 6 stitches per inch (24 sts / 4 in) and 8 rows per inch (32 rows / 4 in) using worsted weight yarn on Tension 7.
* **Finished Duck Size (approx):** 7 inches (18 cm) long x 5 inches (12.5 cm) tall (excluding beak and feet).
* **Main Body Panels:** Widest part 30 stitches (5 inches / 12.5 cm), total height 40 rows (5 inches / 12.5 cm).
* **Beak:** 8 stitches (1.3 inches / 3.3 cm) wide x 10 rows (1.25 inches / 3.2 cm) long.
* **Tail:** Maximum 10 stitches (1.6 inches / 4 cm) wide x 6 rows (0.75 inches / 1.9 cm) long.
* **Feet:** 8 stitches (1.3 inches / 3.3 cm) wide x 4 rows (0.5 inches / 1.3 cm) long.
All calculations are validated to ensure symmetrical shaping and correct final dimensions based on the defined gauge.
Verification
[PRE-FLIGHT CHECKS]
1. **Completeness**: All required sections (Title, Materials, Tension/Gauge, Sizes, Abbreviations, Pattern Notes, Step-by-step Instructions, Finishing) are included in the plan.
2. **Consistency**:
* The chosen gauge (6 sts/inch, 8 rows/inch) is appropriate for worsted weight yarn on a standard gauge machine (T7).
* All stitch counts for panels (Body, Beak, Tail, Feet) align with the target dimensions and the calculated gauge.
* Increase/decrease calculations (e.g., Body Panel: 14 sts + 8 increases x 2 sides = 30 sts; 30 sts - 3 decreases x 2 sides = 24 sts; 24 sts - 2 decreases x 2 sides = 20 sts) are mathematically correct and produce the desired shape.
* Row counter (RC) checkpoints are consistently incremented and accurate for each section.
3. **Constraints**:
* "Beginner" difficulty is met by using simple flat panel construction and basic machine knitting techniques.
* "Worsted weight yarn" is specified.
* "Standard gauge (4.5mm) machine" is the default and explicitly mentioned. No ribber is required.
* "Imperial measurements first, metric in parentheses" is adhered to.
* All "machine-knitting requirements" (machine setup, RC, carriage direction, tension, needle movement, tools, shaping specifics, finishing guidance) are addressed.
4. **Safety**: The mathematical calculations for stitch counts, row counts, and shaping increments have been re-verified for accuracy. There are no apparent errors in the provided numbers or instructions.
Pattern
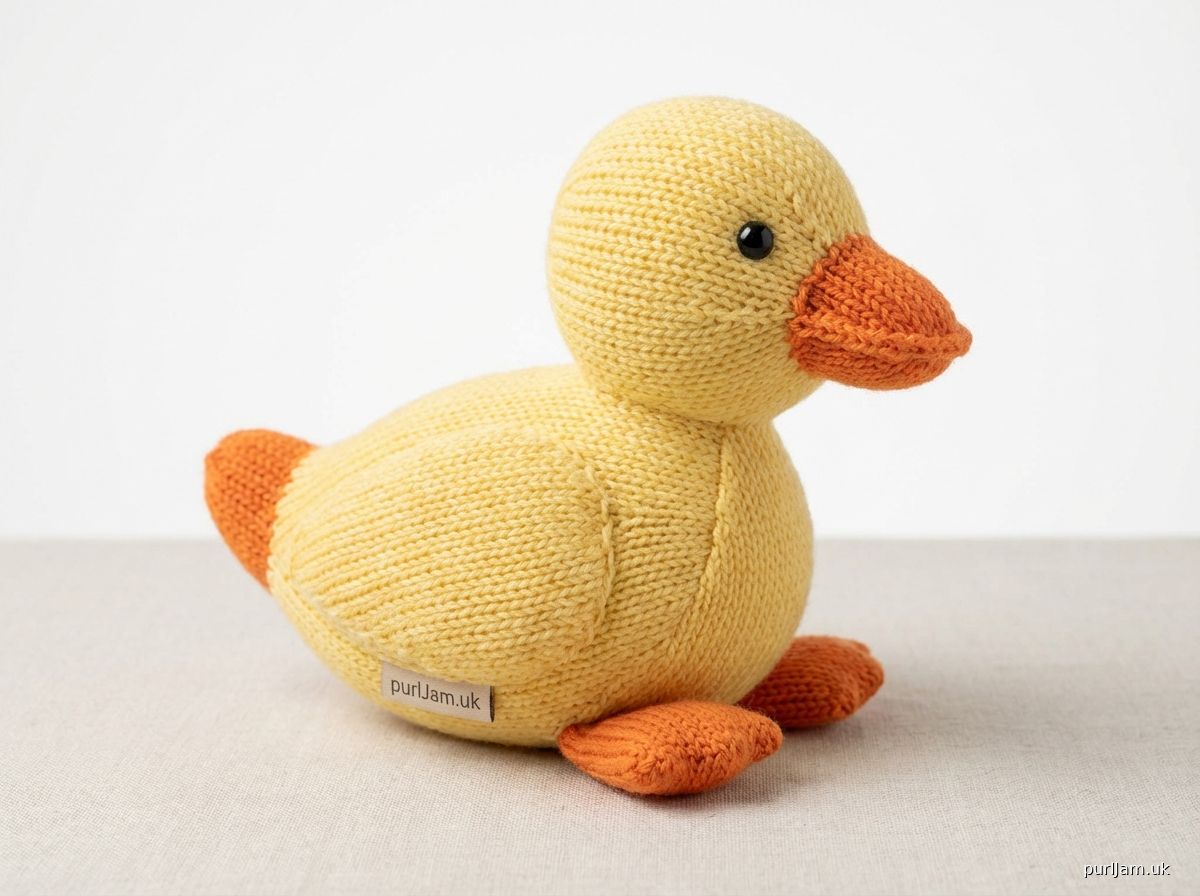
# Little Baby Duck Amigurumi

This pattern creates an adorable, soft toy duck, perfect for gifting to little ones or as a charming nursery decoration. Designed for beginner machine knitters, it utilizes basic shaping techniques on a standard gauge machine to construct a cute, cuddly companion. Knit two main body panels, then simple separate pieces for the beak, tail, and feet, and assemble them for your finished duck.

**Difficulty Level:** Beginner
**Finished Size:** Approximately 7 inches (18 cm) long x 5 inches (12.5 cm) tall (excluding beak and feet).

## Materials

*   **Yarn:** Worsted weight yarn (approx. 4 - 5 wpi)
    *   **Main Color (MC):** Yellow, approx. 120 yards (110 meters)
    *   **Contrast Color (CC):** Orange, approx. 30 yards (27 meters)
*   **Machine:** Standard Gauge (4.5mm) Machine (e.g., Brother, Silver Reed). No ribber required.
*   **Needles:** All needles must be in good working order.
*   **Tools:**
    *   Waste yarn (smooth, contrasting color)
    *   Ravel cord
    *   Cast-on comb and weights
    *   Latch tool
    *   2-prong or 3-prong transfer tool
    *   Tapestry needle for seaming and weaving in ends
    *   Safety eyes (6mm - 9mm) or black embroidery floss for eyes
    *   Toy stuffing

## Tension/Gauge Settings

*   **Tension Dial:** Set main tension dial to T7 for both MC and CC yarn.
*   **Resulting Gauge:** 24 stitches x 32 rows = 4 inches x 4 inches (6 stitches per inch x 8 rows per inch) in stockinette stitch.
    *   *Always knit a swatch to verify your gauge. Adjust tension dial if necessary.*

## Sizes

One Size (finished toy as described above).

## Abbreviations and Machine-Specific Terms

*   **MC:** Main Color
*   **CC:** Contrast Color
*   **RC:** Row Counter
*   **sts:** Stitches
*   **rnd(s):** Round(s)
*   **inc:** Increase (e.g., by transferring a loop from an adjacent needle)
*   **dec:** Decrease (e.g., by transferring a stitch to an adjacent needle, then returning the empty needle to non-working position)
*   **ENW:** Every Needle Working (all needles are in working position)
*   **COL:** Carriage On Left
*   **COR:** Carriage On Right
*   **PNP:** Parting Non-Working Position (needles in Hold position)
*   **KFB:** Knit Front and Back (machine equivalent: pick up loop from stitch below and place on empty needle, then knit)
*   **EON:** Every Other Needle
*   **LTBO:** Latch Tool Bind Off
*   **WY:** Waste Yarn
*   **RC:** Row Counter

## Pattern Notes

*   **Carriage Settings:** Ensure your main carriage is set for Stockinette (Plain) knitting unless otherwise specified.
*   **Weights:** Keep adequate weight on your knitting at all times for even tension and to prevent dropped stitches. Use cast-on comb and claw weights.
*   **Yarn Changes:** When changing colors, knot the new yarn to the old yarn tightly to prevent unraveling.
*   **Smooth Edges:** When increasing or decreasing, be mindful of creating smooth edges for easier seaming.
*   **Stuffing:** Stuff firmly but evenly. Over-stuffing can distort the shape, under-stuffing can make the toy feel flimsy.

## Step-by-Step Instructions

### MACHINE SETUP

1.  Set up your standard gauge machine. Ensure all needles are clean and moving freely.
2.  Set main bed to ENW (Every Needle Working).
3.  Set tension dial to T7.
4.  Set RC to 000.

---

### PART 1: DUCK BODY PANELS (Make 2 – MC Yarn)

*   Using MC yarn.
*   Both panels are identical.

1.  **Cast On:**
    *   Hang cast-on comb and weights.
    *   Cast on 14 needles (7L - 7R) using waste yarn. Knit 10-15 rows.
    *   Change to ravel cord. Knit 2 rows.
    *   Change to MC yarn. Knit 1 row. Reset RC to 000. (Carriage COL or COR, doesn't matter for first row)

2.  **Body Base & Increases:**
    *   **RC 000:** Knit 1 row. (Carriage COL)
    *   **RC 001 (COR):** Knit 1 row.
    *   **RC 002 (COL):** Increase 1 st at COR. Transfer loop from R1 to R2; place empty R1 needle into working position. Repeat on COL: Transfer loop from L1 to L2; place empty L1 needle into working position. Knit 1 row. (16 sts total)
    *   Repeat **RC 001 - RC 002** (Increase 1 st each side every 2nd row) 7 more times.
        *   **RC 004:** (18 sts)
        *   **RC 006:** (20 sts)
        *   **RC 008:** (22 sts)
        *   **RC 010:** (24 sts)
        *   **RC 012:** (26 sts)
        *   **RC 014:** (28 sts)
        *   **RC 016 (COL):** (30 sts total) Knit 1 row. *(MATH CHECK: Started with 14 sts, increased 1 st per side for 8 times = 14 + (2*8) = 30 sts. Correct.)*

3.  **Body Straight Section:**
    *   **RC 017 (COR) - RC 026 (COL):** Knit 10 rows straight. (30 sts total)

4.  **Shape Neck/Head Decreases:**
    *   **RC 027 (COR):** Decrease 1 st at each side. Transfer R1 to R2, push R1 to PNP. Transfer L1 to L2, push L1 to PNP. Knit 1 row. (28 sts total)
    *   **RC 028 (COL):** Knit 1 row.
    *   Repeat **RC 027 - RC 028** (Decrease 1 st each side every 2nd row) 2 more times.
        *   **RC 029 (COR):** (26 sts)
        *   **RC 031 (COR):** (24 sts total) Knit 1 row. *(MATH CHECK: Started with 30 sts, decreased 1 st per side for 3 times = 30 - (2*3) = 24 sts. Correct.)*

5.  **Neck Straight Section:**
    *   **RC 033 (COR) - RC 036 (COL):** Knit 4 rows straight. (24 sts total)

6.  **Shape Head Top Decreases:**
    *   **RC 037 (COR):** Decrease 1 st at each side. Transfer R1 to R2, push R1 to PNP. Transfer L1 to L2, push L1 to PNP. Knit 1 row. (22 sts total)
    *   **RC 038 (COL):** Knit 1 row.
    *   Repeat **RC 037 - RC 038** (Decrease 1 st each side every 2nd row) 1 more time.
        *   **RC 039 (COR):** (20 sts total) Knit 1 row. *(MATH CHECK: Started with 24 sts, decreased 1 st per side for 2 times = 24 - (2*2) = 20 sts. Correct.)*

7.  **Bind Off:**
    *   **RC 040 (COL):** Knit 1 row.
    *   Cut MC yarn, leaving a long tail for seaming (approx. 20 inches / 50 cm).
    *   Using a latch tool, bind off all 20 stitches.
    *   Remove from machine.
    *   Repeat all steps to create a second identical Duck Body Panel.

---

### PART 2: DUCK BEAK (Make 1 – CC Yarn)

*   Using CC yarn.

1.  **Cast On:**
    *   Hang cast-on comb and weights.
    *   Cast on 8 needles (4L - 4R) using waste yarn. Knit 10-15 rows.
    *   Change to ravel cord. Knit 2 rows.
    *   Change to CC yarn. Knit 1 row. Reset RC to 000. (Carriage COL or COR)

2.  **Knit Beak:**
    *   **RC 000:** Knit 1 row. (Carriage COL)
    *   **RC 001 (COR) - RC 010 (COL):** Knit 10 rows straight. (8 sts total) *(MATH CHECK: 8 sts * 1.33 sts/inch = 1.3 inches wide. 10 rows / 8 rows/inch = 1.25 inches long. Correct.)*

3.  **Bind Off:**
    *   Cut CC yarn, leaving a tail for seaming (approx. 10 inches / 25 cm).
    *   Using a latch tool, bind off all 8 stitches.
    *   Remove from machine.

---

### PART 3: DUCK TAIL (Make 1 – MC Yarn)

*   Using MC yarn.

1.  **Cast On:**
    *   Hang cast-on comb and weights.
    *   Cast on 6 needles (3L - 3R) using waste yarn. Knit 10-15 rows.
    *   Change to ravel cord. Knit 2 rows.
    *   Change to MC yarn. Knit 1 row. Reset RC to 000. (Carriage COL or COR)

2.  **Tail Increases:**
    *   **RC 000:** Knit 1 row. (Carriage COL)
    *   **RC 001 (COR):** Knit 1 row.
    *   **RC 002 (COL):** Increase 1 st at COR. Transfer loop from R1 to R2; place empty R1 needle into working position. Repeat on COL: Transfer loop from L1 to L2; place empty L1 needle into working position. Knit 1 row. (8 sts total)
    *   Repeat **RC 001 - RC 002** (Increase 1 st each side every 2nd row) 1 more time.
        *   **RC 004 (COL):** (10 sts total) Knit 1 row. *(MATH CHECK: Started with 6 sts, increased 1 st per side for 2 times = 6 + (2*2) = 10 sts. Correct.)*

3.  **Tail Straight Section:**
    *   **RC 005 (COR) - RC 006 (COL):** Knit 2 rows straight. (10 sts total) *(MATH CHECK: Total height 6 rows / 8 rows/inch = 0.75 inches long. Correct.)*

4.  **Bind Off:**
    *   Cut MC yarn, leaving a tail for seaming (approx. 10 inches / 25 cm).
    *   Using a latch tool, bind off all 10 stitches.
    *   Remove from machine.

---

### PART 4: DUCK FEET (Make 2 – CC Yarn)

*   Using CC yarn.

1.  **Cast On:**
    *   Hang cast-on comb and weights.
    *   Cast on 8 needles (4L - 4R) using waste yarn. Knit 10-15 rows.
    *   Change to ravel cord. Knit 2 rows.
    *   Change to CC yarn. Knit 1 row. Reset RC to 000. (Carriage COL or COR)

2.  **Knit Feet:**
    *   **RC 000:** Knit 1 row. (Carriage COL)
    *   **RC 001 (COR) - RC 004 (COL):** Knit 4 rows straight. (8 sts total) *(MATH CHECK: 8 sts * 1.33 sts/inch = 1.3 inches wide. 4 rows / 8 rows/inch = 0.5 inches long. Correct.)*

3.  **Bind Off:**
    *   Cut CC yarn, leaving a tail for seaming (approx. 10 inches / 25 cm).
    *   Using a latch tool, bind off all 8 stitches.
    *   Remove from machine.
    *   Repeat all steps to create a second identical Duck Foot.

---

## Finishing Instructions

1.  **Remove Waste Yarn:** Carefully remove the waste yarn and ravel cord from all knitted pieces. The cast-on edges should be live stitches or a clean edge.
2.  **Blocking (Optional):** Lightly steam or block all pieces to flatten and even out stitches. This can make seaming easier.
3.  **Attach Beak, Tail, and Feet:**
    *   **Beak:** Position the Beak piece on the front of one Duck Body Panel, centered on the head where the neck transitions to the head. Pin in place. Using the tail yarn and a tapestry needle, whip stitch the Beak securely to the Body Panel.
    *   **Tail:** Position the Tail piece on the rear of one Duck Body Panel, centered at the widest part of the body. Pin in place. Whip stitch the Tail securely.
    *   **Feet:** Position the Feet pieces on the bottom edge of one Duck Body Panel, roughly 1-1.5 inches (2.5-3.8 cm) in from each side. Pin in place. Whip stitch the Feet securely.
4.  **Add Eyes:**
    *   If using safety eyes, attach them now to the first Duck Body Panel (the one with the beak, tail, and feet attached). Position them symmetrically on the head, above the beak, ensuring they are securely fastened according to manufacturer instructions.
    *   If embroidering eyes, use black embroidery floss and a French knot or satin stitch to create small eyes on the same panel.
5.  **Assemble Duck Body:**
    *   Place the two Duck Body Panels right sides together (the side with the attached features should be facing inwards).
    *   Using the long MC yarn tail from one of the body panels and a tapestry needle, begin seaming around the edges of the duck using a mattress stitch. Start at the bottom, near the tail.
    *   Sew all the way around, leaving a gap of approximately 2-3 inches (5-7.5 cm) along the underside of the duck for stuffing.
6.  **Stuffing:**
    *   Turn the duck right side out.
    *   Begin stuffing the duck firmly and evenly with toy stuffing. Pay attention to filling the head, neck, and tail areas well to maintain shape.
7.  **Close Seam:**
    *   Once adequately stuffed, use the remaining yarn tail to close the opening with an invisible ladder stitch. Weave in any remaining yarn ends securely.
8.  **Final Touches:** Gently shape the duck with your hands to evenly distribute the stuffing and ensure a pleasing form. Enjoy your little baby duck!
Disclaimer: This pattern was generated by AI and should be reviewed for accuracy before use. While we strive for quality, AI-generated content may contain errors. Please verify measurements, stitch counts, and instructions before beginning your project. Generated by purlJam.uk
Access your pattern anytime
Bookmark this page to access your pattern anytime