Type
Crochet
Difficulty
easy
Category
pullover
Pattern
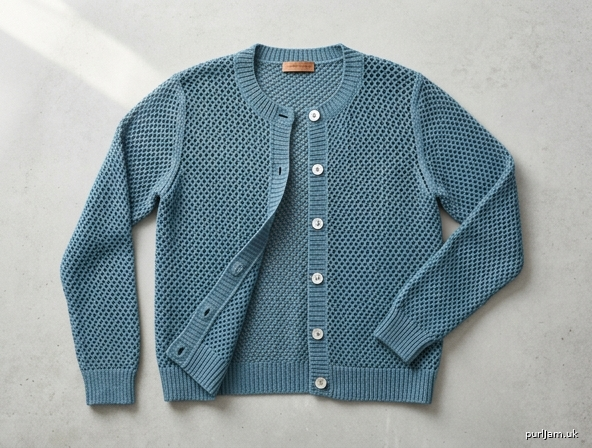
# Lace Mesh Summer Cardigan
### An Easy Button-Front Pullover-Style Cardigan in Sport-Weight Yarn

A light, airy cardigan worked in a simple double-crochet mesh — perfect for warm-weather layering. Worked flat in pieces and seamed, with a buttoned front closure ("close front") so it can be worn open or buttoned up.

---

## Skill Level
**Easy** — uses only chain (ch), single crochet (sc), and double crochet (dc). The mesh is a simple 2-stitch repeat.

---

## Sizes
| Size | To Fit Bust | Finished Bust | Ease |
|------|-------------|---------------|------|
| Small | 34–36" | 38" | ~4" |
| Medium | 38–40" | 42" | ~4" |
| Large | 42–44" | 46" | ~4" |
| XL | 46–48" | 50" | ~4" |
| 2XL | 50–52" | 54" | ~4" |

Sample shown in size Small. Instructions are written for **Small**, with larger sizes in parentheses: **S (M, L, XL, 2XL)**.

### Finished Measurements
| Measurement | S | M | L | XL | 2XL |
|-------------|---|---|---|----|-----|
| Finished bust (buttoned) | 38" | 42" | 46" | 50" | 54" |
| Back width | 19" | 21" | 23" | 25" | 27" |
| Each front width (before bands) | 9.5" | 10.5" | 11.5" | 12.5" | 13.5" |
| Body length (cuff ribbing to shoulder) | 23" | 23.5" | 24" | 24.5" | 25" |
| Sleeve length (cuff to underarm) | 17" | 17" | 17.5" | 17.5" | 18" |

---

## Materials
- **Yarn:** Sport weight (#2 Fine), cotton or cotton blend recommended for drape and breathability.
  - Approx. yardage: **1100 (1250, 1400, 1550, 1700) yds**
- **Hook:** US G/6 (4.0 mm) for body; US 7 (4.5 mm) if needed to meet gauge.
- **Smaller hook:** US E/4 (3.5 mm) for ribbing and bands (optional, for firmer edges).
- **Notions:** Tapestry needle, stitch markers, 5–6 buttons (¾" / 19 mm), sewing needle and thread.

---

## Gauge
**20 sts and 12 rows = 4" (10 cm)** in lace mesh pattern, after blocking, using G/6 (4.0 mm) hook.

> **Mesh stitch reminder:** One mesh unit = 1 dc + ch 1. So 5 sts (dc/ch) = 1".

**Gauge swatch:** Ch 24. Work mesh pattern (below) for 14 rows. Block, then measure center 4". Adjust hook size to match gauge — **checking gauge is essential for proper fit and drape.**

---

## Abbreviations (US Terms)
- **ch** — chain
- **sc** — single crochet
- **dc** — double crochet
- **st(s)** — stitch(es)
- **sp** — space
- **BLO** — back loop only
- **RS / WS** — right side / wrong side
- **rep** — repeat

---

## Stitch Patterns

**Mesh Pattern** (worked over an even number of base stitches + 1):
- **Row 1 (RS):** Ch 4 (counts as dc + ch 1), skip first 2 sts, *dc in next st, ch 1, skip next st; rep from * to last st, dc in last st. Turn.
- **Row 2:** Ch 4 (counts as dc + ch 1), *dc in next dc, ch 1; rep from *, ending dc in 3rd ch of turning ch. Turn.
- Rep Row 2 for pattern.

**SC Ribbing** (worked sideways in BLO):
- Ch desired height. Row 1: sc in 2nd ch from hook and each ch across. Turn. Following rows: ch 1, sc in BLO of each st. Turn.

---

## Pattern Notes
- The body is worked flat in five pieces: **Back, Left Front, Right Front, and two Sleeves**, then seamed.
- Ribbing is worked sideways first, then stitches are picked up along its long edge for the body. (Alternatively, work ribbing rows downward — see note.)
- Turning ch-4 counts as **1 dc + ch 1** throughout the mesh.
- This is a **cardigan with a close (button) front**: each front is half the body plus a 1" buttonband overlap, finished with buttonbands and buttons.

---

# BACK

### Ribbing
With smaller hook, ch **11** (this makes a 2½" tall ribbing).
- Row 1: sc in 2nd ch from hook and each ch across — **10 sc**. Turn.
- Rows 2–95 (105, 115, 125, 135): ch 1, sc in BLO of each st across — **10 sc**. Turn.

You now have a ribbing strip **95 (105, 115, 125, 135) rows long**.
> ✓ **Math check:** Body needs 95 (105, 115, 125, 135) sts. Picking up 1 st per ribbing row = correct count. Back width = 95 ÷ 5 = **19"** ✓ (S).

Do not fasten off. Rotate to work along the long edge.

### Body (Mesh)
Switch to G/6 (4.0 mm) hook.
- **Set-up Row (RS):** Ch 1, sc evenly along the long edge of ribbing, placing **95 (105, 115, 125, 135) sc** (1 per ribbing row). Turn.
- **Begin Mesh:** Work **Row 1** of Mesh Pattern over these sts. Turn.
> ✓ Stitch count is odd, so the mesh begins and ends with a dc. ✓
- Continue in Mesh Pattern (Row 2 repeated) until piece measures **15 (15, 15, 15, 15)"** from cast-on edge, ending after a WS row.

### Armhole Shaping
- **Next row (RS):** Slip st over first **6 (8, 10, 12, 14) sts**, ch 4, continue in mesh to last **6 (8, 10, 12, 14) sts**, leaving them unworked. Turn.
- Remaining width: **83 (89, 95, 101, 107) sts**.
> ✓ 95 − 12 = 83 (S) ✓
- Continue even in Mesh Pattern until armhole measures **8 (8.5, 9, 9.5, 10)"**, ending after a WS row.

### Shoulder & Neck Shaping
- **Mark center:** Place markers around the center **29 (29, 31, 31, 33) sts** for the back neck.
- **Next row (RS):** Work in mesh to first marker (**27 (30, 32, 35, 37) sts** for shoulder), fasten off center sts, rejoin and work remaining **27 (30, 32, 35, 37) sts** for second shoulder.
- Work each shoulder even for 1 more row. Fasten off.
> ✓ 27 + 29 + 27 = 83 (S) ✓

---

# LEFT FRONT
*(As worn; buttonband side will be added later.)*

### Ribbing
With smaller hook, ch 11.
- Row 1: sc in 2nd ch and each ch — **10 sc**. Turn.
- Rows 2–47 (53, 57, 63, 67): ch 1, sc in BLO across — **10 sc**. Turn.

### Body (Mesh)
Switch to G/6 hook.
- **Set-up Row (RS):** Ch 1, sc along long edge, placing **47 (53, 57, 63, 67) sc**. Turn.
> ✓ Front width = 47 ÷ 5 ≈ 9.4" ≈ 9.5" ✓
- Work Mesh Pattern until piece measures **15"**, ending after a WS row.

### Armhole Shaping (armhole edge = side seam edge)
- **Next row (RS):** Slip st over first **6 (8, 10, 12, 14) sts**, ch 4, work mesh to end. Turn.
- Remaining: **41 (45, 47, 51, 53) sts**.
- Work even until armhole measures **5 (5.5, 6, 6.5, 7)"**, ending at the front (neck) edge.

### Front Neck Shaping
- **Next row (neck edge):** Work in mesh, leaving last **14 (15, 15, 16, 16) sts** unworked at neck edge. Turn.
- **Dec row:** Work in mesh, skip 1 mesh unit at neck edge (dec). Rep dec at neck edge every RS row **2 more times**.
- Continue even on remaining **27 (30, 32, 35, 37) shoulder sts** until armhole matches Back. Fasten off.
> ✓ Shoulder sts match Back: 27 (S) ✓

---

# RIGHT FRONT
Work as for Left Front, **reversing all shaping** (armhole shaping worked at the end of a RS row; neck shaping worked at the opposite edge).

---

# SLEEVES (make 2)

### Cuff Ribbing
With smaller hook, ch 11.
- Row 1: sc in 2nd ch and each ch — **10 sc**. Turn.
- Rows 2–45 (45, 47, 47, 49): ch 1, sc in BLO across. Turn.

### Sleeve Body (Mesh)
Switch to G/6 hook.
- **Set-up Row (RS):** Ch 1, sc along long edge, placing **45 (45, 47, 47, 49) sc**. Turn. (Cuff circumference ≈ 9").
- Work Mesh Pattern, **increasing 1 st at each edge every 6th row** (work 2 dc into the first and last mesh sp) **8 (9, 9, 10, 10) times total**.
> ✓ Final sleeve width: 45 + 16 = **61 (63, 65, 67, 69) sts** ≈ 12.2 (12.6, 13, 13.4, 13.8)" ✓
- Continue even until sleeve measures **17 (17, 17.5, 17.5, 18)"** from cast-on, ending after a WS row.

### Sleeve Cap
- **Next row (RS):** Slip st over first **6 (8, 10, 12, 14) sts**, ch 4, work mesh to last **6 (8, 10, 12, 14) sts**. Turn.
- Remaining: **49 (47, 45, 43, 41) sts**.
- Dec 1 st each edge every RS row **5 times**.
- Work even 2 rows. Fasten off.

---

# ASSEMBLY

1. **Block all pieces** to finished measurements. This relaxes and opens the mesh — do not skip blocking.
2. **Seam shoulders:** Whip stitch or slip stitch Front shoulders to Back shoulders.
3. **Set in sleeves:** Center sleeve cap at shoulder seam; seam into armhole.
4. **Seam sides and underarms:** Use slip stitch or whip stitch from cuff to hem in one line.

---

# BUTTONBANDS & NECKBAND

### Button Band (Left Front, as worn)
With smaller hook, RS facing, join yarn at lower edge.
- Row 1: ch 1, sc evenly up the front edge — about **3 sc per 2 rows**, ending at neck edge. Turn.
- Rows 2–5: ch 1, sc in each st. Turn.
- Fasten off. Band is ~1" wide.

### Buttonhole Band (Right Front, as worn)
Work as Button Band through Row 2.
- **Row 3 (buttonhole row):** ch 1, sc to first buttonhole position, *ch 2, skip 2 sc, sc to next position*; rep for **5 (5, 6, 6, 6) buttonholes**, spacing evenly. Turn.
- Row 4: ch 1, sc across, working 2 sc into each ch-2 sp.
- Row 5: ch 1, sc across. Fasten off.
> ✓ Space buttonholes evenly: divide band length by (number of buttons − 1).

### Neckband
With smaller hook, RS facing, join at top of right buttonhole band.
- Row 1: ch 1, sc evenly around neckline (right front neck, back neck, left front neck). Turn.
- Rows 2–4: ch 1, sc in each st. Turn.
- Fasten off.

---

# FINISHING
1. Weave in all ends.
2. Sew **buttons** to the button band, aligned with buttonholes.
3. Lightly steam or wet-block the bands flat.
4. Wear open for a breezy layer or buttoned for a closed front.

---

## Final Math Validation (Size Small)
- **Bust:** Back 19" + 2 Fronts (9.5" × 2 = 19") = 38" finished ✓
- **Back sts:** 95 ÷ 5 sts/in = 19" ✓
- **Shoulders:** 27 + 29 (neck) + 27 = 83 sts (post-armhole) ✓
- **Sleeve:** 45 sts cuff → +16 inc → 61 sts (12.2") at underarm ✓
- **Gauge:** 20 sts (10 mesh units) = 4" → 5 sts/in used consistently ✓

Enjoy your breezy **Lace Mesh Summer Cardigan**!
Disclaimer: This pattern was generated by AI and should be reviewed for accuracy before use. While we strive for quality, AI-generated content may contain errors. Please verify measurements, stitch counts, and instructions before beginning your project. Generated by purlJam.uk
Access your pattern anytime
Bookmark this page to access your pattern anytime