Type
Knitting
Difficulty
intermediate
Category
custom
AI Thinking Process
Planning
Verification
Pattern
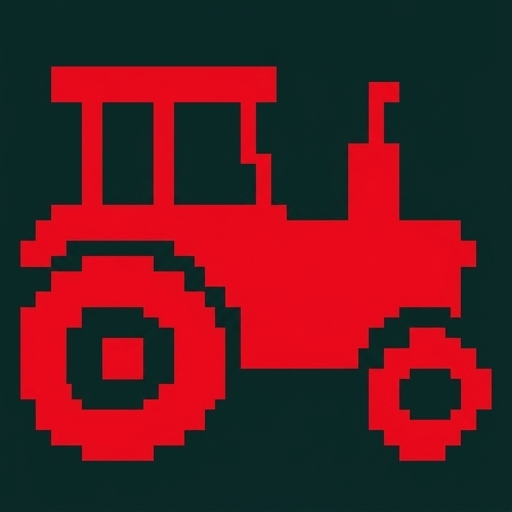
Little Red Tractor Christmas Stocking
A cheerful, beginner-friendly Christmas stocking featuring a bold tractor motif worked in stranded colorwork. The stocking is knit flat in one piece and seamed up the back, so there are no tricky in-the-round maneuvers — perfect for a confident beginner ready to try simple colorwork. Finished stocking measures approximately 12 in (30 cm) long from cuff to heel base and 12 in (30 cm) flat width (24 in / 60 cm around).
Materials
- Main Color (MC): Worsted-weight yarn (Aran/#4), cream or white — approx. 150 yds (137 m)
- Contrast Color A (CA): Worsted-weight, red (tractor body) — approx. 40 yds (37 m)
- Contrast Color B (CB): Worsted-weight, black/dark gray (wheels/details) — approx. 20 yds (18 m)
- Contrast Color C (CC): Worsted-weight, yellow (wheel hubs/accents) — approx. 10 yds (9 m)
- Needles: US 7 (4.5 mm) straight or circular needles
- Notions: Tapestry needle, stitch markers, scrap yarn or stitch holder, scissors
Gauge
20 stitches and 28 rows = 4 in (10 cm) in stockinette stitch, worked flat. That is 5 sts and 7 rows per inch.
Gauge check: 60 sts ÷ 5 sts/in = 12 in flat width ✓
Take time to knit a swatch — colorwork can slightly tighten your gauge, so swatch in stranded knitting if possible.
Size
One size — decorative Christmas stocking.
- Flat width: 12 in (30 cm) → 24 in (60 cm) circumference when seamed
- Cuff to heel: approx. 12 in (30 cm)
- Foot length: approx. 7 in (18 cm)
Abbreviations
- k — knit
- p — purl
- st(s) — stitch(es)
- RS — right side
- WS — wrong side
- k2tog — knit 2 together (right-leaning decrease)
- ssk — slip, slip, knit (left-leaning decrease)
- MC / CA / CB / CC — main color / contrast colors
- rep — repeat
- rem — remaining
Pattern Notes
- The stocking is worked flat from the cuff down and seamed up the back at the end.
- The tractor motif is worked in stranded colorwork on the front leg panel using the attached stitch chart.
- On RS rows, read the chart right to left; on WS rows, read left to right.
- Carry unused colors loosely across the back of the work. For any color block wider than 5 stitches (like the tractor body), gently "catch" the floating yarn every 3–4 stitches to keep floats tidy.
- The chart panel (32 sts) is centered on the 60-st row: 14 MC sts – 32 chart sts – 14 MC sts (14 + 32 + 14 = 60 ✓).
Attached Stitch Chart
Use the separate attached chart panel for the visual grid of the tractor. Do not look for a grid printed in this text — the chart is provided as its own asset.
- Placement: The attached chart is worked across the leg section, beginning at the row indicated in Step 2 below (after the cuff and 6 plain MC rows). It occupies the center 32 stitches of each row and is 17 rows tall.
- How to read it: Each square = 1 stitch. Read RS (odd) rows from right to left and WS (even) rows from left to right, following the color key printed on the chart panel (MC = background, CA = red tractor body, CB = black wheels/details, CC = yellow accents).
- Color management: Bring the new color under the old at each change to avoid holes on WS rows. Keep floats loose. Wind small bobbins for CC (yellow) if you prefer, since it appears in small amounts.
- Stitch-count integration: Every charted row still totals 60 sts on the needle: knit 14 MC, work the 32 charted sts per the chart, knit 14 MC (14 + 32 + 14 = 60 ✓). The chart does not add or remove stitches.
Instructions
Step 1 — Cuff
With MC, cast on 60 stitches.
- Rows 1–12: Work in k1, p1 ribbing (60 sts ÷ 2 = 30 knit + 30 purl ✓).
This forms a 1.75 in (4.5 cm) folded-look cuff.
Step 2 — Leg with Tractor Chart
Switch to stockinette (knit RS rows, purl WS rows).
- Rows 1–6 (plain): Beginning with a RS knit row, work 6 rows stockinette in MC (60 sts).
- Rows 7–23 (charted, 17 rows): Begin the attached tractor chart.
- RS rows: k14 MC, work 32 chart sts (right to left), k14 MC.
- WS rows: p14 MC, work 32 chart sts (left to right), p14 MC.
- Stitch count remains 60 sts every row ✓.
- Rows 24–35 (plain): Work 12 rows stockinette in MC (60 sts).
Total leg length ≈ cuff + 35 rows stockinette ≈ 6.7 in. Continue plain if you want a longer leg (each additional 7 rows = 1 in).
Step 3 — Heel Flap
The heel is worked back and forth over half the stitches.
- Set aside the last 30 sts (the instep/front) on a holder.
- Work the heel flap over the remaining 30 sts in MC:
- RS: slip 1, k1 across (30 sts).
- WS: slip 1, purl to end (30 sts).
- Repeat these 2 rows for 24 rows total (a firm, slip-stitch heel).
Step 4 — Heel Turn
Working only the 30 heel sts (short rows):
- Row 1 (RS): k17, ssk, k1, turn.
- Row 2 (WS): slip 1, p5, p2tog, p1, turn.
- Row 3: slip 1, knit to 1 st before the gap, ssk, k1, turn.
- Row 4: slip 1, purl to 1 st before the gap, p2tog, p1, turn.
- Repeat Rows 3–4 until all heel sts are worked.
- 18 heel sts remain. ✓
Step 5 — Gusset & Foot
- Pick up and knit 12 sts along the first side of the heel flap.
- Knit across the 30 held instep sts.
- Pick up and knit 12 sts along the second side of the heel flap.
- Continue across the 18 heel sts to reach the center back.
Total after pickup: 18 + 12 + 30 + 12 = 72 sts (arranged for flat work; join in the round only if you converted — here we keep working flat and seam later).
Gusset decreases (work flat, RS decrease rows):
- Decrease row (RS): knit to last 2 sts before instep, k2tog; knit instep sts; ssk at start of next section, knit to end. (2 sts decreased per RS row.)
- Work a plain WS purl row between each decrease row.
- Repeat until 60 sts remain (72 − 12 = 60; 6 decrease rows ✓).
Foot: Work even in stockinette in MC until foot measures 5 in (13 cm) from the back of the heel (approx. 35 rows).
Step 6 — Toe
Decrease as follows on RS rows (plain purl WS rows between):
- Decrease row (RS): k1, ssk, knit to last 3 sts, k2tog, k1. (2 sts decreased.)
- Repeat every RS row until 12 sts remain (60 → 12 = 48 sts removed over 24 decrease rows ✓).
Cut yarn leaving a 12 in (30 cm) tail.
Finishing
- Toe: Thread the tail through the remaining 12 sts, pull snug, and secure on the inside.
- Seam: With the RS facing in, seam the toe, foot, and back of the leg using mattress stitch. Fold the cuff so the seam aligns neatly.
- Hanging loop: With MC, cast on 4 sts and knit a garter strip 4 in (10 cm) long; bind off. Fold in half and sew securely to the inside top of the back seam.
- Weave in ends: Neaten all colorwork floats and weave in tails on the WS. Take extra care around the tractor motif so no colors show through on the RS.
- Block: Gently steam or wet-block the stocking flat to even out the colorwork and let the tractor motif shine.
Enjoy your Little Red Tractor Stocking! 🚜 Hang it by the chimney with care.
Disclaimer: This pattern was generated by AI and should be reviewed for accuracy before use. While we strive for quality, AI-generated content may contain errors. Please verify measurements, stitch counts, and instructions before beginning your project. Generated by purlJam.uk
Access your pattern anytime
Bookmark this page to access your pattern anytime