Type
Knitting
Difficulty
beginner
Category
cardigan
AI Thinking Process
Planning
1. **Design Strategy**: Oversized mohair cardigan in stockinette stitch, beginner-friendly with relaxed drop-shoulder feel but using standard set-in sleeve construction per template. Held mohair adds halo and warmth.
2. **Construction Plan**: Worked flat in five pieces (back, 2 fronts, 2 sleeves) bottom-up in stocking stitch, seamed, with picked-up button bands.
3. **Quality Assurance**:
- Mohair is hard to frog — emphasise tension swatch
- Oversized fit: add 20-25 cm positive ease
- Button band tension must not pull in fronts
4. **Final Calculations**: Tension 20 sts × 26 rows = 10 cm on 4.5 mm needles. Sizes XS–XXL with finished bust 100/110/120/130/140 cm. Back cast-on: 100/110/120/130/140 sts. Front cast-on: 52/57/62/67/72 sts (half back + 2 for overlap). Sleeve cast-on: 44/46/48/50/52 sts, increase to 64/68/72/76/80.
Verification
1. **Completeness**: All 11 template sections included ✓
2. **Consistency**: 100 sts ÷ 20 sts/10cm = 50 cm half-circumference × 2 = 100 cm bust ✓ Matches XS oversized fit.
3. **Constraints**: Mohair (worsted-equivalent held), oversized, stocking stitch, beginner ✓
4. **Safety**: Front + Front + Back overlap: 52+52+100 = 204 sts spanning ~102 cm with 2 cm overlap ✓ Armhole bind-offs symmetrical ✓
Pattern
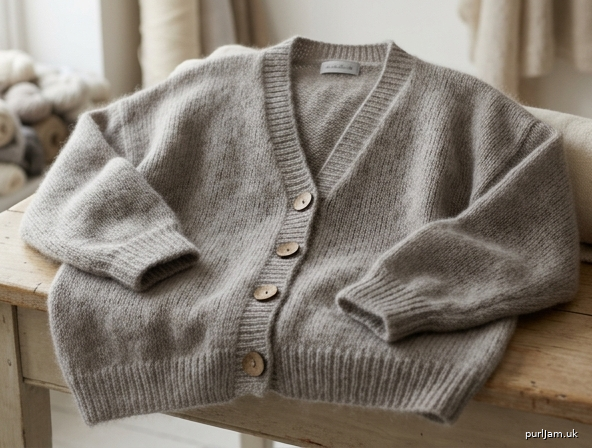
# Oversized Mohair Cardigan in Stocking Stitch

A dreamy, cloud-like cardigan worked in soft mohair-blend yarn. Generous oversized fit, dropped relaxed silhouette, simple stocking stitch body and classic button band. Perfect first cardigan project.

---

## MATERIALS

- **Yarn**: Worsted-weight mohair blend (e.g., mohair/silk held double, or a brushed mohair/wool blend)
  - 1200–1800 m total, depending on size (see Sizes)
  - XS: 1200 m • S: 1350 m • M: 1500 m • L: 1650 m • XXL: 1800 m
- **Needles**:
  - 4.5 mm (UK 7 / US 7) straight or circular needles — main fabric
  - 3.75 mm (UK 9 / US 5) needles — ribbing and button bands
- **Notions**: Tapestry needle, stitch markers, stitch holders or scrap yarn, 5–7 buttons (15–20 mm)

---

## TENSION (GAUGE)

**20 sts × 26 rows = 10 cm** in stocking stitch on 4.5 mm needles, after gentle blocking.

> ⚠️ **Mohair note**: Always swatch. Mohair is very difficult to unravel, so check your tension before casting on the garment.

---

## SIZES

Pattern is written for **XS (S, M, L, XXL)**.

| Measurement | XS | S | M | L | XXL |
|---|---|---|---|---|---|
| Finished bust (cm) | 100 | 110 | 120 | 130 | 140 |
| Finished bust (in) | 39¼ | 43¼ | 47¼ | 51¼ | 55 |
| Body length (cm) | 60 | 62 | 64 | 66 | 68 |
| Sleeve length (cm) | 44 | 45 | 46 | 47 | 48 |
| Upper arm (cm) | 32 | 34 | 36 | 38 | 40 |

Designed with **20–25 cm of positive ease**. Choose based on actual bust measurement + desired ease.

---

## ABBREVIATIONS

- **k** – knit
- **p** – purl
- **st(s)** – stitch(es)
- **RS / WS** – right side / wrong side
- **k2tog** – knit 2 together (right-leaning decrease)
- **ssk** – slip, slip, knit (left-leaning decrease)
- **m1** – make one (increase)
- **BO** – cast off (bind off)
- **CO** – cast on
- **rep** – repeat
- **rem** – remaining
- **beg** – beginning

---

## NOTES

- Cardigan is worked **flat in five pieces** (back, two fronts, two sleeves) from the bottom up, then seamed.
- Body and sleeves are worked in **stocking stitch** (k on RS, p on WS).
- Slip the first stitch of every row purlwise with yarn in front for a tidy selvedge that makes seaming easier.
- Mohair fluffs after blocking — your fabric will look denser and softer than the unblocked swatch.

---

## BACK

With 3.75 mm needles, CO **100 (110, 120, 130, 140) sts**.

**Ribbing**: Work in 2×2 rib (k2, p2) for 6 cm, ending with a WS row.

Change to 4.5 mm needles.

**Body**: Work in stocking stitch (k on RS, p on WS) until piece measures **40 (41, 42, 43, 44) cm** from cast-on, ending with a WS row.

### Armhole shaping
- BO 4 sts at beg of next 2 rows → **92 (102, 112, 122, 132) sts**
- Dec row (RS): k1, ssk, k to last 3 sts, k2tog, k1. (2 sts decreased)
- Work dec row every RS row 4 times total → **84 (94, 104, 114, 124) sts**
  - *Math check: 92 − (2×4) = 84 ✓*

Continue straight in stocking stitch until armhole measures **20 (21, 22, 23, 24) cm**, ending with a WS row.

### Shoulders & back neck
- BO 7 (8, 9, 10, 11) sts at beg of next 4 rows → 56 (62, 68, 74, 80) sts
- BO 6 (7, 8, 9, 10) sts at beg of next 2 rows → 44 (48, 52, 56, 60) sts
- BO rem 44 (48, 52, 56, 60) sts loosely for back neck.

*Math check: 7×4 + 6×2 + 44 = 28+12+44 = 84 ✓ (matches XS)*

---

## FRONTS (make 2 — mirrored)

### LEFT FRONT

With 3.75 mm needles, CO **52 (57, 62, 67, 72) sts**.

**Ribbing**: Work 2×2 rib for 6 cm, ending with a WS row. (Begin/end with k2 or p2 as needed to align rib; small selvedge variations are fine.)

Change to 4.5 mm needles.

**Body**: Work in stocking stitch until piece measures **40 (41, 42, 43, 44) cm**, ending with a WS row.

### Armhole shaping (armhole edge = beg of RS rows)
- BO 4 sts at beg of next RS row → 48 (53, 58, 63, 68) sts
- Work 1 WS row.
- Dec row (RS): k1, ssk, k to end. Work dec row every RS row 4 times total → **44 (49, 54, 59, 64) sts**

Continue straight until armhole measures **13 (14, 14, 15, 15) cm**, ending with a RS row.

### Neck shaping (neck edge = beg of WS rows)
- BO 8 (9, 10, 11, 12) sts at beg of next WS row → 36 (40, 44, 48, 52) sts
- Dec row (WS): p1, p2tog, p to end. (Or work neck decrease on RS as ssk at end of row.) Decrease 1 st at neck edge every row 4 times, then every RS row 4 times → **28 (32, 36, 40, 44) sts**
  - *Math check: 36 − 8 = 28 ✓*

Work straight until armhole matches back, ending with a WS row.

### Shoulder shaping
- BO 7 (8, 9, 10, 11) sts at beg of next RS row, then again at beg of next RS row → 14 (16, 18, 20, 22) sts
- BO rem 14 (16, 18, 20, 22) sts.

### RIGHT FRONT
Work as Left Front, **mirroring all shaping**: armhole shaping at beg of WS rows, neck shaping at beg of RS rows.

---

## SLEEVES (make 2)

With 3.75 mm needles, CO **44 (46, 48, 50, 52) sts**.

**Cuff**: Work 2×2 rib for 7 cm, ending with a WS row.

Change to 4.5 mm needles.

Begin stocking stitch. **Inc row (RS)**: k2, m1, k to last 2 sts, m1, k2. (2 sts increased)

Work inc row every **10th row 10 (11, 12, 13, 14) times** → **64 (68, 72, 76, 80) sts**.

*Math check: 44 + (2×10) = 64 ✓*

Continue straight until sleeve measures **44 (45, 46, 47, 48) cm** from cast-on, ending with a WS row.

### Sleeve cap
- BO 4 sts at beg of next 2 rows → 56 (60, 64, 68, 72) sts
- Dec 1 st at each end of every RS row 8 (9, 10, 11, 12) times → 40 (42, 44, 46, 48) sts
- Dec 1 st at each end of every row 4 times → 32 (34, 36, 38, 40) sts
- BO 3 sts at beg of next 4 rows → 20 (22, 24, 26, 28) sts
- BO rem sts loosely.

---

## BUTTON BANDS

**Seam shoulders first** using mattress stitch.

### Buttonhole band (right front for women / left front for men — choose your preference)
With 3.75 mm needles and RS facing, pick up and knit approximately **3 sts for every 4 rows** along the front edge — aim for a number divisible by 4, plus 2.
Example pickup: **120 (124, 128, 132, 136) sts**.

- Rows 1–2: Work in 2×2 rib.
- **Buttonhole row (RS)**: rib 3, *BO 2 sts, rib until 2 sts before next buttonhole position*; rep for 5 (6, 6, 7, 7) buttonholes, rib to end.
- Next row: rib, casting on 2 sts over each gap.
- Continue in rib until band measures 3 cm. Cast off in rib.

### Button band (opposite front)
Pick up same number of sts. Work 2×2 rib for 3 cm. Cast off in rib.

### Neckband
With 3.75 mm needles and RS facing, pick up and knit sts evenly around neck (approx. 80–96 sts depending on size, multiple of 4). Work 2×2 rib for 3 cm. Cast off loosely in rib.

---

## FINISHING

1. **Seam sleeve caps** into armholes using mattress stitch, easing in any extra cap fabric at the top.
2. **Seam side and sleeve seams** in one continuous line from cuff to hem.
3. **Sew on buttons** opposite buttonholes.
4. **Weave in all ends** carefully — split mohair plies and run ends in multiple directions; they will felt invisibly.
5. **Block gently**: soak in lukewarm water with wool wash, press out water in a towel (do not wring), lay flat to measurements. Allow to dry fully. Gently brush surface with a soft brush to enhance the halo, if desired.

---

**Enjoy your cosy mohair cloud! ☁️**
Disclaimer: This pattern was generated by AI and should be reviewed for accuracy before use. While we strive for quality, AI-generated content may contain errors. Please verify measurements, stitch counts, and instructions before beginning your project. Generated by purlJam.uk
Access your pattern anytime
Bookmark this page to access your pattern anytime