Type
Knitting
Difficulty
intermediate
Category
custom
AI Thinking Process
Planning
Verification
Pattern
Seaside Horizon Blanket
Beginner flat crochet throw · Beach scene colorwork · 50" × 60"
A cozy worsted-weight throw worked entirely in single crochet. Soft bands of sky, water, and sand frame a centered beach scene worked from the attached stitch chart. Designed for confident beginners: one stitch, straight edges, and clear color-change guidance.
Materials
Yarn
Worsted weight (category 4), acrylic or cotton blend recommended for easy care.
Approximate total: 2,400 yd (2,195 m)
Suggested color breakdown (adjust names to your palette):
- A – Sky: 550 yd (505 m) light blue
- B – Ocean: 550 yd (505 m) medium/deep blue
- C – Sand: 550 yd (505 m) tan/beige
- D – Foam/Clouds: 250 yd (230 m) white or cream
- E – Sun/Accent: 150 yd (135 m) yellow or gold
- F – Detail (optional palm/boat/umbrella): 150 yd (135 m) green, coral, or brown
(Yardages include a small buffer for tapestry carries and weaving ends.)
Hook
US H/8 (5.0 mm), or size needed to obtain gauge
Notions
- Yarn needle
- Scissors
- Stitch markers (optional, for chart side edges)
- Bobbins or small balls for motif colors (recommended)
Gauge
16 sc and 16 rows = 4" (10 cm) in single crochet, blocked
Check gauge before starting.
- Too few stitches per 4" → go down a hook size
- Too many stitches per 4" → go up a hook size
Finished measurements depend on matching this gauge.
Finished Size
One size: 50" wide × 60" long (127 cm × 152.5 cm), after light blocking
Stitch fabric: 200 sc wide × 240 rows tall
(200 sts ÷ 16 sc per 4" = 50"; 240 rows ÷ 16 rows per 4" = 60" ✓)
Abbreviations (US Crochet)
- ch – chain
- sc – single crochet
- st(s) – stitch(es)
- RS – right side
- WS – wrong side
- sl st – slip stitch
- yo – yarn over
- rep – repeat
Pattern Notes
- Blanket is worked flat, bottom-up, in turned rows of sc.
- Every row has exactly 200 sc. Do not increase or decrease.
- Turning chain: ch 1 at the start of every row; the ch 1 does not count as a stitch. Work the first sc into the first stitch of the previous row.
- Colorwork is charted. Use tapestry crochet (carry unused color under stitches) for short floats, or intarsia (separate bobbins) for larger color blocks such as sun, water bands, or sand.
- When changing color: work the last yo of the previous sc with the new color so the top loops match the new stitch color.
- Keep carried yarns loose enough that the fabric does not pucker; tug gently after each color change to neat edges.
- RS rows are odd-numbered and read right to left on the chart; WS rows are even-numbered and read left to right.
- Weave ends as you go when practical, or leave 6" tails and weave during finishing.
- Beginner tip: place a marker in the first and last stitch of the chart motif columns so you always know where the picture sits.
Attached Stitch Chart
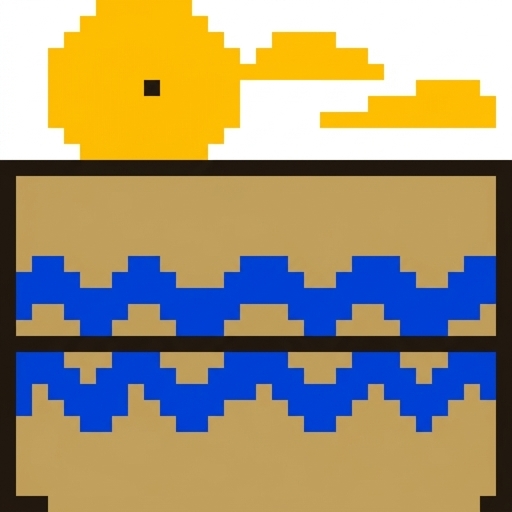
Use the separate attached chart panel supplied with this pattern for the beach-scene visual grid. Do not rely on any inline grid in this text—the attached panel is the authority for color placement.
Where the chart sits in the pattern
- The chart is worked in the center body of the blanket after the lower sand (or border) plain rows and before the upper sky plain rows.
- Side plain margins in the main color of each horizontal band keep the motif centered left-to-right.
How to read the chart (crochet)
- Each chart square = 1 sc in the indicated color.
- Work Row 1 of the chart on the RS, reading the chart from right to left.
- Work Row 2 on the WS, reading the chart from left to right.
- Continue alternating direction each row.
- Color changes happen at square boundaries: finish the last yo of a stitch with the next color.
- If the attached chart uses symbols or a key, match each symbol to the yarn colors listed in Materials (A–F) as labeled on the chart key.
Color / yarn management
- Wind bobbins for sun, foam highlights, and any small motifs.
- For long horizontal bands (sky, ocean, sand), you may work full rows in one color without carrying.
- When a color is used again within a few stitches, lightly carry it; when it rests for more than about 4–5 sts, drop it and rejoin later (intarsia) to avoid long floats on the WS.
- Twist yarns when changing colors at vertical boundaries to prevent holes.
Stitch-count integration (math around the chart)
- Full width every row: 200 sc.
- Let W = width of the attached chart in stitches, and H = height of the attached chart in rows (read these from your attached panel).
- Side margins each row while working the chart:
Left margin = Right margin = (200 − W) ÷ 2
(If 200 − W is odd, put the extra stitch on the right margin so totals remain 200 ✓.) - Vertical placement for a 60" length (240 rows total):
- Lower plain band (sand/foundation): R_low rows
- Chart block: H rows
- Upper plain band (sky/finish): R_up rows
- Choose R_low and R_up so R_low + H + R_up = 240.
- For a balanced look, aim for R_low ≈ R_up; if H is shorter than 240, split the remainder evenly (put any leftover row in the upper band).
- Example check: if chart is 120 sts × 100 rows → margins (200−120)/2 = 40 sc each side; remaining rows 240−100 = 140 → e.g. 70 rows below + 70 above (40+120+40 = 200 ✓; 70+100+70 = 240 ✓).
- Always count to 200 at the end of every row before turning.
Instructions
Setup
With C (Sand), ch 201.
Row 1 (RS): Sc in 2nd ch from hook and in each ch across — 200 sc. Turn.
(Foundation chain used: 201; stitches worked: 200 ✓)
Row 2 (WS): Ch 1, sc in each sc across — 200 sc. Turn.
Lower band (sand / beach foreground)
Continue in C (or follow chart key if the attached chart begins at the lower edge):
Rows 3–R_low: Ch 1, sc in each st across — 200 sc. Turn.
Work until you have completed the planned lower plain band so that the next row will be Chart Row 1 on the RS.
(If your attached chart includes the full sand area, begin the chart earlier and treat “lower band” as 0 rows of plain fabric.)
Place markers after the left-margin stitches and before the right-margin stitches to mark the chart columns if desired:
sc across left margin, PM, work chart width, PM, sc across right margin.
Beach scene (chart section)
Join motif colors as needed (D, E, F, and band colors A/B/C per chart).
Chart rows 1–H:
For each chart row:
Ch 1, sc across in colors as shown on the attached chart for that row, maintaining:
left margin sc in background color of that row, then W chart stitches, then right margin sc — 200 sc total. Turn.
- RS (odd chart rows): read chart right → left
- WS (even chart rows): read chart left → right
- Change colors as indicated; keep stitch count locked at 200 every row (margin + chart + margin = 200 ✓).
After Chart Row H, remove side markers if used.
Upper band (sky / finishing field)
Break motif colors not needed. Continue with A (Sky) (or final background color shown above the motif on your chart):
Next rows until total row count = 240:
Ch 1, sc in each st across — 200 sc. Turn.
Work until the blanket measures 60" from the foundation edge, or until 240 rows are complete — 200 sc.
(R_low + H + R_up = 240 ✓; 240 rows × 4"/16 rows = 60" ✓)
Fasten off. Weave in remaining ends securely on WS.
Border (optional but recommended)
A simple border neatens edges and is beginner-friendly.
Rnd 1: With RS facing, join D (Foam/Clouds) or C (Sand) with sl st in any corner. Ch 1.
- Work sc evenly across each edge:
- Top and bottom: 1 sc in each st (200 sc each)
- Sides: about 3 sc for every 4 row-ends (aim for ~180 sc per long side so the edge lies flat; adjust by 1–2 sts if needed)
- At each corner: (sc, ch 2, sc) in corner st or corner space.
Join with sl st to first sc. Do not turn.
Rnd 2: Ch 1, sc in each sc around, working (sc, ch 2, sc) in each corner ch-2 space. Join, fasten off.
Weave in ends.
Finishing
- Weave in all ends on the WS. For tapestry sections, weave tails along matching color paths where possible.
- Block lightly: mist with water or steam-block gently (follow yarn label). Pin to 50" × 60" measurements on a flat surface; allow to dry fully.
- Trim any remaining tails.
- Optional: add a small fabric label on the WS corner.
Beginner Tips
- Count stitches at the end of every row for the first 10–15 rows until the rhythm is automatic (always 200).
- If a side edge starts to diagonal, you are missing the first or last stitch—mark those stitches.
- Color changes feel awkward for a few rows; tension improves quickly.
- Photograph your bobbin layout once the motif starts so you can resume easily after a break.
- Machine-wash only if your yarn label allows; otherwise hand wash cold and lay flat.
Inline math validation (summary)
| Item | Calculation | Result |
|---|---|---|
| Width | 200 sc ÷ 16 sc per 4" | 50" ✓ |
| Length | 240 rows ÷ 16 rows per 4" | 60" ✓ |
| Foundation | ch 201, sc in 2nd ch and across | 200 sc ✓ |
| Every body row | fixed sc count | 200 sc ✓ |
| Chart centering | left + W + right = 200 | (200−W)/2 each side ✓ |
| Vertical stack | R_low + H + R_up | 240 rows ✓ |
Enjoy your Seaside Horizon Blanket—may every row feel like a day at the beach.
Disclaimer: This pattern was generated by AI and should be reviewed for accuracy before use. While we strive for quality, AI-generated content may contain errors. Please verify measurements, stitch counts, charts, and instructions before beginning your project. Generated by purlJam.uk
Love this pattern?
Save this pattern to your free PurlJam libraryAccess your pattern anytime
Bookmark this page to access your pattern anytime