Type
Knitting
Difficulty
advanced
Category
scarf
AI Thinking Process
Planning
Verification
Pattern
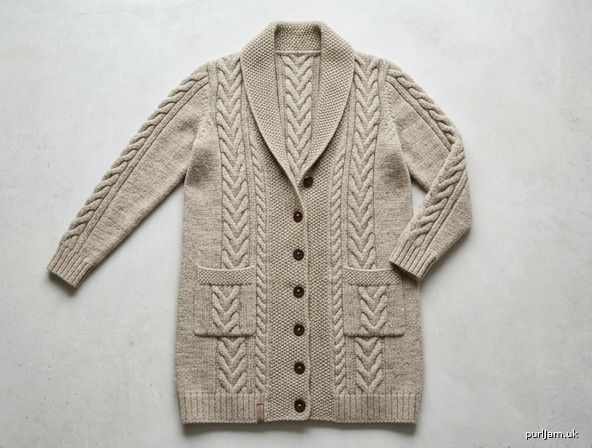
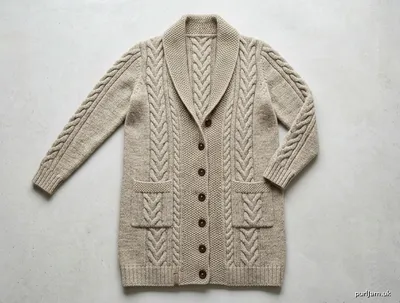
The Long Cable Coat
An advanced, knee-skimming coat with a centre plait, mirrored rope cables and a deep moss shawl collar. The body is a straight, relaxed silhouette — no waist shaping — so the cables stay undistorted. Worked flat in pieces and seamed, with set-in sleeves.
Figures are given for size 1 (2, 3, 4).
Sizes
| 1 | 2 | 3 | 4 | |
|---|---|---|---|---|
| To fit bust | 81–86 cm (32–34 in) | 89–96 cm (35–38 in) | 99–107 cm (39–42 in) | 109–117 cm (43–46 in) |
| Finished bust, buttoned | 96 cm (38 in) | 104 cm (41 in) | 113 cm (44.5 in) | 124 cm (49 in) |
| Ease over bust | about 10–15 cm (4–6 in) | about 10–15 cm | about 10–15 cm | about 10–15 cm |
| Length, cast-on to shoulder | 100 cm (39.5 in) | 102 cm (40 in) | 104 cm (41 in) | 106 cm (41.75 in) |
| Back width | 49 cm (19.25 in) | 54 cm (21.25 in) | 58 cm (22.75 in) | 65 cm (25.5 in) |
| Armhole depth | 19 cm (7.5 in) | 20 cm (8 in) | 21.5 cm (8.5 in) | 23 cm (9 in) |
| Sleeve length to underarm | 46 cm (18 in) | 46 cm (18 in) | 47 cm (18.5 in) | 47 cm (18.5 in) |
| Upper sleeve width | 34 cm (13.5 in) | 37 cm (14.5 in) | 40 cm (15.75 in) | 44 cm (17.25 in) |
| Cuff | 20 cm (8 in) | 21 cm (8.25 in) | 22 cm (8.75 in) | 24 cm (9.5 in) |
| Back neck | 18 cm (7 in) | 18 cm | 18 cm | 18 cm |
Length is measured from the cast-on edge. It is a knee-skimming length on a height of about 163–173 cm. Sleeve length does not include the sleeve cap.
Tension (gauge)
18 stitches and 24 rows = 10 cm (4 in) over reverse stocking stitch, after blocking, using 5.0 mm needles.
The 39-stitch centre panel (Chart C) measures 18 cm (7 in) wide. Cables pull in: do not measure tension over stocking stitch and assume the coat will match. If you have 18 stitches to 10 cm but the panel is wider than 18 cm, use a smaller needle for the fabric. If the panel is narrower, use a larger needle. Rib and moss are worked on 4.5 mm needles and are not used for tension.
Knit a swatch of at least 50 stitches: 6 reverse-stocking stitches, the full 39-stitch panel, and 6 reverse-stocking stitches, for at least 3 pattern repeats. Steam it before measuring. Do not flatten the cables.
Materials
- Aran-weight yarn (worsted), wool or wool-blend fibre, approx. 180 m per 100 g: 1600 (1800, 2050, 2300) metres / 1750 (1970, 2240, 2515) yards. About 9 (10, 12, 13) × 100 g balls at 180 m each. Cables use more yarn than plain fabric; metreage is a working estimate, not a scarf quantity.
- Pair of 4.5 mm needles (UK 7 / US 7), plus a 4.5 mm circular needle, 100 cm long, for the collar
- Pair of 5.0 mm needles (UK 6 / US 8)
- Cable needle
- Stitch markers
- Stitch holders or waste yarn
- 8 buttons, 2 cm diameter
- Tapestry needle
- Blocking mats and pins; a steam iron or garment steamer
Abbreviations
k knit; p purl; st(s) stitch(es); RS right side; WS wrong side; patt pattern; rep repeat; rem remaining; cont continue; beg beginning; dec decrease; inc increase; foll following; alt alternate; tog together; tbl through the back loop; cn cable needle; cm centimetres; mm millimetres.
k2tog knit 2 together (1 st decreased, slants right). ssk slip 2 stitches knitwise one at a time, knit them together through the back loops (1 st decreased, slants left). p2tog purl 2 together. p2tog tbl purl 2 together through the back loops. M1P make 1 purlwise: lift the bar between the stitches from front to back with the left needle and purl into the back of it. C6B slip 3 sts to cn and hold at back, k3, k3 from cn (slants right). C6F slip 3 sts to cn and hold at front, k3, k3 from cn (slants left). C10B slip 5 sts to cn and hold at back, k5, k5 from cn. C10F slip 5 sts to cn and hold at front, k5, k5 from cn.
Reverse stocking stitch (rev st st): purl on RS rows, knit on WS rows. Stocking stitch: knit on RS rows, purl on WS rows. Used inside the cables. Moss stitch (UK; US seed stitch), over an odd number of stitches: every row, k1, (p1, k1) to end.
Stitch patterns and charts
Read charts with RS (odd) rows from right to left and WS (even) rows from left to right. Written instructions are the authority if you prefer not to follow a chart; they match the charts exactly.
Symbol key
| Symbol | Meaning |
|---|---|
| | | Knit on RS; purl on WS |
| − | Purl on RS; knit on WS |
| C6F | 6-st left cross (see abbreviations) |
| C6B | 6-st right cross |
| C10F | 10-st left cross |
| C10B | 10-st right cross |
On every WS row of every cable in this pattern, purl the cable stitches and knit the reverse-stocking stitches. There are no wrong-side crosses.
Chart A — Centre Plait (15 sts × 8 rows)
st:  15 14 13 12 11 10  9  8  7  6  5  4  3  2  1     ← read RS this way
r8   −  −  −  −  −  −  −  −  −  −  −  −  −  −  −
r7   |  |  |  |  |  [======== C10F ========]
r6   −  −  −  −  −  −  −  −  −  −  −  −  −  −  −
r5   |  |  |  |  |  |  |  |  |  |  |  |  |  |  |
r4   −  −  −  −  −  −  −  −  −  −  −  −  −  −  −
r3   [======== C10B ========]  |  |  |  |  |
r2   −  −  −  −  −  −  −  −  −  −  −  −  −  −  −
r1   |  |  |  |  |  |  |  |  |  |  |  |  |  |  |
Written:
- Row 1 (RS): K15.
- Row 2 (WS): P15.
- Row 3: C10B, k5.
- Row 4: P15.
- Row 5: K15.
- Row 6: P15.
- Row 7: K5, C10F.
- Row 8: P15.
Repeat rows 1–8.
Chart B — Rope Cable (6 sts × 8 rows)
Shown as the left-slanting rope (C6F). For the right-slanting rope, work C6B on row 7 instead. All other rows are identical.
st:   6  5  4  3  2  1
r8    −  −  −  −  −  −
r7    [==== C6F ====]
r6    −  −  −  −  −  −
r5    |  |  |  |  |  |
r4    −  −  −  −  −  −
r3    |  |  |  |  |  |
r2    −  −  −  −  −  −
r1    |  |  |  |  |  |
Written (C6F version):
- Rows 1, 3 and 5 (RS): K6.
- Rows 2, 4, 6 and 8 (WS): P6.
- Row 7: C6F (or C6B where the instructions say so).
Repeat rows 1–8. The rope crosses once every 8 rows, on the same row as the plait’s second cross, so the coat stays in step.
Chart C — Back Centre Panel (39 sts × 8 rows)
How the charts sit together. Reverse-stocking columns separate the ropes from the plait so the crosses never collide.
39 sts =  3 rev + Chart B (C6F) + 3 rev + Chart A + 3 rev + Chart B (C6B) + 3 rev
          |←—— 6 ——→|              |←—— 15 ——→|              |←—— 6 ——→|
- Row 1 (RS): P3, k6, p3, k15, p3, k6, p3.
- Row 2 and every WS row: K3, p6, k3, p15, k3, p6, k3.
- Row 3: P3, k6, p3, C10B, k5, p3, k6, p3.
- Row 5: P3, k6, p3, k15, p3, k6, p3.
- Row 7: P3, C6F, p3, k5, C10F, p3, C6B, p3.
- Row 8: As row 2.
The first rope (C6F) slants in toward the plait; the second rope (C6B) slants in from the other side. Repeat rows 1–8.
Front cable border (10 sts + 7-st moss band)
Kept as a unit of 17 stitches at the centre-front edge until neck shaping begins.
Left front, as worn (border at the end of a RS row). Rope slants toward the band.
- RS rows 1, 3, 5: P2, k6, p2, moss 7.
- RS row 7: P2, C6F, p2, moss 7.
- WS rows: Moss 7, k2, p6, k2.
Right front, as worn (border at the start of a RS row). Rope slants toward the band.
- RS rows 1, 3, 5: Moss 7, p2, k6, p2.
- RS row 7: Moss 7, p2, C6B, p2.
- WS rows: K2, p6, k2, moss 7.
Moss 7, every row: k1, (p1, k1) 3 times. (7 is odd, so both sides of the band use the same row.)
Where the panels sit
Cast-on formula, adapted from a panelled scarf to a coat:
Back = side rev-st + 39-st Chart C + side rev-st. Each front = side rev-st + 10-st cable border + 7-st moss band. Each sleeve = side rev-st + 3 rev + Chart A + 3 rev + side rev-st.
| Piece | Size 1 | Size 2 | Size 3 | Size 4 |
|---|---|---|---|---|
| Back side rev-st, each side | 28 sts (15.5 cm) | 32 sts (18 cm) | 36 sts (20 cm) | 42 sts (23.5 cm) |
| Back centre panel | 39 sts (18 cm) | 39 | 39 | 39 |
| Back total | 95 sts | 103 sts | 111 sts | 123 sts |
| Front side rev-st | 26 sts | 30 sts | 34 sts | 38 sts |
| Front border | 17 sts | 17 | 17 | 17 |
| Front total | 43 sts | 47 sts | 51 sts | 55 sts |
Check: 28 + 39 + 28 = 95; 32 + 39 + 32 = 103; 36 + 39 + 36 = 111; 42 + 39 + 42 = 123. Fronts: 26 + 17 = 43; 30 + 17 = 47; 34 + 17 = 51; 38 + 17 = 55.
Place a marker at each edge of Chart C and at each edge of the sleeve plait. Slip the markers every row.
Pattern notes
- Work armhole and sleeve increases and decreases 1 stitch in from the edge, inside the reverse stocking stitch, so the selvedge stays neat for seaming.
- RS armhole decrease at the start of a rev-st row: p1, p2tog. At the end: p2tog tbl, p1.
- When a cable is reduced below 6 stitches by neck shaping, stop crossing it and work the remaining stitches of that cable in reverse stocking stitch.
- Length may be changed before the armhole, in multiples of 8 rows (about 3.3 cm / 1.25 in), so the charts stay in repeat. Add yarn if you lengthen. Do not lengthen after the armhole has been started.
- Buttonholes are written for a woman’s coat, on the right front as worn. For a man’s coat, work the buttonholes on the left front instead and sew the buttons on the right front.
Back
With 4.5 mm needles, cast on 95 (103, 111, 123) sts.
Rib row 1 (RS): K1, (p1, k1) to end. Rib row 2: P1, (k1, p1) to end.
Repeat these 2 rows until the rib measures 6 cm, ending with a WS row.
Change to 5.0 mm needles.
Set Chart C (RS): P28 (32, 36, 42), place marker, work Chart C row 1 over the next 39 sts, place marker, p28 (32, 36, 42).
Next row (WS): K to marker, work Chart C row 2, k to end.
Continue in this way, purling the side stitches on RS rows and knitting them on WS rows, and repeating Chart C rows 1–8, until the back measures 81 (82, 82.5, 83) cm from the cast-on edge, ending with a WS row. Note which pattern row you have just completed.
Shape armholes
Keep Chart C correct throughout. Cast off in pattern.
Cast off 3 (4, 4, 5) sts at the beg of the next 2 rows. 89 (95, 103, 113) sts.
Decrease row (RS): P1, p2tog, patt to the last 3 sts, p2tog tbl, p1. 2 sts decreased. Work 1 WS row.
Repeat the last 2 rows a further 3 (4, 5, 7) times. 81 (85, 91, 97) sts. Armhole decreases so far, each side: 3 (4, 4, 5) cast off + 4 (5, 6, 8) decreases.
Next decrease row (RS): P1, p2tog, patt to the last 3 sts, p2tog tbl, p1. Work 3 rows straight.
Repeat the last 4 rows a further 1 (2, 3, 4) times. 77 (79, 83, 87) sts.
Stitches removed each side: 9 (12, 14, 18). Remaining side stitches outside the markers: 19 (20, 22, 24) each side. Centre stitches inside the markers: 39. Check: 19 + 39 + 19 = 77; 20 + 39 + 20 = 79; 22 + 39 + 22 = 83; 24 + 39 + 24 = 87.
Work straight in pattern until the armhole measures 19 (20, 21.5, 23) cm, ending with a WS row.
Shape shoulders and back neck
The cast-off stitches are the reverse-stocking shoulder stitches only. Keep the 39-st panel correct on the rows you work across it. Cast off purlwise on RS rows and knitwise on WS rows (in pattern).
Cast off 6 (7, 7, 8) sts at the beg of the next 2 rows. Cast off 6 (7, 7, 8) sts at the beg of the next 2 rows. Cast off 7 (6, 8, 8) sts at the beg of the next 2 rows.
39 sts remain. Slip these 39 sts to a holder for the collar. Do not cast them off.
Shoulder check: 6 + 6 + 7 = 19; 7 + 7 + 6 = 20; 7 + 7 + 8 = 22; 8 + 8 + 8 = 24.
Left front (as worn)
With 4.5 mm needles, cast on 43 (47, 51, 55) sts.
Work in 1×1 rib as for the back (k1, (p1, k1) to end on RS) for 6 cm, ending with a WS row.
Change to 5.0 mm needles.
Set pattern (RS): P26 (30, 34, 38), place marker, work left-front cable border row 1 over the last 17 sts (p2, k6, p2, moss 7).
WS: Work border row 2, slip marker, k to end.
Continue until the front matches the back to the start of the armhole, ending with a WS row and on the same pattern row as the back. 43 (47, 51, 55) sts.
Shape armhole
Next row (RS): Cast off 3 (4, 4, 5) sts, patt to end, working the last 17 sts as the border. 40 (43, 47, 50) sts. Work 1 WS row.
Decrease row (RS): P1, p2tog, patt to end (border stays at the end of the row). Work 1 WS row.
Repeat the last 2 rows a further 3 (4, 5, 7) times.
Then decrease in the same way on every 4th row (that is, every other RS row) a further 2 (3, 4, 5) times. 34 (35, 37, 37) sts.
The 17-st border is still intact. Side reverse-stocking stitches remaining: 17 (18, 20, 20).
Work straight until the armhole measures 10 (11, 12, 13) cm, ending with a RS row, ready to shape the neck at the start of a WS row.
Shape neck
Next row (WS): Cast off 7 sts (the moss band), patt to end. 27 (28, 30, 30) sts.
Neck decrease row (RS): Patt to the last 3 sts, decrease 1 st (p2tog tbl, p1 while those stitches are reverse stocking stitch; once the decrease falls inside the 6 cable stitches, k2tog or ssk as appropriate, then discontinue the cable when fewer than 6 cable stitches remain and work them in reverse stocking stitch), p1.
Work 1 WS row.
Repeat the last 2 rows a further 7 (7, 7, 5) times. 19 (20, 22, 24) sts.
Neck stitches removed: 7 cast off + 8 (8, 8, 6) decreases = 15 (15, 15, 13). Check: 34 − 15 = 19; 35 − 15 = 20; 37 − 15 = 22; 37 − 13 = 24. These match the back shoulders.
Work straight until the armhole matches the back to the start of the shoulder, ending with a WS row.
Shape shoulder
Cast off 6 (7, 7, 8) sts at the beg of the next RS row. Work 1 WS row. Cast off 6 (7, 7, 8) sts at the beg of the next RS row. Work 1 WS row. Cast off the remaining 7 (6, 8, 8) sts.
Right front (as worn)
With 4.5 mm needles, cast on 43 (47, 51, 55) sts. Work 6 cm of 1×1 rib as for the left front, ending with a WS row.
Change to 5.0 mm needles.
Set pattern (RS): Work right-front cable border row 1 over the first 17 sts (moss 7, p2, k6, p2), place marker, p26 (30, 34, 38).
Continue as set. At the same time, work 8 buttonholes on the moss band, as follows.
Buttonholes
Work a buttonhole when the front measures 8 cm from the cast-on, and then at 19, 30, 41, 52, 63, 74 and 85 cm (8 buttonholes, 11 cm apart). The last sits below the neck cast-off on every size.
Buttonhole row (RS): Moss 2, cast off 3 sts, moss 2 (the 7-st band is complete: 2 + 3 + 2 = 7), slip marker, patt to end. Next row (WS): Patt to the gap, turn the work and cast on 3 sts, turn back, moss 2 to finish the band.
Shape armhole
End with a RS row so the armhole cast-off is at the start of a WS row (the side-seam edge).
Cast off 3 (4, 4, 5) sts at the beg of the next WS row, patt to end. Decrease row (RS): Patt to the last 3 sts, p2tog tbl, p1 (the border stays at the start of the RS row).
Decrease on the same schedule as the left front: every RS row 4 (5, 6, 8) times in all, then every 4th row 2 (3, 4, 5) times. 34 (35, 37, 37) sts.
Shape neck
Begin on the same row-count as the left front, ending with a WS row so the neck cast-off is at the start of a RS row.
Next row (RS): Cast off 7 sts (the moss band), patt to end. 27 (28, 30, 30) sts. Work 1 WS row.
Neck decrease row (RS): P1, decrease 1 st, patt to end. Use the same cable rule as the left front (decrease with p2tog while in reverse stocking stitch; with ssk or k2tog once inside the cable; drop the cable below 6 sts).
Work 1 WS row. Repeat the decrease row every RS row 8 (8, 8, 6) times in all. 19 (20, 22, 24) sts.
Work straight to match the left front armhole, ending with a RS row.
Shape shoulder
Cast off 6 (7, 7, 8) sts at the beg of the next WS row. Work 1 RS row. Cast off 6 (7, 7, 8) sts at the beg of the next WS row. Work 1 RS row. Cast off the remaining 7 (6, 8, 8) sts.
Sleeves (make 2)
With 4.5 mm needles, cast on 41 (43, 45, 49) sts. Work 6 cm of 1×1 rib as for the back, ending with a WS row.
Change to 5.0 mm needles.
Set plait (RS): P10 (11, 12, 14), place marker, p3, work Chart A row 1 over 15 sts, p3, place marker, p10 (11, 12, 14).
Centre panel = 3 + 15 + 3 = 21 sts. Sides: 10 + 21 + 10 = 41; 11 + 21 + 11 = 43; 12 + 21 + 12 = 45; 14 + 21 + 14 = 49.
WS: K to marker, k3, p15, k3, k to end. Continue Chart A as set, with 3 reverse-stocking stitches inside each marker.
Shape sleeve
Increase row (RS): P1, M1P, patt to the last st, M1P, p1. 2 sts increased, both in reverse stocking stitch, outside the markers.
Repeat the increase row every 8th (6th, 6th, 4th) row a further 11 (12, 14, 16) times. 12 (13, 15, 17) increase rows in total; 24 (26, 30, 34) sts increased.
65 (69, 75, 83) sts: 22 + 21 + 22 = 65; 24 + 21 + 24 = 69; 27 + 21 + 27 = 75; 31 + 21 + 31 = 83.
Work straight until the sleeve measures 46 (46, 47, 47) cm from the cast-on edge, ending with a WS row and, if you can, on the same Chart A row as the back at the armhole. A row or two of difference is acceptable; do not stretch the sleeve to force it.
Shape sleeve cap
Cast off 3 (4, 4, 5) sts at the beg of the next 2 rows. 59 (61, 67, 73) sts.
Decrease row (RS): P1, p2tog, patt to the last 3 sts, p2tog tbl, p1. Work 1 WS row.
Repeat the last 2 rows a further 10 (11, 13, 14) times. 37 (37, 39, 43) sts. RS decreases in total: 11 (12, 14, 15).
Next row (RS): P1, p2tog, patt to the last 3 sts, p2tog tbl, p1. Next row (WS): K1, ssk, patt to the last 3 sts, k2tog, k1.
Repeat the last 2 rows a further 4 (4, 5, 6) times. 27 (27, 27, 29) sts. Every-row decreases: 5 (5, 6, 7) at each end.
Cast off 4 (4, 4, 5) sts at the beg of the next 4 rows. 11 (11, 11, 9) sts. Cast off the remaining 11 (11, 11, 9) sts in pattern.
Cap check, size 1: 6 cast off at the underarm + 22 side decreases + 10 every-row decreases + 16 top cast-off + 11 final = 65. Sizes 2–4 follow the same path back to 69, 75 and 83.
Once fewer than 6 stitches of the plait remain on the needle, work them in stocking stitch or reverse stocking stitch rather than attempting a cross.
Cap depth is about 14 (15, 17, 18) cm. A little ease across the top of the cap is correct for this coat.
Pockets (make 2)
With 5.0 mm needles, cast on 22 sts.
Row 1 (RS): Moss 3, p5, k6, p5, moss 3. Row 2: Moss 3, k5, p6, k5, moss 3. Rows 3 and 5: As row 1. Rows 4 and 6: As row 2. Row 7: Moss 3, p5, C6B, p5, moss 3. Row 8: As row 2.
Repeat rows 1–8 until the pocket measures 13 cm, ending with a WS row.
Change to 4.5 mm needles. Work 6 rows of moss stitch across all 22 sts (on an even count: row 1, (k1, p1) to end; row 2, (p1, k1) to end; repeat these two rows). Cast off in moss stitch.
Each pocket is about 12 cm wide and 15 cm deep, including the moss top.
Shawl collar
Join both shoulders with mattress stitch, matching the stepped cast-offs. Do not sew the side seams yet.
With the RS facing and the 4.5 mm circular needle, begin at the right-front neck edge (the cast-off end of the moss band).
Pick up 24 (24, 26, 24) sts evenly up the right-front neck edge, including the 7 cast-off band stitches. Knit across the 39 held back-neck stitches. Pick up 24 (24, 26, 24) sts evenly down the left-front neck edge.
87 (87, 91, 87) sts. Check: 24 + 39 + 24 = 87; 26 + 39 + 26 = 91.
Set moss (WS): K1, (p1, k1) to end. Every following row: k1, (p1, k1) to end.
Continue in moss stitch until the collar measures 14 cm. Cast off loosely in moss stitch. Do not tighten this cast-off; the collar has to fold.
The collar is not sewn down at the front edges. It folds back on itself to about 7 cm and lies over the top of the bands. The top buttonhole, at 85 cm, is the collar break.
Finishing
Sew the pockets on with the lower edge about 8 cm above the rib and the band edge of each pocket about 6 cm from the moss button band. Centre them on the reverse-stocking ground of each front, not over the rope cable. Use small stitches into the reverse of the fabric so they do not show on the right side.
Blocking
This is a cable coat, not a lace piece. Steam-block; do not wet-block, and do not press the cables flat.
Pin each piece to the measurements in the table, wrong side up, on blocking mats. Ease the rib slightly; let the plait and ropes sit raised. Hover a steam iron, or use a steamer, over the fabric without touching the cables. Leave to dry completely before moving the pins. The reverse-stocking ground will relax; the cables should still stand proud. If a cable has been flattened, a light mist and a gentle lift with the fingers will restore it.
Seams
- Set in the sleeves, matching the underarm cast-off of 3 (4, 4, 5) stitches on the sleeve to the same cast-off on the body. Ease the cap; do not gather it into pleats. Mattress-stitch the sleeve head, taking a whole stitch from each edge.
- Join the side seams and the sleeve seams in one continuous mattress stitch, matching the top of the rib on body and sleeve. The reverse-stocking selvedges give a clean seam if you take half a stitch from each edge, or one full stitch if you prefer a firmer coat seam.
- Weave in every end along a reverse-stocking column or inside a seam. Do not weave ends through a cable; they will show and they will stiffen the cross.
Buttons
Sew the 8 buttons on the left-front moss band to match the buttonholes, about 2 cm in from the front edge. Reinforce each button with a small shank of yarn so it sits on top of the band rather than pulling the moss open.
Wearing and care
The finished coat should button without strain across the bust, with the plait sitting on the centre of the back and each front rope sitting just inside the band. If the coat is snug, the tension was tighter than 18 stitches to 10 cm — this fabric does not block out the way lace does.
Hand-wash cool, or follow the ball-band. Dry flat, patting the cables back into relief while damp. Steam lightly to refresh between washes. Do not hang the coat by the shoulders while it is wet; the plait will stretch.
Schematic (flat, before sewing)
BACK                         FRONT (one)                 SLEEVE
┌──────────────────┐         ┌────────────┐              ┌──────────┐
│  shoulder  neck  │         │ shoulder   │              │   cap    │
│  10.5–13 cm      │         │            │              │          │
│     18 cm neck   │         │   neck     │              │ 34–44 cm │
├──────────────────┤         ├────────────┤              │  at top  │
│                  │         │            │              │          │
│   49–65 cm       │         │  23–30 cm  │              │          │
│                  │         │  moss band │              │          │
│   Chart C        │         │  + rope    │              │  Chart A │
│   centred        │         │            │              │  centred │
│                  │         │            │              │          │
│   100–106 cm     │         │            │              └────┬─────┘
│                  │         │            │                   │ 20–24 cm cuff
└──────────────────┘         └────────────┘                   └──────────┘
     6 cm rib                    6 cm rib                        6 cm rib
The two fronts, buttoned, plus the back, make the finished bust. The moss bands meet at the centre front; they are included in the front width, not added on top of it.
Disclaimer: This pattern was generated by AI and should be reviewed for accuracy before use. While we strive for quality, AI-generated content may contain errors. Please verify measurements, stitch counts, charts, and instructions before beginning your project. Generated by purlJam.uk
Love this pattern?
Save this pattern to your free PurlJam libraryAccess your pattern anytime
Bookmark this page to access your pattern anytime