Type
Knitting
Difficulty
intermediate
Category
custom
AI Thinking Process
Planning
Verification
Pattern
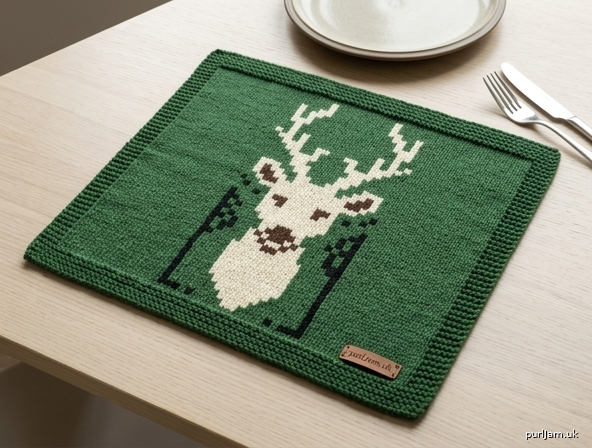
Woodland Stag Placemat
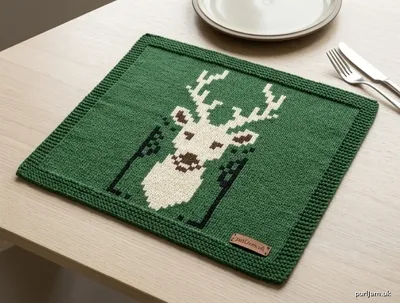
A rectangular knitted placemat with a garter-stitch frame and a stockinette center. A folk-style stag head — face, ears, and branching antlers — is worked as two-color colorwork in the middle of the field. The project is knit flat in worsted-weight yarn and is sized for a standard place setting.
This version is written for beginners: the fabric is plain knitting, the stitch count never changes, and the motif is added with duplicate stitch (the most beginner-friendly colorwork method for a single picture). If you prefer to knit the stag in as you go, use intarsia (or stranded knitting) and center the same motif on the stockinette panel.
Finished Size
One size: 18" (45.5 cm) wide × 13" (33 cm) tall, after blocking.
Materials
Yarn: Worsted weight (CYC 4), two colors.
- MC (background): 160 yd / 146 m. Suggested: cream, oatmeal, forest green, or rust.
- CC (stag): 40 yd / 37 m. Suggested: natural brown, charcoal, or cream (use high contrast with MC).
A washable wool, wool blend, or cotton/cotton-blend worsted is practical for a table mat.
Needles: US 8 (5 mm) knitting needles, or size needed to obtain gauge. Straight or circular needles used flat.
Notions:
- 2 stitch markers
- Tapestry needle
- Scissors
- Optional: blocking pins or wires
Gauge
18 stitches and 24 rows = 4" (10 cm) in stockinette stitch, blocked.
Work a 5" (12.5 cm) swatch, measure the center 4" (10 cm), and change needle size if needed. Gauge controls the finished measurements of the placemat.
Abbreviations (US)
- BO — bind off
- CC — contrast color
- CO — cast on
- k — knit
- MC — main color
- p — purl
- pm — place marker
- RS — right side
- sl m — slip marker
- st(s) — stitch(es)
- St st — stockinette stitch (knit on RS, purl on WS)
- WS — wrong side
Pattern Notes
- The placemat is knit flat, from the lower edge up. There is no shaping. You should have 81 stitches on every row.
- The first and last 6 stitches are worked in garter stitch (knit every row) for a firm border that lies flat.
- The center 69 stitches are stockinette stitch. This is the field for the stag.
- Colorwork (beginner method): Knit the whole placemat in MC. After binding off and before final blocking, add the stag head in CC with duplicate stitch (also called Swiss darning). Duplicate stitch traces the path of existing knit stitches, so it looks like knitted-in colorwork.
- Optional knit-in method: Work the same centered stag in CC while knitting the stockinette panel, using intarsia (separate yarn lengths for the motif) or stranded knitting (carrying CC across the back). Keep floats loose. Do not pull CC tight or the mat will pucker.
- Center stitch of the whole piece is stitch 41. Use it to line up the face of the stag.
- Weave in ends as you go when possible. Block the finished piece flat; do not fold it while damp.
Motif (written description)
Do not follow a stitch-by-stitch grid from this text. Place a single, stylized front-facing stag head in CC on the MC stockinette field.
Look: Folk or lodge style, not realistic. An oval or shield-shaped face, two short ears, and a pair of antlers that rise and branch (about three or four tines on each side). A small dark nose or short vertical mark at the lower face is optional. No body, no legs, no background scenery.
Placement:
- Center the motif on stitch 41, horizontally.
- Sit it in the middle of the 11" (28 cm) stockinette panel so there is similar empty stockinette above, below, and to each side.
- The whole motif (antler tips to chin) should occupy roughly the middle of the panel — about 6–7" (15–18 cm) tall and about 5–6" (12.5–15 cm) wide — leaving a clear MC margin inside the garter frame.
- Keep the lowest point of the face well above the lower garter border and the antler tips well below the upper garter border.
Color: MC is the ground. CC is the stag only. Do not outline the entire motif in a third color.
If working duplicate stitch: After the fabric is finished, thread CC on a tapestry needle. Starting at the center of the face, cover knit stitches with duplicate stitch until the face, ears, and antlers read clearly from a table-length viewing distance. Work antler branches as single-stitch or two-stitch paths so they stay crisp. Weave CC ends on the WS.
If working the motif as you knit: On RS rows, knit CC where the stag should appear and MC everywhere else in the 69-stitch panel; on WS rows, purl each stitch in the color it was worked on the RS. Center the design using stitch 41. Begin the motif after about 2–2½" (5–6.5 cm) of stockinette have been worked above the lower border, and complete it before the upper border.
Instructions
Lower border
With MC, CO 81 sts.
Rows 1–8: Knit. (Garter stitch.)
Piece measures about 1" (2.5 cm) from the cast-on edge. 81 sts remain ✓
Stockinette panel with side borders
Set-up row (RS): K6, pm, k to last 6 sts, pm, k6.
Next row (WS): K6, sl m, p to marker, sl m, k6.
Continue as follows until the piece measures 12" (30.5 cm) from the cast-on edge, ending with a WS row:
- RS: Knit all sts, slipping markers as you come to them.
- WS: K6, sl m, p to marker, sl m, k6.
The 6 stitches outside each marker stay in garter stitch. The 69 stitches between markers are stockinette. 81 sts remain on every row ✓
If you are knitting the stag in as you go, work CC on the center panel as described in Motif, still knitting the 6 border stitches at each side in MC garter. Do not work colorwork on the garter borders.
The stockinette panel is 11" (28 cm) tall (12" total minus the 1" lower border). Width check: 81 sts ÷ 18 sts × 4" = 18" ✓
Upper border
Remove markers on the next row if you prefer.
Next 8 rows: Knit. (Garter stitch.)
Piece measures about 13" (33 cm) from the cast-on edge. 81 sts remain ✓
BO knitwise on the RS. Cut yarn, leaving a 6" (15 cm) tail.
Finishing
- Weave in remaining MC ends on the WS with the tapestry needle.
- Add the stag head in CC with duplicate stitch if you have not already knit it in. Center on stitch 41 as described in Motif. Weave in CC ends on the WS.
- Block: Soak in lukewarm water with a little wool wash if using wool. Press out water in a towel (do not wring). Pin the placemat flat to 18" × 13" (45.5 × 33 cm), squaring the corners. Let dry completely. A light steam block is fine for cotton or superwash; hover the iron — do not mash the stitches.
- Check that the WS floats or duplicate-stitch tails are secure and will not snag on a table.
No seaming. The mat should lie flat. If the side edges curl, the garter borders were too narrow or the stockinette was worked tightly; blocking usually corrects a mild curl.
Beginner tips
- Count stitches after the cast-on and once or twice in the stockinette panel. The number is always 81.
- If a side border grows or shrinks, you knit or purled a border stitch by mistake. The markers are there to stop that.
- For duplicate stitch, use a blunt tapestry needle and match the tension of the knitted fabric. If the motif looks gathered, the duplicate stitches are too tight — relax them.
- High contrast between MC and CC makes the antlers readable. Test both colors in daylight before you commit.
- This placemat is a picture on one side. The WS will show duplicate-stitch or intarsia travels; that is expected.
Care
Follow the yarn label. Many worsted wools prefer hand wash, cool water, lay flat to dry. Cotton may be machine washed gentle if the label allows; reshape while damp. Do not tumble dry unless the yarn is approved for it.
Disclaimer: This pattern was generated by AI and should be reviewed for accuracy before use. While we strive for quality, AI-generated content may contain errors. Please verify measurements, stitch counts, charts, and instructions before beginning your project. Generated by purlJam.uk
Love this pattern?
Save this pattern to your free PurlJam libraryAccess your pattern anytime
Bookmark this page to access your pattern anytime