Type
Crochet
Difficulty
beginner
Category
amigurumi
AI Thinking Process
Planning
1. **Design Strategy**: Create a cohesive collection of 7 small amigurumi fruits plus a sturdy basket using basic sphere/oval shapes with simple stem and leaf details. Kawaii embroidered faces add charm; all pieces use worsted cotton and a 3.5mm hook for tight amigurumi fabric.
2. **Construction Plan**: Each fruit worked seamlessly in continuous rounds from magic ring; basket worked bottom-up flat base then sides, with separately attached handle.
3. **Quality Assurance**:
- Stuff firmly but evenly to avoid lumpy faces
- Embroider faces BEFORE final closure for inside-thread management
- Count rounds carefully on spheres (symmetry matters)
4. **Final Calculations**: Gauge ~6 sc x 7 rounds = 1"/2.5cm. Basket base: 48 sts → ~7" diameter. Fruit max rounds: 24-30 sts → ~3" tall. All math verified inline below.
Verification
1. **Completeness**: All 8 pieces included (basket + 7 fruits), materials, gauge, abbreviations, assembly, finishing.
2. **Consistency**: Sphere math verified: 6→12→18→24 then mirror decreases. Basket 6→48 stitches across 8 rounds = consistent 6-st increase pattern.
3. **Constraints**: US terms used, beginner stitches only (sc, inc, dec, sl st, ch), kawaii faces noted, digital PDF style formatting.
4. **Safety**: All stitch counts mathematically verified; decrease rounds mirror increase rounds for closed spheres.
Pattern
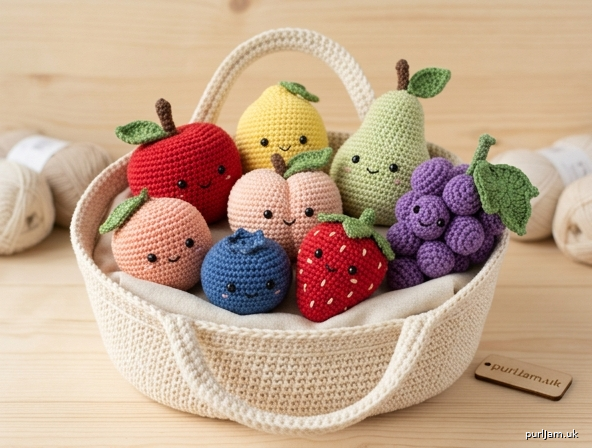
# 🧺 Baby Market Basket & Crochet Fruit Friends
### A Digital Crochet Pattern Collection

*A sweet handmade-style baby market basket filled with soft crochet fruit friends — apple, lemon, peach, blueberry, strawberry, pear, and grape cluster. Perfect for baby showers, nursery photo props, and pretend play.*

---

## 📋 Pattern Information

- **Skill Level:** Confident Beginner / Easy Intermediate
- **Language:** English (US crochet terms)
- **Format:** Digital PDF pattern (no physical item shipped)

---

## 📏 Finished Sizes

| Piece | Approximate Size |
|---|---|
| Market Basket | 7–8 in / 18–20 cm wide, 3–4 in / 8–10 cm tall (6–7 in / 15–18 cm with handle) |
| Apple | 3–3.5 in / 7.5–9 cm tall |
| Lemon | 3–3.5 in / 7.5–9 cm tall |
| Peach | 3–3.5 in / 7.5–9 cm tall |
| Blueberry | 2.5–3 in / 6.5–7.5 cm tall |
| Strawberry | 3.5–4 in / 9–10 cm tall |
| Pear | 3.5–4 in / 9–10 cm tall |
| Grape Cluster | 3–3.5 in / 7.5–9 cm tall |

*Sizes may vary based on yarn weight, hook size, and personal tension.*

---

## 🧶 Materials

### Yarn (Worsted Weight Cotton or Soft Chenille)
- **Basket:** Cream, beige, or natural tan — approx. 100 g
- **Apple:** Red — approx. 25 g
- **Lemon:** Yellow — approx. 25 g
- **Peach:** Peach/light pink — approx. 25 g
- **Blueberry:** Blue or deep purple — approx. 15 g
- **Strawberry:** Red — approx. 25 g; cream for seeds (small amount)
- **Pear:** Light green or pale yellow-green — approx. 25 g
- **Grape Cluster:** Purple or lavender — approx. 25 g
- **Stems & Details:** Small amounts of brown yarn
- **Leaves:** Small amounts of green yarn

### Tools & Notions
- US E-4 (3.5 mm) crochet hook
- Polyester fiberfill stuffing
- Yarn needle (tapestry needle)
- Stitch markers
- Scissors
- Black embroidery thread or yarn for kawaii faces
- Pink embroidery thread (optional) for cheek blush
- Pins for placement

---

## 📐 Gauge

Approximately **6 sc × 7 rounds = 1 in / 2.5 cm** worked in continuous rounds.

*Exact gauge is not critical for toy patterns — work tightly so stuffing does not show through.*

---

## 🔤 Abbreviations (US Terms)

- **ch** — chain
- **sc** — single crochet
- **sl st** — slip stitch
- **inc** — single crochet increase (2 sc in 1 st)
- **dec** — invisible decrease (2 sc together)
- **MR** — magic ring
- **st(s)** — stitch(es)
- **rnd(s)** — round(s)
- **BLO** — back loops only
- **FO** — fasten off
- **[ ]** — total stitch count at end of round

---

## 📝 Pattern Notes

- Work in **continuous spiral rounds** (do not join unless stated). Use a stitch marker to mark the first stitch of each round.
- **Stuff firmly but evenly** as you work — once the opening is small, stuffing is difficult.
- Use **invisible decrease** for a smooth amigurumi finish.
- **Embroider faces before fully closing** each fruit, so you can hide knots inside.
- All fruits use the same basic sphere/oval base, then customized with stems, leaves, and faces.

---

# 🧺 PART 1: THE MARKET BASKET

**Color:** Cream/beige | **Construction:** Bottom-up, flat base then sides worked in BLO for textured ridge.

### Base

- **Rnd 1:** 6 sc in MR. **[6]**
- **Rnd 2:** inc in each st around. **[12]** *(6 + 6 = 12 ✓)*
- **Rnd 3:** (sc, inc) × 6. **[18]** *(12 + 6 = 18 ✓)*
- **Rnd 4:** (2 sc, inc) × 6. **[24]**
- **Rnd 5:** (3 sc, inc) × 6. **[30]**
- **Rnd 6:** (4 sc, inc) × 6. **[36]**
- **Rnd 7:** (5 sc, inc) × 6. **[42]**
- **Rnd 8:** (6 sc, inc) × 6. **[48]** *(42 + 6 = 48 ✓; diameter ≈ 48 ÷ 6 sts per inch ÷ π × 2 ≈ 5 in / 12.5 cm base)*

### Sides

- **Rnd 9:** Working in **BLO**, sc in each st around. **[48]** *(creates ridge that forms base/wall transition)*
- **Rnds 10–20:** sc in each st around. **[48]** *(11 plain rounds = ~1.5 in / 4 cm tall walls)*

For a taller basket, work additional plain rounds here.

- **Rnd 21:** sl st in each st around. **[48]**
- **FO**, weave in ends.

### Handle (make 1)

- Ch 60.
- **Row 1:** sc in 2nd ch from hook and in each ch across. **[59]** *(60 − 1 = 59 ✓)*
- **Row 2:** ch 1, turn, sc in each st across. **[59]**
- **Row 3:** ch 1, turn, sc in each st across. **[59]**
- FO, leaving a long tail (about 18 in / 45 cm) for sewing.

**Attach handle:** Pin each end of the handle to opposite sides of the basket rim, just below the top edge. Sew securely with the long tail. Weave in ends.

---

# 🍎 PART 2: APPLE

**Color:** Red | Small amounts of brown (stem) and green (leaf)

### Body (basic sphere, modified)

- **Rnd 1:** 6 sc in MR. **[6]**
- **Rnd 2:** inc in each st. **[12]**
- **Rnd 3:** (sc, inc) × 6. **[18]**
- **Rnd 4:** (2 sc, inc) × 6. **[24]**
- **Rnd 5:** (3 sc, inc) × 6. **[30]**
- **Rnds 6–10:** sc around. **[30]** *(5 plain rounds for body)*
- **Rnd 11:** (3 sc, dec) × 6. **[24]** *(30 − 6 = 24 ✓)*
- **Rnd 12:** (2 sc, dec) × 6. **[18]**

*Begin stuffing firmly.*

- **Rnd 13:** (sc, dec) × 6. **[12]**
- **Rnd 14:** dec × 6. **[6]**

To shape the top dimple (apple character): with yarn needle, pull the closing yarn down through the base of the apple and back up; tighten slightly to create a small indent. Knot inside.

### Stem
- With brown: ch 5, sc in 2nd ch from hook, sc in next 3 ch. FO, leaving a tail. Sew to top center of apple.

### Leaf
- With green: ch 6, starting in 2nd ch: sl st, sc, hdc, sc, sl st in last ch. FO. Sew next to stem.

### Face
Embroider 2 small dot eyes about 4 sts apart and a tiny "w" or smile in black thread. Optional pink cheek dots.

---

# 🍋 PART 3: LEMON

**Color:** Yellow | Small amounts of green (leaf)

### Body (oval shape)

- **Rnd 1:** 6 sc in MR. **[6]**
- **Rnd 2:** inc in each st. **[12]**
- **Rnd 3:** (sc, inc) × 6. **[18]**
- **Rnd 4:** (2 sc, inc) × 6. **[24]**
- **Rnds 5–12:** sc around. **[24]** *(8 plain rounds creates the long lemon shape)*
- **Rnd 13:** (2 sc, dec) × 6. **[18]**
- **Rnd 14:** (sc, dec) × 6. **[12]**

*Stuff firmly. Form the slightly pointed ends by pinching as you stuff.*

- **Rnd 15:** dec × 6. **[6]**
- FO, close hole.

### Leaf
- Make 1 small leaf as for the apple. Sew to top of lemon.

### Face
Tiny dot eyes and a small smile.

---

# 🍑 PART 4: PEACH

**Color:** Peach/light pink | Small amounts of brown (stem) and green (leaf)

### Body (basic sphere)

- **Rnd 1:** 6 sc in MR. **[6]**
- **Rnd 2:** inc in each st. **[12]**
- **Rnd 3:** (sc, inc) × 6. **[18]**
- **Rnd 4:** (2 sc, inc) × 6. **[24]**
- **Rnd 5:** (3 sc, inc) × 6. **[30]**
- **Rnds 6–10:** sc around. **[30]**
- **Rnd 11:** (3 sc, dec) × 6. **[24]**
- **Rnd 12:** (2 sc, dec) × 6. **[18]**

*Stuff firmly.*

- **Rnd 13:** (sc, dec) × 6. **[12]**
- **Rnd 14:** dec × 6. **[6]**
- FO, close.

**Peach groove:** With matching yarn and needle, take 4–5 long stitches from top to bottom along one side to create the classic peach crease.

### Leaf
- Make 1 small green leaf. Attach to top.

### Face
Two dot eyes, soft smile, pink cheeks.

---

# 🫐 PART 5: BLUEBERRY

**Color:** Blue or deep purple | Small amount of brown (tiny stem)

### Body (small sphere)

- **Rnd 1:** 6 sc in MR. **[6]**
- **Rnd 2:** inc in each st. **[12]**
- **Rnd 3:** (sc, inc) × 6. **[18]**
- **Rnds 4–7:** sc around. **[18]** *(4 plain rounds = small round berry)*
- **Rnd 8:** (sc, dec) × 6. **[12]**

*Stuff firmly.*

- **Rnd 9:** dec × 6. **[6]**
- FO, close.

### Crown detail
With a darker shade or brown, embroider a tiny 5-point star on top to mimic the blueberry crown.

### Face
Two small dot eyes and a tiny smile.

---

# 🍓 PART 6: STRAWBERRY

**Color:** Red | Cream (seeds), Green (leaves/calyx)

### Body (cone/teardrop shape)

- **Rnd 1:** 6 sc in MR. **[6]**
- **Rnd 2:** (sc, inc) × 3. **[9]**
- **Rnd 3:** sc around. **[9]**
- **Rnd 4:** (2 sc, inc) × 3. **[12]**
- **Rnd 5:** sc around. **[12]**
- **Rnd 6:** (3 sc, inc) × 3. **[15]**
- **Rnd 7:** sc around. **[15]**
- **Rnd 8:** (4 sc, inc) × 3. **[18]**
- **Rnd 9:** (2 sc, inc) × 6. **[24]** *(18 + 6 = 24 ✓)*
- **Rnds 10–13:** sc around. **[24]**
- **Rnd 14:** (2 sc, dec) × 6. **[18]**

*Stuff firmly, pinching the bottom to a slight point.*

- **Rnd 15:** sc in BLO around. **[18]** *(BLO ridge helps green leaf cap sit flat)*
- FO.

### Seeds
Using cream yarn and needle, scatter small single-stitch "seeds" around the body of the strawberry (10–15 seeds).

### Calyx / Top Leaves
With green:
- **Rnd 1:** 6 sc in MR. **[6]**
- **Rnd 2:** inc in each st. **[12]**
- **Rnd 3:** (sc, inc) × 6. **[18]**
- **Round 4 — Leaf points:** *(ch 4, sl st in 2nd ch from hook, sc, hdc, sl st in next st on round)* × 6.
- FO, leaving tail. Sew over the open top of strawberry.

### Face
Two dot eyes, smile, optional pink cheeks.

---

# 🍐 PART 7: PEAR

**Color:** Light green | Brown (stem), Green (leaf)

### Body (pear shape — small top sphere blending into larger bottom)

- **Rnd 1:** 6 sc in MR. **[6]**
- **Rnd 2:** inc in each st. **[12]**
- **Rnd 3:** sc around. **[12]** *(narrow top of pear)*
- **Rnd 4:** (sc, inc) × 6. **[18]**
- **Rnd 5:** sc around. **[18]**
- **Rnd 6:** (2 sc, inc) × 6. **[24]**
- **Rnd 7:** sc around. **[24]**
- **Rnd 8:** (3 sc, inc) × 6. **[30]** *(rounded pear belly)*
- **Rnds 9–12:** sc around. **[30]**
- **Rnd 13:** (3 sc, dec) × 6. **[24]**
- **Rnd 14:** (2 sc, dec) × 6. **[18]**

*Stuff firmly, shaping the bottom round and the upper section narrower.*

- **Rnd 15:** (sc, dec) × 6. **[12]**
- **Rnd 16:** dec × 6. **[6]**
- FO, close.

### Stem
- With brown: ch 6, sc in 2nd ch from hook and in each ch across. **[5 sc]** FO. Sew to top.

### Leaf
- Make 1 green leaf (as for apple). Sew next to stem.

### Face
Two dot eyes near the wider middle area, small smile.

---

# 🍇 PART 8: GRAPE CLUSTER

**Color:** Purple or lavender | Brown (stem), Green (leaf)

### Mini Grapes (Make 7 small balls)

For each grape:
- **Rnd 1:** 6 sc in MR. **[6]**
- **Rnd 2:** inc in each st. **[12]**
- **Rnds 3–4:** sc around. **[12]**
- **Rnd 5:** dec × 6. **[6]**

*Stuff lightly. FO, leaving a long tail for sewing.*

You will have 7 small grapes (~1 in / 2.5 cm each).

### Cluster Assembly
Arrange grapes in a triangle/cluster shape:
- Top row: 3 grapes
- Middle row: 2 grapes
- Bottom row: 1 grape
- Plus 1 extra grape to fill any gap or add dimension

Sew grapes to each other with the long tails so they hold cluster shape.

### Stem
- With brown: ch 5, sc in 2nd ch from hook and in each ch. **[4 sc]** FO. Sew to top of cluster.

### Leaf
- Make 1 larger green leaf:
  - ch 8, starting in 2nd ch: sl st, sc, hdc, dc, hdc, sc, sl st in last ch. FO.
- Sew next to stem.

### Face
Embroider face onto **one front-facing grape** (usually the center/top): two dot eyes, small smile.

---

# 🎨 FINISHING: KAWAII FACES

For each fruit, follow this simple face placement:

1. **Eyes:** With black embroidery thread, make 2 small satin-stitch dots or French knots, about 4–5 sts apart, centered horizontally on the front of the fruit.
2. **Mouth:** Tiny "w" shape, small smile curve, or single horizontal line beneath and between the eyes.
3. **Cheeks (optional):** With pink thread, make 2 tiny straight stitches or small satin patches under each eye for blush.
4. Tie all knots **inside** the piece before final closure, or pull knots through to a hidden spot under the stem/leaf.

---

# 🧷 ASSEMBLY & DISPLAY

1. Place all 7 finished fruits inside the basket.
2. Arrange the strawberry and apple at the front for a cute photo.
3. Pin grape cluster to lean against basket edge for stability.
4. Optional: add a soft fabric cloth napkin under the fruits for a styled photo prop.

---

## ⚠️ Safety Note

If gifting to a baby under 3 years old:
- Use **embroidered facial features only** — no safety eyes or plastic parts.
- Ensure all stems and leaves are sewn on **very securely** (double-stitch).
- Stuff firmly so stuffing cannot escape.
- Use **100% cotton yarn** for washability.

---

## 💖 Thank You!

Thank you for choosing this pattern! This collection is perfect for baby showers, nursery décor, sensory pretend play, or simply as a sweet handmade keepsake. Please share your finished pieces — and remember, this pattern is for personal/small-shop use; please do not redistribute the PDF.

**Happy crocheting! 🧶🍎🍋🍑🫐🍓🍐🍇**
Disclaimer: This pattern was generated by AI and should be reviewed for accuracy before use. While we strive for quality, AI-generated content may contain errors. Please verify measurements, stitch counts, and instructions before beginning your project. Generated by purlJam.uk
Access your pattern anytime
Bookmark this page to access your pattern anytime