Type
Knitting
Difficulty
intermediate
Category
custom
AI Thinking Process
Planning
Verification
Pattern
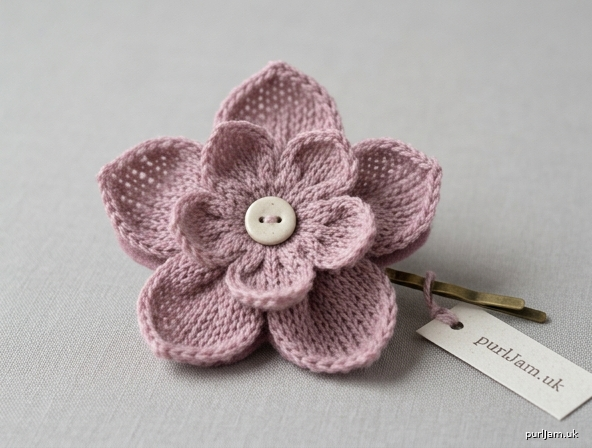
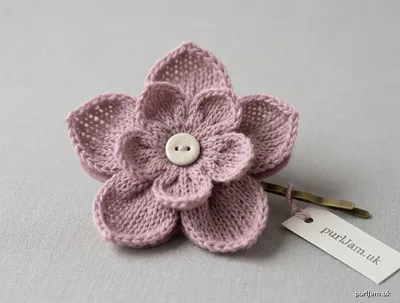
Beginner’s Airy Blossom Hair Pin
A soft, see-through five-petal flower with a smaller inner layer, knit in garter stitch from lace-weight yarn on larger needles. The open fabric looks like a garden bloom. Petals are sewn together, given a simple center, and mounted on a metal hair pin. This is a small, low-stakes project that practices cast-on, knit, kfb, k2tog, and seaming.
Materials
- Yarn: 15 g lace-weight yarn (about 120 yd / 110 m in 15 g). A smooth wool, cotton, or wool-blend lace works well. You will use only about 10–15 yd (9–14 m); the rest is leftover.
- Needles: US 7 (4.5 mm) straight or circular needles.
- Notions:
- Tapestry needle
- Scissors
- 1 metal hair pin, bobby pin, or small barrette, about 2–2½ in (5–6.5 cm) long
- 1 felt circle, 1¼ in (3 cm) diameter, in a matching or coordinating color
- 1 small button or bead, ⅜–½ in (1–1.3 cm), for the center (optional)
- Craft glue or a low-temp glue gun (optional, for mounting)
- 2 locking stitch markers (optional, to mark the first stitch of a row)
Yarn note: Lace yarn on a 4.5 mm needle is intentionally loose. The petals will look airy and a little “holey.” That is the design.
Gauge
5 stitches and 10 rows = 1 in (2.5 cm) in garter stitch, measured after a light steam or spray block.
Gauge is not critical for this accessory. A slightly tighter or looser gauge will only change the finished flower by a fraction of an inch. Do not spend time knitting a large swatch; the first petal is your swatch. If that petal is between 1½ and 2 in (4–5 cm) long, you are in range.
Size
One size.
Finished flower: about 2¾–3 in (7–7.5 cm) in diameter, after assembly.
Abbreviations (US)
- BO – bind off
- CO – cast on
- k – knit
- k2tog – knit 2 stitches together (decrease 1)
- kfb – knit into the front and then the back of the same stitch (increase 1)
- rep – repeat
- RS – right side
- st(s) – stitch(es)
- WS – wrong side
Beginner stitch reminders
Garter stitch means you knit every row.
kfb: Insert the right needle into the front of the next stitch and knit it, but do not slide it off. Swing the right needle around and knit into the back loop of that same stitch. Now slide it off. You have made 2 stitches from 1.
k2tog: Insert the right needle into the next 2 stitches as if to knit, and knit them together as one stitch.
Pattern Notes
- The whole flower is garter stitch (knit every row). There is no purling.
- Each petal starts at the inner (base) edge, grows wider, then tapers to a point.
- Leave the cast-on tail and the fasten-off tail on every petal — you will use them to sew.
- Count your stitches at the end of every increase or decrease row. The check numbers in parentheses are there so you can catch a mistake on that row, not three rows later.
- Work the stitches loosely. Lace yarn on 4.5 mm needles should look open. If you knit tightly, the flower will be smaller and stiffer; relax your hands.
- Right side and wrong side look the same in garter stitch. Treat the first row of each petal as the right side only so your increase/decrease rows stay on the same face. This keeps the petal edges neat.
Pattern
Large petals (make 5)
These form the outer ring of the flower.
CO 3 sts using a knitted or long-tail cast-on. Leave a 8 in (20 cm) tail.
Row 1 (RS): kfb, k1, kfb. — 5 sts (3 + 2 = 5 ✓)
Row 2 (WS): Knit.
Row 3: kfb, k3, kfb. — 7 sts (5 + 2 = 7 ✓)
Row 4: Knit.
Row 5: kfb, k5, kfb. — 9 sts (7 + 2 = 9 ✓)
Rows 6–8: Knit. (3 rows even; still 9 sts ✓)
Row 9: k2tog, k5, k2tog. — 7 sts (9 − 2 = 7 ✓)
Row 10: Knit.
Row 11: k2tog, k3, k2tog. — 5 sts (7 − 2 = 5 ✓)
Row 12: Knit.
Row 13: k2tog, k1, k2tog. — 3 sts (5 − 2 = 3 ✓)
Row 14: Knit.
Row 15: k2tog, k1. — 2 sts (3 − 1 = 2 ✓)
Row 16: k2tog. — 1 st (2 − 1 = 1 ✓)
Cut yarn, leaving a 8 in (20 cm) tail. Draw the tail through the last stitch and pull to fasten off.
Make 4 more large petals the same way (5 total ✓).
Beginner check: Each large petal should look like a small diamond or leaf, wider in the middle than at either end. If a petal is much narrower than the others, you likely missed a kfb; if it is much wider, you likely missed a k2tog.
Small petals (make 5)
These form the inner ring and sit on top of the large petals.
CO 3 sts. Leave a 6 in (15 cm) tail.
Row 1 (RS): kfb, k1, kfb. — 5 sts (3 + 2 = 5 ✓)
Row 2: Knit.
Row 3: kfb, k3, kfb. — 7 sts (5 + 2 = 7 ✓)
Rows 4–6: Knit. (3 rows even; still 7 sts ✓)
Row 7: k2tog, k3, k2tog. — 5 sts (7 − 2 = 5 ✓)
Row 8: Knit.
Row 9: k2tog, k1, k2tog. — 3 sts (5 − 2 = 3 ✓)
Row 10: Knit.
Row 11: k2tog, k1. — 2 sts (3 − 1 = 2 ✓)
Row 12: k2tog. — 1 st (2 − 1 = 1 ✓)
Fasten off, leaving a 6 in (15 cm) tail.
Make 4 more small petals the same way (5 total ✓).
Optional leaves (make 2)
Skip these if you want a flower only. They sit behind the blossom.
CO 3 sts. Leave a 8 in (20 cm) tail.
Row 1 (RS): kfb, k1, kfb. — 5 sts (3 + 2 = 5 ✓)
Row 2: Knit.
Row 3: kfb, k3, kfb. — 7 sts (5 + 2 = 7 ✓)
Row 4: Knit.
Row 5: kfb, k5, kfb. — 9 sts (7 + 2 = 9 ✓)
Rows 6–10: Knit. (5 rows even; still 9 sts ✓)
Row 11: k2tog, k5, k2tog. — 7 sts (9 − 2 = 7 ✓)
Row 12: Knit.
Row 13: k2tog, k3, k2tog. — 5 sts (7 − 2 = 5 ✓)
Row 14: Knit.
Row 15: k2tog, k1, k2tog. — 3 sts (5 − 2 = 3 ✓)
Row 16: Knit.
Row 17: k2tog, k1. — 2 sts (3 − 1 = 2 ✓)
Row 18: k2tog. — 1 st (2 − 1 = 1 ✓)
Fasten off, leaving a 8 in (20 cm) tail.
Make 1 more leaf the same way (2 total ✓).
Knitted center (optional)
Use this if you do not have a button or bead.
CO 16 sts. Leave a 10 in (25 cm) tail.
Rows 1–4: Knit. (4 rows garter; 16 sts ✓)
BO all sts loosely. Leave a 10 in (25 cm) tail.
Thread the bind-off tail onto a tapestry needle. Weave it along the bind-off edge, then through the cast-on edge, and pull up so the strip coils into a tight little bun about ½ in (1.3 cm) across. Stitch through the coil a few times to lock it. (16 sts gathered into a coil ✓)
Finishing
1. Block the pieces (gentle)
Pin each petal (and leaf, if made) flat on a towel, stretching them just enough to open the lace. Spray lightly with water. Let dry completely. Do not soak; lace yarn on large needles can grow if it is wet-blocked hard.
2. Assemble the outer flower
Lay the 5 large petals in a circle, points facing out, bases meeting at the center, like slices of a pie. Overlap each petal’s side edge over the next by about ¼ in (6 mm) so there is no gap at the middle.
Using a tapestry needle and the cast-on tails, sew the 5 bases together with a few firm stitches through all layers at the center. Then take 2 or 3 stitches along each overlap to hold the petals in a ring. Do not sew all the way out to the points — the tips should stay free. (5 large petals joined at the center ✓)
3. Add the inner flower
Lay the 5 small petals on top of the large ring, points facing out, offset so each small petal sits over a join between two large petals (not directly on top of a large petal). Sew the 5 small bases together at the center, then tack each small petal to the large layer with 1 or 2 tiny stitches near the base only. (5 small petals stacked and offset on 5 large petals ✓)
4. Add leaves (if using)
Place the 2 leaves behind the flower, pointing in different directions (about 10 o’clock and 4 o’clock, or wherever looks natural). Tack the base of each leaf to the back of the flower with a few stitches. Leave the leaf tips free.
5. Add the center
Sew the button, bead, or knitted coil firmly over the middle of the inner petals, covering all the gathered bases. Take several stitches so it cannot snag or pull off in the hair.
Weave in remaining tails on the back of the flower. Trim.
6. Mount on the hair pin
- Center the flower on the felt circle. The felt should be slightly smaller than the flower so it does not show from the front.
- Sew the flower to the felt all the way around, about ¼ in (6 mm) in from the felt edge, catching the back of the petals only. The felt gives the airy lace a stable back so the blossom does not flop on the pin.
- Attach the felt to the hair pin:
- Sewn method (recommended): Hold the felt against the top bend or head of the pin. With matching yarn, wrap tightly around the pin and through the felt 8–10 times, then knot and weave in. The wraps should cover about ½ in (1.3 cm) of the pin so the flower cannot twist.
- Glued method: Put a thin line of craft glue or low-temp hot glue on the pin’s top surface. Press the felt on and hold until set. Let glue cure fully before wearing. Keep glue off the knitted front.
7. Wear
Slide the pin into a bun, half-up style, or the side of a braid. The flower should sit on top of the hair with the pin hidden underneath.
Care
Hand wash cold if needed, reshape the petals, and dry flat. Do not wring. If the flower is glued to the pin, spot-clean only. Store flat so the petals are not crushed.
What you practiced
Cast on, knit every row (garter stitch), kfb, k2tog, fastening off, seaming with a tapestry needle, and a simple accessory finish. When you are ready for a next step, try the same petals in a second color for the inner ring, or make two flowers and sew them to a plain headband.
Disclaimer: This pattern was generated by AI and should be reviewed for accuracy before use. While we strive for quality, AI-generated content may contain errors. Please verify measurements, stitch counts, charts, and instructions before beginning your project. Generated by purlJam.uk
Love this pattern?
Save this pattern to your free PurlJam libraryAccess your pattern anytime
Bookmark this page to access your pattern anytime