Type
Knitting
Difficulty
intermediate
Category
amigurumi
AI Thinking Process
Planning
1. **Design Strategy**: A beginner-friendly knitted puppy amigurumi in worsted weight yarn, worked in the round in stockinette. Simple shaping with basic increases/decreases, separate pieces seamed together. Floppy ears and a cute tail for puppy character.
2. **Construction Plan**: Five separate pieces (head, body, 4 legs, 2 ears, tail) worked in the round bottom-up on DPNs, stuffed, and seamed; ears knit flat.
3. **Quality Assurance**:
- Tight gauge essential so stuffing doesn't show through.
- Symmetric leg placement — mark positions before sewing.
- Safety eyes must be inserted before closing head.
4. **Final Calculations**: Gauge 5 sts/inch, 7 rows/inch in stockinette on US 5 / 3.75mm. Head starts at 6 sts, increases to 30 sts (~6" circumference). Body 8→32 sts. Legs 12 sts. Finished puppy ~7" tall.
Verification
1. **Completeness**: Head, body, 4 legs, 2 ears, tail, finishing — all included. ✓
2. **Consistency**: 30 sts ÷ 5 sts/in = 6" head circumference (≈2" diameter head). Body 32 sts = 6.4" circumference. Math checks out. ✓
3. **Constraints**: Beginner-level — only k, p, kfb, k2tog used. Worsted weight specified. US terminology used. ✓
4. **Safety**: Safety eyes noted as optional — embroidery recommended for children under 3. Stitch counts verified in each section. ✓
Pattern
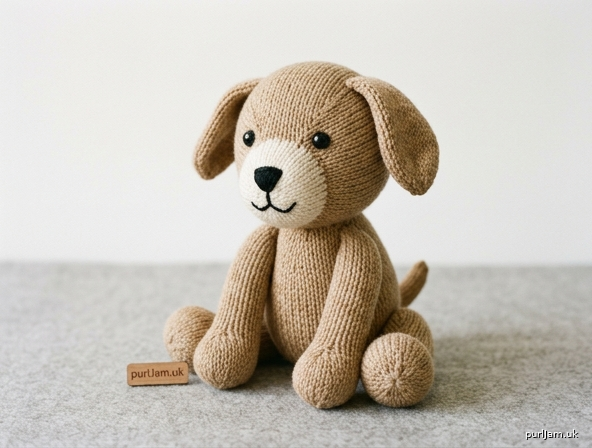
# Buddy the Knitted Puppy
### A Beginner Amigurumi Pattern

A cuddly little puppy worked in simple stockinette stitch in the round. Perfect first amigurumi project — only basic increases and decreases required!

**Finished Size:** Approximately 7 inches (18 cm) tall, seated.

---

## Materials

- **Main Color (MC):** Approximately 100 yards (90 m) of worsted weight yarn in tan, brown, or gray (puppy body color)
- **Contrast Color (CC):** Small amount (10 yards / 9 m) in cream or white for belly/muzzle accent (optional)
- **Needles:** US 5 / 3.75 mm double-pointed needles (set of 4 or 5), OR one 32" circular needle for Magic Loop
  - *Note: This is 1–2 sizes smaller than typical for worsted weight, creating a tight fabric that hides stuffing.*
- **Polyester fiberfill stuffing:** approximately 2 oz (55 g)
- **Safety eyes:** 2 x 9 mm black (or use embroidery floss for children under 3 years)
- **Tapestry needle** for seaming and weaving in ends
- **Stitch marker** to mark beginning of round
- **Black embroidery floss** for nose and mouth
- **Scrap yarn or locking markers** for marking limb placement

---

## Gauge

**22 sts x 28 rows = 4 inches (10 cm)** in stockinette stitch in the round.

*Gauge is not critical for size, but fabric MUST be tight enough that stuffing doesn't show through. If you can see stuffing through your swatch, go down another needle size.*

---

## Abbreviations (US Terms)

- **k** — knit
- **p** — purl
- **kfb** — knit into front and back of stitch (increase 1)
- **k2tog** — knit 2 stitches together (decrease 1)
- **st(s)** — stitch(es)
- **rnd(s)** — round(s)
- **MC** — main color
- **CC** — contrast color

---

## Construction Overview

Each piece is worked separately in the round (except ears, worked flat), stuffed firmly, then seamed together with mattress stitch. Assemble in this order: attach head to body → legs → ears → tail.

---

## HEAD (make 1, in MC)

Cast on 6 sts. Divide evenly over 3 DPNs (2 sts per needle) or set up for Magic Loop. Join to work in the round, being careful not to twist. Place marker.

- **Rnd 1:** Kfb in every st. *(12 sts)*
- **Rnd 2:** Knit.
- **Rnd 3:** *Kfb, k1* around. *(18 sts)*
- **Rnd 4:** Knit.
- **Rnd 5:** *Kfb, k2* around. *(24 sts)*
- **Rnd 6:** Knit.
- **Rnd 7:** *Kfb, k3* around. *(30 sts)*
- **Rnds 8–16:** Knit (9 rnds). *(30 sts)*

**Check:** 30 sts ÷ 22 sts/4" ≈ 5.5" circumference. ✓

**Insert safety eyes** between Rnds 12 and 13, approximately 6 sts apart, centered on the front of the head. Secure backings firmly.

**Begin stuffing** the head firmly as you shape the top.

- **Rnd 17:** *K2tog, k3* around. *(24 sts)*
- **Rnd 18:** Knit.
- **Rnd 19:** *K2tog, k2* around. *(18 sts)*
- **Rnd 20:** *K2tog, k1* around. *(12 sts)*
- **Rnd 21:** *K2tog* around. *(6 sts)*

Add a final bit of stuffing. Cut yarn leaving 8" tail; thread through remaining 6 sts and pull tight to close. Weave in end to inside.

---

## BODY (make 1, in MC)

Cast on 8 sts. Divide over DPNs, join in the round, place marker.

- **Rnd 1:** Kfb in every st. *(16 sts)*
- **Rnd 2:** Knit.
- **Rnd 3:** *Kfb, k1* around. *(24 sts)*
- **Rnd 4:** Knit.
- **Rnd 5:** *Kfb, k2* around. *(32 sts)*
- **Rnds 6–18:** Knit (13 rnds). *(32 sts)*

**Check:** 32 sts ÷ 22 sts/4" ≈ 5.8" circumference. ✓

**Begin shaping shoulders and stuffing firmly:**

- **Rnd 19:** *K2tog, k6* around. *(28 sts)*
- **Rnd 20:** Knit.
- **Rnd 21:** *K2tog, k5* around. *(24 sts)*
- **Rnd 22:** *K2tog, k2* around. *(18 sts)*
- **Rnd 23:** *K2tog, k1* around. *(12 sts)*

Stuff firmly. Cut yarn leaving 12" tail (for attaching head). Thread through remaining 12 sts and pull tight to close.

---

## LEGS (make 4, in MC)

Cast on 6 sts. Divide over DPNs, join in the round, place marker.

- **Rnd 1:** Kfb in every st. *(12 sts)*
- **Rnds 2–12:** Knit (11 rnds). *(12 sts)*

Bind off loosely OR cut yarn leaving 10" tail and thread through live sts without gathering (for a flat top to seam to body).

Stuff legs lightly — leave top inch unstuffed for easier attachment.

---

## EARS (make 2, in MC) — worked flat

Cast on 8 sts. Work back and forth on 2 DPNs or straight needles.

- **Row 1 (RS):** Knit.
- **Row 2 (WS):** Purl.
- **Rows 3–10:** Repeat Rows 1–2 (4 more times). *(10 rows total)*
- **Row 11:** K2tog, k4, k2tog. *(6 sts)*
- **Row 12:** Purl.
- **Row 13:** K2tog, k2, k2tog. *(4 sts)*
- **Row 14:** P2tog, p2tog. *(2 sts)*
- **Row 15:** K2tog. *(1 st)*

Cut yarn, pull through last st. Leave an 8" tail for sewing. The ears will naturally curl — this adds floppy puppy charm! Do not stuff.

---

## TAIL (make 1, in MC)

Cast on 6 sts. Divide over DPNs, join in the round.

- **Rnds 1–8:** Knit. *(6 sts)*
- **Rnd 9:** *K2tog* around. *(3 sts)*

Cut yarn, thread through remaining 3 sts, pull tight. Stuff very lightly. Leave a 6" tail for attaching.

---

## Assembly & Finishing

Work assembly in this order for best results:

**1. Attach Head to Body:**
Position head on top of body. Using the 12" tail from the body, sew head securely to body with mattress stitch, going around twice for strength. Add a bit more stuffing into the neck junction before closing if needed.

**2. Attach Legs:**
- **Back legs:** Pin two legs to the lower sides of the body, positioned symmetrically so the puppy can "sit." Use locking markers to check placement before sewing.
- **Front legs:** Pin two legs to the front/upper body just below the head. Check symmetry.
- Sew each leg securely using mattress stitch around the open edge.

**3. Attach Ears:**
Pin ears to the top sides of the head, angled slightly forward and outward. Sew the cast-on edge of each ear flat against the head using the long tail. Let tips flop naturally.

**4. Attach Tail:**
Sew tail to the back of the body, slightly angled upward.

**5. Embroider Face:**
- **Nose:** Using black embroidery floss, embroider a small triangular or oval nose at the front-center of the head, just below the eyes.
- **Mouth:** Embroider a small "Y" shape below the nose for a puppy smile.
- **Optional muzzle:** Use CC to work a few satin stitches around the mouth area for a lighter muzzle.

**6. Weave in All Ends:**
Thread all loose ends to the INSIDE of the body/head through the seams. Weave in securely so they can't work loose — this is essential for a toy that will be handled.

---

## Care Instructions

Hand wash gently in cool water with mild soap. Squeeze (do not wring) and air dry flat. Reshape while damp.

---

## Tips for Success (Beginner Notes)

- **Tight fabric is everything.** If stuffing shows, unravel and go down a needle size.
- **Stuff firmly but not lumpy.** Use small pinches of fiberfill at a time.
- **Mattress stitch** creates nearly invisible seams — worth practicing on scrap before assembly.
- **Symmetry matters.** Pin all limbs first, step back, and adjust before sewing.
- **For child safety:** If giving to a child under 3, skip the safety eyes and embroider eyes with black floss instead.

Enjoy your new puppy friend! 🐶
Disclaimer: This pattern was generated by AI and should be reviewed for accuracy before use. While we strive for quality, AI-generated content may contain errors. Please verify measurements, stitch counts, and instructions before beginning your project. Generated by purlJam.uk
Access your pattern anytime
Bookmark this page to access your pattern anytime