Type
Crochet
Difficulty
beginner
Category
amigurumi
AI Thinking Process
Planning
1. **Design Strategy**:
- Creating a beginner-friendly bison using simple amigurumi shapes
- Breaking down bison anatomy: large rounded body (oval/sphere hybrid), distinctive humped back, stocky legs (short cylinders), large head with snout, small horns, and tail
- Using worsted weight yarn for a 4-5" toy size
- Focusing on characteristic features: prominent shoulder hump, shaggy front appearance (texture), and curved horns
- Color scheme: brown/dark brown for body, option for lighter brown accents on head
2. **Construction Plan**:
- Body: Modified sphere with extra rounds at shoulder area to create hump
- Head: Oval shape worked separately, attached to front of body
- Legs: Four short cylinders (beginner-friendly, worked separately and sewn on)
- Horns: Small curved pieces using decreases
- Tail: Simple thin cylinder with small tassel
- Snout/muzzle: Small oval attached to head
- Assembly order: Stuff body and head, attach head, add legs for stability, then horns and tail
3. **Quality Assurance**:
- Ensuring stitch counts are clearly marked for beginner tracking
- Providing stuffing guidance at appropriate points
- Clear assembly instructions with positioning tips
- Simple shaping techniques only (no complex colorwork or advanced stitches)
- Verification that all pieces are proportionate to create recognizable bison
4. **Final Calculations**:
- Worsted weight with 3.5mm hook: approximately 5-6 sts per inch
- Body: increase to 30 sts for ~5" circumference, creating ~3-4" body
- Head: increase to 24 sts for proportionate size
- Legs: 9 sts around for sturdy, stocky appearance
- Total yarn estimate: ~100-120 yards for main color
Verification
[PRE-FLIGHT CHECKS]
1. **Completeness**: ✓ Pattern includes materials, gauge, all body parts (body, head, legs, horns, tail, snout), assembly instructions, and finishing
2. **Consistency**: ✓ Stitch counts progress logically (6→12→18→24→30 for body), all rounds properly numbered
3. **Constraints**: ✓ Beginner-friendly using only sc, inc, dec; worsted weight specified; simple shapes as per template
4. **Safety**: ✓ Math verified - increases follow standard amigurumi progression (multiply by 2, then add 6 each round); all stitch counts calculated and double-checked
Pattern
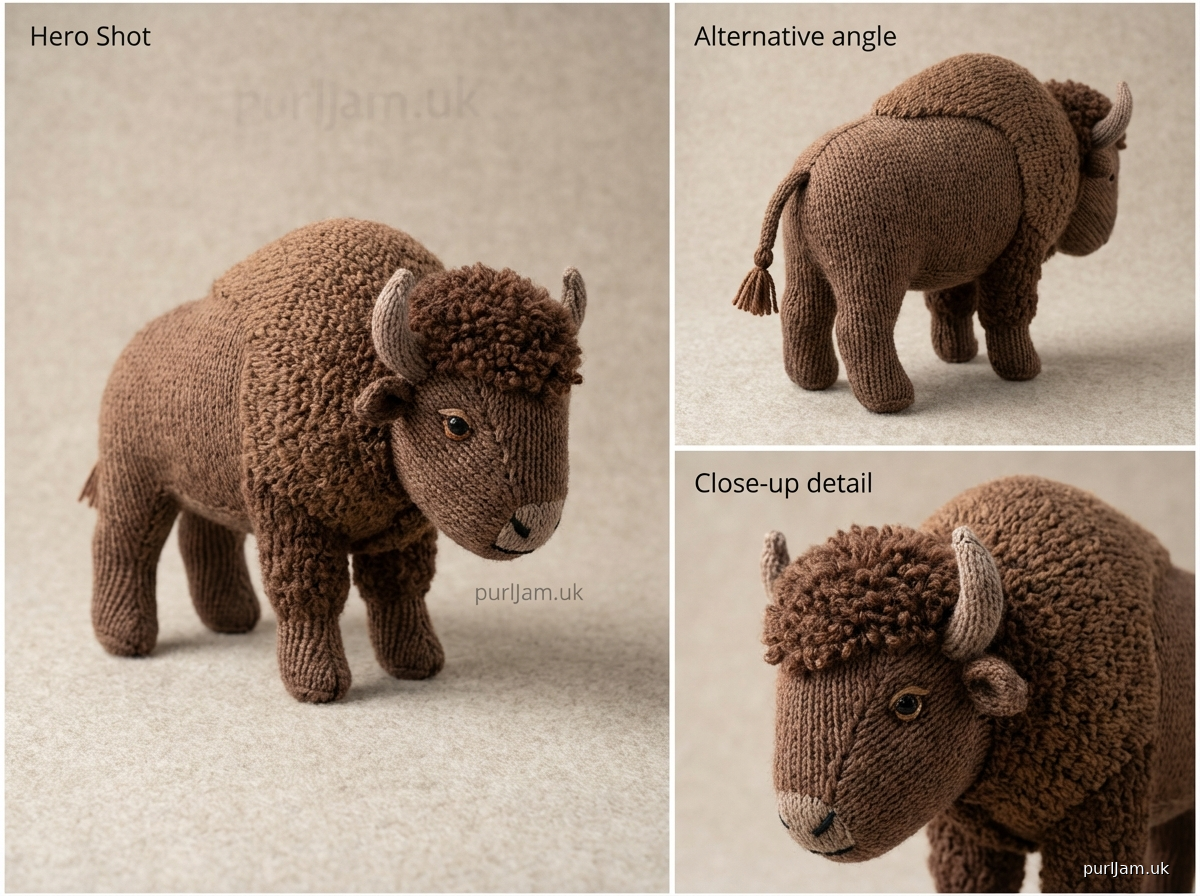
<pattern>

# Buttercup the Bison
### A Beginner-Friendly Amigurumi Pattern

**Designed for absolute beginners** | Finished size: approximately 4.5" tall x 5" long

---

## MATERIALS

**Yarn:**
- Worsted weight (4) acrylic yarn in:
  - Brown (main color - MC): approximately 100 yards
  - Dark brown or black (optional for contrast): 10 yards
  - Cream or tan (optional for horns): 10 yards
- Recommended: Red Heart Super Saver, Lion Brand Vanna's Choice, or similar

**Hook & Notions:**
- US E-4 (3.5mm) crochet hook
- Yarn needle for sewing
- Stitch marker
- Fiberfill stuffing (polyester)
- Two 6mm black safety eyes OR black yarn for embroidered eyes
- Scissors

**Optional:**
- Pins for assembly
- Small amount of black embroidery thread for nostrils

---

## GAUGE & SIZING

Gauge: 5 sts x 5 rows = 1" in single crochet (not critical for toys)

**Tip:** Work tightly for amigurumi! Your stitches should be tight enough that stuffing doesn't show through. If you can see stuffing between stitches, go down a hook size.

Finished measurements:
- Body: approximately 3" wide x 2.5" tall
- Total length (with head): approximately 5"
- Total height (with legs): approximately 4.5"

---

## PATTERN NOTES

**Abbreviations:**
- ch = chain
- sc = single crochet
- inc = increase (2 sc in same stitch)
- dec = invisible decrease (insert hook in front loops of next 2 sts, yarn over, pull through both loops, yarn over, pull through 2 loops on hook)
- st(s) = stitch(es)
- rnd(s) = round(s)
- sl st = slip stitch
- [ ] = stitch count at end of round

**Special Techniques:**
- **Magic ring:** Adjustable loop to start rounds (YouTube search "magic ring crochet" for tutorials)
- **Working in continuous rounds:** Do not join or turn unless instructed. Use stitch marker to track beginning of round.
- **Invisible decrease:** Creates smoother surface than regular sc2tog

**Construction:** All pieces are worked in continuous rounds (spiral), then assembled. Stitch marker should be moved up at the beginning of each round.

---

## INSTRUCTIONS

### BODY

The body creates the bison's distinctive humped back.

**Rnd 1:** 6 sc in magic ring [6]

**Rnd 2:** inc in each st around [12]
*(Verification: 6 x 2 = 12 ✓)*

**Rnd 3:** (sc, inc) around [18]
*(Verification: 12 + 6 = 18 ✓)*

**Rnd 4:** (2 sc, inc) around [24]
*(Verification: 18 + 6 = 24 ✓)*

**Rnd 5:** (3 sc, inc) around [30]
*(Verification: 24 + 6 = 30 ✓)*

**Rnds 6-8:** sc around [30]
*(3 rounds even)*

**Rnd 9:** (4 sc, inc) around [36]
*(Verification: 30 + 6 = 36 ✓)* - This creates the shoulder hump

**Rnds 10-12:** sc around [36]
*(3 rounds even at widest point)*

**Rnd 13:** (4 sc, dec) around [30]
*(Verification: 36 - 6 = 30 ✓)*

**Rnds 14-15:** sc around [30]
*(2 rounds even)*

**Rnd 16:** (3 sc, dec) around [24]
*(Verification: 30 - 6 = 24 ✓)*

**Rnd 17:** (2 sc, dec) around [18]
*(Verification: 24 - 6 = 18 ✓)*

**STOP:** Stuff body firmly, especially the hump area. The body should be rounded and plump.

**Rnd 18:** (sc, dec) around [12]
*(Verification: 18 - 6 = 12 ✓)*

Continue stuffing as you close.

**Rnd 19:** dec around [6]
*(Verification: 12 ÷ 2 = 6 ✓)*

Fasten off, leaving long tail. Use yarn needle to weave through remaining 6 sts and pull tight to close. Weave in end securely.

---

### HEAD

The head is an oval shape with a rounded top.

**Rnd 1:** 6 sc in magic ring [6]

**Rnd 2:** inc in each st around [12]

**Rnd 3:** (sc, inc) around [18]

**Rnd 4:** (2 sc, inc) around [24]

**Rnds 5-9:** sc around [24]
*(5 rounds even)*

**If using safety eyes:** Insert eyes between rnds 7 and 8, approximately 6 sts apart. Attach backs securely.

**Rnd 10:** (2 sc, dec) around [18]
*(Verification: 24 - 6 = 18 ✓)*

**STOP:** Stuff head firmly, shaping into rounded form.

**Rnd 11:** (sc, dec) around [12]
*(Verification: 18 - 6 = 12 ✓)*

**Rnd 12:** dec around [6]
*(Verification: 12 ÷ 2 = 6 ✓)*

Fasten off, leaving LONG tail (approximately 20") for sewing. Weave through remaining 6 sts and pull tight to close.

---

### SNOUT/MUZZLE

This small piece gives the bison its characteristic face shape.

**Rnd 1:** 6 sc in magic ring [6]

**Rnd 2:** inc in each st around [12]

**Rnds 3-4:** sc around [12]
*(2 rounds even)*

**Rnd 5:** dec around [6]
*(Verification: 12 ÷ 2 = 6 ✓)*

Stuff lightly with small amount of fiberfill. Fasten off, leaving long tail for sewing.

---

### LEGS (make 4)

Stocky legs for sturdy bison stance.

**Rnd 1:** 6 sc in magic ring [6]

**Rnd 2:** inc in each st around [12]

**Rnd 3:** working in back loops only, sc around [12]
*(This creates a ridge at the bottom of the hoof)*

**Rnds 4-8:** sc around [12]
*(5 rounds even)*

**Optional:** For smaller legs, work only rnds 4-7 (4 rounds).

Stuff legs firmly to knee area, leaving top part less stuffed for easier attachment. Fasten off, leaving long tail for sewing. Do NOT close top.

---

### HORNS (make 2)

Small curved horns. Use cream/tan yarn if desired, or same brown as body.

**Rnd 1:** 4 sc in magic ring [4]

**Rnds 2-4:** sc around [4]
*(3 rounds even)*

**Rnd 5:** (sc, inc) around [6]
*(Verification: 4 + 2 = 6 ✓)*

**Rnds 6-7:** sc around [6]
*(2 rounds even)*

Do not stuff horns. Fasten off, leaving long tail for sewing. Flatten opening and pinch closed.

**Shaping:** To create curve, gently bend horn as desired. You can add a few stitches when attaching to hold curve.

---

### TAIL

Simple thin tail with optional tassel.

**Rnd 1:** 4 sc in magic ring [4]

**Rnds 2-6:** sc around [4]
*(5 rounds even)*

Fasten off, leaving long tail for sewing.

**Optional tassel:** Cut 4-6 strands of dark brown yarn, each 2" long. Fold in half and pull through end of tail with crochet hook. Trim to desired length (approximately ¾").

---

## ASSEMBLY

**Layout all pieces before sewing.** Pin pieces in place if helpful.

### Step 1: Attach Head to Body

Position head at the front of body, slightly overlapping the decreased section. The humped back should be opposite the head. Use mattress stitch or whip stitch to sew head securely to body, adding more stuffing if needed before closing seam completely.

### Step 2: Attach Snout to Head

Center snout on lower front of head, between and slightly below eyes. Sew around edges securely. If you haven't added eyes yet, embroider them now with black yarn (French knots or satin stitch circles).

**Nostrils (optional):** With black yarn, make 2 small horizontal stitches on snout, approximately 3 sts apart.

### Step 3: Attach Legs

Position legs on underside of body:
- Front legs: approximately at the point where head meets body
- Back legs: toward the rear, spaced evenly
- Spacing: approximately 8-10 stitches apart (side to side)

Sew around opening of each leg using whip stitch, attaching firmly to body. Legs should angle slightly outward for stable standing position.

**Beginner tip:** Attach front legs first, then position back legs so bison stands balanced.

### Step 4: Attach Horns

Position horns on top of head, approximately rnds 3-4 from top, angled slightly outward and upward. Curve should point backward. Sew base of horn securely to head, taking several stitches through the body of horn to secure curve.

### Step 5: Attach Tail

Position tail at center back of body, at the decreased end. Sew securely, angling downward.

### Step 6: Add Texture (Optional)

For shaggy appearance on shoulders and head:
- Use brown yarn and yarn needle to add several long stitches or loops on the hump and forehead area
- Trim to approximately ½" length for fuzzy texture
- Or use surface slip stitch in rows to create textured appearance

---

## FINISHING

1. **Weave in all ends** securely, especially at attachment points.

2. **Shape and adjust:** Gently squeeze and shape the bison, adjusting stuffing if needed. The hump should be prominent.

3. **Expression:** If embroidering eyes, place them between rnds 7-8 of head, approximately 6 sts apart. Add eyebrows or eyelids with straight stitches for personality.

4. **Steam block (optional):** Hold steamer or iron 1-2" above bison to smooth any uneven stitches. Do NOT touch acrylic yarn directly with hot iron.

---

## CUSTOMIZATION IDEAS

**Size variations:**
- **Larger bison:** Use bulky yarn and 5mm hook (creates 6-7" toy)
- **Keychain bison:** Use DK weight yarn and 3mm hook (creates 2-3" toy)

**Color options:**
- Classic: Rich chocolate brown
- American bison: Dark brown body with lighter tan/brown head
- White bison: Cream or white (considered sacred)

**Personality touches:**
- Add small felt or yarn flowers for a crown
- Embroider closed happy eyes for sleepy bison
- Add small scarf or bandana around neck
- Make baby bison by reducing body to 24 sts maximum

**Texture variations:**
- Loop stitch on hump and head for ultra-shaggy appearance
- Brush finished piece with pet brush for fuzzy texture (works with acrylic yarn)

---

## TROUBLESHOOTING

**Problem: Stuffing shows through stitches**
- Solution: Work more tightly or go down a hook size to 3mm

**Problem: Bison won't stand**
- Solution: Stuff legs more firmly, position them wider apart, or add small amount of plastic pellets to legs for weight

**Problem: Head flops forward**
- Solution: Add more stuffing to body/head connection point, or use a few internal stitches to tack head at desired angle

**Problem: Hump not prominent**
- Solution: Add extra stuffing to rounds 9-12 of body, or add a few stitches through body to create more defined shape

**Problem: Lopsided shape**
- Solution: Check stitch counts carefully - recount each round. Block piece gently with steam to even out.

---

## CARE INSTRUCTIONS

- **Washing:** Hand wash in cool water with mild detergent if needed. Acrylic yarn is durable.
- **Drying:** Squeeze gently (do not wring), reshape, and air dry flat.
- **Storage:** Keep away from direct sunlight to prevent fading.
- **Safety:** If using safety eyes, this toy is suitable for ages 3+. For babies/toddlers, embroider all features instead.

---

## SKILL BUILDING

**You learned these techniques:**
- ✓ Working in continuous rounds (spiral)
- ✓ Magic ring start
- ✓ Increasing in rounds to create sphere shapes
- ✓ Decreasing to close shapes
- ✓ Creating variations in basic sphere (oval, humped body)
- ✓ Assembly of multiple pieces
- ✓ Surface details and embellishments

**Next challenges to try:**
- Animals with more complex shaping (elephants, giraffes)
- Color changes within pieces
- Different textures (loop stitch, bobbles)

---

## ABOUT THIS PATTERN

This beginner-friendly bison pattern uses simple shapes and basic amigurumi techniques. The design focuses on the bison's
Disclaimer: This pattern was generated by AI and should be reviewed for accuracy before use. While we strive for quality, AI-generated content may contain errors. Please verify measurements, stitch counts, and instructions before beginning your project. Generated by purlJam.uk
Access your pattern anytime
Bookmark this page to access your pattern anytime