Type
Crochet
Difficulty
intermediate
Category
custom
AI Thinking Process
Planning
Verification
Pattern
Butterfly Spiral Wind Spinners
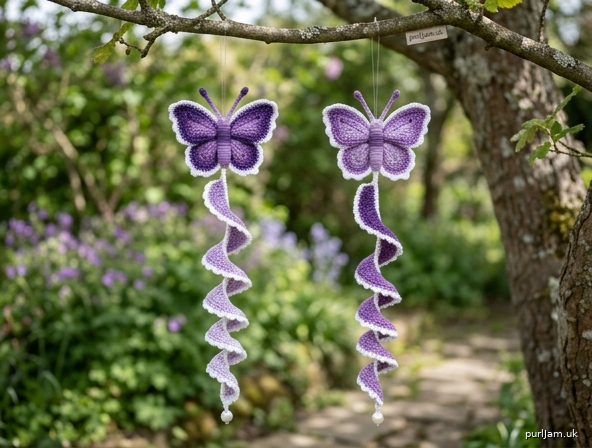
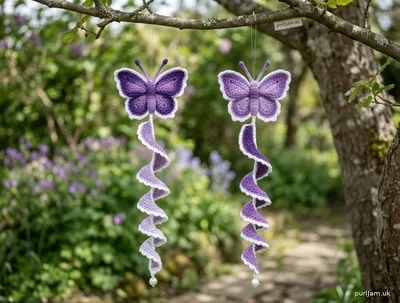
A pair of lightweight 3D crochet butterflies with long, twisting spiral tails. Purple ombré fans form the wings; a contrasting white scalloped border outlines every edge, and a small pearl bead drops from the tip of each spiral. Hang them on a porch, in a window, or from a garden branch and let the breeze set them spinning.
This pattern makes 2 identical spinners. Instructions are written for one spinner; repeat everything for the second.
Materials
Yarn (sport weight / Category 2)
- MC (purple ombré): 140 yd (128 m) per spinner; 280 yd (256 m) for the pair
- CC (white): 60 yd (55 m) per spinner; 120 yd (110 m) for the pair
A self-striping ombré cake in purple is ideal. 100% acrylic is recommended for outdoor hanging (colorfast, quick-drying). Cotton gives crisper stitch definition but can sag when wet.
Hook
- US E-4 / 3.5 mm (or size needed to obtain a firm fabric)
Notions
- Tapestry needle
- Scissors
- 2 white pearl beads, 6–8 mm (one per spinner), with a hole that will take yarn or sewing thread
- Optional: matching sewing thread and a fine needle for the beads
- Optional: fabric glue to lock the body wrap and bead knot
- Optional: 2 small jump rings, or 8" (20 cm) of clear fishing line per spinner, for hanging
Gauge
20 sc and 24 rows = 4" × 4" (10 cm × 10 cm) with US E-4 / 3.5 mm, in single crochet.
Gauge is not critical for fit, but a firm fabric helps the spiral hold its twist. If your swatch is loose and holey, go down to US D-3 / 3.25 mm.
Finished Size (one spinner)
- Butterfly wingspan: 5½" (14 cm)
- Butterfly height (antennae to abdomen): 3½" (9 cm)
- Spiral hanging length: 15" (38 cm)
- Total hanging length, loop to bead: 20" (51 cm)
One size. To lengthen the spiral, add foundation chains in multiples of 4 (each 4 extra chains add 12 dc and 3 scallops).
Abbreviations (US)
| Abbreviation | Meaning |
|---|---|
| beg | beginning |
| CC | contrasting color (white) |
| ch | chain |
| dc | double crochet |
| MC | main color (purple ombré) |
| rem | remaining |
| rep | repeat |
| rnd | round |
| sc | single crochet |
| sl st | slip stitch |
| st(s) | stitch(es) |
Special Stitches
Scallop (shell): 5 dc in the indicated stitch.
Antenna tip: 3 sc in the same chain (forms a small rounded knob).
Pattern Notes
- US crochet terminology is used throughout.
- Ch-3 at the beginning of a row counts as 1 dc.
- Work in both loops unless stated otherwise.
- Wings are worked flat, in turned rows, as open fans (do not join the first row into a ring).
- The spiral is one single row of 3 dc in each chain. It will curl and corkscrew on its own — this is the design. Do not block it flat.
- Stitch counts are given in parentheses at the end of each row.
- For ombré yarn, start the butterfly first (darker end of the cake) so the spiral fades toward the bead; reverse if you prefer a dark tail.
- Make 2 spinners for a pair.
Spinner (make 2)
Upper Wing (make 2 per spinner)
With MC:
Row 1: Ch 4, 7 dc in 4th ch from hook. (8 dc — ch-3 counts as first dc ✓)
Row 2: Ch 3, turn, dc in first st (same st as ch-3), 2 dc in each of the rem 7 sts. (2 + 14 = 16 dc ✓)
Row 3: Ch 3, turn, dc in first st, (2 dc in next st, dc in next st) 7 times, dc in last st. (2 + 21 + 1 = 24 dc; 8 increases → 16 + 8 = 24 ✓)
Fasten off MC.
White scalloped border Join CC with sl st in the first dc of Row 3 (start of the outer arc, not the short side edges).
Border: *Skip 1 dc, 5 dc in next dc, skip 1 dc, sl st in next dc; rep from * across. (24 dc ÷ 4 sts per scallop = 6 scallops ✓)
Fasten off CC, leaving a 10" (25 cm) tail for assembly.
Lower Wing (make 2 per spinner)
With MC:
Row 1: Ch 4, 7 dc in 4th ch from hook. (8 dc ✓)
Row 2: Ch 3, turn, dc in first st, 2 dc in each of the rem 7 sts. (16 dc ✓)
Fasten off MC.
White scalloped border Join CC with sl st in the first dc of Row 2.
Border: *Skip 1 dc, 5 dc in next dc, skip 1 dc, sl st in next dc; rep from * across. (16 dc ÷ 4 = 4 scallops ✓)
Fasten off CC, leaving a 10" (25 cm) tail for assembly.
Antennae (make 2 per spinner)
With MC:
Ch 11, 3 sc in 2nd ch from hook, sl st in each of the rem 9 ch. Fasten off, leaving a 6" (15 cm) tail.
Hanging Loop (make 1 per spinner)
With MC:
Ch 16, sl st in first ch to form a ring. Fasten off, leaving a 6" (15 cm) tail.
Spiral Tail (make 1 per spinner)
With MC:
Foundation: Ch 103.
Row 1: 2 dc in 4th ch from hook (ch-3 counts as first dc; 3 dc in that chain), 3 dc in each rem ch across. (100 worked chains × 3 dc = 300 dc ✓)
The strip will begin to corkscrew after the first few inches. Continue working; do not flatten it.
Fasten off MC.
Inner edge (foundation-chain side) Join CC with sl st in the unused loop of the first worked foundation ch (the inner coil).
Sc in each unused loop of the foundation chain across. (100 sc ✓)
Fasten off CC.
Outer scalloped edge Join CC with sl st in the top of the first dc of Row 1 (the outer, longer edge).
*Skip 1 dc, 5 dc in next dc, skip 1 dc, sl st in next dc; rep from * across. (300 dc ÷ 4 = 75 scallops ✓)
Fasten off CC, leaving an 8" (20 cm) tail at the tip (the last scallop, which will be the bottom of the spinner) for attaching the bead.
Tip: Work the white border while you can still rotate the strip in your hands. The piece becomes a firm corkscrew as the scallops are added — that is correct.
Finishing
Assemble the butterfly
- Lay one upper wing with the straight (unbordered) edge toward the center, scallops facing out. Lay the second upper wing opposite it, overlapping the inner corners by about ⅜" (1 cm).
- Place the two lower wings below the upper pair, also scallops out, overlapping the upper wings slightly at the center so they read as one butterfly.
- Wrap the body: Cut a 60" (152 cm) length of MC. Holding the four inner corners firmly together, wrap the yarn tightly around the center 15–20 times to form a thorax about ⅝" (1.5 cm) wide. Continue wrapping a slightly longer, thinner abdomen about ¾" (2 cm) below the thorax. Tie off at the back and weave the end under the wraps. The fans should sit at gentle angles — this is the 3D shape. A small dot of fabric glue on the back of the wrap will lock it.
- With the tapestry needle, sew the hanging loop under the top of the thorax wraps so it stands at the head.
- Sew one antenna on each side of the hanging loop, tucking the tails under the wraps.
Attach the spiral
Sew the starting-chain end of the spiral (the end without the long bead tail) to the bottom of the abdomen wraps with several firm stitches through the wrap and the inner edge of the spiral. The corkscrew should hang straight down from the butterfly.
Attach the pearl
Thread the 8" (20 cm) CC tail at the spiral tip through the pearl bead, slide the bead up to the last scallop, and tie a secure double knot. Weave in the remainder. If the bead hole is small, use matching sewing thread instead.
Weave and set
Weave in all remaining ends on the back of the wings and inside the spiral coil.
Set the twist: Hang the spinner from the loop. Mist the spiral lightly with water (do not soak the butterfly) and let it dry hanging so the corkscrew and bead weight settle the shape. Do not steam-block the spiral flat. Wings may be steamed very lightly from the back if they need to open.
Repeat all steps for the second spinner.
Wearing / Hanging Notes
Hang from a porch hook, curtain rod, window suction hook, or tree branch where air can move. The pair looks best with 8–12" (20–30 cm) of space between them so the spirals do not tangle. These are decorative objects, not toys; the beads are a choking hazard for small children and pets.
To store, hang or coil loosely — never crush the spirals in a drawer.
Disclaimer: This pattern was generated by AI and should be reviewed for accuracy before use. While we strive for quality, AI-generated content may contain errors. Please verify measurements, stitch counts, charts, and instructions before beginning your project. Generated by purlJam.uk
Love this pattern?
Save this pattern to your free PurlJam libraryAccess your pattern anytime
Bookmark this page to access your pattern anytime