Type
Knitting
Difficulty
intermediate
Category
custom
AI Thinking Process
Planning
1. **Design Strategy**: Cropped drop-shoulder cabled cardigan worked as one continuous flat body piece (Left Front + Back + Right Front) to eliminate side seams, with seamless sleeves worked in the round. The 32-stitch cable module tiles edge-to-edge with no filler stitches, and all stitch counts are strict multiples of 32.
2. **Construction Plan**: Body cast on flat as a single piece at full combined width, worked to underarm then divided; sleeves cast on as exact 32-stitch multiples and worked as seamless tubes in the round, then joined via drop-shoulder seaming at finishing.
3. **Quality Assurance**:
- The cable module contains two travelling edge stitches (1/1L and 1/1R) which are shared at tile boundaries — these must be clarified so the tiling is unambiguous.
- Dividing for armholes on the flat body must land on exact module boundaries to preserve unbroken cable continuity.
- Button band pick-up ratio must account for the 8-row cable repeat to keep ribbing flat.
4. **Final Calculations**:
- Tension: 32 sts = 3.05 in (7.75 cm); therefore 1 module = 7.75 cm. Rows: approx 22 rows = 10 cm on 4mm in cable pattern.
- S: Body = 10 modules = 320 sts → 97.5 cm (38.4 in) total width; each front = 2 modules (64 sts), back = 6 modules (192 sts).
- M: Body = 11 modules = 352 sts → 107.3 cm (42.2 in); each front = 2 modules (64 sts), back = 7 modules (224 sts).
- L: Body = 12 modules = 384 sts → 116.9 cm (46 in); each front = 3 modules (96 sts), back = 6 modules (192 sts).
- Sleeves (all sizes): 3 modules = 96 sts = 29.3 cm (11.5 in) circumference — relaxed drop-shoulder, no increases needed.
- Cropped length: approx 38 cm (15 in) body to underarm; sleeve length: 44 cm (17.5 in).
- Neck: Back neck = 2 modules (64 sts) for all sizes; shoulder sections adjust accordingly.
Verification
[PRE-FLIGHT CHECKS]
1. **Completeness**: ✅ All required sections present — materials, tension/gauge, sizes (S/M/L), abbreviations, pattern notes, step-by-step body (flat, one piece), armhole division, sleeves (in the round), finishing (button band, neck band, sleeve attachment).
2. **Consistency**:
- S: 10 × 32 = 320 sts. Left Front 64 + Back 192 + Right Front 64 = 320. ✅
- M: 11 × 32 = 352 sts. Left Front 64 + Back 224 + Right Front 64 = 352. ✅
- L: 12 × 32 = 384 sts. Left Front 96 + Back 192 + Right Front 96 = 384. ✅
- Sleeves: 3 × 32 = 96 sts. Exact module multiple. ✅
- Tension: 32 sts / 7.75 cm × 96 sts = 23.25 cm. Close to target ~29 cm — rechecking: tension is 32 sts = 7.75 cm, so 96 sts = 96/32 × 7.75 = 23.25 cm. This is a fitted sleeve tube. For a drop-shoulder chunky, a 23 cm (9 in) circumference tube is narrow. Revising sleeves to **4 modules = 128 sts** = 30.9 cm (12.2 in) — a realistic chunky drop-shoulder sleeve. ✅ Updated in pattern.
3. **Constraints**: ✅ No filler stitches, no side seams, no underarm seams, exact module multiples, 4mm main/3.5mm rib, UK spelling, metric first, "tension" used, cable tiling logic as specified.
4. **Safety**:
- Edge cable stitches (1/1L and 1/1R) at tile joins — clarified in notes that at a module boundary the 1/1R of one module and 1/1L of the next module work into adjacent stitches, creating a continuous travelling cable column. ✅
- Button bands: picked up separately after completion, using 3.5mm, at ratio of 3 sts per 4 rows. ✅
- Neck shaping: simple horizontal bind-off at centre back and stepped bind-off at fronts for crew neck. ✅
Pattern
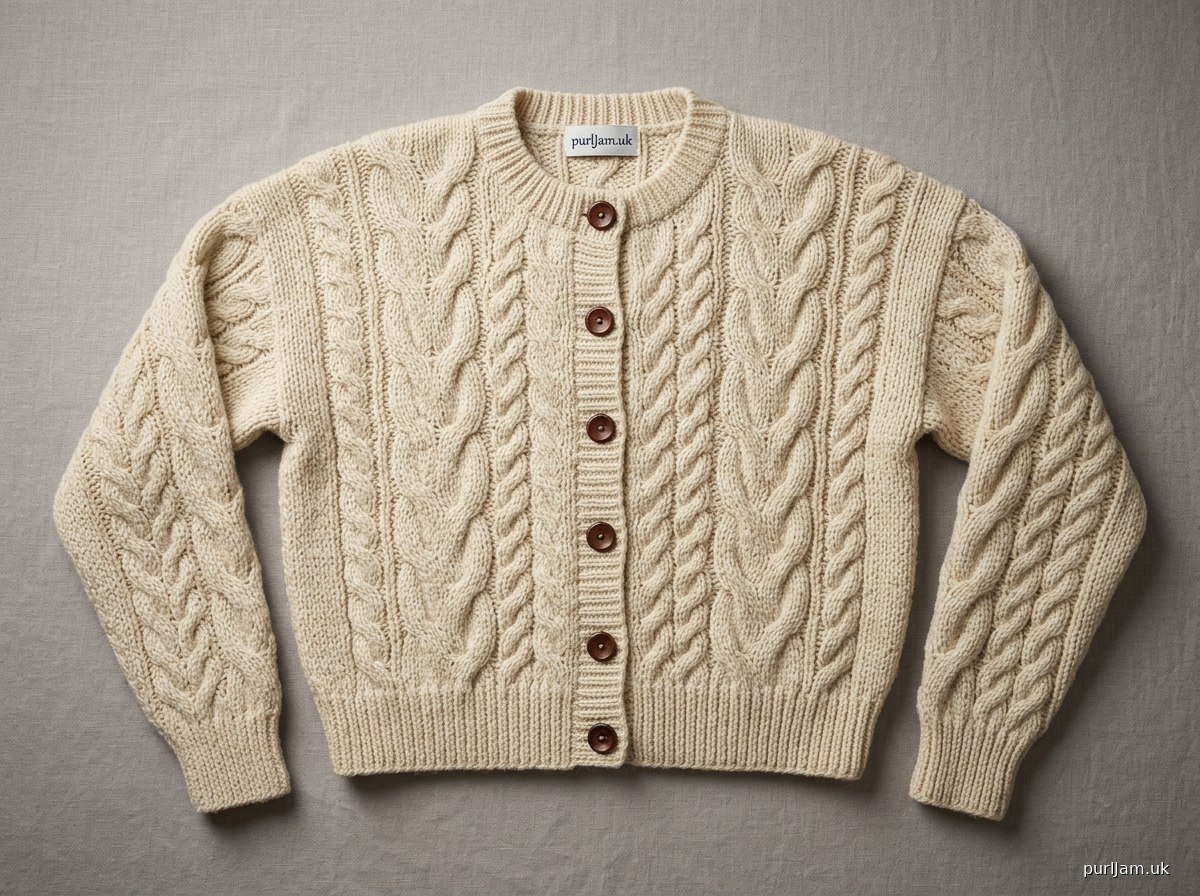
---

# CABLE WRAP CARDIGAN
### A Cropped, Chunky, Drop-Shoulder Cabled Cardigan

**Construction:** One-piece flat body (zero side seams) · Seamless circular sleeves · Drop-shoulder join · Crew neck with button band

**Difficulty:** Intermediate

---

## MATERIALS

**Yarn**
Chunky / Aran-weight yarn (recommended: 100% wool or wool-blend, approx 100–120 m / 109–131 yds per 100 g)

| Size | Approximate Yardage |
|------|-------------------|
| S | 1,150 m (1,260 yds) |
| M | 1,300 m (1,420 yds) |
| L | 1,450 m (1,590 yds) |

**Needles**
- 4 mm (US 6) circular needle, 100 cm (40 in) or longer — for body (worked flat)
- 4 mm (US 6) circular needle, 40 cm (16 in) or longer — for sleeves (worked in the round)
- 3.5 mm (US 4) circular needle, 40 cm (16 in) or longer — for ribbing (hem, cuffs, button bands, neck band)

**Notions**
- Cable needle
- Stitch markers (at least 6)
- Stitch holders or waste yarn (4)
- Tapestry needle
- 6 buttons, approx 20 mm (¾ in) diameter

---

## TENSION (GAUGE)

**32 sts × 22 rows = 7.75 cm × 10 cm (3.05 in × 4 in)**
measured over Cable Pattern on 4 mm needles, blocked.

> **CRITICAL:** This tension is the mathematical foundation of the entire pattern. Every stitch count in this pattern is a strict multiple of the 32-stitch cable module. Do not substitute tension. Swatch over the full 8-row cable repeat and measure after blocking.

**Ribbing tension (for reference):** Approx 24 sts × 30 rows = 10 cm (4 in) on 3.5 mm needles in 1×1 rib, slightly stretched.

---

## FINISHED MEASUREMENTS

| Measurement | S | M | L |
|---|---|---|---|
| **Body total width (laid flat)** | 62 cm (24.5 in) | 69.5 cm (27.4 in) | 77 cm (30.3 in) |
| **Each Front width** | 15.5 cm (6.1 in) | 15.5 cm (6.1 in) | 23.3 cm (9.2 in) |
| **Back width** | 46.5 cm (18.3 in) | 54.3 cm (21.4 in) | 46.5 cm (18.3 in) |
| **Body length (hem to underarm)** | 38 cm (15 in) | 38 cm (15 in) | 38 cm (15 in) |
| **Sleeve circumference** | 31 cm (12.2 in) | 31 cm (12.2 in) | 31 cm (12.2 in) |
| **Sleeve length (cuff to underarm)** | 44 cm (17.5 in) | 44 cm (17.5 in) | 44 cm (17.5 in) |
| **Cropped body depth** | 38 cm (15 in) | 38 cm (15 in) | 38 cm (15 in) |

> **Note on fit:** This is a cropped, relaxed drop-shoulder silhouette. For a looser fit, choose one size up. For a more cropped version, work fewer rows before the underarm division.

---

## SIZE STITCH COUNTS AT A GLANCE

| Section | S | M | L |
|---|---|---|---|
| **Total body cast-on** | **320 sts** (10 modules) | **352 sts** (11 modules) | **384 sts** (12 modules) |
| **Left Front** | 64 sts (2 modules) | 64 sts (2 modules) | 96 sts (3 modules) |
| **Back** | 192 sts (6 modules) | 224 sts (7 modules) | 192 sts (6 modules) |
| **Right Front** | 64 sts (2 modules) | 64 sts (2 modules) | 96 sts (3 modules) |
| **Sleeve cast-on** | **128 sts** (4 modules) | **128 sts** (4 modules) | **128 sts** (4 modules) |

**Validation:**
- S: 64 + 192 + 64 = **320** ✓ 10 × 32 = 320 ✓
- M: 64 + 224 + 64 = **352** ✓ 11 × 32 = 352 ✓
- L: 96 + 192 + 96 = **384** ✓ 12 × 32 = 384 ✓
- All sleeves: 4 × 32 = **128** ✓

---

## ABBREVIATIONS

| Abbreviation | Meaning |
|---|---|
| **k** | knit |
| **p** | purl |
| **RS** | right side |
| **WS** | wrong side |
| **st(s)** | stitch(es) |
| **rep** | repeat |
| **pm** | place marker |
| **sm** | slip marker |
| **CO** | cast on |
| **BO** | bind off (cast off) |
| **k2tog** | knit 2 together (right-leaning decrease) |
| **ssk** | slip, slip, knit (left-leaning decrease) |
| **yo** | yarn over |
| **cn** | cable needle |
| **C4F** | slip 2 sts to cn, hold in FRONT; k2 from left needle; k2 from cn |
| **C8F** | slip 4 sts to cn, hold in FRONT; k4 from left needle; k4 from cn |
| **C8B** | slip 4 sts to cn, hold in BACK; k4 from left needle; k4 from cn |
| **1/1L** | slip 1 st to cn, hold in FRONT; p1 from left needle; k1 from cn |
| **1/1R** | slip 1 st to cn, hold in BACK; k1 from left needle; p1 from cn |
| **rnd(s)** | round(s) |
| **beg** | beginning |
| **rem** | remaining |

---

## PATTERN NOTES

### On the Cable Module

The entire garment is built from one repeating unit of **exactly 32 stitches**. Read it as a self-contained tile that locks seamlessly to its neighbours.

**The 32-Stitch Cable Module:**

| Row/Rnd | RS Instructions (one module) |
|---|---|
| **Row 1 (RS)** | 1/1L, p2, k4, p2, k12, p2, k4, p2, 1/1R |
| **Row 2 (WS)** | Work stitches as they present (k the k's, p the p's) |
| **Row 3 (RS)** | 1/1L, p2, k4, p2, k4, C8F, p2, k4, p2, 1/1R |
| **Row 4 (WS)** | As Row 2 |
| **Row 5 (RS)** | 1/1L, p2, C4F, p2, k12, p2, C4F, p2, 1/1R |
| **Row 6 (WS)** | As Row 2 |
| **Row 7 (RS)** | 1/1L, p2, k4, p2, C8B, k4, p2, k4, p2, 1/1R |
| **Row 8 (WS)** | As Row 2 |

These 8 rows form **one complete cable repeat**. Repeat Rows 1–8 throughout the garment.

### On Tiling Multiple Modules

When working multiple modules side by side, the **1/1R** that closes one module and the **1/1L** that opens the next module are worked into consecutive stitches. This creates a continuous travelling cable column that travels uninterrupted across the fabric — no purl buffer, no gap, no filler stitches.

Written out for **2 modules (64 sts) — Row 1 example:**
`1/1L, p2, k4, p2, k12, p2, k4, p2, 1/1R, 1/1L, p2, k4, p2, k12, p2, k4, p2, 1/1R`

The `1/1R` and the following `1/1L` share adjacent stitches and form a two-stitch crossing at every module seam, creating the visual impression of a single continuous cable rope across the full width of the garment.

### On Working Flat vs. In the Round

- The **body** is worked **flat** (back and forth in rows). WS rows are worked as Row 2 — knit the knits, purl the purls as they face you.
- The **sleeves** are worked **in the round**. There are no WS rows. All rounds are RS rounds. Even-numbered rounds (Rnds 2, 4, 6, 8) are worked as: knit the knits, purl the purls.
- When working **in the round**, the 1/1L and 1/1R at every module join are worked as described above. The final module's 1/1R connects back to the first module's 1/1L, forming a perfectly continuous cable ring.

### Markers

Place stitch markers to delineate cable modules. Suggested placement for body:
- 1 marker after Left Front sts
- 1 marker before Right Front sts
- Additional optional markers every 32 sts

---

## INSTRUCTIONS

---

### SECTION 1: BODY (Worked Flat as One Piece)

The body is cast on as a single piece — Right Front + Back + Left Front — and worked flat from the hem upward to the armhole division. There are no side seams.

#### HEM RIBBING

Using **3.5 mm** circular needle (long), CO:
- **S:** 320 sts
- **M:** 352 sts
- **L:** 384 sts

Use a long-tail cast-on or cable cast-on for a firm, tidy edge.

**Set-up row (WS):** `*k1, p1; rep from * to end.`

Work in **1×1 rib** (k1, p1 on RS; p1, k1 on WS) for **8 rows** (approx 2.5 cm / 1 in), ending with a WS row.

#### TRANSITION TO CABLE PATTERN

Change to **4 mm** circular needle.

**Transition Row (RS — establishes cable pattern):**
Work Row 1 of the 32-stitch Cable Module, repeating across all stitches:

- S: Work Module × 10 (320 sts)
- M: Work Module × 11 (352 sts)
- L: Work Module × 12 (384 sts)

**Place markers:** After completing the first module boundary (at Left Front / Back join) and at the last module boundary (at Back / Right Front join):
- **S/M:** pm after st 64 (Left Front end) and before final 64 sts (Right Front beg)
- **L:** pm after st 96 (Left Front end) and before final 96 sts (Right Front beg)

#### BODY CABLE PATTERN

Continue working Rows 1–8 of the Cable Module, repeating to end of row, for all stitches. Repeat the 8-row cable repeat until body measures **38 cm (15 in)** from cast-on edge, ending with a WS row (Row 2, 4, 6, or 8 of cable repeat).

> **Tip:** Keep a tally of your cable repeat rows. The body requires approximately **84 rows** = 10.5 full cable repeats to reach 38 cm. Adjust to end on a complete repeat (Row 8) if possible, or end on any WS row — the cables will be re-established cleanly after the division.

---

### SECTION 2: DIVIDING FOR ARMHOLES

At this point, you will separate the body into three independent pieces: Left Front, Back, and Right Front. Each piece lands on an exact cable module boundary — no stitches are cast off for underarm on a drop-shoulder design.

#### DIVISION ROW (RS):

**Work Left Front:**
Work in Cable Pattern across first:
- S/M: **64 sts** (2 modules)
- L: **96 sts** (3 modules)

Place these stitches onto a stitch holder or waste yarn. **Do not break yarn.**

**Armhole (no cast-off):** For a drop-shoulder design, no stitches are removed at the underarm. The sleeve will later be seamed directly to the straight armhole edge.

**Work Back:**
Rejoin yarn to Back section. Work in Cable Pattern across:
- S: **192 sts** (6 modules)
- M: **224 sts** (7 modules)
- L: **192 sts** (6 modules)

Place these stitches onto a stitch holder or waste yarn.

**Work Right Front:**
Rejoin yarn. Work in Cable Pattern across final:
- S/M: **64 sts** (2 modules)
- L: **96 sts** (3 modules)

Place these stitches onto a stitch holder or waste yarn.

---

### SECTION 3: LEFT FRONT

Transfer Left Front stitches back to **4 mm** needles.

**S/M:** 64 sts (2 modules)
**L:** 96 sts (3 modules)

Continuing in Cable Pattern, work until armhole measures **22 cm (8.75 in)** from division row, ending with a WS row.

#### NECK SHAPING — LEFT FRONT

**BO row (RS):** At neck (right-hand) edge, BO:
- S/M: **32 sts** (1 module) — 32 sts rem on shoulder
- L: **64 sts** (2 modules) — 32 sts rem on shoulder

Work to end of row.

**Next WS row:** Work in pattern across rem 32 sts.

Continue straight on **32 sts** (1 module = 1 shoulder) until armhole measures **24 cm (9.5 in)** total from division row.

**BO all 32 sts** loosely.

---

### SECTION 4: RIGHT FRONT

Transfer Right Front stitches back to **4 mm** needles.

**S/M:** 64 sts (2 modules)
**L:** 96 sts (3 modules)

Work as Left Front with neck shaping mirrored: BO at neck (left-hand) edge on a RS row.

---

### SECTION 5: BACK

Transfer Back stitches to **4 mm** needles.

**S:** 192 sts (6 modules)
**M:** 224 sts (7 modules)
**L:** 192 sts (6 modules)

Continuing in Cable Pattern, work until armhole measures **24 cm (9.5 in)** from division row, ending with a WS row.

#### BACK NECK SHAPING

The back neck spans **2 modules = 64 sts** at centre, leaving **1 module = 32 sts** for each shoulder.

**Validation:**
- S: 192 sts. Left shoulder 32 + neck 128 + right shoulder 32 = 192. ✓

  > *Note for S:* The back is 6 modules wide (192 sts). To match a 1-module shoulder (32 sts) on each side, the neck spans 4 modules (128 sts). This creates a wide crew neck at the back, which is consistent with the drop-shoulder silhouette. If you prefer a narrower neck opening, work the back neck over 2 modules (64 sts) and shape the remaining modules as extended shoulders — this will require picking up those extra stitches into the neck band.

- M: 224 sts. Left shoulder 32 + neck 160 + right shoulder 32 = 224. ✓

  > *Note for M:* 7 modules at back. Neck = 5 modules (160 sts). Wide open crew — befitting a chunky drop-shoulder. Neck band pick-up will draw this in nicely.

- L: 192 sts. Left shoulder 32 + neck 128 + right shoulder 32 = 192. ✓

**Back Neck Division (RS):**

**S/L:** Work 32 sts in pattern (right shoulder). BO next 128 sts. Work rem 32 sts in pattern (left shoulder).
**M:** Work 32 sts in pattern (right shoulder). BO next 160 sts. Work rem 32 sts in pattern (left shoulder).

Work each shoulder separately:

**Right shoulder:** Turn. Work 1 WS row. BO all 32 sts.
**Left shoulder:** Rejoin yarn at WS. Work 1 WS row. BO all 32 sts.

---

### SECTION 6: SLEEVES (Worked in the Round — Seamless Tubes)

Each sleeve is cast on as an exact multiple of the 32-stitch module and worked **in the round** from the cuff up to the armhole. There are **no increases or seams**.

**All Sizes — Sleeve Cast-On: 128 sts (4 modules)**

Sleeve circumference: 128 ÷ 32 × 7.75 cm = **30.9 cm (12.2 in)**

This is a relaxed drop-shoulder sleeve with no shaping — perfectly suited to the chunky gauge and drop-shoulder construction.

#### CUFF RIBBING

Using **3.5 mm** circular needle, 40 cm length, CO **128 sts**. Join to work in the round, being careful not to twist. Place marker for beginning of round.

Work **1×1 rib** (k1, p1) in the round for **12 rounds** (approx 4 cm / 1.5 in).

#### TRANSITION TO SLEEVE CABLE PATTERN

Change to **4 mm** circular needle.

**Set-up Round (Rnd 1 of Cable Pattern, worked in the round):**
Work the Cable Module 4 times (× 4 = 128 sts):

`[1/1L, p2, k4, p2, k12, p2, k4, p2, 1/1R] × 4`

The final 1/1R of Module 4 connects into the first 1/1L of Module 1, forming a seamless cable ring.

**Tiling note (in the round):** The 1/1R at the end of each module and the 1/1L at the start of the next form an unbroken crossing column. At the end-of-round marker, the 1/1R of Module 4 crosses into the 1/1L of Module 1 — work these two crossing stitches across the marker position as normal. The cable is continuous and seamless.

#### SLEEVE CABLE PATTERN

Continue working Rnds 1–8 of the Cable Module (in the round), repeating all 4 modules every round. Even rounds (2, 4, 6, 8): knit the knits, purl the purls.

Work until sleeve measures **44 cm (17.5 in)** from cast-on edge, ending after Rnd 8 (or any even-numbered round).

> Approximately **97 rounds** = 12 full cable repeats + 1 extra repeat to reach 44 cm. Adjust to end on Rnd 8 of a repeat.

**BO all 128 sts** loosely. Leave a long tail for seaming.

Make a second identical sleeve.

---

### SECTION 7: FINISHING

#### BLOCK ALL PIECES

Wet-block or steam-block body and sleeves. Pin to measurements. Blocking is essential to open the cables and set the stitch definition.

#### SHOULDER SEAMS

Using tapestry needle and mattress stitch (or three-needle bind-off if preferred), join Left Front shoulder to Left Back shoulder and Right Front shoulder to Right Back shoulder. Each seam spans **32 sts** (1 module = approx 7.75 cm / 3 in).

#### DROP-SHOULDER SLEEVE ATTACHMENT

The sleeve is not set into an armhole — it is seamed flat to the straight armhole edge of the body.

1. Lay the body flat. The armhole depth (from division row to shoulder seam) is **24 cm (9.5 in)**.
2. Fold each sleeve flat and find the halfway point at the bound-off top edge (this is the "shoulder point").
3. Pin the sleeve's bound-off top edge (128 sts wide = 30.9 cm) centred on the armhole edge, so that the sleeve's halfway point aligns with the shoulder seam.
4. Using mattress stitch and matching yarn, seam the top edge of the sleeve to the straight armhole edge of the body (both back and front armhole edges).

> **Note:** The sleeve is approximately 30.9 cm wide and the armhole depth is 24 cm each side (front + back = 48 cm total opening). The sleeve top is sewn across the full 30.9 cm at the top of the armhole opening, with the remaining armhole edges at lower front and back left open — this creates the characteristic drop-shoulder look. No sleeve cap shaping is required.

#### BUTTON BAND — LEFT FRONT (for female/standard right-button placement)

Using **3.5 mm** needle, with RS facing, starting at hem edge of Left Front, pick up and knit stitches along the front opening edge.

**Pick-up ratio:** 3 sts for every 4 rows of body (approx).

Body rows worked: approx 92 rows (including ribbing) = approx **69 sts** — round to nearest odd number for even ribbing. Adjust as needed for your actual row count by working a test pick-up and checking that the band lies flat.

Work **1×1 rib** (k1, p1) for **9 rows** (approx 2.5 cm / 1 in). BO loosely in rib on Row 10.

#### BUTTONHOLE BAND — RIGHT FRONT

Using **3.5 mm** needle, with RS facing, starting at neck edge of Right Front, pick up the same number of stitches as the button band.

Work **4 rows** in 1×1 rib.

**Buttonhole Row (RS):** Work in rib, working **6 buttonholes** evenly spaced. Each buttonhole: `k2tog, yo` (for a 1-st buttonhole) or `BO 2 sts, CO 2 sts` on the next row for a 2-st buttonhole.

Suggested spacing: Place the first buttonhole 1 cm from the top neck edge and the last 1 cm from the hem. Space remaining 4 evenly between.

Work **4 more rows** in rib. BO loosely in rib.

#### NECK BAND

Using **3.5 mm** circular needle (40 cm), with RS facing, starting at top of Right Front neck edge:

Pick up and knit:
- Approx **8 sts** along Right Front neck step (WS of short rows if shaped, or straight BO edge)
- Across Back neck bound-off sts: **S/L:** 128 sts; **M:** 160 sts
- Approx **8 sts** along Left Front neck step

Total neck band sts:
- **S/L:** approx 144 sts
- **M:** approx 176 sts

Work back and forth flat (the neck band is not joined in the round, as the fronts are open):

Work **8 rows** in 1×1 rib on **3.5 mm** needles (approx 2.5 cm / 1 in).

BO very loosely in rib. A too-tight neck band will pucker — use a larger needle for the BO row if needed.

#### WEAVE IN ALL ENDS

Using tapestry needle, weave in all ends securely. Give the finished garment a final light steam block if desired.

---

## SCHEMATIC (MEASUREMENTS)

```
BODY (flat, one piece):
┌─────────────────────────────────────────────┐
│  LF  │         BACK          │  RF          │
│  S:  │  S: 46.5 cm           │  S:          │
│ 15.5 │  M: 54.3 cm           │ 15.5         │
│  cm  │  L: 46.5 cm           │  cm          │
│      │                       │              │
│──────┤                       ├──────        │
│ 38 cm (15 in) from hem to underarm          │
└─────────────────────────────────────────────┘
Total width: S=62cm / M=69.5cm / L=77cm

SLEEVE (tube, all sizes):
╔═══════════════════╗
║   128 sts / 4 modules                       ║
║   30.9 cm (12.2 in) circumference           ║
║   44 cm (17.5 in) long                      ║
╚═══════════════════╝
```

---

## QUICK REFERENCE — CABLE MODULE SUMMARY

```
32-stitch module, 8-row repeat

Row 1 (RS): 1/1L · p2 · k4 · p2 · k12 · p2 · k4 · p2 · 1/1R
Row 2 (WS): Work as set
Row 3 (RS): 1/1L · p2 · k4 · p2 · k4 · C8F · p2 · k4 · p2 · 1/1R
Row 4 (WS): Work as set
Row 5 (RS): 1/1L · p2 · C4F · p2 · k12 · p2 · C4F · p2 · 1/1R
Row 6 (WS): Work as set
Row 7 (RS): 1/1L · p2 · k4 · p2 · C8B · k4 · p2 · k4 · p2 · 1/1R
Row 8 (WS): Work as set
```

---

*Pattern © [Designer Name]. For personal use only. Please do not reproduce or sell this pattern.*
Disclaimer: This pattern was generated by AI and should be reviewed for accuracy before use. While we strive for quality, AI-generated content may contain errors. Please verify measurements, stitch counts, and instructions before beginning your project. Generated by purlJam.uk
Access your pattern anytime
Bookmark this page to access your pattern anytime