Type
Crochet
Difficulty
intermediate
Category
shawl
AI Thinking Process
Planning
Verification
Pattern
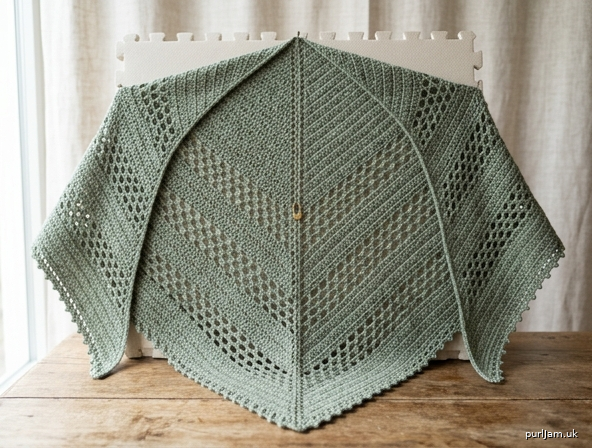
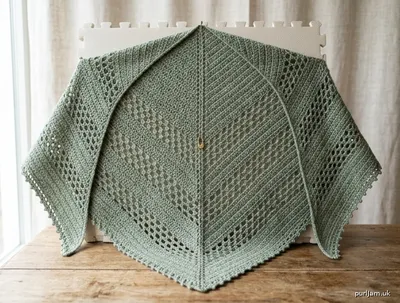
Centerline Lace Shawl
A top-down triangle shawl worked from the center of the neck edge. Solid double-crochet rows keep the fabric stable; every third row opens into a mirrored lattice of chain-2 spaces and double crochet. A marked center spine and matched increases at both edges keep the two wings even. The finished fabric is meant to be blocked hard so the lattice opens and the worsted drapes.
Skill level: Intermediate
You should be comfortable with double crochet, working into chain spaces, using a stitch marker, and counting a repeating row. The new skill is keeping a center spine while the second half of every lace row is the mirror of the first.
Finished size (blocked, including edging): About 67" (170 cm) wingspan × 29" (74 cm) deep at the center.
Body before edging: 66" (168 cm) wide × 28" (71 cm) deep, if gauge is met.
              apex (start)
             /            \
            /              \   29" (74 cm)
           /       |        \
          /        |         \
         /_________↓__________\
              67" (170 cm)
Materials
- Yarn: Category 4 worsted weight, estimated 900 yds (823 m) / about 14.5 oz (410 g). Buy 1000 yds (914 m) if your worsted runs heavy or you plan to lengthen the shawl. Yardage includes the edging and varies with gauge and fiber.
- Choose a soft yarn with drape (wool, wool blend, or a soft acrylic). Stiff cotton will hold the shape but will not drape the way this lace is written to drape.
- Hook: US J/10 (6 mm), or size needed to obtain gauge.
- Locking stitch marker
- Tapestry needle
- Rust-proof pins and a blocking surface. Blocking wires are optional but helpful on the long edges.
Gauge
12 dc and 7 rows = 4" (10 cm), blocked.
Chain 27. Dc in the 4th ch from the hook and in each ch across — 25 dc, counting the skipped chains as 1 dc. Work 9 more rows in dc. Block, then measure the center 12 stitches and 7 rows.
Match both stitch gauge and row gauge. The finished measurements come from this gauge, not from the hook size alone. Lace chain-spaces are blocked to the width of the stitches they replace, so the side edges stay straight.
Abbreviations (US terms)
US crochet terms are used throughout.
- ch: chain
- dc: double crochet
- sc: single crochet
- sl st: slip stitch
- st(s): stitch(es)
- sp(s): space(s)
- RS: right side
- WS: wrong side
- rep: repeat
Special stitches
- V-st: (dc, ch 2, dc) in the indicated stitch.
- Double V-st: (dc, ch 2, dc, ch 2, dc) in the indicated space.
- Picot: ch 3, sl st in the 3rd ch from the hook.
Notes
- The shawl begins at the center top and grows by 2 stitches on each side of the spine every row (4 stitches total). One increase is at the outer edge; one is beside the center spine.
- The beginning ch-3 always counts as 1 dc. Count it, or the edge will come up short.
- Place a marker in the center ch-2 space on Row 1. Each row, work (dc, ch 2, dc) in that marked space and move the marker into the new ch-2. The center space is not a wing stitch, and it is never treated as a lace chain-space.
- On a lace row, each wing ch-2 replaces 2 skipped stitches. On the next row, work 2 dc in that ch-2 sp and do not also work into the skipped stitches underneath. Working both will inflate the count and ripple the edge.
- Count a wing ch-2 as 2 stitches when you check your count. Do not count the center ch-2.
- Stitch count: after Row n, each side has 2n + 1 stitches. Total wing stitches = 4n + 2.
- Lace rows are every row whose number is divisible by 3 (Rows 3, 6, 9, and so on, through Row 48). All other rows are Increase Rows. If the row you just finished has wing chain-spaces, the next two rows are Increase Rows, then a Lace Row again.
- The second half of a Lace Row is mirrored: chain first on the way to the center, dc first on the way away from the center. Using the same repeat on both halves will shift the lattice.
- One slanted edge carries the turning chains; the other carries the last stitches of each row. Stitch counts match. The side edging and blocking even out the look.
- The triangle looks small, and the lace looks sparse, until about Row 18. Trust the checkpoints and continue.
Stitch patterns
Use these two rows from Row 2 on. Rows 1–6 are also written in full below so you can see them once before relying on the general wording.
Increase Row
Ch 3 (counts as 1 dc), dc in the first st (edge increase), dc in each dc across to the center ch-2 sp, working 2 dc in each wing ch-2 sp, (dc, ch 2, dc) in the center ch-2 sp and move the marker to the new ch-2, dc in each dc across to the last st, working 2 dc in each wing ch-2 sp, 2 dc in the top of the turning ch (edge increase). Turn.
Stop when you reach the marked center space. Do not put the “2 dc in each ch-2 sp” treatment in the center space.
Lace Row
Ch 3, dc in the first st, dc in the next st, *ch 2, skip 2 sts, dc in the next st*; rep from * to * until the center marker is reached. The last dc of the repeat should fall in the last st before the center; no wing stitch remains unworked. (Dc, ch 2, dc) in the center ch-2 sp and move the marker up, **dc in the next st, ch 2, skip 2 sts**; rep from ** to ** until 2 sts remain (the next dc and the top of the turning ch), dc in the next st, 2 dc in the top of the turning ch. Turn.
Each of these rows adds 2 stitches per side. After Row 6, for example, 2 × 6 + 1 = 13 stitches each side. ✓
Instructions
Shawl body
Row 1 (RS): Ch 3, (2 dc, ch 2, 3 dc) in the 3rd ch from the hook. Turn. The beginning ch-3 counts as 1 dc. (3 dc each side of the center ch-2; 3 + 3 = 6 dc ✓)
Place the marker in the center ch-2 sp.
Row 2 (WS) — Increase Row: Ch 3, dc in the first st, dc in the next 2 dc, (dc, ch 2, dc) in the center ch-2 sp, dc in the next 2 dc, 2 dc in the top of the beginning ch-3. Turn. (5 dc each side; 3 + 2 = 5 ✓; 10 dc total)
Row 3 (RS) — Lace Row: Ch 3, dc in the first st, dc in the next st, ch 2, skip 2 sts, dc in the next st, (dc, ch 2, dc) in the center ch-2 sp, dc in the next st, ch 2, skip 2 sts, dc in the next st, 2 dc in the top of the turning ch. Turn.
You should see, from edge to edge: 3 dc, ch 2, 2 dc, center ch-2, 2 dc, ch 2, 3 dc. (7 sts each side: 5 dc + one ch-2 sp ✓)
Row 4 (WS) — Increase Row: Ch 3, dc in the first st, dc in the next 2 dc, 2 dc in the next ch-2 sp, dc in the next 2 dc, (dc, ch 2, dc) in the center ch-2 sp, dc in the next 2 dc, 2 dc in the next ch-2 sp, dc in the next 2 dc, 2 dc in the top of the turning ch. Turn. (9 dc each side; 18 dc ✓)
Do not work into the stitches skipped under the chain-spaces on Row 3. The 2 dc in each ch-2 sp replace them.
Row 5 (RS) — Increase Row: Ch 3, dc in the first st, dc in the next 8 dc, (dc, ch 2, dc) in the center ch-2 sp, dc in the next 8 dc, 2 dc in the top of the turning ch. Turn. (11 dc each side; 22 dc ✓)
Row 6 (WS) — Lace Row: Ch 3, dc in the first st, dc in the next st, (ch 2, skip 2 sts, dc in the next st) 3 times, (dc, ch 2, dc) in the center ch-2 sp, (dc in the next st, ch 2, skip 2 sts) 3 times, dc in the next st, 2 dc in the top of the turning ch. Turn. (13 sts each side: 7 dc and 3 ch-2 sps; 7 + 6 = 13 ✓)
Rows 7–49: Continue in pattern.
- If the row number divides evenly by 3, work a Lace Row.
- Otherwise work an Increase Row.
Row 48 is a Lace Row (48 ÷ 3 = 16). Row 49 is an Increase Row. Turn at the end of Row 49 and fasten off.
Checkpoints
Count each wing ch-2 as 2 stitches. Both sides must match. If they do not, fix that row before continuing; later rows will not absorb the error.
| After row | Stitches each side | You should see |
|---|---|---|
| 3 | 7 | 5 dc and 1 ch-2 sp |
| 6 | 13 | 7 dc and 3 ch-2 sps |
| 12 | 25 | lattice established |
| 24 | 49 | halfway in the row count |
| 36 | 73 | — |
| 48 | 97 | last Lace Row |
| 49 | 99 dc | solid row; 99 × 2 = 198 dc ✓ |
Formula check: stitches each side = 2 × row number + 1. After Row 49, 2 × 49 + 1 = 99. ✓
Measurement checks, pinned out flat:
- After Row 12: about 17" (43 cm) wide and 6 7/8" (17.5 cm) deep. (50 wing stitches ÷ 12 × 4" = 16 2/3", plus the center space ≈ 17" ✓; 12 ÷ 7 × 4" = 6 7/8" ✓)
- After Row 24: about 33" (84 cm) wide and 13 3/4" (35 cm) deep.
- After Row 49, before edging: 66" (168 cm) wide and 28" (71 cm) deep. (198 ÷ 12 × 4" = 66" ✓; 49 ÷ 7 × 4" = 28" ✓)
If Row 12 is more than about 1/2" (1.3 cm) off in either direction, adjust the hook and start again. A small gauge error becomes several inches by Row 49.
If the count is short: an edge increase or the center increase was skipped, or a ch-2 was counted as 1 stitch. If the count is over: skipped stitches under a ch-2 were worked as well as the chain space, or the center space was worked twice.
Edging
Join all edging with the RS facing and the apex pointing away from you.
Bottom hem
Join with a sl st in the first dc of Row 49 (the right-hand corner).
Ch 1, sc in the first 3 dc. Work the following 31 times: skip the next dc, V-st in the next dc, skip the next dc. Sc in the next 3 dc. Double V-st in the center ch-2 sp (this sits on the spine; if it does not, a wing count drifted). Sc in the next 3 dc. Work the following 31 times: skip the next dc, V-st in the next dc, skip the next dc. Sc in the last 3 dc.
Each side uses 3 + (31 × 3) + 3 = 99 dc. ✓ Do not fasten off.
The 3 sc at each end of a wing form a firm corner. The V-sts are slightly fuller than the stitches they sit on; blocking opens them flat instead of leaving a heavy ruffle.
Side edging and apex
Continue from the last sc of the hem (left-hand corner).
Picot. Work the following 24 times: 2 sc in the end of the next row, 2 sc in the end of the next row, picot. 2 sc in the end of the last row before the apex.
That is 24 × 2 + 1 = 49 row-ends, which is every body row. ✓ Do not put these stitches into the starting chain itself.
(Sc, picot, sc) in the base of the starting chain at the apex.
2 sc in the end of the first row down the other side. Work the following 24 times: picot, 2 sc in the end of the next row, 2 sc in the end of the next row.
That is 1 + 24 × 2 = 49 row-ends on the second side. ✓
Picot, sl st in the first sc of the hem (the right-hand corner). Fasten off.
Finishing
Weave in ends. Leave the tails long enough to tug back into place if blocking shifts them, then trim after the shawl is dry.
Blocking
Blocking is not optional. Unblocked, the lattice stays narrow, the side edges pull in, and a worsted fabric will not drape. Block to the finished measurements, not merely “until it looks bigger.”
- Weave in ends first.
- Wool and wool blends: Soak in cool water with a little no-rinse wool wash for about 20 minutes. Support the shawl when you lift it. Press water out in a towel. Do not wring or twist.
- Acrylic and other synthetics: Do not rest an iron on the fabric. Mist until evenly damp, or steam from above with the iron held clear of the stitches. Heat that touches acrylic can flatten it permanently.
- Lay the shawl on a blocking surface with the RS up. Pin the apex.
- Mark a straight line 29" (74 cm) down from the apex. Pin the center of the hem — the Double V-st — to that point. The spine should lie on this line.
- Pin the two bottom corners 67" (170 cm) apart: 33 1/2" (85 cm) on each side of the center line.
- Pin both slanted edges straight between the apex and the corners, about every 2" (5 cm). Do not let them curve inward.
- Open every wing ch-2 along the lace rows and pin the lace rows to the same width as the solid rows. If the lace is left loose, the sides will scallop.
- Pin each hem V-st open at its ch-2 so the hem lies smooth along the 67" (170 cm) edge.
- Dry completely before you unpin. Trim ends.
The blocked shawl should feel fluid along the spine, with the lattice visibly open and the hem lying flat. If it is still stiff after a full block, the yarn is firmer than this drape needs; a second gentle wet-block can help wool, but it will not make stiff cotton behave like wool.
Size adjustments
The written shawl ends on Row 49. To change the size, keep the same rhythm and end on another Increase Row whose number is 1 more than a multiple of 3 (46, 49, 52, 55, and so on), so the last row is the solid row after a Lace Row.
- Stitches each side = 2n + 1, where n is the last body row.
- V-sts each side of the center Double V-st = (2n − 5) ÷ 3. For n = 49, (98 − 5) ÷ 3 = 31. ✓
- Side row-ends = n. Place the leftover single row-end beside the apex, as in the written edging, and put the paired row-ends below it.
- Each extra 3 rows add about 1 3/4" (4.5 cm) of depth and 4" (10 cm) of wingspan (3 × 4 ÷ 7 = 1 3/4" ✓; 12 extra stitches × 4" ÷ 12 = 4" ✓) and use additional yarn.
Wearing
Put the apex at the nape and bring the wings forward, or put the apex at the center front. After blocking, the open lattice folds softly along the spine rather than standing away from the body.
Care as the yarn label directs.
Disclaimer: This pattern was generated by AI and should be reviewed for accuracy before use. While we strive for quality, AI-generated content may contain errors. Please verify measurements, stitch counts, charts, and instructions before beginning your project. Generated by purlJam.uk
Love this pattern?
Save this pattern to your free PurlJam libraryAccess your pattern anytime
Bookmark this page to access your pattern anytime