Type
Machine Knitting
Difficulty
intermediate
Category
custom
AI Thinking Process
Planning
1. **Design Strategy**: The user requests mittens ("votter" in Norwegian) in cherry color. This is a beginner-level pattern, so I'll create classic mittens with simple construction: flat panels seamed together, with a basic thumb gusset. Cherry suggests a warm red color. I'll use straightforward stockinette stitch on a standard gauge machine with worsted weight yarn.
2. **Construction Plan**:
- Flat panels for back and palm (2 pieces per mitten)
- Separate thumb piece knitted flat
- Thumb gusset increases worked with manual needle manipulation
- Standard waste yarn cast-on for easy hanging
- Simple decreases at fingertip shaping
- Ribbed cuff (can be done on main bed with manual manipulation or ribber)
- Seamed construction for beginner-friendly assembly
3. **Quality Assurance**:
- Ensure thumb gusset increases are gradual and symmetrical
- Verify hand measurements accommodate average adult sizes
- Include clear instructions for left vs right mitten thumb placement
- Provide RC checkpoints at every major milestone
- Address potential issues: too-tight cuffs, thumb length, fingertip shaping
4. **Final Calculations**:
- Worsted weight at T7: approximately 5.5 sts/inch, 7.5 rows/inch
- Adult medium hand: 8" (20cm) circumference, 10" (25cm) length
- Cuff: 44 sts × 20 rows = 8" × 2.67"
- Hand: 44 sts × 50 rows = 8" × 6.67"
- Thumb gusset: increase from 0 to 14 sts over 20 rows
- Fingertip: decrease 44 sts to 8 sts over 18 rows
Verification
[PRE-FLIGHT CHECKS]
1. **Completeness**: Pattern will include title, materials, gauge, sizes, abbreviations, notes, complete instructions with RC checkpoints, and finishing.
2. **Consistency**: 44 sts ÷ 5.5 sts/inch = 8" circumference ✓; 70 rows ÷ 7.5 rows/inch = 9.33" + cuff = ~10" total ✓
3. **Constraints**: Beginner level = simple techniques, clear instructions, no complex colorwork or lace. Cherry = solid red color specified in materials.
4. **Safety**: Thumb gusset math: 2 sts increased every 3 rows × 7 times = 14 sts over 21 rows (adjusted to 20 for even RC). Fingertip decreases: 44 - 8 = 36 sts to decrease ÷ 2 sides = 18 sts per side over 18 rows = 1 st per row ✓
Pattern
<pattern>
# **CHERRY RED MITTENS**
*Classic flat-panel mittens with thumb gusset for standard gauge machines*
---
## **DESCRIPTION**
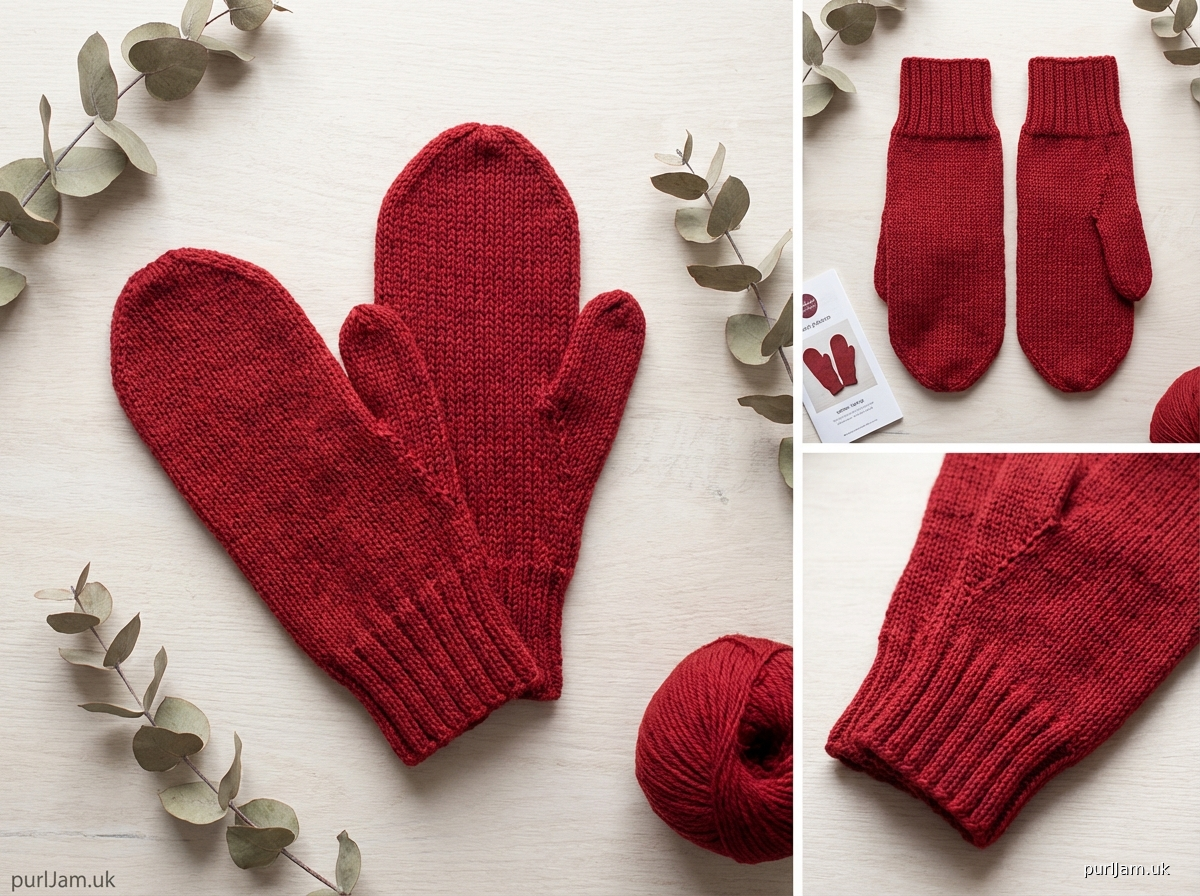
These warm, cozy mittens are knitted flat in stockinette stitch and seamed together. Perfect for beginners learning thumb gusset shaping and basic mitten construction. The cheerful cherry red color makes them a delightful gift or personal accessory.
---
## **MATERIALS**
**Yarn:**
- Worsted weight yarn in cherry red
- Approximately 150 yards (137m) for one pair
- Sample shown in Red Heart Super Saver, Cherry Red
**Machine:**
- Standard gauge (4.5mm) knitting machine
- Ribber attachment optional (instructions provided for main bed alternative)
**Notions:**
- Waste yarn for cast-on (contrasting color)
- Ravel cord
- Cast-on comb and weights
- Transfer tools
- Latch tool for bind-off
- Tapestry needle for seaming
- Stitch markers (optional, for tracking thumb placement)
---
## **GAUGE/TENSION**
**Tension Dial:** T7 (adjust for your machine and yarn)
**Resulting Gauge:** 5.5 stitches and 7.5 rows per inch (2.5cm) in stockinette stitch
**Gauge Swatch:** Knit a 40-stitch × 50-row swatch. Measure after light steaming. Adjust tension dial if needed.
---
## **SIZES**
Adult Medium (suitable for most women and smaller men)
- Hand circumference: 8" (20cm)
- Total length from cuff edge to fingertip: 10.5" (27cm)
- Thumb length: 2.5" (6.5cm)
**Sizing Notes:** For larger mittens, cast on 50 sts and add 10 rows to hand length. For smaller, cast on 38 sts.
---
## **ABBREVIATIONS & TERMS**
- **RC** = Row Counter
- **COL** = Carriage On Left
- **COR** = Carriage On Right
- **T** = Tension dial setting
- **WY** = Waste Yarn
- **MY** = Main Yarn (cherry red)
- **sts** = stitches
- **HP** = Holding Position (needles held, not knitting)
- **WP** = Working Position (needles knitting)
- **EON** = Every Other Needle
- **e-wrap** = manual cast-on wrapping method
---
## **PATTERN NOTES**
1. **Construction:** Each mitten consists of two flat panels (back and palm), knitted separately and seamed. The thumb is knitted as a separate flat piece.
2. **Thumb Gusset:** Increases are made on the palm piece by bringing needles into work manually. The gusset creates a triangular section that becomes the thumb opening.
3. **Left vs Right:** The thumb gusset placement differs between hands. Instructions specify which side to work increases.
4. **Row Counter:** Reset to 000 at the start of each new section as indicated.
5. **Ribbed Cuff:** Instructions provided for both ribber attachment and main-bed mock rib.
6. **Seaming:** Mattress stitch is recommended for invisible seams on stockinette.
---
## **INSTRUCTIONS**
### **MITTEN BACK (Make 2, identical)**
**Setup:**
- Main bed only, no ribber required for this piece
- Thread carriage with WY, tension T10
- Place needles 22L to 22R in WP (44 needles)
**Waste Yarn Cast-On:**
1. Using WY at T10, knit 8 rows, ending COR.
2. Hang cast-on comb and add weight.
3. Knit 1 row with ravel cord.
4. Set RC to 000.
**Cuff (Mock Rib - Main Bed Method):**
1. Change to MY (cherry red), set tension to T7.
2. Using transfer tool, create 1×1 mock rib:
- Transfer all odd-numbered needle stitches to adjacent even-numbered needles
- Bring empty odd needles back to WP
- **Needle arrangement: 22L, 20L, 18L... 2L, 2R, 4R... 20R, 22R in WP (22 needles working, every other needle)**
3. RC 000, COL: Knit 1 row at T5 (tighter for rib).
4. Push empty needles back to WP. Stitches will hang on alternating needles.
5. Continue knitting at T5, RC 000-020 (20 rows total). Every row creates loops on empty needles; push all needles to WP before each pass.
6. RC 020, COR: Transfer stitches back to standard arrangement:
- Using transfer tool, move each stitch loop from every other needle back to its own needle
- All needles 22L to 22R should have one stitch each (44 needles working)
**Hand Section:**
7. Set tension to T7, RC 000.
8. Knit straight in stockinette: RC 000-070 (70 rows). End COR.
- **Checkpoint RC 035:** Verify 44 sts across, measure approximately 4.67" from cuff.
- **Checkpoint RC 070:** Measure 9.33" from cuff edge.
**Fingertip Shaping (Decrease):**
9. RC 070, COR: Begin decreases at both edges.
- **Method:** Push outermost needle at each side to HP before each carriage pass
10. RC 070: Push needle 22L to HP (43 needles in WP), knit to left. COL.
11. RC 071: Push needle 22R to HP (42 needles in WP), knit to right. COR.
12. RC 072: Push needle 21L to HP (41 needles in WP), knit to left. COL.
13. Continue this pattern, pushing 1 needle to HP at the side the carriage is approaching:
- **RC 073:** 21R to HP (40 sts)
- **RC 074:** 20L to HP (39 sts)
- **RC 075:** 20R to HP (38 sts)
- Continue decreasing...
- **RC 086:** 13R to HP (28 sts)
- **RC 087:** 12L to HP (27 sts)
- **RC 088:** 12R to HP (26 sts)
14. Continue until RC 106, with 8 needles remaining in center (4L to 4R).
- **Final checkpoint RC 106:** 8 sts remain, COR
**Bind Off:**
15. Cut MY, leaving 20" tail for seaming.
16. Using latch tool, bind off remaining 8 sts:
- Remove first stitch on latch tool, pull through second stitch
- Continue across all 8 sts
- Pull tail through final stitch and secure
**Remove from Machine:**
17. Remove work carefully. Unravel ravel cord.
18. Remove waste yarn by pulling gently.
19. Set aside.
---
### **MITTEN PALM - RIGHT HAND**
**Setup:**
- Main bed only
- Thread carriage with WY, tension T10
- Place needles 22L to 22R in WP (44 needles)
**Waste Yarn Cast-On:**
1. Repeat steps 1-4 from Mitten Back (WY cast-on, ravel cord, RC 000).
**Cuff:**
2. Repeat steps 1-6 from Mitten Back (mock rib cuff, 20 rows). End RC 020, COR.
3. Transfer back to all needles working, set T7, RC 000.
**Hand Section with Thumb Gusset:**
4. RC 000-015: Knit straight (15 rows), no shaping. End COL.
- **Checkpoint RC 015:** 44 sts, approximately 2" from cuff
**Begin Thumb Gusset (Right Hand = increases on left side of work):**
5. RC 015, COL: Bring needle 11L (next to working needles) into WP. This creates position for first increase.
6. Using latch tool or transfer tool, pick up running thread between 12L and 11L, place on needle 11L. Now 45 needles in WP. Knit to right. COR.
7. RC 016: Knit across, no increase. COL.
8. RC 017: Knit across, no increase. COR.
9. RC 018: Bring needle 12L into WP, pick up running thread to create new stitch. 46 needles in WP. Knit to left. COL.
10. Repeat this pattern: **Increase 1 st on left edge every 3 rows, 7 times total:**
- **RC 015:** increase (45 sts) ✓
- **RC 018:** increase (46 sts) ✓
- **RC 021:** increase (47 sts)
- **RC 024:** increase (48 sts)
- **RC 027:** increase (49 sts)
- **RC 030:** increase (50 sts)
- **RC 033:** increase (51 sts)
11. **Checkpoint RC 033, COL:** 51 sts total (44 original + 7 increases on left side)
**Separate Thumb Stitches:**
12. RC 033, COL: Place 14 thumb gusset stitches on waste yarn:
- Manually thread WY through stitches on needles 18L to 5L (14 sts)
- Remove these stitches from needles using latch tool
- Push these 14 needles back to NWP (non-working position)
- **Remaining in WP:** needles 22L to 19L (4 sts) and 4L to 22R (19 sts) = 23 sts + gap of 14 needles
13. RC 034, COL: Bridge the gap:
- Using e-wrap method, cast on 14 new stitches onto needles 18L to 5L
- Return these needles to WP
- **Now 44 sts in WP total (22L to 22R), with 14 cast-on sts spanning thumb opening**
14. RC 034: Knit to right, COR. The cast-on stitches will knit.
15. **Checkpoint RC 034:** 44 sts active, thumb sts on WY holder
**Continue Hand:**
16. RC 035-070: Knit straight (35 rows). End COR.
- **Checkpoint RC 070:** 44 sts, ready for fingertip shaping
**Fingertip Shaping:**
17. Repeat steps 9-16 from Mitten Back (decrease to 8 sts over rows 70-106).
18. Bind off and remove from machine as per Mitten Back instructions.
---
### **MITTEN PALM - LEFT HAND**
**Setup & Cuff:**
1. Repeat complete setup and cuff as per Right Hand Palm (steps 1-3). End RC 020, then reset RC 000.
**Hand Section with Thumb Gusset:**
2. RC 000-015: Knit straight (15 rows). End COR.
**Begin Thumb Gusset (Left Hand = increases on right side of work):**
3. RC 015, COR: Bring needle 11R into WP. Pick up running thread between 10R and 11R, place on needle 11R. 45 needles in WP. Knit to left. COL.
4. RC 016-017: Knit straight, no increase.
5. RC 018, COR: Bring needle 12R into WP, pick up running thread. 46 needles in WP. Knit to left.
6. **Increase 1 st on right edge every 3 rows, 7 times total:**
- RC 015, 018, 021, 024, 027, 030, 033 (same row schedule as right hand)
7. **Checkpoint RC 033, COR:** 51 sts total
**Separate Thumb Stitches:**
8. RC 033, COR: Place 14 thumb gusset stitches on waste yarn:
- Thread WY through stitches on needles 5R to 18R (14 sts)
- Remove these stitches, push needles to NWP
- **Remaining in WP:** needles 22L to 4L (19 sts) and 19R to 22R (4 sts) = 23 sts + gap
9. RC 034, COR: E-wrap cast on 14 sts onto needles 5R to 18R. Return to WP. 44 sts total.
10. Knit to left. COL.
**Continue Hand & Fingertip:**
11. RC 035-070: Knit straight (35 rows). End COR.
12. RC 070-106: Work fingertip shaping as per Mitten Back.
13. Bind off and remove from machine.
---
### **THUMB (Make 2, identical)**
**Setup:**
1. Main bed, needles 7L to 7R in WP (14 needles).
2. Thread carriage with WY at T10.
**Waste Yarn Cast-On:**
3. Knit
Disclaimer: This pattern was generated by AI and should be reviewed for accuracy before use. While we strive for quality, AI-generated content may contain errors. Please verify measurements, stitch counts, and instructions before beginning your project. Generated by purlJam.uk
Access your pattern anytime
Bookmark this page to access your pattern anytime