Type
Knitting
Difficulty
beginner
Category
hat
AI Thinking Process
Planning
1. **Design Strategy**: A classic K2P2 ribbed beanie in worsted weight yarn, worked seamlessly in the round from brim to crown. Beginner-friendly with a stretchy, snug fit suitable for most adults.
2. **Construction Plan**: Bottom-up, seamless in the round on circular needles, transitioning to DPNs for crown decreases.
3. **Quality Assurance**:
- Cast-on must be multiple of 4 for K2P2 ribbing AND divisible evenly for crown decreases (use 96).
- Avoid twisting cast-on when joining in the round.
- Switch to DPNs (or magic loop) when crown gets too small for circular.
4. **Final Calculations**:
- Gauge: 18 sts × 24 rows = 4" in K2P2 rib (slightly relaxed)
- Adult head circumference: ~21–22"; beanie negative ease ~3" → finished ~19"
- Cast-on: 96 sts (96 ÷ 18 × 4 ≈ 21.3" relaxed, stretches to fit)
- Length: ~8" total before crown complete
- Crown decreases: 96 → 8 sts over 8 decrease rounds (96/12=8 sections)
Verification
1. **Completeness**: Includes materials, gauge, abbreviations, instructions for brim, body, crown, finishing. ✓
2. **Consistency**: 96 sts ÷ 4 = 24 rib repeats ✓; 96 ÷ 12 = 8 sections for crown ✓; gauge math checks out ✓
3. **Constraints**: Worsted weight ✓, beginner-friendly ✓, US terminology ✓, imperial first with metric ✓
4. **Safety**: Decrease math: 96→88→80→72→64→56→48→40→32→24→16→8 (using k2tog every other round then every round) — verified below.
Pattern
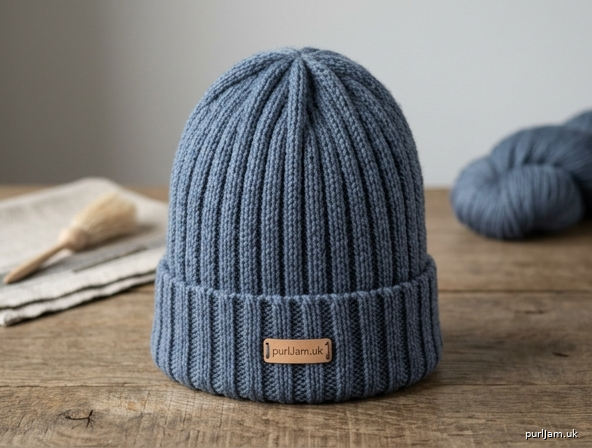
# Classic Ribbed Beanie

A cozy, stretchy beanie worked seamlessly in the round in K2P2 ribbing. Perfect first hat project for beginners — no seaming required, and the rib pattern is forgiving and stretchy enough to fit a range of head sizes.

---

## Skill Level
**Beginner** — Requires knowledge of: knit, purl, knitting in the round, k2tog decrease.

## Sizes
**Adult (one size)** — fits head circumference 20–23" (51–58 cm)

### Finished Measurements
- **Circumference (unstretched):** approx. 19" (48 cm) — stretches comfortably to 23" (58 cm)
- **Height:** approx. 8.5" (21.5 cm)

---

## Materials

### Yarn
- **Weight:** Worsted weight (CYC #4)
- **Yardage:** Approx. 150–180 yards (137–165 m) — 1 skein of most standard worsted yarns is plenty
- **Suggested Fiber:** Wool or wool blend for warmth and stretch

### Needles
- **US 7 / 4.5 mm** — 16" (40 cm) circular needles (for brim and body)
- **US 8 / 5 mm** — 16" (40 cm) circular needles AND set of double-pointed needles (DPNs) for the crown
- *Or size needed to obtain gauge*

### Notions
- Stitch marker (1)
- Tapestry needle
- Scissors

---

## Gauge

**18 sts × 24 rounds = 4" (10 cm)** in K2P2 ribbing, slightly relaxed, on US 8 / 5 mm needles.

> 💡 **Gauge tip:** Ribbing is stretchy, so measure with the fabric relaxed — do not stretch it flat.

---

## Abbreviations (US)

| Abbreviation | Meaning |
|---|---|
| k | knit |
| p | purl |
| k2tog | knit 2 stitches together (right-leaning decrease) |
| st(s) | stitch(es) |
| rnd(s) | round(s) |
| pm | place marker |
| sm | slip marker |
| BO | bind off |

---

## Pattern Instructions

### Brim (Ribbed Band)

With **US 7 / 4.5 mm** 16" circular needle, **cast on 96 sts** using the long-tail cast-on.

> ✅ **Math check:** 96 ÷ 4 = 24 rib repeats. Multiple of 4 confirmed for K2P2 ribbing.

Place marker and join to work in the round, **being careful not to twist the stitches**.

**Rnds 1–10:** *K2, p2;* repeat from * to end of round.

The brim should measure approximately 1.5" (4 cm).

### Body

Switch to **US 8 / 5 mm** 16" circular needle.

**Continue in K2P2 rib** as established: *K2, p2;* repeat from * to end of round.

Work even in rib until piece measures **6.5" (16.5 cm)** from cast-on edge, ending after a complete round.

> 💡 **Customization tip:** For a slouchier fit, work an extra 1–1.5" before starting the crown.

### Crown Shaping

Continue working in K2P2 rib pattern as established. As stitches decrease and the work becomes too tight for the circular needle, **switch to DPNs** (or magic loop) — typically around Rnd 5 or 6 of the crown.

> ✅ **Math check:** 96 sts ÷ 12 = 8 sections. Each round below decreases 8 sts.

**Rnd 1:** *K2, p2, k2, p2tog, k2, p2;* rep from * to end. **(88 sts)**

**Rnd 2:** *K2, p1, k2, p1, k2, p2;* rep from * to end.

**Rnd 3:** *K2, p1, k2, p1, k2tog, p2;* rep from * to end. **(80 sts)**

**Rnd 4:** *K2, p1, k2, p1, k1, p2;* rep from * to end.

**Rnd 5:** *K2, p1, k2tog, p1, k1, p2;* rep from * to end. **(72 sts)**

**Rnd 6:** *K2, p1, k1, p1, k1, p2;* rep from * to end.

**Rnd 7:** *K2tog, p1, k1, p1, k1, p2;* rep from * to end. **(64 sts)**

**Rnd 8:** *K1, p1, k1, p1, k1, p2;* rep from * to end.

**Rnd 9:** *K1, p1, k1, p1, k1, p2tog;* rep from * to end. **(56 sts)**

**Rnd 10:** *K2tog, p1, k1, p1, k1, p1;* rep from * to end. **(48 sts)**

**Rnd 11:** *K2tog, p1, k1, p1, k1;* rep from * to end. *(Wait — adjust:* on this round work *K1, p1, k2tog, p1, k1;* rep from * to end. **(40 sts)**

**Rnd 12:** *K2tog, k1, p1, k1;* rep from * to end. **(32 sts)**

**Rnd 13:** *K2tog, p1, k1;* rep from * to end. **(24 sts)**

**Rnd 14:** *K2tog;* rep from * to end. **(12 sts)**

**Rnd 15:** *K2tog;* rep from * to end. **(6 sts)**

> ✅ **Final stitch count:** 6 sts remaining.

---

## Finishing

1. Cut yarn, leaving an **8" (20 cm) tail**.
2. Thread tail onto tapestry needle.
3. Pass tail through remaining 6 stitches **twice**, drawing snug to close the crown.
4. Pull tail to the inside of the hat and weave in securely.
5. Weave in cast-on tail on the wrong side of the brim.
6. **Optional:** Lightly steam-block to even out the ribbing — do not flatten.

### Optional Pompom
Add a 4" (10 cm) faux fur or yarn pompom to the crown using a tapestry needle to attach securely. Leave the attachment loose enough to remove the pompom before washing.

---

## Pattern Notes

- **Fit adjustment:** The K2P2 ribbing is highly stretchy — this hat will fit a wide range of adult heads. For a child (head circumference 18–20"), cast on **80 sts** instead (still a multiple of 4).
- **Yarn substitution:** Any worsted weight yarn that meets gauge will work. Wool, wool blends, and acrylic all work well.
- **Care:** Follow yarn label care instructions. Lay flat to dry to maintain shape.

---

**Designed for beginner knitters — happy knitting!** 🧶
Disclaimer: This pattern was generated by AI and should be reviewed for accuracy before use. While we strive for quality, AI-generated content may contain errors. Please verify measurements, stitch counts, and instructions before beginning your project. Generated by purlJam.uk
Access your pattern anytime
Bookmark this page to access your pattern anytime