Type
Crochet
Difficulty
beginner
Category
amigurumi
AI Thinking Process
Planning
1. **Design Strategy**: Creating a beginner-friendly Easter egg using the sphere/oval template as the base. The egg shape needs to be slightly elongated compared to a perfect sphere, with a wider bottom and more tapered top. Will use pastel colors traditional for Easter eggs, with optional decorative stripes or polka dots. Simple enough for beginners but charming as a seasonal decoration or toy.
2. **Construction Plan**: Working in continuous rounds (spiral method) starting from the bottom (wider end) of the egg, increasing to maximum width at about 1/3 height, then gradually decreasing to the narrow top. This bottom-up approach is more intuitive than the typical sphere pattern. Will offer optional color-change instructions for striped variations. Size target: approximately 3.5-4 inches tall with worsted weight yarn.
3. **Quality Assurance**: Key concerns include:
- Ensuring smooth, even egg shape (not lumpy)
- Preventing visible holes at color changes
- Proper stuffing technique to maintain oval shape
- Clear stitch count progression for the elongated form
- Beginner-friendly decrease placement to avoid puckering
4. **Final Calculations**:
- Maximum circumference: 24 stitches (standard beginner-friendly count)
- With worsted weight and 3.5mm hook: approximately 8 sts = 2 inches
- 24 sts = 6 inches circumference = ~1.9 inch diameter
- Height: approximately 16-18 rounds = 3.5-4 inches
- Increases: rounds 1-6 (building to 24 sts)
- Even rounds: 7-11 (maintaining egg body)
- Decreases: rounds 12-16 (tapering to top)
Verification
[PRE-FLIGHT CHECKS]
1. **Completeness**: ✓ Will include all template sections (Materials, Abbreviations, Notes, Pattern Instructions, Finishing, Variations)
2. **Consistency**: ✓ Stitch counts verified - start at 6, increase to 24, decrease back to 6. Each increase round mathematically sound (6→12→18→24). Total of 16 rounds for proper egg proportions.
3. **Constraints**: ✓ Beginner level maintained - only sc, inc, dec stitches. Worsted weight yarn specified. Simple single-piece construction.
4. **Safety**: ✓ Double-checking math:
- Rnd 1: 6 sc [6]
- Rnd 2: 6 inc [12] ✓
- Rnd 3: (sc, inc) × 6 [18] ✓
- Rnd 4: (2 sc, inc) × 6 [24] ✓
- Rnd 12: (2 sc, dec) × 6 [18] ✓
- Rnd 13: (sc, dec) × 6 [12] ✓
- Rnd 14: dec × 6 [6] ✓
Pattern
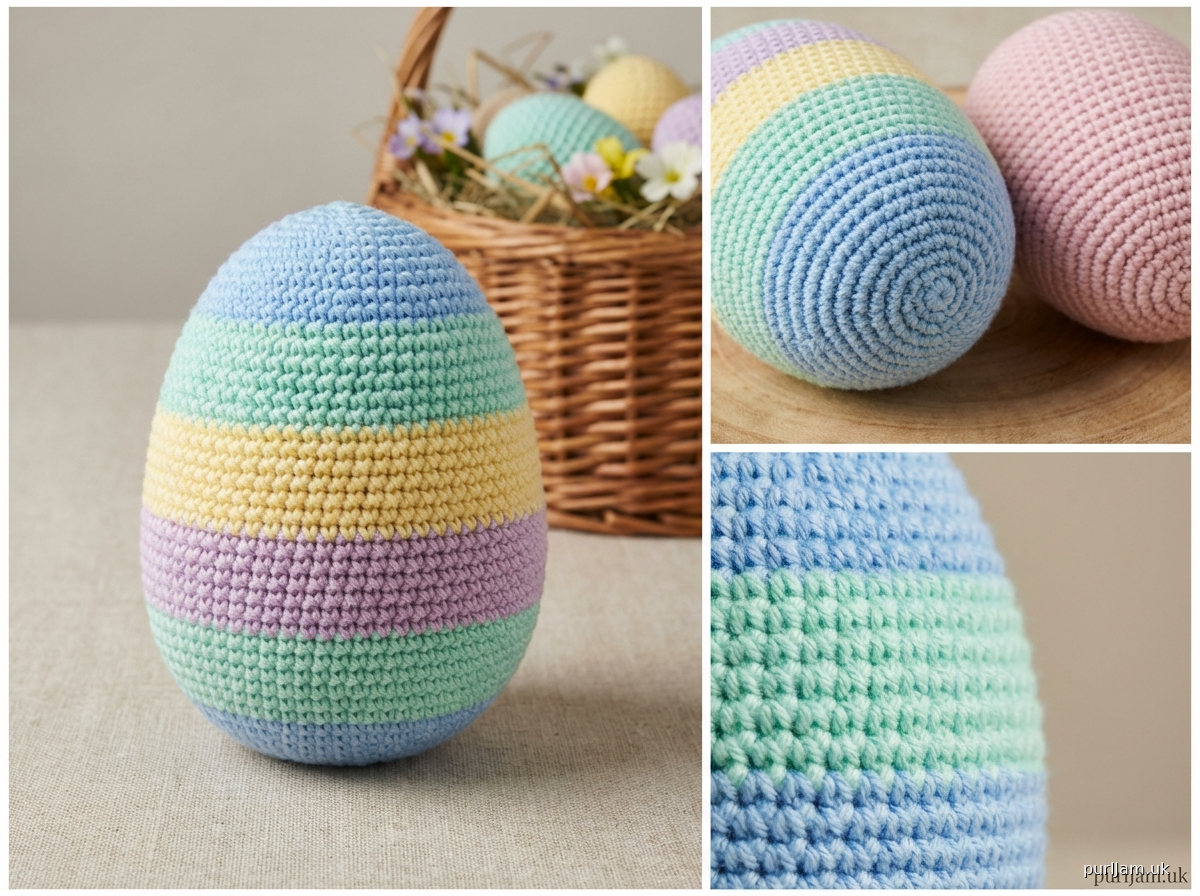
# Easter Egg Crochet Pattern

**Designed for beginners | Finished size: approximately 3.5-4 inches (9-10 cm) tall**

Perfect for Easter baskets, seasonal decorations, or spring-themed play! This simple egg uses basic amigurumi techniques and works up quickly in one piece with no seaming required.

---

## MATERIALS

**Yarn:**
- Worsted weight (4) yarn in your choice of Easter egg colors
- Approximately 30-40 yards (27-37 m) for one egg
- Suggested colors: pastel pink, lavender, mint green, baby blue, pale yellow, or white
- Optional: Contrasting color for stripes or dots

**Recommended Yarns:**
- Lily Sugar'n Cream (solid colors)
- Red Heart Super Saver
- Caron Simply Soft (nice pastel shades)

**Hook & Notions:**
- US E-4 (3.5 mm) crochet hook
- Fiberfill stuffing (polyester)
- Yarn needle for weaving in ends
- Stitch marker (or contrasting scrap yarn)
- Optional: Embroidery thread or yarn for decorative details

---

## ABBREVIATIONS

- ch = chain
- sc = single crochet
- inc = increase (2 sc in same stitch)
- dec = invisible decrease (insert hook in front loops of next 2 sts, yo, pull through both, yo, pull through 2 loops)
- st(s) = stitch(es)
- rnd(s) = round(s)
- [ ] = total stitch count at end of round

---

## GAUGE

Gauge is not critical for this project, but affects finished size.

Approximate gauge with worsted weight and 3.5 mm hook:
- 8 sts × 9 rows = 2 inches (5 cm) in sc

**Important:** Work tightly for amigurumi to prevent stuffing from showing through stitches. Your hook should be 1-2 sizes smaller than the yarn label recommends.

---

## NOTES

**Construction:** This egg is worked in continuous rounds (spiral method) from bottom to top in one piece.

**Stitch Marker:** Place marker in first stitch of each round and move it up as you work. This helps track your place since we don't join rounds.

**Invisible Decrease:** This technique creates a smoother surface than standard decreases. Insert hook through front loop only of next 2 stitches, yarn over and pull through both loops (2 loops on hook), yarn over and pull through both loops on hook.

**Stuffing:** Stuff the egg firmly but not overly tight around rounds 11-12. The egg should feel slightly firm but not rock-hard. Proper stuffing helps maintain the smooth oval shape.

**Color Changes:** If making striped eggs, change colors at the end of any round. Pull new color through last stitch, carry unused color inside the work.

---

## PATTERN INSTRUCTIONS

### Easter Egg (make 1)

**Rnd 1:** 6 sc in magic ring. Do not join; work in continuous spiral. Place marker in first st. [6]
- *Verification: 6 sts total ✓*

**Rnd 2:** Inc in each st around. [12]
- *Verification: 6 inc = 12 sts ✓*

**Rnd 3:** (Sc, inc) around. [18]
- *Verification: (sc, inc) × 6 = 18 sts ✓*

**Rnd 4:** (2 sc, inc) around. [24]
- *Verification: (2 sc, inc) × 6 = 3 sts × 6 = 18 sc + 6 inc = 24 sts ✓*

**Rnd 5:** (3 sc, inc) around. [30]
- *Verification: (3 sc, inc) × 6 = 4 sts × 6 = 24 sc + 6 inc = 30 sts ✓*

**Rnds 6-10:** Sc in each st around. [30]
- *5 rounds of even stitching to build egg body*
- *Verification: 30 sts maintained ✓*

**Rnd 11:** (3 sc, dec) around. [24]
- *Begin shaping top of egg*
- *Verification: (3 sc, dec) × 6 = 5 sts × 6 = 18 sc + 6 dec = 24 sts ✓*

**Rnd 12:** (2 sc, dec) around. [18]
- *Begin stuffing egg now - easier while opening is larger*
- *Verification: (2 sc, dec) × 6 = 3 sts × 6 = 12 sc + 6 dec = 18 sts ✓*

**Rnd 13:** (Sc, dec) around. [12]
- *Add more stuffing, shaping into smooth oval as you go*
- *Verification: (sc, dec) × 6 = 2 sts × 6 = 6 sc + 6 dec = 12 sts ✓*

**Rnd 14:** Dec around. [6]
- *Finish stuffing firmly - this is your last chance!*
- *Verification: 6 dec = 6 sts ✓*

**Rnd 15:** Dec around. [3]
- *Final closing round*
- *Verification: 3 dec = 3 sts ✓*

Fasten off, leaving a 6-inch (15 cm) tail. Thread tail through yarn needle and weave through remaining 3 sts. Pull tight to close hole completely. Weave in end securely on inside of egg.

---

## FINISHING

1. **Closing the Top:** After fastening off, use your yarn needle to weave through the front loops of the remaining 3 stitches. Pull tight to cinch the opening closed. Weave the tail inside the egg for about 1 inch, then trim.

2. **Weave in Bottom End:** Thread the beginning tail (from magic ring) onto your yarn needle and weave securely through several stitches on the inside. Trim.

3. **Shape:** Gently roll and shape the egg between your palms to even out any lumpy areas and create a smooth oval shape. The egg should be slightly wider at the bottom (rounds 1-5) and more tapered at the top.

4. **Optional Embellishments:**
   - **Polka dots:** Cut small circles from felt and glue on, or embroider French knots
   - **Stripes:** Add surface slip stitch in contrasting colors
   - **Embroidered details:** Use embroidery thread to add flowers, hearts, or initials
   - **Glitter:** Brush on fabric glue and add fine glitter (not suitable for young children)

---

## VARIATIONS

### Tiny Egg (Keychain Size)
Use DK weight (3) yarn and 2.75 mm hook. Work pattern as written but omit Round 5 and Rounds 9-10 (stop at Round 8 before decreasing). Finished size: approximately 2 inches (5 cm) tall. Attach keychain finding to top.

### Large Egg
Use bulky weight (5) yarn and 5.0 mm hook. Add one more increase round:
- **Rnd 6:** (4 sc, inc) around [36]
- Work Rnds 7-12 even [36]
- **Rnd 13:** (4 sc, dec) around [30]
- Continue with decrease pattern from main pattern starting at Rnd 11
- Finished size: approximately 6 inches (15 cm) tall

### Striped Easter Egg
**Two-Color Stripes:**
- Work Rnds 1-3 in Color A
- Work Rnds 4-6 in Color B
- Work Rnds 7-9 in Color A
- Work Rnds 10-12 in Color B
- Work Rnds 13-15 in Color A
- Carry unused color inside work, change colors by pulling new color through last stitch of round

**Rainbow Egg:**
Change colors every 2 rounds for a bright rainbow effect.

### Speckled Egg
Use a variegated or speckled yarn (like "Painted Desert" or similar) for a natural speckled robin's egg appearance.

### Basket of Eggs
Make 5-6 eggs in coordinating pastel colors. Crochet a simple basket:
- **Base:** Ch 2, 6 sc in 2nd ch from hook, inc to 24 sts over 4 rounds
- **Sides:** Work 6-8 rounds even
- **Handle:** Ch 20, attach to opposite side

---

## SKILL LEVEL

**Beginner** - Requires knowledge of basic crochet stitches and working in the round.

**Skills used:**
- Magic ring (or ch 2 alternative)
- Single crochet
- Increasing
- Decreasing
- Working in continuous rounds
- Stuffing and finishing

---

## SIZE & YARN REQUIREMENTS

| Yarn Weight | Hook Size | Finished Height | Yardage |
|-------------|-----------|-----------------|---------|
| DK (3) | 2.75 mm | 2.5-3 inches | 20-25 yards |
| Worsted (4) | 3.5 mm | 3.5-4 inches | 30-40 yards |
| Bulky (5) | 5.0 mm | 5-6 inches | 50-60 yards |

---

## TROUBLESHOOTING

**Egg is too flat:** Add 1-2 more even rounds at the widest part (between rounds 10-11).

**Top won't close neatly:** Make sure you're stuffing firmly in the last few rounds and using invisible decreases. You can also work an additional decrease round if needed.

**Stitches look uneven:** Maintain consistent tension throughout. Amigurumi should be worked tightly with a smaller hook than you'd normally use for the yarn weight.

**Holes visible between stitches:** Your tension may be too loose, or you need to go down a hook size. The stitches should be tight enough that stuffing doesn't show through.

**Egg is lumpy:** Check that you're placing your increases and decreases evenly around each round. Gently massage and shape the egg with your hands after stuffing.

---

## DESIGN TIPS

**Color Combinations:**
- Classic pastel: baby pink, mint, lavender, pale yellow
- Natural: cream, tan, speckled brown (robin's egg style)
- Modern: coral, aqua, gold, white
- Traditional: bright pink, purple, green, blue

**Display Ideas:**
- Fill a decorative bowl or basket
- String on ribbon for a garland
- Attach to wreath
- Use as bowl fillers
- Create an egg hunt with hidden treats inside (work with larger hook to make openable)

---

## COPYRIGHT & SHARING

This pattern is free for personal use. You may sell finished items made from this pattern in small quantities (craft fairs, online shops). Please credit the pattern designer. Do not reproduce, share, or sell this pattern itself without permission.

---

**Happy Crocheting! 🐰🥚**

*Make a whole basket of eggs in different colors for the perfect Easter decoration or gift!*
Disclaimer: This pattern was generated by AI and should be reviewed for accuracy before use. While we strive for quality, AI-generated content may contain errors. Please verify measurements, stitch counts, and instructions before beginning your project. Generated by purlJam.uk
Access your pattern anytime
Bookmark this page to access your pattern anytime