Type
Knitting
Difficulty
beginner
Category
Pattern
Pattern
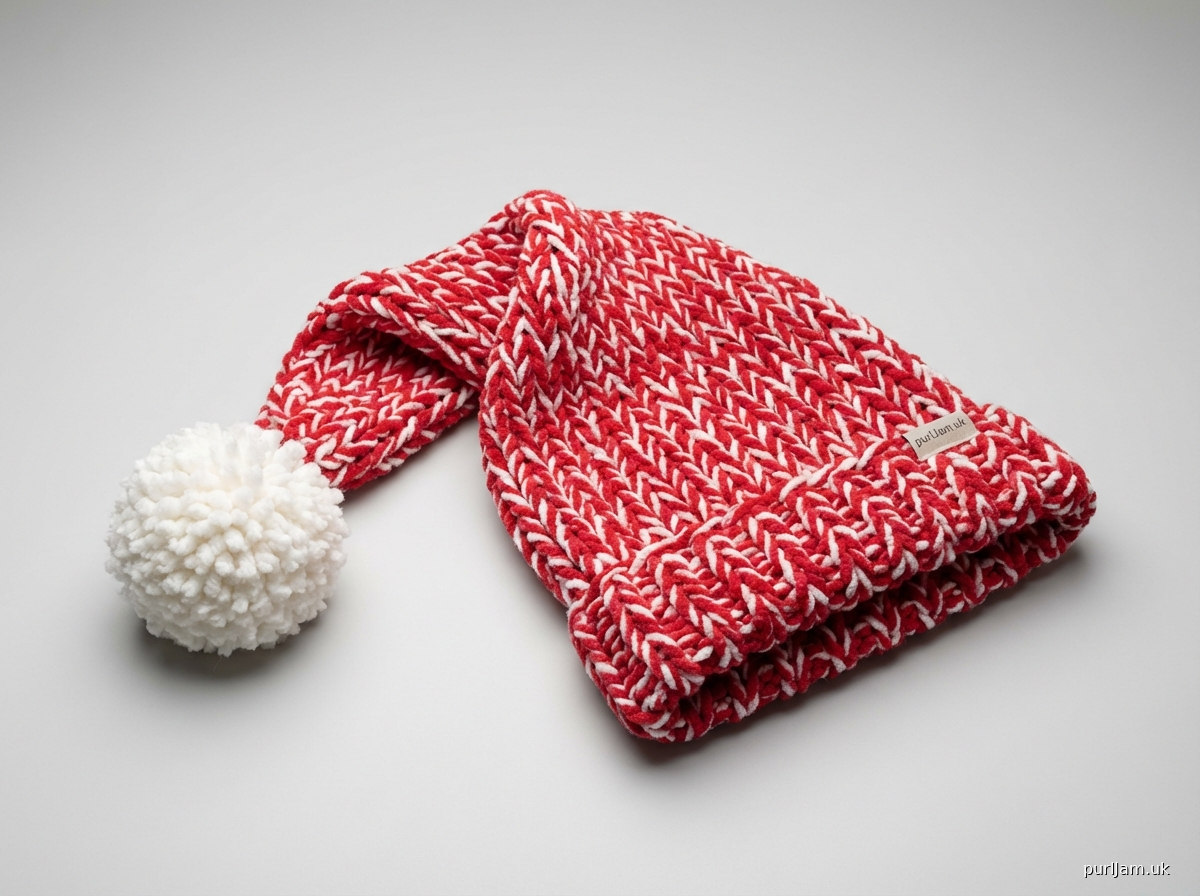
# Floppy Ribbed Santa Hat

This pattern creates a long, floppy, ribbed Santa hat, perfect for beginners using bulky yarn. Worked in the round from the brim up, it features a classic k2p2 ribbing for stretch and warmth, and simple decreases to shape a festive pointed crown.

**DIFFICULTY LEVEL:** Beginner

**SIZE:** Adult Average
*   **Circumference (relaxed):** 19.2 inches (48.5 cm), stretches to fit 22-24 inches (56-61 cm)
*   **Length (including point):** Approximately 20 inches (51 cm)

**MATERIALS:**
*   **Yarn:** Super Bulky (Category 6) "Super Soft Big Jumbo Blanket Yarn"
    *   Approximately 200-250 yards (180-230 meters) in a festive color (e.g., red, white), including yarn for pompom.
*   **Needles:** US 17 / 12 mm 16-inch (40 cm) circular knitting needles
*   **Notions:** Stitch marker, tapestry needle, scissors, optional pompom maker.

**GAUGE:**
2.5 stitches and 3 rows = 1 inch (2.5 cm) in k2p2 rib, relaxed, worked in the round.
*(Check your gauge! If you have more stitches per inch, use a larger needle; if you have fewer stitches per inch, use a smaller needle.)*

**ABBREVIATIONS:**
*   **k** = knit
*   **p** = purl
*   **k2tog** = knit 2 stitches together
*   **pm** = place marker
*   **sm** = slip marker
*   **st(s)** = stitch(es)
*   **rnd(s)** = round(s)

**PATTERN NOTES:**
*   This hat is worked in the round from the bottom up.
*   The entire hat is worked in k2p2 ribbing for a stretchy and textured fabric.
*   Place a stitch marker at the beginning of the round to keep track of your progress.

---

## INSTRUCTIONS

**Cast On:**
Using US 17 / 12 mm circular needles, cast on 48 stitches using your preferred stretchy cast-on method (e.g., Long-Tail Cast-On). Be careful not to twist stitches when joining in the round.
*(Validation: 48 stitches is a multiple of 4, suitable for k2p2 ribbing.)*

**Join in the Round:**
Place a stitch marker (pm) to denote the beginning of the round. Join by knitting the first cast-on stitch with the working yarn.

**Body (Ribbing):**
**Rnd 1:** \*k2, p2\* around to marker. (48 stitches)
Repeat Rnd 1 until your hat measures approximately 15 inches (38 cm) from the cast-on edge. This will create the long, floppy body of the Santa hat.
*(Validation: 15 inches body length + crown shaping will give approx 20 inches total length for floppiness.)*

**Crown Shaping (Decreases):**
The crown decreases will create a pointed tip for your Santa hat.

**Rnd 1 (Decrease):** \*k6, k2tog\* around to marker. (42 stitches)
*(Validation: 48 sts - 6 decreases = 42 sts remaining.)*

**Rnd 2 (Decrease):** \*k5, k2tog\* around to marker. (36 stitches)
*(Validation: 42 sts - 6 decreases = 36 sts remaining.)*

**Rnd 3 (Decrease):** \*k4, k2tog\* around to marker. (30 stitches)
*(Validation: 36 sts - 6 decreases = 30 sts remaining.)*

**Rnd 4 (Decrease):** \*k3, k2tog\* around to marker. (24 stitches)
*(Validation: 30 sts - 6 decreases = 24 sts remaining.)*

**Rnd 5 (Decrease):** \*k2, k2tog\* around to marker. (18 stitches)
*(Validation: 24 sts - 6 decreases = 18 sts remaining.)*

**Rnd 6 (Decrease):** \*k1, k2tog\* around to marker. (12 stitches)
*(Validation: 18 sts - 6 decreases = 12 sts remaining.)*

**Rnd 7 (Decrease):** \*k2tog\* around to marker. (6 stitches)
*(Validation: 12 sts - 6 decreases = 6 sts remaining.)*

---

## FINISHING

1.  Cut your working yarn, leaving a tail of about 8-10 inches (20-25 cm).
2.  Thread the tapestry needle with the yarn tail.
3.  Slip the remaining 6 stitches from your knitting needle onto the tapestry needle.
4.  Pull the yarn tail tightly to gather the stitches and close the top of the hat. Secure with a knot on the inside of the hat.
5.  Weave in any remaining loose ends on the inside of your hat.
6.  **Pompom (Optional):** Make a large pompom using your chosen yarn (or a contrasting color) and attach it securely to the pointed tip of the hat.

Enjoy your new Floppy Ribbed Santa Hat!
Disclaimer: This pattern was generated by AI and should be reviewed for accuracy before use. While we strive for quality, AI-generated content may contain errors. Please verify measurements, stitch counts, and instructions before beginning your project. Generated by purlJam.uk
Access your pattern anytime
Bookmark this page to access your pattern anytime