Type
Knitting
Difficulty
beginner
Category
Pattern
Pattern
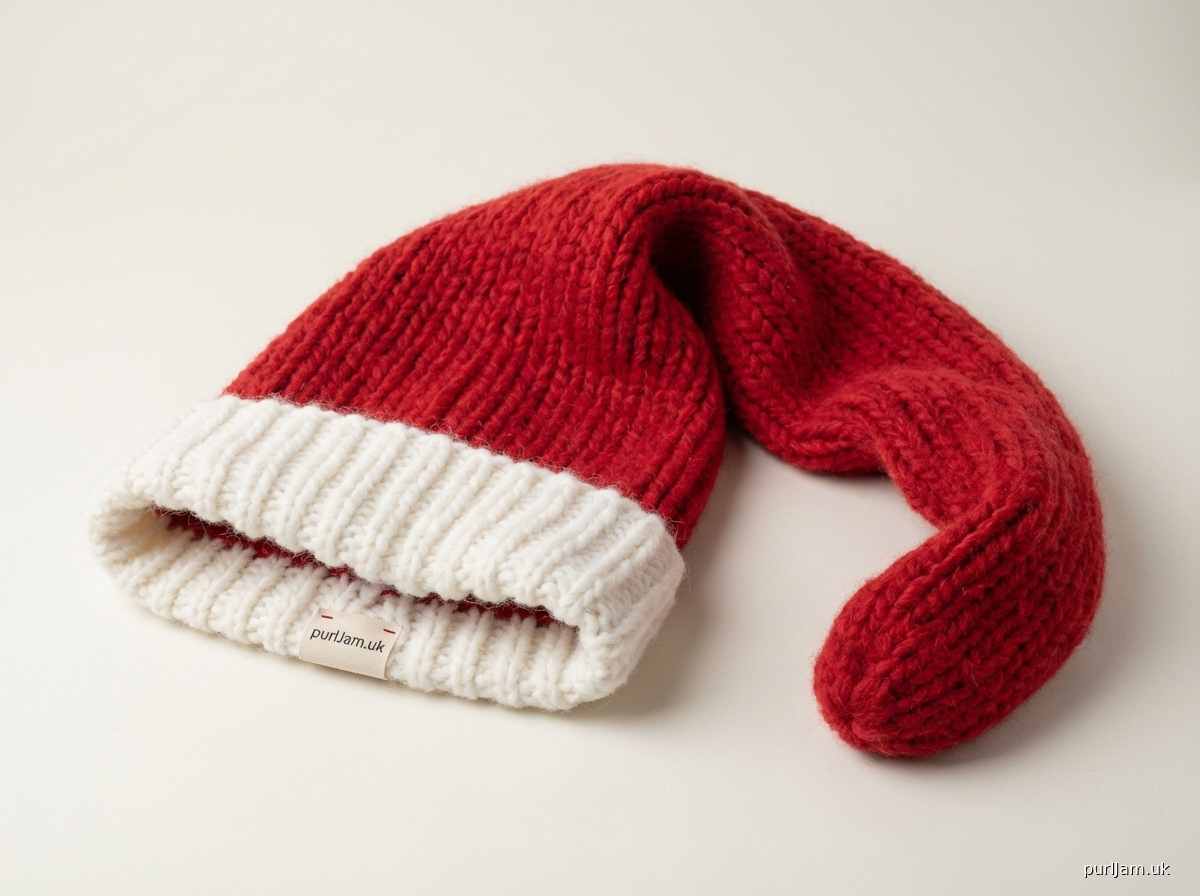
# Floppy Santa Hat

**Skill Level:** Beginner
**Sizes:** One Size (Adult)
**Finished Measurements:** Approximately 20-22 inches (51-56 cm) circumference (stretched), 24 inches (61 cm) total length.

---

### Materials

*   **Yarn:** Super Bulky (Weight 6) – approximately 150-180 yards (137-165 meters) total.
    *   **Color A (White/Brim):** Approximately 40-50 yards (37-46 meters) of fluffy Super Bulky yarn.
    *   **Color B (Red/Body):** Approximately 110-130 yards (100-119 meters) of fluffy Super Bulky yarn.
    *(Look for yarns with a soft, brushed, or loosely plied texture for maximum floppiness and fluffiness.)*
*   **Needles:**
    *   US 17 (12.75 mm) 16-inch (40 cm) circular needle
    *   US 17 (12.75 mm) Double-Pointed Needles (DPNs) – *or use Magic Loop method if preferred.*
*   **Notions:**
    *   1 stitch marker (for beginning of round)
    *   Tapestry needle (for weaving in ends)
    *   Scissors

---

### Gauge

9 stitches (sts) and 12 rounds (rnds) = 4 inches (10 cm) in K2P2 Ribbing, slightly stretched, using US 17 (12.75 mm) needles.
*It is crucial to achieve the correct gauge for the hat to have the desired floppy drape and fit.*

---

### Abbreviations

*   **k:** knit
*   **p:** purl
*   **st(s):** stitch(es)
*   **k2tog:** knit 2 stitches together (single decrease)
*   **p2tog:** purl 2 stitches together (single decrease)
*   **pm:** place marker
*   **sm:** slip marker
*   **rnd(s):** round(s)
*   **CO:** Cast On

---

### Pattern Notes

*   This hat is worked in the round from the brim up, using K2P2 ribbing throughout for a stretchy, warm, and textured fabric.
*   The hat is designed to be very long and floppy, characteristic of a classic Santa hat.
*   Color changes are indicated for the traditional Santa hat look (white brim, red body).
*   For best results and maximum floppiness, consider using a yarn that is soft, lofty, and has a good amount of drape.

---

### Instructions

#### Brim (Color A: White)

1.  Using Color A and the US 17 (12.75 mm) 16-inch (40 cm) circular needle, **CO 48 sts**. *(48 stitches is a multiple of 4, ensuring K2P2 ribbing works evenly.)*
2.  Join to work in the round, being careful not to twist stitches. Pm for beginning of round.
3.  **Rnd 1:** *K2, P2* around. Sm. (48 sts)
4.  Repeat Rnd 1 until the brim measures 3 inches (7.5 cm) from the cast-on edge.

#### Body (Color B: Red)

1.  Cut Color A yarn, leaving a 6-inch (15 cm) tail. Attach Color B yarn.
2.  Continue working in K2P2 rib: *K2, P2* around. Sm. (48 sts)
3.  Continue repeating Rnd 1 of the K2P2 rib pattern until the piece measures approximately 20 inches (51 cm) from the cast-on edge. *(This is 17 inches (43 cm) past the brim, contributing to the "very long" floppy effect.)*

#### Crown Shaping (Color B: Red)

*   *(Switch to DPNs when stitches become too tight for the circular needle.)*

1.  **Decrease Rnd 1:** *K2, P2tog* around. Sm. (36 sts) *(48 sts - (48/4 decreases) = 48 - 12 = 36 sts remaining)*
2.  **Next Rnd:** *K2, P1* around. Sm. (36 sts)
3.  **Decrease Rnd 2:** *K2tog, P1* around. Sm. (24 sts) *(36 sts - (36/3 decreases) = 36 - 12 = 24 sts remaining)*
4.  **Next Rnd:** *K1, P1* around. Sm. (24 sts)
5.  **Decrease Rnd 3:** *K2tog* around. Sm. (12 sts) *(24 sts - (24/2 decreases) = 24 - 12 = 12 sts remaining)*
6.  **Next Rnd:** K all sts. Sm. (12 sts)
7.  **Decrease Rnd 4:** *K2tog* around. Sm. (6 sts) *(12 sts - (12/2 decreases) = 12 - 6 = 6 sts remaining)*

### Finishing

1.  Cut yarn, leaving a 10-inch (25 cm) tail.
2.  Thread the tapestry needle with the tail.
3.  Thread the tail through the remaining 6 stitches, going in the same direction you would knit them. Pull tight to close the hole at the top of the hat.
4.  Weave in all loose ends securely on the inside of the hat.
5.  Gently block if desired, but for a floppy hat, often no harsh blocking is needed – just a gentle steam or mist to even out stitches.

Enjoy your very long and floppy Santa Hat!
Disclaimer: This pattern was generated by AI and should be reviewed for accuracy before use. While we strive for quality, AI-generated content may contain errors. Please verify measurements, stitch counts, and instructions before beginning your project. Generated by purlJam.uk
Access your pattern anytime
Bookmark this page to access your pattern anytime