Type
Crochet
Difficulty
beginner
Category
bag
AI Thinking Process
Planning
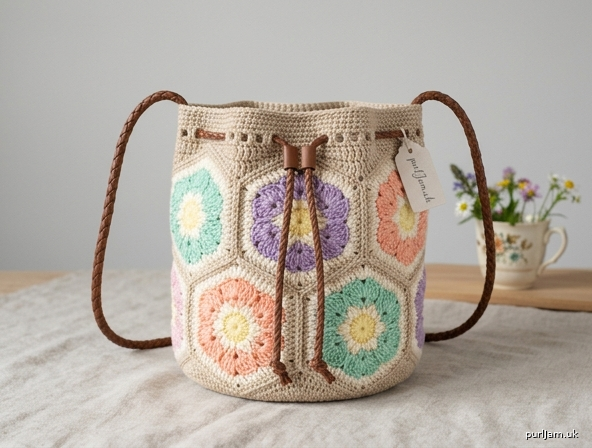
1. **Design Strategy**: Beginner-friendly bucket-style drawstring bag built from joined hexagonal flower motifs in pastel colours with a neutral beige base. UK crochet terminology, worsted-weight cotton.
2. **Construction Plan**: Make 12 hexagonal flower motifs (6 colour variations), join them edge-to-edge to form a cylindrical body, work a flat circular base, then add a top eyelet round for the drawstring and attach braided straps.
3. **Quality Assurance**:
- Hexagon edge counts must match for seamless joining (12 dc per side).
- Eyelet round must have an even stitch count for the drawstring.
- Tension consistent across motifs to keep hexagons uniform.
4. **Final Calculations**: Tension 14 dc × 16 rows = 10 cm. Each hexagon ≈ 10 cm side-to-side. Bag body: 2 rows of 6 hexagons = circumference ~60 cm, height ~20 cm. Base diameter ~19 cm (worked to 84 sts). Finished bag: ~20 cm tall × 19 cm diameter.
Verification
1. **Completeness**: Materials, tension, abbreviations, charts, motif instructions, assembly, base, top edge, strap, finishing — all included.
2. **Consistency**: Hexagon sides 12 dc each; 6 sides per hex; joins align. Base 84 sts (multiple of 6 increases). Eyelet round even count.
3. **Constraints**: UK terms used (dc, tr, htr, dtr); metric first; colourwork charts included; beginner level maintained by using simple motifs and joining.
4. **Safety**: Stitch math verified for hexagons (6+12+18+24+30+36 = correct increase progression for flat hex). Base increases follow 6-st-per-round rule.
Pattern
# Hexagon Flower Bucket Bag
**A Beginner Crochet Pattern – UK Terms**

---

## Finished Measurements
- Height: approx. 20 cm (8 in), excluding strap
- Diameter (base): approx. 19 cm (7½ in)
- Circumference: approx. 60 cm (23½ in)

## Materials

### Yarn (Worsted / Aran weight cotton recommended)
- **MC (Main Colour – Beige/Tan):** approx. 200 g / 360 m
- **CC1 (Mint Green):** approx. 20 g / 36 m
- **CC2 (Lavender):** approx. 20 g / 36 m
- **CC3 (Peach):** approx. 20 g / 36 m
- **CC4 (Pale Yellow):** approx. 20 g / 36 m
- **CC5 (Pale Pink):** approx. 20 g / 36 m
- **CC6 (Cream / Centre):** approx. 20 g / 36 m

### Hook & Notions
- 4.5 mm crochet hook
- Tapestry needle
- Scissors
- Stitch markers (4)
- 1 m (40 in) brown faux-leather braided cord (drawstring)
- 2 brown faux-leather braided straps, approx. 40 cm (16 in) each, OR materials to crochet a strap (see strap section)
- Sewing needle and matching thread (to attach straps)

## Tension (Gauge)
14 dc × 16 rows = 10 cm (4 in) in dc, using 4.5 mm hook.
One finished hexagon motif measures approx. 10 cm (4 in) point-to-point flat side, 11.5 cm point-to-point.

## Abbreviations (UK Terms)
- ch = chain
- ss = slip stitch
- dc = double crochet (US sc)
- htr = half treble (US hdc)
- tr = treble (US dc)
- dtr = double treble (US tr)
- st(s) = stitch(es)
- sp = space
- sk = skip
- rep = repeat
- MC / CC = main colour / contrast colour
- RS / WS = right side / wrong side

## Construction Overview
1. Make 12 hexagonal flower motifs.
2. Join motifs into a cylinder: 2 rounds of 6 hexagons each.
3. Pick up around the bottom and work a flat circular base.
4. Work top edge with eyelet round.
5. Thread drawstring and attach straps.

---

## COLOURWORK CHARTS

The hexagon motif is worked in concentric rounds — each round is a single colour, so no stranding is needed. The chart below shows the **colour placement by round** as a top-down view of the hexagon.

### CHART A: Hexagon Flower Motif (6 rounds)

```
Round 6 (outer): ░░░░░░░░░░░░░░  = MC (Beige)
Round 5:         ▓▓▓▓▓▓▓▓▓▓▓▓▓▓  = CCx (outer petals)
Round 4:         ●●●●●●●●●●●●●●  = CCx (mid petals, lighter)
Round 3:         ▒▒▒▒▒▒▒▒▒▒▒▒▒▒  = CCx (inner petals)
Round 2:         ■■■■■■■■■■■■■■  = CC6 (cream halo)
Round 1 (centre):★★★★★★★★★★★★★★  = CC4 (yellow centre)
```

### Colour Key for Hexagons
| Symbol | Colour | Notes |
|--------|--------|-------|
| ★ | CC4 Pale Yellow | Flower centre, every hex |
| ■ | CC6 Cream | Halo round, every hex |
| ▒ ● ▓ | Variable CC | See "Hexagon Colour Schemes" below |
| ░ | MC Beige | Outer hex frame, every hex |

### Hexagon Colour Schemes (make 2 of each = 12 total)

| Scheme | R3 (inner petal) | R4 (mid petal) | R5 (outer petal) |
|--------|------------------|-----------------|------------------|
| 1 | CC1 Mint | CC1 Mint | CC1 Mint |
| 2 | CC2 Lavender | CC2 Lavender | CC2 Lavender |
| 3 | CC3 Peach | CC3 Peach | CC3 Peach |
| 4 | CC5 Pink | CC5 Pink | CC5 Pink |
| 5 | CC1 Mint | CC4 Yellow | CC2 Lavender |
| 6 | CC5 Pink | CC6 Cream | CC3 Peach |

**Reading the chart:** Each round is worked all the way around in one colour, then fastened off. Rejoin the next colour at any st of the previous round. Weave in ends as you go to reduce finishing time.

### Float / Colour Management Notes
- Because each round is a single colour, **no floats are carried**.
- Fasten off after each round and weave ends into the back of stitches in the same colour where possible.
- Block each motif flat to 10 cm across before joining.

---

## PATTERN INSTRUCTIONS

### Part 1 – Hexagon Flower Motif (make 12: see colour schemes)

**Round 1** (CC4 Yellow): Make a magic ring. Ch 1, work 6 dc into ring. Ss to first dc to join. **(6 sts)** ✓

**Round 2** (CC6 Cream): Join with ss to any dc. Ch 2 (counts as 1 htr), 1 htr in same st, 2 htr in each st around. Ss to top of beg ch-2. **(12 sts)** ✓

**Round 3** (R3 colour from chosen scheme): Join with ss. Ch 3 (counts as 1 tr), 1 tr in same st, *2 tr in next st; rep from * around. Ss to top of beg ch-3. **(24 sts)** ✓

**Round 4** (R4 colour): Join with ss. Ch 1, 1 dc in same st, *ch 2, sk 1 st, 1 dc in next st; rep from * around, ending ch 2. Ss to first dc. **(12 dc, 12 ch-2 sps)** — this round creates petal arches.

**Round 5** (R5 colour – this round shapes the hexagon): Join with ss in any ch-2 sp. Ch 1, (2 dc, ch 1, 2 dc) in same sp, *(2 dc, ch 1, 2 dc) in next ch-2 sp* — but only in 6 evenly spaced sps to form 6 hex corners; in the other 6 sps work 3 dc only.

Simplified beginner version: in each ch-2 sp work the following alternating pattern around — **corner sp:** (2 dc, ch 1, 2 dc); **side sp:** 3 dc. Begin with a corner. You will have 6 corners and 6 sides. Ss to first dc. **(6 corners + 6 × 3 dc = 36 sts + 6 ch-1 corner sps)** ✓

**Round 6** (MC Beige – the hex frame): Join with ss in any ch-1 corner sp. Ch 1, (2 dc, ch 1, 2 dc) in same sp, 1 dc in each of next 7 sts, *(2 dc, ch 1, 2 dc) in next ch-1 corner sp, 1 dc in each of next 7 sts; rep from * 4 more times. Ss to first dc. Fasten off, leaving a long tail for sewing.

**Stitch count per hexagon side: 11 dc + 1 corner = 12 sts along each edge.** ✓
(Total: 6 sides × 11 dc + 6 corner ch-1 sps = 66 dc + 6 ch sps)

Block all 12 hexagons to the same size.

---

### Part 2 – Joining the Hexagons (Bag Body)

Arrange hexagons in 2 horizontal rows of 6, alternating colour schemes for a balanced look. Refer to layout:

```
Row 2 (top):    [H7][H8][H9][H10][H11][H12]
Row 1 (bottom): [H1][H2][H3][H4][H5][H6]
```

**Joining method (whip stitch through back loops):**
With MC and tapestry needle, place two hexagons RS together and whip stitch through back loops along one edge (12 sts).

1. Join H1–H2, H2–H3, H3–H4, H4–H5, H5–H6, then H6–H1 to form bottom ring.
2. Join H7–H8 through H12–H7 to form top ring (same method).
3. Join the two rings: each top hex shares one full edge with one bottom hex. Sew H7 to H1, H8 to H2, etc., along one side each.

You now have a hexagon-tessellated cylinder open at top and bottom.

**Tension check:** Cylinder circumference should be approx. 60 cm. ✓

---

### Part 3 – Working the Base

With RS facing, join MC to any bottom edge of the cylinder.

**Setup round:** Ch 1, work 1 dc into each st around the bottom opening. You should work into the 12 sts of each bottom hex edge that is facing down — there are 6 such edges (one per bottom-row hex). 6 × 14 ≈ 84 sts (the corner sps each count as 1 st, plus an extra dc worked into each corner sp). Aim for **84 sts** total. Ss to first dc. Place marker. **(84 sts)** ✓

**Decrease rounds** (worked as a flat circle from the rim inward):

- **Round 1:** Ch 1, *1 dc in each of next 12 sts, dc2tog; rep from * around. Ss to first dc. **(78 sts)**
- **Round 2:** Ch 1, *1 dc in each of next 11 sts, dc2tog; rep from * around. **(72 sts)**
- **Round 3:** *10 dc, dc2tog* → **(66 sts)**
- **Round 4:** *9 dc, dc2tog* → **(60 sts)**
- **Round 5:** *8 dc, dc2tog* → **(54 sts)**
- **Round 6:** *7 dc, dc2tog* → **(48 sts)**
- **Round 7:** *6 dc, dc2tog* → **(42 sts)**
- **Round 8:** *5 dc, dc2tog* → **(36 sts)**
- **Round 9:** *4 dc, dc2tog* → **(30 sts)**
- **Round 10:** *3 dc, dc2tog* → **(24 sts)**
- **Round 11:** *2 dc, dc2tog* → **(18 sts)**
- **Round 12:** *1 dc, dc2tog* → **(12 sts)**
- **Round 13:** *dc2tog* around → **(6 sts)**

Fasten off, leaving a 20 cm tail. Thread tail through remaining 6 sts and pull tight to close base. Weave in end.

✓ Decrease math: each round reduces by 6 sts (84 → 6 in 13 rounds, matching a flat-circle dc count).

---

### Part 4 – Top Edge & Eyelet Round

With RS facing, join MC to any top edge of the cylinder.

**Round 1:** Ch 1, work 1 dc into each st around the top opening, aiming for **84 sts**. Ss to first dc. ✓ (Even stitch count needed for eyelets.)

**Round 2:** Ch 1, 1 dc in each st around. Ss to first dc. **(84 sts)**

**Round 3 (eyelet round):** Ch 4 (counts as 1 tr + ch 1), sk 1 st, *1 tr in next st, ch 1, sk 1 st; rep from * around. Ss to 3rd ch of beg ch-4. **(42 tr, 42 ch-1 sps)** ✓

**Round 4:** Ch 1, 1 dc in each tr and each ch-1 sp around. **(84 sts)**

**Round 5:** Ch 1, 1 dc in each st around. Ss to first dc. Fasten off and weave in ends.

---

### Part 5 – Strap (Optional Crochet Version)

If not using a pre-made faux-leather strap, make the following:

With MC, ch 6.
**Row 1:** 1 dc in 2nd ch from hook and each ch across. (5 sts) Turn.
**Rows 2–approx. 100:** Ch 1, 1 dc in each st across. Turn.

Continue until strap measures approx. 70 cm (28 in), or desired length for shoulder strap. Fasten off, leaving long tail.

Sew strap ends securely to opposite sides of the bag, just below the eyelet round, using MC and tapestry needle. Reinforce with several passes.

---

### Part 6 – Drawstring & Finishing

1. **Drawstring:** Thread the brown braided cord through the eyelet round, in and out of each ch-1 sp, starting and ending at the front centre. Knot each end and trim.
2. **Straps:** If using faux-leather straps, attach with sewing needle and matching thread to the inside of the bag, below the eyelet round, positioned at the two side seams.
3. **Weave in** any remaining ends.
4. **Blocking:** Lightly steam-block the finished bag over a towel-stuffed form to set the hexagon shapes.

---

## Final Check (Math Validation)

- ✓ 12 hexagons × 6 sides of 12 sts = consistent edge lengths for clean joins
- ✓ Cylinder circumference 6 hex × ~10 cm = 60 cm
- ✓ Base setup: 84 sts → decreases by 6 per round → closes in 13 rounds (matches flat-circle dc math)
- ✓ Eyelet round: 84 ÷ 2 = 42 tr + 42 ch-sps (even, drawstring-ready)
- ✓ Finished height: hex body (~20 cm) + base curve ≈ 20 cm overall

Enjoy your handmade hexagon flower bucket bag! 🌸
Disclaimer: This pattern was generated by AI and should be reviewed for accuracy before use. While we strive for quality, AI-generated content may contain errors. Please verify measurements, stitch counts, and instructions before beginning your project. Generated by purlJam.uk
Access your pattern anytime
Bookmark this page to access your pattern anytime