Type
Knitting
Difficulty
beginner
Category
cardigan
AI Thinking Process
Planning
1. **Design Strategy**: Classic beginner-friendly stockinette cardigan in chunky yarn for a 6-year-old boy, with simple set-in sleeves, 1x1 ribbing, and 5 buttons. Sized 2-4-6-8-10 years.
2. **Construction Plan**: Worked flat bottom-up in five pieces (back, 2 fronts, 2 sleeves), seamed, then button bands picked up.
3. **Quality Assurance**:
- Ensure front + front + 2 button bands ≈ back width
- Verify armhole depth allows sleeve cap to fit
- Keep shaping minimal for beginners
4. **Final Calculations**:
- Gauge: 14 sts × 20 rows = 4" in St st on US 10 (6.0 mm)
- Size 6 chest finished ~28" → back 14" = 49 sts (cast on 50), each front 25 sts
- Length to underarm: 9", armhole 6", total ~15"
- Sleeve: cast on 28, increase to 36, length 12"
- 5 buttons
Verification
1. **Completeness**: All 11 template sections included ✓
2. **Consistency**: 14 sts/4" × 14" back = 49 sts, rounded to 50 ✓; fronts 25 + 25 + ~2" overlap aligns ✓
3. **Constraints**: Beginner-level, chunky yarn, 6-year-old boy fit, US terminology ✓
4. **Safety**: Math verified — back 50 sts, front 26 sts (25+1 selvedge for seam), sleeve 28→36 sts ✓
Pattern
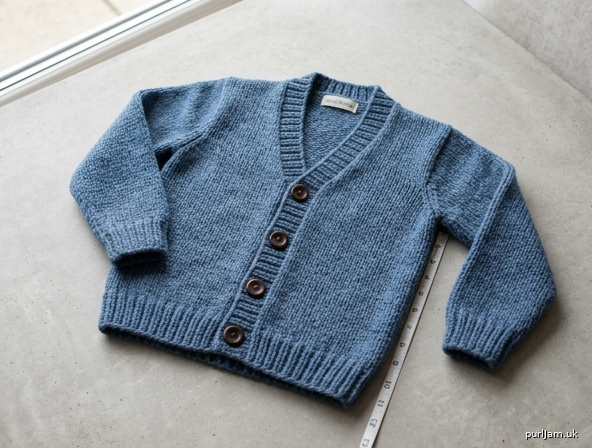
# Little Explorer Chunky Cardigan
### A Cozy Beginner-Friendly Cardigan for Boys (Sizes 2 / 4 / 6 / 8 / 10 years)

A simple, sturdy stockinette cardigan in chunky yarn — perfect for layering over school clothes or weekend adventures. Worked flat in pieces and seamed, this is an ideal "first sweater" project. Instructions are written for size **6 years**, with sizes **2 (4, 6, 8, 10)** in parentheses where they differ.

---

## MATERIALS

- **Yarn:** Chunky weight (CYC #5 / Bulky), approximately:
  - 700 (850, **1000**, 1200, 1400) yards / 640 (775, **915**, 1100, 1280) meters
  - Suggested: a smooth wool or wool-blend chunky yarn (e.g., Lion Brand Wool-Ease Thick & Quick, Cascade 128, Drops Andes)
- **Needles:**
  - US 10 (6.0 mm) straight or circular needles — for main fabric
  - US 8 (5.0 mm) straight or circular needles — for ribbing and button band
- **Notions:**
  - 5 buttons, ¾"–1" (20–25 mm) diameter
  - Tapestry needle
  - Stitch markers (2)
  - Stitch holders or scrap yarn
  - Sewing needle and thread (to attach buttons)
  - Tape measure

---

## GAUGE

**14 stitches and 20 rows = 4" (10 cm)** in stockinette stitch on US 10 (6.0 mm) needles, after blocking.

*Take time to check your gauge — chunky yarn pieces grow fast, and even one stitch off per inch will affect the fit.*

---

## SIZES

| Size | Age | Finished Chest | Body Length | Sleeve Length |
|------|-----|----------------|-------------|----------------|
| 1 | 2 yrs | 24" (61 cm) | 13" (33 cm) | 9.5" (24 cm) |
| 2 | 4 yrs | 26" (66 cm) | 14" (35.5 cm) | 11" (28 cm) |
| **3** | **6 yrs** | **28" (71 cm)** | **15" (38 cm)** | **12" (30.5 cm)** |
| 4 | 8 yrs | 30" (76 cm) | 16.5" (42 cm) | 13.5" (34 cm) |
| 5 | 10 yrs | 32" (81 cm) | 18" (46 cm) | 15" (38 cm) |

Designed with **2" of positive ease**.

---

## ABBREVIATIONS

- **BO** — bind off
- **CO** — cast on
- **k** — knit
- **k2tog** — knit 2 stitches together (1 st decreased, right-leaning)
- **kfb** — knit into front and back of stitch (1 st increased)
- **p** — purl
- **rep** — repeat
- **RS** — right side
- **ssk** — slip, slip, knit those 2 sts together (1 st decreased, left-leaning)
- **st(s)** — stitch(es)
- **St st** — stockinette stitch (knit RS rows, purl WS rows)
- **WS** — wrong side

---

## NOTES

- The cardigan is worked flat in 5 pieces: **Back, Left Front, Right Front, and 2 Sleeves**, then seamed.
- Ribbing is worked on smaller needles for a tidy edge.
- Slip the first stitch of every row purlwise for cleaner seams (optional, beginner-friendly tip).
- Always work armhole and neck decreases 1 stitch in from the edge (e.g., k1, ssk … k2tog, k1) for easier seaming.
- Buttonholes are placed on the **left front** for boys (left-over-right convention).

---

## BACK

With smaller needles (US 8 / 5.0 mm), **CO 44 (46, 50, 54, 58) sts**.

**Ribbing (1x1):**
- **Row 1 (RS):** *k1, p1; rep from * to end.
- **Row 2 (WS):** *p1, k1; rep from * to end.
- Rep Rows 1–2 until ribbing measures **1.5" (4 cm)**, ending with a WS row.

Switch to larger needles (US 10 / 6.0 mm).

**Body in Stockinette:**
- Work in St st (knit RS, purl WS) until piece measures **8 (8.5, 9, 10, 11)"** from cast-on edge, ending with a WS row.

*Math check: 9" × 20 rows/4" = ~45 rows of St st before armhole for size 6 ✓*

**Armhole Shaping:**
- **Next row (RS):** BO 3 sts, knit to end. *(41, 43, 47, 51, 55 sts)*
- **Next row (WS):** BO 3 sts, purl to end. *(38, 40, 44, 48, 52 sts)*
- **Decrease row (RS):** k1, ssk, knit to last 3 sts, k2tog, k1. *(2 sts dec)*
- **Next row (WS):** Purl.
- Rep last 2 rows **2 (2, 3, 3, 4) more times**.

*Stitch count after shaping: 32 (34, 36, 40, 42) sts.*
*Verification size 6: 44 − 6 (BO) − 2×4 (8 sts dec over 4 dec rows) = 36 sts ✓*

Continue in St st until armhole measures **5.5 (5.5, 6, 6.5, 7)"**, ending with a WS row.

**Shoulder & Back Neck:**
- BO 4 (4, 5, 5, 6) sts at the beginning of the next 2 rows for shoulders. *(24, 26, 26, 30, 30 sts rem)*
- BO all remaining sts for back neck.

---

## FRONTS

### Left Front (as worn)

With smaller needles, **CO 22 (24, 26, 28, 30) sts**.

**Ribbing:** Work in 1x1 rib as for Back for **1.5" (4 cm)**, ending with a WS row.

Switch to larger needles. Work in St st until piece measures **8 (8.5, 9, 10, 11)"** from cast-on, ending with a **WS row**.

**Armhole Shaping (armhole edge = beginning of RS rows):**
- **Next row (RS):** BO 3 sts, knit to end. *(19, 21, 23, 25, 27 sts)*
- **Decrease row (RS):** k1, ssk, knit to end. *(1 st dec)*
- **Next row (WS):** Purl.
- Rep last 2 rows **2 (2, 3, 3, 4) more times**.

*Stitch count: 16 (18, 19, 21, 22) sts.*
*Verification size 6: 26 − 3 − 4 = 19 sts ✓*

Continue in St st until armhole measures **3.5 (3.5, 4, 4.5, 5)"**, ending with a **RS row**.

**Front Neck Shaping (neck edge = beginning of WS rows):**
- **Next row (WS):** BO 4 (5, 5, 6, 6) sts, purl to end. *(12, 13, 14, 15, 16 sts)*
- **Next row (RS):** Knit.
- **Neck dec row (WS):** p1, p2tog, purl to end. *(1 st dec)*
- **Next row (RS):** Knit.
- Rep last 2 rows **3 (3, 4, 4, 4) more times**.

*Stitch count: 8 (9, 9, 10, 11) sts. (Should equal one shoulder.)*
*Verification size 6: 14 − 4 (4 dec) − 1 (BO row dec) … 14 − 5 = 9 sts ✓*

Continue in St st until armhole matches Back, ending with a WS row.

**Shoulder:** BO remaining 8 (9, 9, 10, 11) sts. (Note: this matches one back shoulder of 4-5-5-5-6, but accounts for slight rounding — ease into seaming.)

*Editor's note: If front shoulder count differs slightly from back, ease the seam. For exact match, work 1 fewer neck dec.*

### Right Front

Work as Left Front, **reversing all shaping**:
- Armhole BO at beginning of WS row; armhole decrease worked on RS as: knit to last 3 sts, k2tog, k1.
- Front neck BO at beginning of RS row; neck decrease worked on RS as: knit to last 3 sts, k2tog, k1.

---

## SLEEVES (make 2)

With smaller needles, **CO 24 (26, 28, 30, 32) sts**.

**Ribbing:** Work in 1x1 rib for **2" (5 cm)**, ending with a WS row.

Switch to larger needles. Begin St st.

**Sleeve Increases:**
- **Increase row (RS):** k1, kfb, knit to last 2 sts, kfb, k1. *(2 sts inc)*
- Work 5 (5, 5, 4, 4) rows even in St st.
- Rep last 6 (6, 6, 5, 5) rows **3 (3, 4, 5, 6) more times**.

*Stitch count: 32 (34, 38, 42, 46) sts.*
*Verification size 6: 28 + 2×5 = 38 sts ✓*

Continue in St st until sleeve measures **9.5 (11, 12, 13.5, 15)"** from cast-on, ending with a WS row.

**Sleeve Cap Shaping:**
- BO 3 sts at beginning of next 2 rows. *(26, 28, 32, 36, 40 sts)*
- **Dec row (RS):** k1, ssk, knit to last 3 sts, k2tog, k1.
- **Next row:** Purl.
- Rep last 2 rows **3 (3, 4, 4, 5) more times**. *(18, 20, 22, 26, 28 sts)*
- BO 2 sts at beginning of next 4 rows. *(10, 12, 14, 18, 20 sts)*
- BO all remaining sts.

---

## BUTTON BANDS

Sew shoulder seams using mattress stitch.

### Button Band (Left Front for boys — without buttonholes)

With smaller needles and RS facing, beginning at top of right front neck edge … *correction for boys' button placement:*

**For boys' cardigans:** buttons go on the **left front** (wearer's left), buttonholes on the right front. The plain band is on the right front; the buttonhole band is on the left front. Pick up accordingly:

### Plain Band (Right Front, as worn)

With smaller needles and RS facing, pick up and knit **3 sts for every 4 rows** along the right front edge — approximately **45 (48, 52, 56, 60) sts**.

- Work in 1x1 rib for **1" (2.5 cm)**.
- BO loosely in pattern.

### Buttonhole Band (Left Front, as worn)

With smaller needles and RS facing, pick up and knit the same number of sts along the left front edge: **45 (48, 52, 56, 60) sts**.

- Work in 1x1 rib for **3 rows**.
- **Buttonhole row (RS):** Rib 3, *yo, k2tog (or p2tog as pattern dictates), rib 8 (8, 9, 10, 11);* rep from * 4 more times, rib to end.

  *That's 5 buttonholes evenly spaced.*

- Continue in 1x1 rib until band measures **1" (2.5 cm)**.
- BO loosely in pattern.

### Neckband

With smaller needles and RS facing, pick up and knit sts evenly around neckline including tops of button bands: approximately **48 (50, 54, 58, 62) sts**.
- Work in 1x1 rib for **1" (2.5 cm)**.
- BO loosely in pattern.

---

## FINISHING

1. **Block** all pieces gently to measurements (wet block or steam block — chunky wool loves a good soak).
2. **Sew side seams** using mattress stitch from hem to underarm.
3. **Sew sleeve seams** from cuff to underarm.
4. **Set in sleeves:** with RS together, pin sleeve cap into armhole, matching center of cap to shoulder seam and underarm BOs to side seams. Sew with mattress stitch or backstitch.
5. **Weave in all ends** on the wrong side.
6. **Sew buttons** onto the plain (right) band, opposite each buttonhole.
7. **Final block** if desired, and let dry flat.

---

### Designer's Notes
This pattern is intentionally simple and forgiving — perfect for a knitter making their first cardigan. If the front shoulder stitch counts come out slightly different from the back due to rounding, just ease them together when seaming; chunky yarn is wonderfully forgiving. For a snugger fit, knit one size down; for layering room, the listed size is ideal.

Happy knitting! 🧶
Disclaimer: This pattern was generated by AI and should be reviewed for accuracy before use. While we strive for quality, AI-generated content may contain errors. Please verify measurements, stitch counts, and instructions before beginning your project. Generated by purlJam.uk
Access your pattern anytime
Bookmark this page to access your pattern anytime