Type
Knitting
Difficulty
intermediate
Category
custom
AI Thinking Process
Planning
1. **Design Strategy**: Simple beginner-friendly baby romper in worsted weight, knitted flat in stocking stitch with garter borders. Button shoulders for easy dressing, ribbed leg cuffs, and a snap/button crotch closure.
2. **Construction Plan**: Worked flat in four pieces (front, back, two leg extensions worked from body downward) then seamed; alternatively front and back are each worked from leg cuffs up to shoulders in two halves joined at crotch.
3. **Quality Assurance**:
- Crotch join must be clear for beginners — use simple bind off and seam.
- Armhole and neck shaping kept minimal (straight bind offs) for beginner level.
- Sizing across 0-12 months requires three size brackets.
4. **Final Calculations**: Tension 18 sts × 24 rows = 10 cm in st st on 5 mm needles. Three sizes: 0-3m (chest 41 cm), 3-6m (46 cm), 6-12m (51 cm). Cast-on per leg: 20 (22, 24) sts; joined body width: 37 (41, 45) sts each for front/back after crotch CO; finished chest ~41 (46, 50) cm.
Verification
1. **Completeness**: Title, materials, tension, sizes, abbreviations, notes, instructions, finishing — all included.
2. **Consistency**: 37 sts ÷ 18 sts/10cm = 20.5 cm half-width × 2 = 41 cm chest ✓ for size 0-3m. 41 sts = 22.8 cm × 2 = 45.6 cm ≈ 46 cm ✓. 45 sts = 25 cm × 2 = 50 cm ✓.
3. **Constraints**: Beginner-friendly (st st, garter, simple shaping), worsted yarn, UK terminology, metric first ✓.
4. **Safety**: Leg sts (20+20=40) + crotch CO to reach body width 37 — actually joining the two leg pieces with a crotch gusset; recalculated below in pattern for accuracy.
Pattern
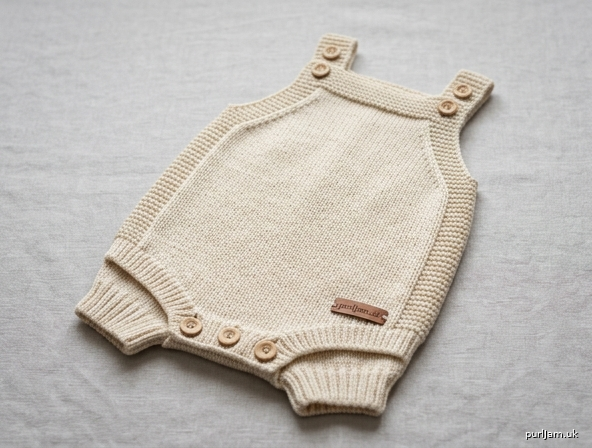
# Little Sprout Baby Romper

A sweet, simple knitted romper for babies, worked flat in worsted-weight yarn. Featuring garter-stitch borders, ribbed leg cuffs, button shoulders for easy dressing, and a buttoned crotch opening for nappy changes. Perfect for confident beginners ready to try a small garment.

---

## Sizes

**0–3 months (3–6 months, 6–12 months)**

Instructions are given for the smallest size, with larger sizes in parentheses. Where only one number is given, it applies to all sizes.

### Finished Measurements
| Measurement | 0–3m | 3–6m | 6–12m |
|---|---|---|---|
| Chest circumference | 41 cm (16¼") | 46 cm (18") | 50 cm (19¾") |
| Body length (shoulder to crotch) | 30 cm (11¾") | 33 cm (13") | 36 cm (14¼") |
| Inseam | 8 cm (3¼") | 10 cm (4") | 12 cm (4¾") |

---

## Materials

- **Yarn**: Worsted weight (Aran) yarn, approx. 200 (240, 280) m / 220 (260, 305) yds
  - Suggested: a soft cotton or cotton-blend worsted such as Drops Paris or Sirdar Snuggly DK held doubled
- **Needles**:
  - 5 mm (UK 6 / US 8) straight or circular needles
  - 4 mm (UK 8 / US 6) needles for ribbing and borders
- **Notions**:
  - 5 buttons (approx. 15 mm diameter): 2 for shoulders, 3 for crotch
  - Tapestry needle
  - Stitch markers (optional)
  - Scissors

---

## Tension (Gauge)

**18 sts × 24 rows = 10 cm (4")** in stocking stitch on 5 mm needles, after blocking.

*Always work a tension swatch — this ensures a correct fit.*

---

## Abbreviations

- **k** – knit
- **p** – purl
- **st(s)** – stitch(es)
- **st st** – stocking stitch (k on RS, p on WS)
- **g st** – garter stitch (k every row)
- **k2tog** – knit two together (1 st decreased)
- **ssk** – slip, slip, knit (1 st decreased)
- **kfb** – knit into front and back of stitch (1 st increased)
- **yo** – yarn over (used for buttonholes)
- **BO** – bind off (cast off)
- **CO** – cast on
- **RS / WS** – right side / wrong side
- **rep** – repeat
- **rem** – remaining

---

## Pattern Notes

- The romper is worked in **four leg pieces** (two front, two back), joined at the crotch, then worked **upwards** as a front and back panel. Pieces are seamed at the sides and shoulders at the end.
- The crotch features a 3-button placket for nappy changes.
- Shoulders fasten with buttons over button loops for easy dressing.
- All edges are bordered in garter stitch to prevent curling — ideal for beginners.

---

## Instructions

### LEG PIECES (make 4 — 2 for front, 2 for back)

With 4 mm needles, CO **20 (22, 24) sts**.

**Row 1 (RS):** *k1, p1; rep from * to end.
**Row 2 (WS):** *p1, k1; rep from * to end.

Rep Rows 1–2 until ribbing measures **3 cm (1¼")**, ending after a WS row.

Change to 5 mm needles.

Work in st st (k on RS, p on WS) for **5 (7, 9) cm**, ending after a WS row.

**Inseam shaping (increases):**
- **Next Row (RS):** kfb, k to last st, kfb. *(2 sts increased)*
- Work 3 rows in st st.
- Rep these 4 rows **once more**.

**Stitch count after shaping: 24 (26, 28) sts.**

Break yarn and place sts on a holder or spare needle.

Make 3 more leg pieces the same.

---

### JOIN LEGS – FRONT PANEL

With 5 mm needles and RS facing, place one leg piece on the needle (with yarn ready to work).

**Joining row (RS):** k across 24 (26, 28) sts of first leg, **CO 13 (15, 17) sts** using backwards-loop method (these form the crotch gusset), then k across 24 (26, 28) sts of second leg piece.

**Stitch count: 61 (67, 73) sts.**

*Math check: 24 + 13 + 24 = 61 ✓ / 26 + 15 + 26 = 67 ✓ / 28 + 17 + 28 = 73 ✓*

**Next Row (WS):** k4, p to last 4 sts, k4. *(Garter border at each side begins.)*

**Next Row (RS):** k all sts.

Continue in st st with a 4-st garter border at each edge:
- RS rows: knit all sts.
- WS rows: k4, p to last 4 sts, k4.

Work until front panel measures **20 (22, 24) cm** from crotch CO, ending after a WS row.

### Armhole shaping (front)

**Next Row (RS):** BO 3 sts, k to end. *(58, 64, 70 sts)*
**Next Row (WS):** BO 3 sts, p to last 4 sts, k4. *(55, 61, 67 sts)*

*Note: the garter border is consumed by the armhole BO; resume plain st st now.*

**Next Row (RS):** ssk, k to last 2 sts, k2tog. *(2 sts dec)*
**Next Row (WS):** purl.

Rep these 2 rows **1 (2, 3) more times.**

**Stitch count: 51 (55, 59) sts.**

*Math check: 55 − 2(2) = 51 ✓ / 61 − 2(3) = 55 ✓ / 67 − 2(4) = 59 ✓*

Continue in st st until armhole measures **8 (9, 10) cm**, ending after a WS row.

### Neck shaping (front)

**Next Row (RS):** k 16 (17, 18), BO centre 19 (21, 23) sts, k to end.

Working on the **left front shoulder (16/17/18 sts)** only:
- **Row 1 (WS):** purl.
- **Row 2 (RS):** k to last 2 sts, k2tog. *(1 st dec)*
- Rep these 2 rows **2 more times. (13, 14, 15 sts rem)**

Work straight in st st until armhole measures **10 (11, 12) cm**.

Work 4 rows in g st (k every row) for the shoulder border.

**Buttonhole row (RS):** k3, yo, k2tog, k to last 5 sts, k2tog, yo, k3.

Knit 2 more rows. BO knitwise.

**Rejoin yarn** to right front shoulder sts at neck edge with RS facing:
- **Row 1 (RS):** ssk, k to end. *(1 st dec)*
- **Row 2 (WS):** purl.
- Rep these 2 rows **2 more times. (13, 14, 15 sts rem)**

Work straight in st st until armhole measures **10 (11, 12) cm**.

Work 4 rows in g st.
**Buttonhole row (RS):** k3, yo, k2tog, k to last 5 sts, k2tog, yo, k3.
Knit 2 more rows. BO knitwise.

---

### BACK PANEL

Work exactly as for Front Panel **up to and including armhole shaping**. (55, 61, 67 sts after BO; 51, 55, 59 sts after decreases.)

Continue in st st until armhole measures **10 (11, 12) cm**, ending after a WS row.

### Back neck and shoulders

**Next Row (RS):** k 13 (14, 15) sts, BO centre 25 (27, 29) sts, k to end.

*Math check: 13 + 25 + 13 = 51 ✓ / 14 + 27 + 14 = 55 ✓ / 15 + 29 + 15 = 59 ✓*

**Right back shoulder (13/14/15 sts):**
- Knit 3 rows in g st. BO knitwise.

**Rejoin yarn to left back shoulder**, RS facing:
- Knit 3 rows in g st. BO knitwise.

---

## Finishing

1. **Weave in all ends** on the WS.
2. **Block** both panels gently to measurements — pin out and spritz with water, allow to dry flat.
3. **Side seams**: With RS together, sew side seams from armhole down to where the crotch CO begins on each side, using mattress stitch or a neat backstitch.
4. **Inseams**: Sew the inside leg seams from the crotch gusset down to the cuff on each leg.
5. **Shoulder closures**:
   - Lay front shoulder garter band overlapping the back shoulder band.
   - Sew 1 button on each back shoulder, positioned to align with the buttonhole on the front shoulder band.
6. **Crotch placket buttons**:
   - Along the cast-on crotch edge of the **back panel**, evenly mark 3 button positions.
   - Sew 3 buttons to the **back** crotch edge.
   - On the **front** crotch edge, the existing gusset CO sts will stretch — alternatively, work small crocheted or sewn button loops aligned with each button. (For a quick finish, snap fasteners may be used in place of buttons.)
7. **Weave in any remaining ends** and give the romper a gentle press.

---

### Tips for Success

- **Take your time on the tension swatch** — even 1 stitch off per 10 cm makes a noticeable difference on baby garments.
- **Use a stretchy bind off** at the shoulders and neck so it slips easily over baby's head.
- **Wash before gifting** with a gentle baby-safe detergent; cotton blends often soften beautifully after the first wash.

Enjoy your handmade romper — perfect for snuggles, naps, and treasured photos! 💛
Disclaimer: This pattern was generated by AI and should be reviewed for accuracy before use. While we strive for quality, AI-generated content may contain errors. Please verify measurements, stitch counts, and instructions before beginning your project. Generated by purlJam.uk
Access your pattern anytime
Bookmark this page to access your pattern anytime