Type
Crochet
Difficulty
intermediate
Category
accessory
AI Thinking Process
Planning
Verification
Pattern
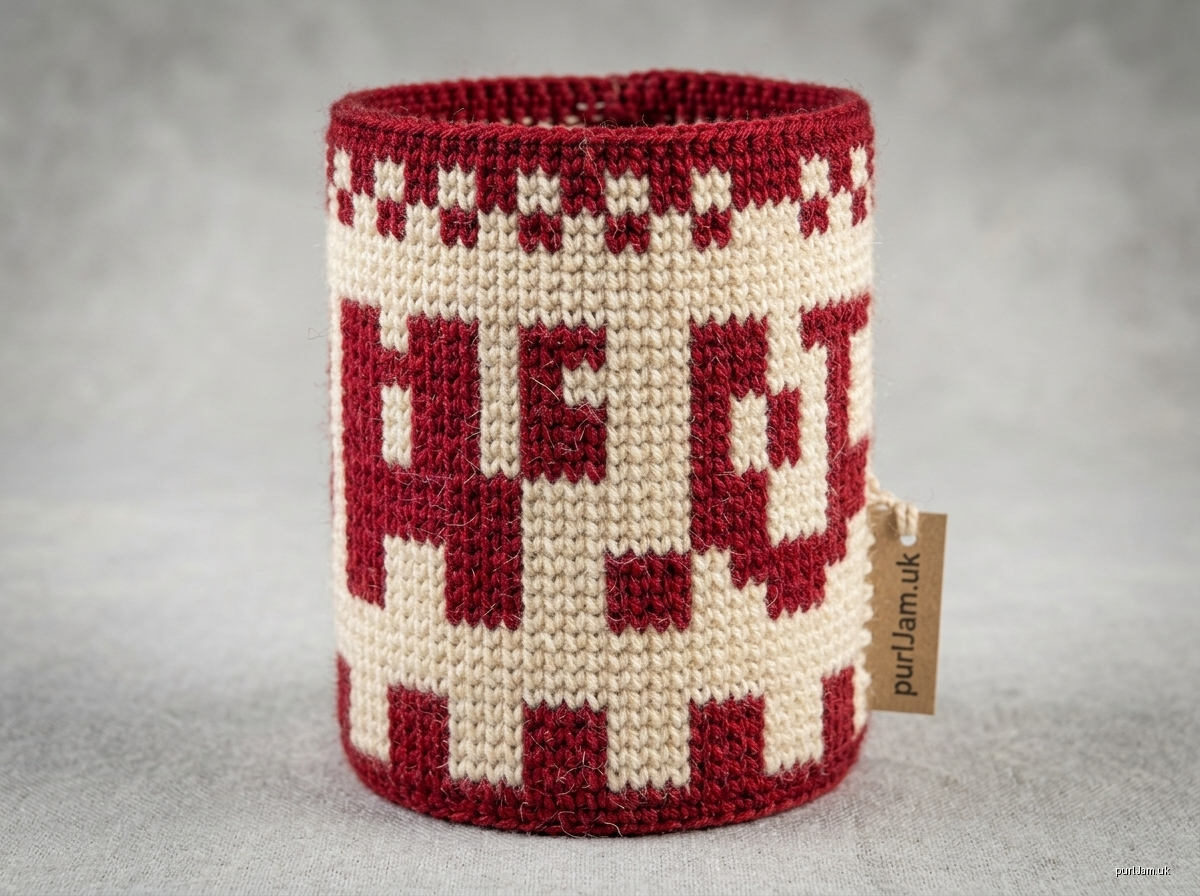
MOTO TANK SLEEVE: Ribbed Oil-Tank Cover with Custom Lettering
Crochet, intermediate. Worsted weight.
(Nota per l'utente: copri-serbatoio elastico a "polsino" con scritta personalizzata, lavorato in tondo senza cuciture.)
Sizes
| Size | Fits tank circumference | Relaxed circumference | Height |
|---|---|---|---|
| S | 11.5–12.5" (29–32 cm) | 10.75" (27 cm) | 4.9" (12.4 cm) |
| M | 13–14" (33–36 cm) | 12.5" (32 cm) | 4.9" (12.4 cm) |
| L | 15–16" (38–41 cm) | 14.25" (36 cm) | 4.9" (12.4 cm) |
Measure around the widest part of your tank and choose the size whose range contains that measurement. The cover is designed to fit with about 10% negative ease, so it stays put by stretching.
In the instructions below, numbers are given as S / M / L.
Materials
- Yarn:
- Worsted weight wool or wool blend, which tolerates heat better than acrylic. Acrylic can soften near hot engine parts.
- MC (main color): 70 / 80 / 95 yd (64 / 73 / 87 m).
- CC (lettering color): 15 / 18 / 20 yd (14 / 16 / 18 m).
- Hook: US G-6 (4 mm).
- Notions: tapestry needle, 1 stitch marker, graph paper and pencil.
Gauge
- 18 sc × 20 rnds = 4" (10 cm) in sc worked in joined rounds.
- 18 dc × 9 rnds = 4" in dc.
Check your gauge before starting. If you have more stitches than this, use a larger hook; if you have fewer, use a smaller hook.
Abbreviations (US)
- ch: chain
- sl st: slip stitch
- sc: single crochet
- dc: double crochet
- fdc: foundation double crochet
- FPdc: front post dc
- BPdc: back post dc
- rnd(s): round(s)
- st(s): stitch(es)
- MC / CC: main color / contrast color
Notes
- The cover is worked bottom-up in joined rounds. The joins sit at the center back, which faces away from view on the bike.
- The ch-2 at the start of the dc and rib rnds does not count as a stitch. The ch-1 at the start of the sc rnds does not count as a stitch.
- Tapestry crochet:
- Carry the unused color along the top of the round and work over it, enclosing it inside each sc.
- Change color in the last yarn-over of the stitch before the color change.
- Keep the carried strand relaxed so the fabric still stretches.
Planning Your Lettering (do this first)
Each letter sits in a grid 5 sts wide × 7 rnds tall (about 1.1" × 1.4"). Leave 1 st of MC between letters, and use 1 blank 5-st cell for a space between words.
Draw your word on graph paper, 7 squares tall. Shade the squares that will be worked in CC; all other squares are MC. Read your drawing bottom row first: rnd 6 below uses your bottom row, and rnd 12 uses your top row. Read each row from right to left, because the rounds are worked counterclockwise with the right side facing.
The text width is (6 × number of characters) − 1.
Maximum characters: S 8, M 9, L 10. Spaces count as characters.
Centering table: this gives the number of MC sts to work at the start of each lettering rnd, before the first letter. After the last letter, work MC to the end of the rnd.
| Characters (n) | Text width | S (48) before | M (56) before | L (64) before |
|---|---|---|---|---|
| 1 | 5 | 21 | 25 | 29 |
| 2 | 11 | 18 | 22 | 26 |
| 3 | 17 | 15 | 19 | 23 |
| 4 | 23 | 12 | 16 | 20 |
| 5 | 29 | 9 | 13 | 17 |
| 6 | 35 | 6 | 10 | 14 |
| 7 | 41 | 3 | 7 | 11 |
| 8 | 47 | 0 | 4 | 8 |
| 9 | 53 | — | 1 | 5 |
| 10 | 59 | — | — | 2 |
Check: before + text width + after = total sts. For example, size M with 5 characters: 13 + 29 + 14 = 56 ✓.
Instructions
Bottom Rib
Rnd 1: With MC, work 48 / 56 / 64 fdc. Join with a sl st to the first fdc, making sure the work is not twisted. Place a marker in the first st. (48 / 56 / 64 sts)
Rnd 2: Ch 2. *FPdc around the next st, BPdc around the next st; repeat from * around. Join with a sl st to the first FPdc.
- 24 / 28 / 32 pairs × 2 = 48 / 56 / 64 ✓
- (48 / 56 / 64 sts)
Rnd 3: Ch 2. *FPdc around the FPdc, BPdc around the BPdc; repeat from * around. Join. (48 / 56 / 64 sts)
Lettering Band
Rnd 4: Ch 1. Sc in each st around. Join with a sl st to the first sc. (48 / 56 / 64 sts)
Rnd 5: Ch 1. Sc in each st around, laying CC along the top of the work and enclosing it from the 1st st. Join. (48 / 56 / 64 sts)
Rnds 6–12 (lettering, 7 rnds): Ch 1. Carrying the unused color throughout, work each rnd as follows:
- Work the number of MC sc given in the centering table for your size and character count.
- Work the letter cells from your graph, 1 sc per square: CC for shaded squares, MC for blank squares. Work 1 MC sc between letters.
- Work MC sc to the end of the rnd.
- Join with a sl st to the first sc.
Each rnd has (48 / 56 / 64 sts). Rnd 6 uses the bottom row of your graph, and rnd 12 uses the top row.
Rnd 13: Ch 1. Sc in each st around in MC, still enclosing CC. Cut CC at the end of this rnd, leaving a 4" tail to tuck inside. Join. (48 / 56 / 64 sts)
Rnd 14: Ch 1. Sc in each st around. Join. (48 / 56 / 64 sts)
Top Rib
Rnd 15: Ch 2. Dc in each st around. Join with a sl st to the first dc. (48 / 56 / 64 sts)
Rnd 16: Ch 2. *FPdc, BPdc; repeat from * around. Join. (48 / 56 / 64 sts)
Rnd 17: Ch 2. *FPdc around the FPdc, BPdc around the BPdc; repeat from * around. Join. (48 / 56 / 64 sts)
Fasten off.
Totals: 17 rnds in all (3 rib + 11 sc + 3 rib), giving a height of about 4.9" (12.4 cm) ✓.
Finishing
- Weave in all ends on the wrong side, along the center-back join line.
- To block, steam lightly with the iron held above the work, not touching it, so the letters lie flat. Do not press the ribs, or they will lose their grip.
- To fit:
- Stretch the cover over the tank with the lettering centered on the side that faces out, and the joins toward the frame or the rear.
- Align the lower rib edge 0.5" (1.3 cm) above the base of the tank.
- Keep the cover clear of the filler cap, the hoses, and the exhaust.
Customizing Height (optional)
For a taller tank, add plain MC sc rnds, keeping (48 / 56 / 64 sts) in every rnd:
- Add the same number before rnd 6 and after rnd 13 to keep the lettering centered vertically.
- Each pair of added rnds (1 before, 1 after) adds 0.4" (1 cm) to the height.
Care
Hand wash cold and dry flat.
Disclaimer: This pattern was generated by AI and should be reviewed for accuracy before use. While we strive for quality, AI-generated content may contain errors. Please verify measurements, stitch counts, charts, and instructions before beginning your project. Generated by purlJam.uk
Love this pattern?
Save this pattern to your free PurlJam libraryAccess your pattern anytime
Bookmark this page to access your pattern anytime