Type
Crochet
Difficulty
advanced
Category
blanket
AI Thinking Process
Planning
Verification
Pattern
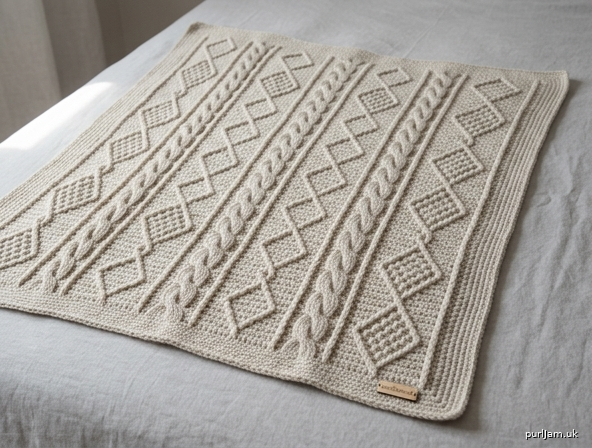
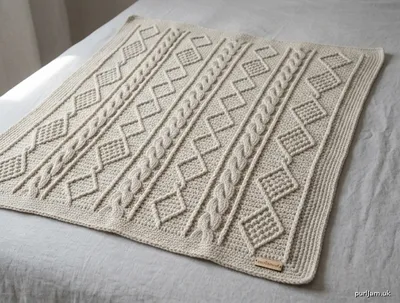
Raised Cable & Triple-Diamond Textured Blanket
Skill Level: Beginner (with post stitches)
Finished Size: 50" wide × 30" long (127 × 76 cm), excluding border
Materials
- Worsted weight yarn (category 4), approx. 950 yd (870 m) / 18 oz (510 g). Sample uses acrylic or wool-blend for clear stitch definition.
- Crochet hook size I/9 (5.5 mm) or size needed to obtain gauge
- Yarn needle
- Stitch markers (optional, to mark repeat edges)
- Scissors
Gauge
14 sts and 10 rows = 4" (10 cm) in pattern stitch after light steam blocking.
Make a 6" × 6" swatch: Ch 26, work Rows 1–12 of pattern, measure central 4". Adjust hook size if needed—post stitches draw in; looser tension is better than tighter.
Abbreviations (US Terms)
- ch – chain
- sc – single crochet
- dc – double crochet
- FPdc – front post double crochet
- BPdc – back post double crochet
- st(s) – stitch(es)
- rep – repeat
- RS – right side
- WS – wrong side
- sk – skip
- yo – yarn over
Special Stitches
- FPdc: Yo, insert hook from front to back to front around post of indicated st, yo and pull up loop, (yo and draw through 2 loops) twice.
- BPdc: Yo, insert hook from back to front to back around post of indicated st, yo and pull up loop, (yo and draw through 2 loops) twice.
- Cable Twist (worked over 2 sts): Sk next st, FPdc around next st, FPdc around skipped st (working in front of previous FPdc).
- Triple Diamond unit (6 sts): FPdc, dc, FPdc, dc, FPdc, dc — diamonds are formed by offsetting these raised posts over successive RS rows.
Notes
- Blanket is worked flat in turned rows.
- Turning ch-2 does not count as a stitch; always work first st into first dc/post.
- Pattern repeat is 12 stitches wide. Vertical lines and cables stay aligned; diamonds shift by 1 st every RS row to create the triple-diamond lattice.
- Keep post stitches relaxed so fabric lies flat.
- Stitch count remains 178 sts every row.
- Inline validation example: (14 reps × 12 sts) + 5 edge each side = 168 + 10 = 178 ✓
Stitch Diagram Legend
- ● = sc (border only)
- ─ = ch
- † = dc
- ╪ = FPdc
- ║ = BPdc (WS rows)
- ✕ = Cable Twist (2 crossed FPdc)
- ◆ = Diamond post (FPdc that forms diamond points)
(Work diagram left-to-right on RS rows, right-to-left on WS rows. One 12-st repeat shown; edge sts omitted.)
RS Row (Cable section + Diamond section):
Edge | ║ ╪ ✕ ╪ ║ | ◆ † ◆ † ◆ † | repeat
WS Row (all posts mirrored):
Edge | ╪ ║ ╪ ║ ╪ | † ║ † ║ † ║ | repeat
Pattern
Foundation
Ch 180.
Row 1 (RS): Dc in 3rd ch from hook and in each ch across. (178 dc)
Row 2 (WS): Ch 2, turn; dc in each st across. (178 dc)
Establish Raised Pattern
Row 3 (RS) – Cable & Vertical Setup: Ch 2, turn;
dc in first 5 sts (right edge),
*FPdc around next st (vertical line),
Cable Twist over next 2 sts,
FPdc around next st (vertical line),
dc in next 2 sts,
FPdc around next st, dc in next st, FPdc around next st, dc in next st, FPdc around next st, dc in next st (triple-diamond start),
dc in next 2 sts;
rep from * 13 more times (14 reps total),
dc in last 5 sts (left edge). (178 sts)
Validation: 5 + (14 × 12) + 5 = 5 + 168 + 5 = 178 ✓
Row 4 (WS): Ch 2, turn;
dc in first 5 sts,
*BPdc around next st, BPdc around next 2 sts, BPdc around next st,
dc in next 2 sts,
BPdc around next st, dc in next st, BPdc around next st, dc in next st, BPdc around next st, dc in next st,
dc in next 2 sts;
rep from * 13 more times,
dc in last 5 sts. (178 sts)
Row 5 (RS) – Diamond Offset 1: Ch 2, turn;
dc in first 5 sts,
*FPdc around next st, Cable Twist over next 2 sts, FPdc around next st,
dc in next 2 sts,
dc in next st, FPdc around next st, dc in next st, FPdc around next st, dc in next st, FPdc around next st (diamonds shift right 1),
dc in next 2 sts;
rep from * 13 more times,
dc in last 5 sts. (178 sts)
Row 6 (WS): Ch 2, turn;
dc in first 5 sts,
*BPdc around next st, BPdc around next 2 sts, BPdc around next st,
dc in next 2 sts,
dc in next st, BPdc around next st, dc in next st, BPdc around next st, dc in next st, BPdc around next st,
dc in next 2 sts;
rep from * 13 more times,
dc in last 5 sts. (178 sts)
Row 7 (RS) – Diamond Offset 2 (completes triple diamond): Ch 2, turn;
dc in first 5 sts,
*FPdc around next st, Cable Twist over next 2 sts, FPdc around next st,
dc in next 2 sts,
FPdc around next st, dc in next st, FPdc around next st, dc in next st, FPdc around next st, dc in next st (diamonds return/align),
dc in next 2 sts;
rep from * 13 more times,
dc in last 5 sts. (178 sts)
Row 8 (WS): Repeat Row 4. (178 sts)
Main Repeat
Repeat Rows 3–8 for pattern.
Each 6-row repeat measures approx. 2.4".
Work until piece measures 29" from foundation edge, ending after a WS row (approximately 12 full 6-row repeats = 72 rows + setup = 76 rows total).
Final stitch count still 178 ✓
Length check: 76 rows ÷ 10 rows per 4" = 30.4" ≈ 30" ✓
Border
Rnd 1: Ch 1, rotate to work down side edge; work 2 sc in each row-end along side (152 sc), 3 sc in corner, sc in each foundation ch across bottom (178 sc), 3 sc in corner, 2 sc in each row-end along other side (152 sc), 3 sc in corner, sc in each st across top (178 sc), 3 sc in last corner; join with sl st to first sc. (670 sc)
Rnd 2: Ch 1, sc in each sc around, working 3 sc in each corner sc; join. Fasten off.
Finishing
- Weave in all ends securely with yarn needle.
- Blocking (essential for raised texture): Steam block—hover iron over fabric or use steam blocker; pin to exact 50" × 30" dimensions without crushing posts. Allow to dry completely. Do not wet-block if using acrylic.
- Optional: Add fringe or tassels to short ends if desired.
Care
Machine wash gentle cold, tumble dry low (acrylic) or hand wash and lay flat (wool blend).
Enjoy your raised cable & triple-diamond blanket! The vertical lines keep the cables crisp while the shifting diamonds add rhythmic texture—perfect for a first post-stitch project.
Disclaimer: This pattern was generated by AI and should be reviewed for accuracy before use. While we strive for quality, AI-generated content may contain errors. Please verify measurements, stitch counts, charts, and instructions before beginning your project. Generated by purlJam.uk
Love this pattern?
Save this pattern to your free PurlJam libraryAccess your pattern anytime
Bookmark this page to access your pattern anytime