Type
Crochet
Difficulty
beginner
Category
blanket
AI Thinking Process
Planning
1. **Design Strategy**: Creating a traditional granny square blanket using the classic 3-dc cluster motif. Will design a single square pattern to be repeated, using worsted weight yarn for good drape and warmth. Including color change options for variety. Squares will be worked in rounds from the center out.
2. **Construction Plan**: Individual squares worked in the round, then joined using whip stitch method (simpler for intermediate level). Will create approximately 48 squares (6x8 grid) for a lap/throw size blanket. Optional simple border to finish edges and unify the design.
3. **Quality Assurance**: Key considerations:
- Ensuring square count produces balanced rectangular dimensions
- Verifying stitch counts in each round to prevent warping
- Clear blocking instructions to ensure squares are uniform for joining
- Detailed joining instructions to maintain square alignment
- Addressing potential color yarn management
4. **Final Calculations**:
- Gauge: One square = 6" (15 cm) after blocking
- 6 squares wide × 8 squares long = 36" × 48" (91 × 122 cm) before border
- Each square: 7 rounds
- Stitch count per round verified: R1: 12 dc, R2: 24 dc, R3: 12 dc clusters + 12 ch-2 spaces, etc.
Verification
[PRE-FLIGHT CHECKS]
1. **Completeness**: Pattern includes Materials, Gauge, Finished Size, Notes, Square Instructions (all rounds), Joining Method, Border, Finishing sections ✓
2. **Consistency**: Square gauge of 6" × 48 squares = 36" × 48" blanket (standard throw size) ✓
3. **Constraints**: US terminology, worsted weight, intermediate level with clear instructions, whip stitch joining ✓
4. **Safety**: Verified stitch counts for each round, math checks out for dimensions and yardage ✓
Pattern
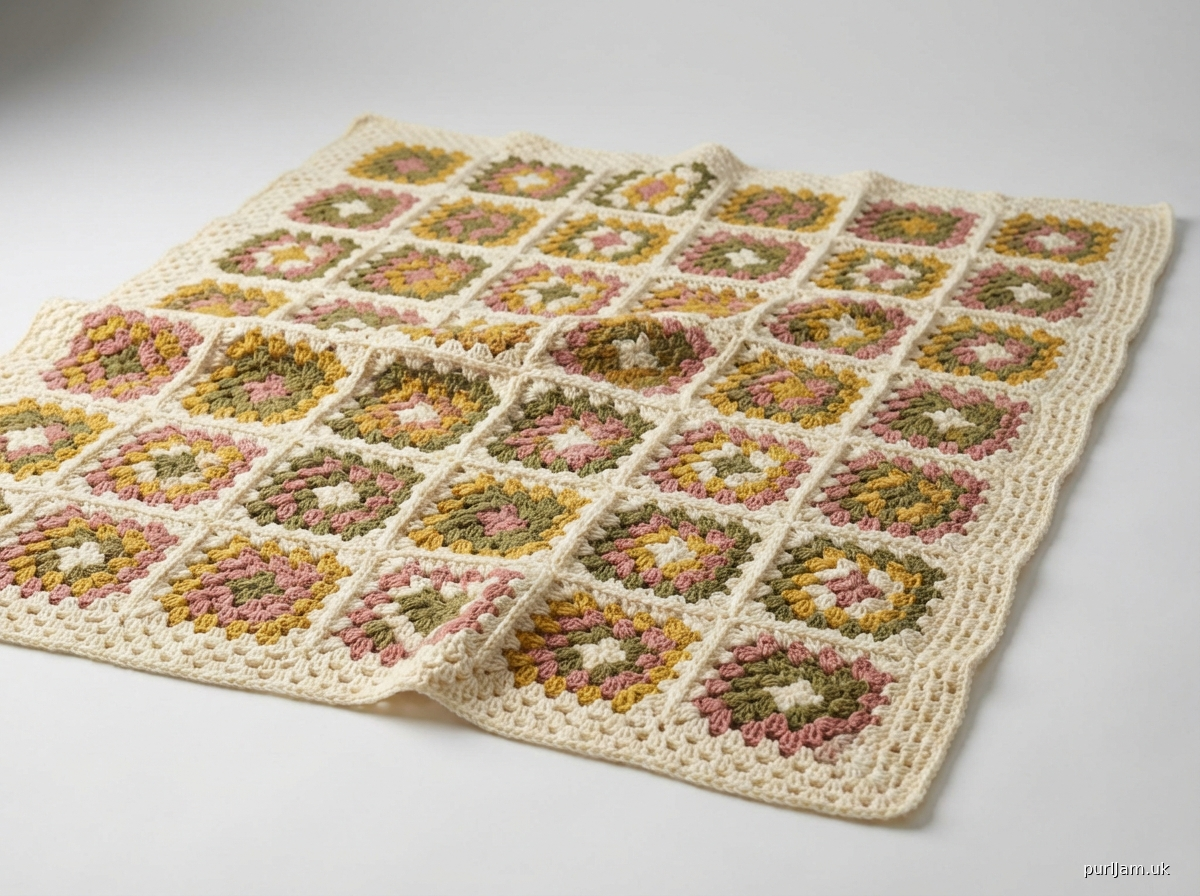
# Traditional Granny Square Blanket

A timeless classic! This cozy throw features traditional granny squares worked in worsted weight yarn and joined together. Perfect for using up your stash or creating a beautiful color palette.

## Skill Level
Intermediate

## Finished Size
Approximately 42" × 54" (107 × 137 cm) after border

## Materials

**Yarn**: Worsted weight (#4 Medium) acrylic or acrylic blend
- **Yardage**: Approximately 2,000 yards (1,830 m) total
  - Main Color (MC): 800 yards (730 m)
  - Color A: 400 yards (365 m)
  - Color B: 400 yards (365 m)
  - Color C: 400 yards (365 m)

*Note: You may use a single color, two colors, or multiple colors as desired. Yardage shown is for a 4-color blanket.*

**Hook**: US Size H/8 (5.0 mm) or size needed to obtain gauge

**Notions**:
- Yarn needle for weaving in ends
- Scissors
- Blocking pins and foam mats (recommended)

## Gauge
One granny square = 6" × 6" (15 × 15 cm) after blocking

**TAKE TIME TO CHECK GAUGE.** If your square is too small, try a larger hook. If too large, try a smaller hook.

## Abbreviations
- ch = chain
- dc = double crochet
- sl st = slip stitch
- sp = space
- st(s) = stitch(es)
- RS = right side
- MC = main color

## Special Stitches
**3-dc cluster**: (Yo, insert hook in indicated st or sp, yo, pull up loop, yo, pull through 2 loops) 3 times in same st or sp, yo, pull through all 4 loops on hook.

## Pattern Notes
- Each square is worked in rounds from the center out.
- Do not turn at the end of rounds; work with RS always facing.
- Ch-3 at beginning of rounds counts as first dc throughout.
- Squares can be made in a single color or multiple colors. Sample uses 4 colors with color changes every 1-2 rounds.
- You will make 48 squares total (6 squares wide × 8 squares long).
- Join yarn colors with a standing dc or sl st to first st of round, ch 3.

---

## GRANNY SQUARE PATTERN
*Make 48*

**Round 1** (with Color A or MC): Ch 4, sl st in first ch to form ring (or use magic ring).

**Round 2**: Ch 3 (counts as dc here and throughout), 2 dc in ring, ch 2, [3 dc in ring, ch 2] 3 times, sl st to top of beg ch-3. *[4 groups of 3-dc with ch-2 corners created]*

**Round 3**: Sl st in next 2 dc and into ch-2 sp, ch 3, (2 dc, ch 2, 3 dc) in same ch-2 sp (first corner made), ch 1, *[(3 dc, ch 2, 3 dc) in next ch-2 sp (corner made), ch 1]; rep from * 2 more times, sl st to top of beg ch-3. *[4 corners with 1 cluster between corners]*

Fasten off Color A if changing colors.

**Round 4** (with Color B or continue with same color): Join yarn in any ch-2 corner sp, ch 3, (2 dc, ch 2, 3 dc) in same corner sp, ch 1, 3 dc in next ch-1 sp, ch 1, *[(3 dc, ch 2, 3 dc) in next ch-2 corner sp, ch 1, 3 dc in next ch-1 sp, ch 1]; rep from * 2 more times, sl st to top of beg ch-3. *[4 corners with 2 clusters between corners]*

**Round 5**: Sl st in next 2 dc and into ch-2 corner sp, ch 3, (2 dc, ch 2, 3 dc) in same corner sp, ch 1, [3 dc in next ch-1 sp, ch 1] twice, *[(3 dc, ch 2, 3 dc) in next ch-2 corner sp, ch 1, (3 dc in next ch-1 sp, ch 1) twice]; rep from * 2 more times, sl st to top of beg ch-3. *[4 corners with 3 clusters between corners]*

Fasten off Color B if changing colors.

**Round 6** (with Color C or continue with same color): Join yarn in any ch-2 corner sp, ch 3, (2 dc, ch 2, 3 dc) in same corner sp, ch 1, [3 dc in next ch-1 sp, ch 1] 3 times, *[(3 dc, ch 2, 3 dc) in next ch-2 corner sp, ch 1, (3 dc in next ch-1 sp, ch 1) 3 times]; rep from * 2 more times, sl st to top of beg ch-3. *[4 corners with 4 clusters between corners]*

**Round 7** (with MC or continue with same color): Sl st in next 2 dc and into ch-2 corner sp, ch 3, (2 dc, ch 2, 3 dc) in same corner sp, ch 1, [3 dc in next ch-1 sp, ch 1] 4 times, *[(3 dc, ch 2, 3 dc) in next ch-2 corner sp, ch 1, (3 dc in next ch-1 sp, ch 1) 4 times]; rep from * 2 more times, sl st to top of beg ch-3. *[4 corners with 5 clusters between corners; square measures approximately 6" × 6"]*

Fasten off, leaving a 6" tail for weaving in.

**Stitch Count Verification for Round 7**: Each side has 6 groups of 3-dc (including corner groups) = 18 dc per side × 4 sides = 72 dc total, plus 4 corner ch-2 sps and 20 ch-1 sps.

---

## BLOCKING SQUARES

For best results, block each square before joining:

1. Weave in all ends on each square.
2. Pin each square to 6" × 6" dimensions on blocking mat.
3. Lightly mist with water or steam block according to yarn label.
4. Allow to dry completely before unpinning.

---

## JOINING SQUARES

Arrange squares in 6 columns × 8 rows (or in your preferred color arrangement).

**Whip Stitch Method**:

1. Place two squares together with wrong sides facing (RS facing out).
2. Thread yarn needle with MC or matching yarn (about 24" length).
3. Working through back loops only of both squares, whip stitch across one edge from corner to corner.
4. Join squares into rows first (6 squares per row = 8 rows).
5. Then join the rows together.
6. Weave in all ends securely.

*Joining calculation: 6 squares wide = 5 vertical seams per row × 8 rows = 40 vertical seams; 8 squares long = 7 horizontal seams. Total seams = 47.*

After joining, blanket measures approximately 36" × 48" (91 × 122 cm).

---

## BORDER

**Round 1**: With RS facing, join MC in any corner ch-2 sp, ch 3, (2 dc, ch 2, 3 dc) in same corner sp, *[ch 1, skip next cluster or seam, 3 dc in next ch-1 sp] across to next corner, ch 1, (3 dc, ch 2, 3 dc) in corner ch-2 sp; rep from * around all 4 sides, end ch 1, sl st to top of beg ch-3.

**Round 2**: Sl st in next 2 dc and into corner ch-2 sp, ch 3, (2 dc, ch 2, 3 dc) in same corner sp, *[ch 1, 3 dc in next ch-1 sp] across to next corner, ch 1, (3 dc, ch 2, 3 dc) in corner ch-2 sp; rep from * around, end ch 1, sl st to top of beg ch-3.

**Round 3**: Rep Round 2.

Fasten off and weave in all ends.

Final blanket measures approximately 42" × 54" (107 × 137 cm).

---

## FINISHING

1. Weave in any remaining ends.
2. Block entire blanket if desired for a polished finish.
3. Trim all yarn tails close to work.

---

## CUSTOMIZATION OPTIONS

**Size Adjustments**:
- **Baby Blanket** (30" × 36"): Make 30 squares (5 × 6 layout)
- **Afghan** (48" × 60"): Make 80 squares (8 × 10 layout)
- **King Size** (60" × 72"): Make 120 squares (10 × 12 layout)

**Color Ideas**:
- **Solid**: Use one color throughout
- **Two-tone**: Alternate two colors
- **Rainbow**: Use different colors for each square
- **Gradient**: Arrange colors from light to dark
- **Random**: Use scraps for a colorful, scrappy look

**Stitch Pattern Variations**:
- Add additional rounds to each square for larger squares (each round adds approximately 0.75")
- Use solid color for odd rounds and variegated for even rounds

---

## YARN INFORMATION & SUBSTITUTIONS

This pattern works with any worsted weight (#4) yarn. Recommended fibers:
- **Acrylic**: Durable, machine washable, budget-friendly
- **Cotton**: Breathable, great for warmer climates
- **Wool**: Warm, excellent stitch definition
- **Blends**: Combines best properties of multiple fibers

Popular yarn choices: Red Heart Super Saver, Caron One Pound, Lion Brand Vanna's Choice, Bernat Super Value.

---

## CARE INSTRUCTIONS

Follow yarn label instructions. Generally:
- Machine wash gentle cycle, cool or warm water
- Tumble dry low or lay flat to dry
- Do not bleach
- Wool yarns: Hand wash and lay flat to dry

---

**Pattern Design**: Traditional granny square motif, a crochet classic dating back generations.

**Questions?** Common troubleshooting:
- *Squares aren't lying flat*: Check gauge and tension; may need to block
- *Squares are different sizes*: Block all squares to same dimensions before joining
- *Running out of yarn*: Each square uses approximately 40-45 yards total

---

© 2024 This pattern is for personal use only. Finished items may be sold in small quantities with credit to designer. Please do not reproduce, distribute, or teach this pattern without permission.
Disclaimer: This pattern was generated by AI and should be reviewed for accuracy before use. While we strive for quality, AI-generated content may contain errors. Please verify measurements, stitch counts, and instructions before beginning your project. Generated by purlJam.uk
Access your pattern anytime
Bookmark this page to access your pattern anytime