Type
Crochet
Difficulty
intermediate
Category
basket
AI Thinking Process
Planning
Verification
Pattern
Rounded Daisy Storage Basket
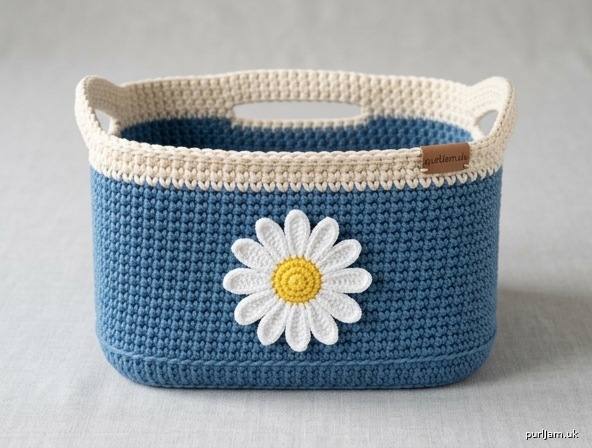
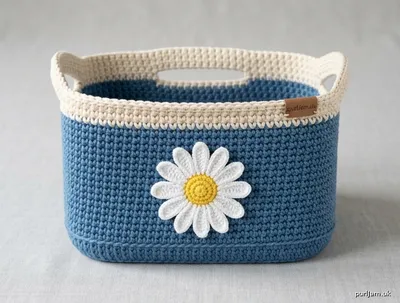
A sturdy rectangular storage basket with rounded corners, worked in single crochet from the bottom up. The body is blue, the top border and handles are cream, and a white daisy with a yellow center is sewn to the front.
Difficulty: Easy / Beginner
Finished measurements: Approximately 10½" long × 5½" wide × 5" tall (26.5 × 14 × 12.5 cm), not including handles. Handle opening is about 2¾" (7 cm) wide with a 1¼" (3 cm) drop. Measurements are after light blocking; cotton relaxes slightly with use.
Materials
Yarn: Worsted weight (category 4) 100% cotton. Cotton is required for a basket that holds its shape. Do not substitute soft acrylic.
Suggested yarns: Lily Sugar’n Cream, WeCrochet Dishie, or Lion Brand 24/7 Cotton.
| Color | Role | Amount |
|---|---|---|
| MC Blue | Body | 190 yd / 174 m (about 2 balls of Sugar’n Cream, or 1 skein of Dishie/24/7 Cotton) |
| CCA Cream | Border and handles | 55 yd / 50 m (1 ball; leftovers are enough if you already have cream) |
| CCB White | Daisy petals | 20 yd / 18 m |
| CCC Yellow | Daisy center | 10 yd / 9 m |
Hook: US H-8 / 5.0 mm (or size needed to match gauge). This is 1 size smaller than many worsted labels — the tighter fabric is what makes the basket rigid.
Notions:
- 4 stitch markers
- Yarn needle
- Scissors
- Optional: fabric stiffener spray
- Optional: ¼" (6 mm) cotton clothesline or piping cord to crochet over for extra rigidity
Gauge
14 sc and 15 rnds = 4" (10 cm) in single crochet, worked tightly.
Work a 5" (12.5 cm) swatch, measure the inner 4" (10 cm). If you have fewer than 14 sc in 4" (10 cm), go down a hook size. A loose gauge makes a floppy basket.
Abbreviations (US)
- BLO — back loop only
- ch — chain
- CCA — contrast color A (cream)
- CCB — contrast color B (white)
- CCC — contrast color C (yellow)
- dc — double crochet
- hdc — half double crochet
- inc — increase (2 sc in the same stitch)
- MC — main color (blue)
- MR — magic ring
- rep — repeat
- rnd(s) — round(s)
- sc — single crochet
- sk — skip
- sl st — slip stitch
- st(s) — stitch(es)
Pattern Notes
- US crochet terms throughout.
- The base and blue walls are worked in a continuous spiral. Do not join or turn. Place a marker in the first stitch of every round and move it up as you go.
- The cream border is worked in joined rounds so the handles sit evenly.
- The oval stays flat because you increase exactly 6 times per base round — 3 increases at each short curved end. The two long sides are worked even (no increases) after Round 1.
- After Round 1, place a marker at each end of both 18-st long sides (4 markers). Slide them up every round. These markers are how you find the handle positions later.
- Work tightly. If the fabric looks holey, drop to US G-6 / 4.0 mm.
- Count stitches at the end of every base round before moving on.
Basket
Base (MC Blue)
Worked in a spiral. The foundation chain is the long axis of the oval.
Foundation: With MC, ch 21.
Rnd 1: 2 sc in 2nd ch from hook, sc in next 18 ch, 3 sc in last ch; rotate to work along the opposite side of the foundation chain, sc in next 18 ch, 1 sc in the same ch as the beginning 2-sc. (42 sc) Place a marker in the first st. The two curved ends have 3 sc each; each long side has 18 sc.
Place 4 additional markers at the first and last stitch of each 18-st long side.
Rnd 2: Inc in next 3 sts, sc 18, inc in next 3 sts, sc 18. (6 increases → 42 + 6 = 48 sc ✓)
Rnd 3: (Sc 1, inc) 3 times, sc 18, (sc 1, inc) 3 times, sc 18. (48 + 6 = 54 sc ✓)
Rnd 4: (Sc 2, inc) 3 times, sc 18, (sc 2, inc) 3 times, sc 18. (54 + 6 = 60 sc ✓)
Rnd 5: (Sc 3, inc) 3 times, sc 18, (sc 3, inc) 3 times, sc 18. (60 + 6 = 66 sc ✓)
Rnd 6: (Sc 4, inc) 3 times, sc 18, (sc 4, inc) 3 times, sc 18. (66 + 6 = 72 sc ✓)
Rnd 7: (Sc 5, inc) 3 times, sc 18, (sc 5, inc) 3 times, sc 18. (72 + 6 = 78 sc ✓)
Rnd 8: (Sc 6, inc) 3 times, sc 18, (sc 6, inc) 3 times, sc 18. (78 + 6 = 84 sc ✓)
Rnd 9: (Sc 7, inc) 3 times, sc 18, (sc 7, inc) 3 times, sc 18. (84 + 6 = 90 sc ✓)
Rnd 10: (Sc 8, inc) 3 times, sc 18, (sc 8, inc) 3 times, sc 18. (90 + 6 = 96 sc ✓)
Base should measure about 10½" × 5½" (26.5 × 14 cm) and lie flat. If it cups, your increases are too few or your tension is tighter than gauge; if it ruffles, you added extra stitches. Do not begin the walls until the base is flat.
Base-to-sides transition (MC Blue)
This round makes the 90-degree fold between floor and walls. Do not skip it.
Rnd 11: Sc BLO in each st around. (96 sc)
Resume working through both loops from Round 12 onward.
Sides (MC Blue)
Work even. No increases, no decreases. Count 96 sc every round.
Rnds 12–25: Sc in each st around. (96 sc each rnd; 14 even rounds ✓)
Walls will stand about 3¾" (9.5 cm) above the BLO fold. Fasten off MC at the end of Rnd 25, leaving a 6" (15 cm) tail.
Cream border and handles (CCA Cream)
Join CCA with a sl st in the first st of either long side (an 18-st increase-free section). From here, work joined rounds: ch 1 at the start of each round (does not count as a st), sl st to the first sc to join.
Rnd 26: Ch 1, sc in each st around, join. (96 sc)
Rnd 27 (handle round): Ch 1. On the first long side: sc in next 4 sts, ch 10, sk 10 sts, sc in next 4 sts. Sc in next 30 sts (first curved end). On the second long side: sc in next 4 sts, ch 10, sk 10 sts, sc in next 4 sts. Sc in remaining 30 sts (second curved end). Join. (76 sc + two ch-10 spaces; 4 + 10 skipped + 4 = 18 per long side ✓)
The two handles sit on the long ends of the oval, each centered with 4 sc on either side.
Rnd 28: Ch 1, sc in next 4 sts, 10 sc in ch-10 space, sc in next 4 sts, sc in next 30 sts, sc in next 4 sts, 10 sc in ch-10 space, sc in next 4 sts, sc in remaining 30 sts, join. (4 + 10 + 4 + 30 + 4 + 10 + 4 + 30 = 96 sc ✓)
Pull the handle chains so they sit as even arches before working into them.
Rnd 29: Ch 1, sc in each st around, join. (96 sc)
This extra round reinforces the handle joins.
Rnd 30 (optional polished edge): Ch 1, reverse sc (crab stitch) in each st around, join. Reverse sc is worked left to right: insert hook in the next st to the right, yo, pull up a loop, yo, pull through both loops. Skip this round if you prefer a simple sc rim.
Fasten off CCA.
Daisy Appliqué
Worked in joined rounds. Same hook. If you cannot make a magic ring, ch 2 and work Rnd 1 into the 2nd ch from the hook.
Center (CCC Yellow)
Rnd 1: MR, 8 sc in ring, join. (8 sc)
Rnd 2: Ch 1, 2 sc in each st around, join. (16 sc)
Fasten off yellow, leaving a 12" (30 cm) tail for sewing the center down later if you like extra security.
Petals (CCB White)
Join white with a sl st in any st of Rnd 2.
Petals: *Ch 8, sl st in 2nd ch from hook, sc in next ch, hdc in next ch, dc in next 2 ch, hdc in next ch, sc in last ch, sk next st of the yellow center, sl st in next st of the yellow center; rep from * 7 more times. (8 petals; each petal uses 2 center sts → 8 × 2 = 16 ✓)
Fasten off white, leaving an 18" (45 cm) tail for sewing.
Gently tug each petal so they lie flat and radiate evenly. Finished daisy is about 3–3½" (7.5–9 cm) across.
Finishing
- Weave in all basket ends on the wrong side (inside). Weave the cream join down into the wall, not along the top edge.
- Pin the daisy to the center of one long side, about ¾" (2 cm) above the BLO fold so it sits in the middle of the blue wall, midway between the two handles. The flower should not overlap the cream border.
- With the white tail, sew around the yellow center with small whip stitches, catching the back of the petal bases. Then tack the tip of every other petal with 1–2 tiny stitches so the daisy stays flat in use. If you saved a yellow tail, take a few stitches through the center for extra hold. Weave in remaining flower ends inside the basket.
- Reinforce each handle corner (where the ch-10 meets the wall) with 3–4 extra whip stitches in cream on the inside, if the joins feel stretchy.
Blocking and shaping
- Dampen the basket (spray bottle or a quick rinse). Do not soak the daisy if you used a colored cotton that might bleed; you can block the basket first and sew the daisy on after it dries, if preferred.
- Shape the base into a rounded rectangle on a flat towel. Push the BLO round out so the walls stand straight.
- Set a heavy book (protected with a plastic bag) on the inside of the base only and let dry fully. This sets a flat floor.
- Optional: when dry, spray the inside with fabric stiffener, shape again, and dry upright. Do not soak the daisy in stiffener or the petals may go crunchy and off-color.
- Optional extra rigidity: on a future basket, work every side round over ¼" (6 mm) clothesline, keeping the cord snug inside the stitches.
The empty basket should stand on its own. Fill it with yarn, mail, or bathroom extras — the cotton will soften slightly and then hold the shape of use.
Disclaimer: This pattern was generated by AI and should be reviewed for accuracy before use. While we strive for quality, AI-generated content may contain errors. Please verify measurements, stitch counts, charts, and instructions before beginning your project. Generated by purlJam.uk
Love this pattern?
Save this pattern to your free PurlJam libraryAccess your pattern anytime
Bookmark this page to access your pattern anytime