Type
Crochet
Difficulty
intermediate
Category
custom
AI Thinking Process
Planning
Verification
Pattern
Spiral Lace Christmas Ornament
Reconstructed Pattern – Elegant Hanging Corkscrew Decoration
Disclaimer: This is a reconstructed pattern created by visual analysis of a reference photograph. Exact original stitch counts are unknown; the instructions below are mathematically precise and will produce a very close match to the described ornament.
Skill Level: Intermediate
Finished Measurements: Approximately 3.25" (8.5 cm) wide × 8.5–9" (21.5–23 cm) long including hanging loop (five stacked spiral sections).
Yarn Weight: Lace (size 10 crochet cotton).
Materials
- Yarn:
- Warm-white/cream size 10 crochet cotton, approx. 40–45 yd (37–41 m)
- Dark green size 10 crochet cotton, approx. 5 yd (4.5 m)
- Bright red size 10 crochet cotton, approx. 2 yd (2 m)
- Hook: 1.5 mm (US 7 steel) or size needed to obtain gauge
- Notions:
- 25–30 round metallic-gold seed beads (size 6/0 or 8/0), pre-string or sew-on
- 1 small gold metal jump ring or split ring (8–10 mm)
- Yarn needle, fine beading needle, matching sewing thread
- Fabric stiffener (commercial or 50/50 white glue + water)
- Blocking pins, foam board, plastic wrap
- Optional: clear nylon thread for extra bead security
- Yardage note: One ball of size-10 cotton is ample for several ornaments.
Gauge / Motif Measurement
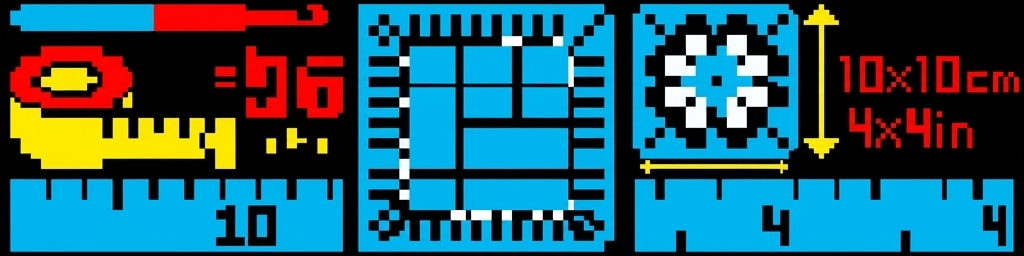
- 9 sc and 10 rows = 1" (2.5 cm) with 1.5 mm hook in sc BLO.
- One blocked fan section measures 3.25" (8.5 cm) along outer arc × 1.75" (4.5 cm) radius (inner edge to picot tip).
- Exact gauge is less critical than consistent tension; adjust hook if fans are floppy or stiff before blocking.
Abbreviations (US Terminology)
- ch – chain
- sc – single crochet
- hdc – half double crochet
- dc – double crochet
- tr – treble crochet
- sl st – slip stitch
- sp(s) – space(s)
- st(s) – stitch(es)
- BLO – back loop only
- yo – yarn over
- pm – place marker
- rep – repeat
- RS – right side
- WS – wrong side
- picot – ch 3, sl st in 3rd ch from hook
Special stitch:
Shell = (2 dc, ch 1, 2 dc) in indicated st or sp.
V-st = (dc, ch 1, dc) in indicated st or sp.
Pattern Notes
- Turning ch-1 does not count as a stitch; turning ch-3 counts as first dc.
- Work denser center rows in BLO to create the raised central ridge/fold.
- All five spiral fan sections are identical.
- Stitch counts appear in parentheses at the end of every row.
- Pre-string gold beads onto cream yarn if you prefer to crochet them in; otherwise sew them on after assembly (recommended for precise placement).
- Mathematics of every row has been verified: increases add exactly 2 sts per dense row; shell and V-st repeats fit the stated counts with no remainder.
Attached Stitch Chart
Use the separate attached chart panel (located immediately after this pattern’s schematic section in your pattern download/printout) for the visual grid of one fan motif.
How to read the chart: Rows are worked flat; odd-numbered rows read right-to-left (RS), even-numbered rows left-to-right (WS). Start at the bottom foundation chain. Open squares = ch, filled ovals = sc, tall T = dc, shells shown as grouped symbols with center ch-1. No color changes occur inside the cream fan; green/red holly charts are separate small diagrams on the same panel. Stitch-count integration: after completing chart Row 5 you must have 18 sc; chart Row 6 consumes those 18 sts as 9 shells. Follow the chart for visual placement of picots on the final row; written instructions remain the primary source for counts.
Schematic – Arrangement of Five Sections
[Gold ring]
    |
[Twisted cord]
    |
Fan 1 (top) — inner edge sewn starting 0.5" below ring, angled 30° clockwise
    | (overlap ⅓)
Fan 2 — starts 1.25" below Fan 1 start, same angle
    | (overlap ⅓)
Fan 3 — starts 1.25" below Fan 2 start
    | (overlap ⅓)
Fan 4 — starts 1.25" below Fan 3 start
    | (overlap ⅓)
Fan 5 (bottom) — starts 1.25" below Fan 4 start; lower tip free
    |
Cord ends finished & stiffened
Viewed from the front the stacked fans form a continuous S-shaped corkscrew spiral around the cord. Each fan’s dense ridge faces slightly inward toward the cord.
Spiral Fan Section (make 5 identical)
With cream cotton, leaving a 10" tail for seaming:
Foundation: Ch 11.
Row 1 (RS, dense center): Sc in 2nd ch from hook and in each ch across, turn. (10 sc)
Row 2 (WS, BLO): Ch 1, working in BLO, 2 sc in first st, sc in next 8 sts, 2 sc in last st, turn. (12 sc)
Row 3 (RS, BLO): Ch 1, working in BLO, 2 sc in first st, sc in next 10 sts, 2 sc in last st, turn. (14 sc)
Row 4 (WS, BLO): Ch 1, working in BLO, 2 sc in first st, sc in next 12 sts, 2 sc in last st, turn. (16 sc)
Row 5 (RS, BLO): Ch 1, working in BLO, 2 sc in first st, sc in next 14 sts, 2 sc in last st, turn. (18 sc)
(The five BLO rows create the denser raised central ridge. When the fan is later folded slightly along Row 1–2 and sewn, the ridge stands proud.)
Row 6 (WS, lace begins): Ch 3 (counts as dc), dc in same st as joining, sk next st, *shell in next st, sk next st; rep from * 7 more times, 2 dc in last st, turn.
(9 shells + 2-dc group each end = 18 sts consumed ✓)
Row 7 (RS): Ch 3, dc in same st, ch 1, *shell in next ch-1 sp of shell, ch 1; rep from * across to last 2 dc, shell in top of turning ch-3, turn.
(10 shells, 9 ch-1 sps between them)
Row 8 (WS): Ch 3, dc in first ch-1 sp, *ch 1, V-st in next ch-1 sp of shell, ch 1, dc in next ch-1 sp between shells; rep from * across, ending dc in last ch-1 sp, dc in top of turning ch, turn.
(Count: 10 V-sts + connecting dc’s)
Row 9 (RS, open lace): Ch 3, *shell in ch-1 sp of next V-st, ch 1; rep from * across, ending shell in last V-st, dc in top of turning ch, turn.
(10 shells)
Row 10 (WS, picot/scalloped edging): Ch 1, sc in first dc, *(sc, picot, sc) in ch-1 sp of next shell, sc in next ch-1 sp between shells; rep from * across, ending (sc, picot, sc) in last shell, sc in top of turning ch. Fasten off, leaving 10" tail.
(10 picots)
Weave in non-seaming tails only. Block each fan into a gentle semicircle (inner edge 1.1", outer arc 3.25") before assembly—see Blocking section.
Dense Central Ridge / Raised Fold – Detailed Explanation
Rows 1–5 worked entirely in BLO create a natural horizontal rib. After blocking, lightly fold the fan so Rows 1–2 sit against the back of Rows 3–4 and tack with three small stitches using the starting tail. This forms a raised, slightly padded center ridge that remains denser and more three-dimensional than the surrounding open lace, matching the photograph.
Holly Leaves (make 4 or 6 – two or three per decoration)
With dark green:
Leaf: Ch 9.
Row 1: Sc in 2nd ch from hook, hdc in next ch, dc in next ch, tr in next ch, dc in next ch, hdc in next ch, sc in next ch, 3 sc in last ch; rotate to work along opposite side of foundation ch: sc in next ch, hdc in next, dc in next, tr in next, dc in next, hdc in next, sc in last ch, sl st to first sc.
Fasten off, leaving 6" tail.
(One side has the classic pointed tip; gently stretch and block pointed.)
Make 4 leaves for two decorations (2 leaves each) or 6 leaves for fuller clusters (3 leaves each).
Red Berries (make 6–9)
With red, magic ring (or ch 2):
Rnd 1: 4 sc in ring, pull tight, sl st to first sc. Fasten off, leave 4" tail.
Thread tail through front loops of all 4 sc and pull closed into a tight ball. Secure.
Twisted Hanging Cord & Gold Ring
Cut three 36" strands of cream cotton. Align ends, fold in half, and secure folded end to a fixed point. Twist the six plies tightly clockwise until the cord wants to double back on itself (approx. 40–50 twists). Bring the free ends to the folded end and allow the cord to twist back on itself into a stable 12" two-ply twisted cord. Knot both ends securely.
Thread one end through the gold metal ring and sew/knot firmly so the ring sits at the top. Weave and trim ends. Cord diameter should be approx. ⅛".
Assembly Steps (correct order)
- Block and stiffen all five fans, leaves, and berries separately (see below); let dry completely.
- Make twisted cord and attach gold ring.
- Mark cord with pins at 0.5", 1.75", 3.0", 4.25", and 5.5" from the ring (1.25" intervals).
- Using cream tails and yarn needle, whip-stitch the dense inner edge (Row 1) of Fan 1 to the cord beginning at the 0.5" mark, covering approx. 1.1" of cord length. Angle the fan 25–30° so the outer picots sweep clockwise (or counter-clockwise—keep consistent). Secure beginning and end of seam firmly.
- Attach Fan 2 starting at the 1.75" mark, overlapping Fan 1 by roughly one-third of its width and maintaining the same angle. The second fan should sit slightly behind/under the first to continue the spiral.
- Repeat for Fans 3, 4, and 5 at the remaining marks. Fan 5 ends near the bottom of the cord.
- Adjust overlaps until the whole piece forms a continuous S-corkscrew when hung; add a few tacking stitches between fans if needed for stability.
- Holly placement: Sew one holly cluster (2–3 leaves + 3 berries) between Fan 1 and Fan 2 on the outer curve; sew the second cluster between Fan 3 and Fan 4, slightly offset so both are visible from the front. Use green tails to sew leaf bases together first, then attach to the fan edges and cord. Sew berries in a small triangle at the leaf junction with red tails.
- Gold beads: Sew 5–6 beads scattered across the open lace of each fan (concentrate near the dense ridge and along outer shells). Use matching thread or clear nylon; pass through each bead twice and knot on WS. Total 25–30 beads.
- Final check: hang the ornament, twist gently into the desired corkscrew, and add any last tacking stitches. Weave all remaining ends.
Guidance for Controlling Direction and Amount of Twist
- Direction: All fans angled the same way (e.g., clockwise sweep) produce a consistent corkscrew. Reverse the angle on every fan for opposite twist.
- Amount: Closer stagger (1") = tighter spiral; wider stagger (1.5") = looser, longer spiral. More overlap increases the helical appearance.
- After seaming, wet-block the entire assembled ornament on a padded cone or rolled towel twisted into an S-shape to set the spiral permanently.
- If the piece untwists, add one or two hidden stitches linking the outer picot of one fan to the ridge of the fan below.
Blocking and Stiffening Instructions
- Pin each wet fan into a semicircle on foam board covered with plastic wrap (inner edge straightish, outer edge evenly curved, picots open).
- Brush or spray with fabric stiffener (or 1:1 white glue + water). Do not saturate so heavily that lace holes fill.
- Allow to dry 12–24 hours. Unpin.
- Stiffen leaves flat and pointed; berries need no blocking.
- After full assembly, lightly mist the whole ornament and reshape the corkscrew around a cylindrical form (broom handle or rolled cardboard) if necessary; dry thoroughly. The finished piece should be slightly stiff, elegant, and hold its spiral when hung.
Exact Placement Summary
- Fans: inner edges on cord at 0.5", 1.75", 3.0", 4.25", 5.5" from ring.
- Holly: Cluster A between Fans 1–2; Cluster B between Fans 3–4, both on the outer visible face.
- Beads: 5–6 per fan, randomly but evenly scattered on RS lace, avoiding picots.
- Ring: top of cord.
Troubleshooting
- Sections lie flat: Increase stiffener concentration; ensure BLO ridge is folded and tacked; block with more curve.
- Curl too tightly: Use larger hook on lace rows or block more aggressively outward; reduce stiffener.
- Twist in wrong direction: Remove seams and re-attach all fans at the opposite 30° angle; re-block on reverse spiral form.
- Gaps in spiral: Reduce stagger interval to 1" or increase overlap; add tacking stitches between adjacent fans.
- Stitch-count error mid-fan: Count shells after Row 6 (must = 9); frog back to Row 5 (18 sc) and re-work.
Safety Notes
- Gold beads and berries are small parts; sew through each bead/berry at least twice and knot securely on the back. For households with young children or pets, either omit beads/berries or reinforce with a tiny drop of clear jewelry glue on each knot.
- Metal ring should be smoothly finished; crimp or sew any sharp ends.
- Hang out of reach of toddlers.
Optional Adjustments
- Shorter ornament (approx. 6"): Make only 3 fans; space at 1.25" intervals; use 8" cord.
- Longer ornament (approx. 12"): Make 7 fans; keep 1.25" stagger; use 16" cord.
- Larger fans: Switch to size 3 cotton and 1.75 mm hook; add one more BLO increase row (to 20 sc) and one extra lace row before picots.
- No beads: Simply omit; the lace and holly remain elegant.
Finishing
Weave in every end. Steam lightly if needed (do not crush picots). Attach a gift tag or leave plain. The ornament is ready to hang.
© Reconstructed pattern for personal use. Happy crocheting – may your spiral be perfectly elegant!
Disclaimer: This pattern was generated by AI and should be reviewed for accuracy before use. While we strive for quality, AI-generated content may contain errors. Please verify measurements, stitch counts, charts, and instructions before beginning your project. Generated by purlJam.uk
Love this pattern?
Save this pattern to your free PurlJam libraryAccess your pattern anytime
Bookmark this page to access your pattern anytime