Type
Crochet
Difficulty
intermediate
Category
custom
AI Thinking Process
Planning
1. **Design Strategy**: A lightweight summer poncho worked flat in the user's "perforated shell stitch" pattern, creating one rectangle that folds and seams into an L-shape leaving a neck opening. Stitch uses a multiple of 8 + 2 foundation chains.
2. **Construction Plan**: Work one flat rectangle (56 + 2 = 58 ch), fold and seam along the top to form the poncho, then add a dc border and fringes.
3. **Quality Assurance**:
- Foundation count: user said "56 +2" = 58 chains; 56 is a multiple of 8 (8×7), so pattern multiple of 8+2 satisfied. ✓
- Fold/seam logic: neck opening must be left clear after folding — clarify fold direction and seam length.
- Gauge in sport-weight microfiber with 4.0mm hook is loose/airy; lacy fabric means gauge must be checked against 30 cm height & 60 cm length.
4. **Final Calculations**:
- Yarn: Mondial Oro, 250 m/100 g, sport, 4.0 mm (US G/6) hook.
- Foundation: 58 ch (56 + 2). 56 = 8 × 7 (7 pattern repeats).
- Target rectangle: ~60 cm (23.5 in) long × ~30 cm (12 in) high.
- Gauge target: 1 shell-pattern repeat (8 sts) ≈ 8.5 cm wide; ~58 ch ≈ 60 cm. Row gauge ~ adjust to reach 30 cm height. Verify with swatch.
Verification
[PRE-FLIGHT CHECKS]
1. **Completeness**: All template sections present — title, materials, gauge, size, abbreviations, notes, instructions, finishing. ✓
2. **Consistency**: 56 + 2 = 58 ch; 56 ÷ 8 = 7 repeats exactly, matching the 8+2 multiple. ✓ Width (~60 cm) maps to length of poncho; height (~30 cm) achieved by repeating rows 2–5 until target. ✓
3. **Constraints**: US terms throughout; single rectangle folded and seamed leaving neck opening on the left; dc border + fringes; beginner-friendly; rectangle construction explained. ✓
4. **Safety**: Lacy/open fabric — gauge stated as approximate and swatch recommended. Fold/seam direction explained carefully to keep neck opening correct. ✓
Pattern
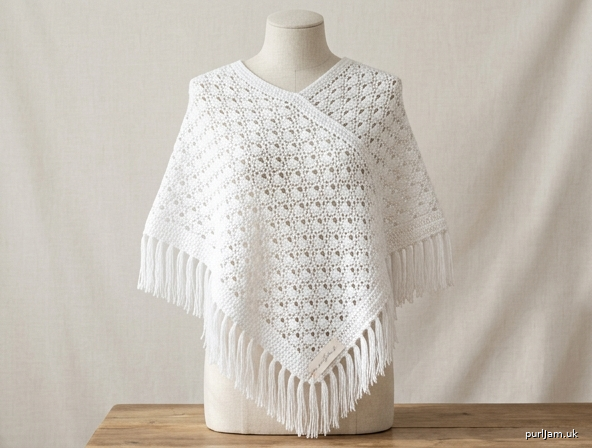
# Summer Breeze Poncho
### A Lightweight Perforated Shell Poncho (Beginner)

A breezy, drapey summer poncho worked as a single flat rectangle in an airy perforated shell stitch, then folded and seamed to form the classic poncho shape. Finished with a simple double-crochet border and playful fringe.

---

## Materials
- **Yarn:** Mondial "Oro" by ORO — 92% Microfiber PC / 8% Microfiber PL Met, sport weight, 100 g / 250 m (273 yds), Color 960 (Bright White).
  - **Quantity:** 2 balls (approx. 400–450 m / 437–492 yds total, including border and fringe). Buy 3 balls if you want extra-long fringe or plan to lengthen the poncho.
- **Hook:** US G/6 (4.0 mm)
- **Notions:** Tapestry/yarn needle, scissors, stitch markers (2–3), a piece of cardboard ~12 cm (4¾ in) tall for cutting fringe.

---

## Gauge
Worked in pattern (perforated shell stitch):
- **1 pattern repeat (8 sts wide) ≈ 8.5 cm (3⅜ in)**
- **4 pattern rows (Rows 2–5) ≈ 7.5 cm (3 in) tall**

> Because this is a lacy, open fabric, gauge is approximate and stretches with blocking. **Make a small swatch** of 18 ch (2 repeats + 2) and work Rows 1–5 to confirm your shell width before starting. Adjust hook size if needed.

---

## Finished Measurements (before seaming)
- **Rectangle length (becomes poncho length):** approx. 60 cm (23½ in)
- **Rectangle height (drop over the arms):** approx. 30 cm (12 in)

These are easily adjusted — see **Sizing Notes** below.

---

## Abbreviations (US terms)
- **ch** = chain
- **sc** = single crochet
- **dc** = double crochet
- **st(s)** = stitch(es)
- **sp** = space
- **rep** = repeat
- **RS / WS** = right side / wrong side

---

## Pattern Notes
- The poncho is worked **flat in rows**, back and forth.
- The foundation chain is a **multiple of 8 + 2**. For this size: **56 + 2 = 58 chains.** (56 ÷ 8 = **7 pattern repeats**.)
- "5 dc shell" = 5 dc worked together into one point, forming the shell.
- The turning chains vary by row — follow each row exactly. Where a turning ch counts as a stitch, it is noted.
- Stitch counts are given at the end of key rows.
- Work into both loops unless told otherwise.

---

## THE RECTANGLE

### Foundation
**Ch 58.** *(56 + 2)*

### Row 1 (set-up)
1 sc in the 2nd ch from hook, *ch 5, skip 3 ch, 1 sc in the next (4th) ch*; rep from * across to the end of the row. Turn.
*(You will have 7 ch-5 loops and 8 sc anchor points across the row — one loop per repeat.)*

### Row 2 (shell row)
Ch 3 (counts as first dc), turn. 2 dc into the first sc (the base sc); *1 sc in the 3rd ch of the next ch-5 loop, ch 5, 1 sc in the 3rd ch of the following ch-5 loop, 5 dc into the next sc of the previous row (this makes a shell), 1 sc in the 3rd ch of the next loop*; rep from * across, ending with **3 dc in the last sc** of the previous row. Turn.

> **Beginner tip:** The shells (5 dc) sit on top of the sc points; the small ch-5 loops sit between the shells.

### Row 3 (mesh row)
Ch 1, turn. 1 sc in the first st, *ch 5, 1 sc in the 3rd dc of the next shell*; rep from * across. At the end: ch 5, 1 sc in the 3rd ch of the turning chain. Turn.

### Row 4 (shell row)
Ch 5 (counts as a loop), turn. 1 sc in the 3rd ch of the first loop, *5 dc in the next sc of the previous row, 1 sc in the 3rd ch of the next loop, ch 5, 1 sc in the 3rd ch of the following loop*; rep from * across, ending with **ch 2, 1 sc in the last sc** of the previous row. Turn.

### Row 5 (mesh row — same as Row 3)
Ch 1, turn. 1 sc in the first st, *ch 5, 1 sc in the 3rd ch of next loop / 3rd dc of next shell*; rep from * across. At the end: ch 5, 1 sc in the 3rd ch of the turning chain. Turn.

### Continue
**Repeat Rows 2–5** in order until the rectangle measures approximately **30 cm (12 in)** from the foundation edge, ending after a **Row 5** (a mesh row) so both long edges match.

> Since 4 rows ≈ 7.5 cm, you will work Rows 2–5 about **4 times** (≈ 30 cm). Work more or fewer repeats to hit your exact measurement. Fasten off, leaving a long tail (~50 cm) for seaming.

---

## HOW TO FOLD & SEAM THE PONCHO

This is the part to read slowly — it's simpler than it sounds:

1. Lay the finished rectangle flat in **"landscape"** orientation: the **long edges** (60 cm) are top and bottom, the **short edges** (30 cm) are left and right.

2. **Fold the rectangle in half** by bringing the **right short edge over to the left short edge** (folding left-to-right), so it now looks like a smaller square/rectangle. You now have a **folded top edge** (the new top) running along what was the top long edge.

3. **The neck opening is on the LEFT** (per your design). So you will **seam along the TOP edge**, starting from the **folded right side** and sewing toward the left — **but stop before you reach the left edge**, leaving an opening big enough for the head.

4. **Seam length:** Sew about **18–20 cm (7–8 in)** along the top, then **leave the remaining ~10–12 cm (4–5 in) open** at the left for the neck. Try it over your head before fastening — the neck should slip on comfortably but not gape.

5. Use the long tail and a tapestry needle to **whip stitch** or **mattress stitch** the seam closed. Weave in the tail.

> **Visual check:** When you hold the poncho up by the seam, it should drape into an open, asymmetric shape with the neck hole at the top-left. The open sides become the drape over your arms.

---

## BORDER (worked after seaming)

Join yarn at any convenient point along the **outer edges** of the poncho (the open hanging edges, not the neck).

**Border Round:** Ch 3 (counts as first dc), work **1 dc in each st and approximately 2–3 dc in each ch-5 loop / row-end space** evenly around the entire outer edge, keeping the work flat (do not crowd or stretch). Work a small fan of 3 dc into each corner point to turn corners neatly. Join with a sl st to the top of the ch-3. Fasten off and weave in ends.

> **Aim for an even number of dc** so the fringe spaces out evenly. The exact count isn't critical for a lacy poncho — just keep it lying flat.

*(Optional: you may also work a single dc round around the neck opening for a tidy finish, but keep it loose so the neck still stretches over your head.)*

---

## FRINGE

1. Cut yarn into **24 cm (9½ in)** lengths. For each fringe tassel, use **3–4 strands** folded in half.
2. Insert hook through a stitch/point along the bottom border, pull the folded loop through, then pull the cut ends through the loop and tighten (a standard lark's-head/fringe knot).
3. Attach one fringe **at each dc point or evenly every 2–3 sts** along the bottom (and side, if desired) edges.
4. When all fringe is attached, lay flat and **trim** the ends even using a ruler.

> **Tip:** Wrap yarn around your 12 cm cardboard and cut along one edge to get uniform 24 cm strands quickly.

---

## FINISHING
1. Weave in all remaining ends with the tapestry needle.
2. **Block gently:** pin the poncho to shape (especially opening up the lacy mesh) and lightly steam or mist with water. Microfiber blocks well and the stitch pattern will open beautifully.
3. Let dry fully before wearing.

---

## Sizing Notes (how to adjust)
- **To make it longer (more drape):** add pattern repeats to the foundation chain in multiples of **8** (e.g., 64 + 2 = 66 ch for 8 repeats, ≈ 68 cm). Each extra repeat ≈ 8.5 cm.
- **To make it taller (deeper arm coverage):** simply work more repeats of Rows 2–5. Each full 4-row repeat ≈ 7.5 cm.
- **Neck opening too tight/loose?** Adjust the seamed length in Step 4 of folding — sew more for a smaller neck, less for a wider neck.

Enjoy your breezy summer poncho! 🌿
Disclaimer: This pattern was generated by AI and should be reviewed for accuracy before use. While we strive for quality, AI-generated content may contain errors. Please verify measurements, stitch counts, and instructions before beginning your project. Generated by purlJam.uk
Access your pattern anytime
Bookmark this page to access your pattern anytime