Type
Knitting
Difficulty
beginner
Category
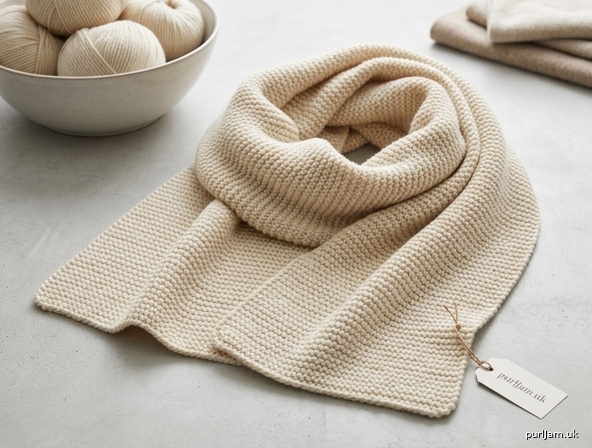
scarf
AI Thinking Process
Planning
1. **Design Strategy**: A "Sophie scarf" is typically a generous, cosy wrap-style scarf. For an absolute beginner I'll use simple garter stitch (knit every row) in worsted yarn for a squishy, reversible, flat-lying fabric. Sized "large" — wider and longer than a standard scarf.
2. **Construction Plan**: Worked flat in one piece from end to end as a long rectangle in garter stitch; no shaping or seaming.
3. **Quality Assurance**:
- Beginners drop/add stitches accidentally — emphasise counting every few rows.
- Splitting yarn at cast-on — give clear long-tail and knit-stitch guidance.
- Tension drift (too tight at edges) — note relaxed, even tension.
4. **Final Calculations**: Tension 18 sts = 10 cm in garter. Large width 30 cm: 18 ÷ 10 × 30 = 54 sts. Length target 200 cm. Needles 5.0 mm. Yarn ~350–450 g worsted.
Verification
[PRE-FLIGHT CHECKS]
1. **Completeness**: All sections present — TITLE, MATERIALS, GAUGE, FINISHED_SIZE, ABBREVIATIONS, PATTERN, FINISHING. ✓
2. **Consistency**: 54 sts ÷ (18 sts/10 cm) = 30 cm width. ✓ Garter rows ~36 ridges per 10 cm → length scalable by knitting to 200 cm. ✓
3. **Constraints**: Beginner ✓, large ✓, in-depth directions ✓, worsted yarn ✓, UK terminology & metric-first ✓, garter default ✓.
4. **Safety**: Math checks out; cast-on 54 within reasonable extension of template range for a "large" scarf. No decreases/increases to err on. ✓
Pattern
# The Large Sophie Scarf — A Cosy Garter-Stitch Wrap for Absolute Beginners

A wonderfully simple, squishy rectangular scarf knitted entirely in garter stitch (you only ever knit — never purl!). This generous, oversized version of the much-loved Sophie scarf is wide enough to wrap, snuggle and loop, yet uses only the very first skill you will learn: the knit stitch. There is no shaping, no seaming and nothing to count beyond your stitches. Perfect for your very first project.

---

## MATERIALS

- **Yarn:** Worsted weight (Aran/medium, weight category 4). Approximately **350–450 g** total.
  - Example: roughly **4–5 balls** of a 100 g / ~180 m worsted yarn.
  - Choose a smooth, light-coloured yarn for your first project — it is far easier to see your stitches than with dark or fuzzy yarns.
- **Needles:** **5.0 mm (UK size 6 / US 8)** straight or circular needles.
  - A long circular needle (80 cm or longer) is recommended — it comfortably holds all the stitches of a wide scarf without crowding. You still knit back and forth as if using straight needles.
- **Notions:**
  - 1 blunt-tipped tapestry/darning needle (for weaving in ends)
  - Scissors
  - A few stitch markers or scrap yarn (optional, to mark every 10th stitch while you learn)
  - A tape measure

---

## GAUGE (TENSION)

**18 stitches and 36 rows (18 garter ridges) = 10 cm (4 in) square in garter stitch** on 5.0 mm needles.

> **How to check (don't skip this!):** Cast on about 24 stitches and knit every row until your piece is roughly 12 cm tall. Lay it flat (do not stretch) and count how many stitches fit across 10 cm in the centre.
> - If you count **more than 18 stitches** in 10 cm, your tension is tight — try a **5.5 mm** needle.
> - If you count **fewer than 18 stitches** in 10 cm, your tension is loose — try a **4.5 mm** needle.
>
> Tension does not need to be perfect for a scarf, but it affects how much yarn you use and the final width.

---

## FINISHED SIZE

- **Width:** approximately **30 cm (12 in)**
- **Length:** approximately **200 cm (78–79 in)**

*Maths check:* 54 sts ÷ 18 sts per 10 cm = 3 × 10 cm = **30 cm wide** ✓
This is a deliberately **large** scarf — generous enough to wrap twice or drape as a wide stole. To make it narrower, see the "Make It Your Size" note in the Pattern section.

---

## ABBREVIATIONS

| Abbreviation | Meaning |
|---|---|
| **k** | knit |
| **st(s)** | stitch(es) |
| **CO** | cast on |
| **BO** | cast (bind) off |
| **RS / WS** | right side / wrong side (in garter stitch both sides look the same — handy!) |
| **cm / in** | centimetres / inches |

*This scarf uses only the **knit** stitch. There is no purl, no yo, no k2tog — nothing else to learn.*

---

## PATTERN

### Step 1 — Cast On

Cast on **54 stitches** using the **long-tail cast-on** (a tidy, stretchy edge that is ideal for scarves).

> **Beginner tip — measuring your tail:** For 54 stitches in worsted yarn, pull out a starting tail roughly **1.5 metres** long before you make your slip knot. A rough guide is "about 2.5 cm of tail per stitch, plus a little extra." If you run short, simply unravel and start again with a longer tail — this is completely normal!

> **No-fuss alternative:** If the long-tail cast-on feels tricky, the **knitted cast-on** is perfectly fine here and uses only the knit stitch you are about to learn. Cast on 54 stitches by that method instead.

**Count your stitches now.** You must have exactly **54**. Marking every 10th stitch with a removable marker can help you count: 10, 20, 30, 40, 50, + 4 = 54.

---

### Step 2 — Knit Every Row (Garter Stitch)

This is the entire body of the scarf:

> **Every row: knit all stitches across (k54).**

That's it. Turn your work at the end of each row and knit straight back. Because you knit every single row, you are making **garter stitch**, which forms cosy horizontal ridges and lies beautifully flat without curling.

**Understanding ridges:** Every **two rows** of knitting creates **one visible ridge** on each side. So counting ridges is an easy way to track your progress without counting individual rows.

**Beginner reassurance:**
- Both sides look identical, so there is no "wrong side" to worry about.
- If you put the scarf down mid-row, you can always pick it back up — just continue knitting toward the needle tip that has the working yarn.
- **Re-count to 54 stitches every 10–15 rows.** The two most common beginner mistakes are (a) accidentally splitting the yarn and (b) the "yarn-over" wrap that adds an extra loop at the start of a row. If you ever count 55, you likely have an accidental extra loop at the edge — slip it off and continue.

---

### Step 3 — Keep Going Until It's Long Enough

Continue knitting every row until the scarf measures approximately **200 cm (78 in)** from the cast-on edge, measured flat without stretching.

> **How many rows is that?** At a tension of 36 rows = 10 cm:
> 200 cm × (36 rows ÷ 10 cm) = **720 rows** (≈ 360 ridges).
> You do **not** need to count rows — simply knit until the tape measure reads 200 cm. The row figure is just for reassurance.

**Save enough yarn to cast off:** Stop adding new balls once you are near the end. You need roughly **3 times the width** of unworked yarn to cast off safely — about **1 metre** for a 30 cm-wide scarf. When you have that much working yarn left, move to the next step.

---

### Step 4 — Cast (Bind) Off

Cast off all stitches **knitwise and loosely**:

1. Knit the first 2 stitches.
2. With the tip of the left needle, lift the **first** stitch up and over the **second** stitch and off the needle. (1 stitch remains on the right needle.)
3. Knit 1 more stitch (2 on the right needle again).
4. Lift the first over the second and off, as before.
5. Repeat steps 3–4 across the whole row until **1 stitch** remains.
6. Cut the yarn leaving a **15 cm tail**, pass the tail through the last loop and pull snug.

> **Beginner tip:** A loose cast-off keeps the end of the scarf as stretchy and flat as the rest. If yours pulls in and looks tight, cast off again using a needle one or two sizes larger in your right hand.

---

> ### Make It Your Size (optional)
> - **Narrower scarf?** For every **5.4 fewer stitches** you remove about **3 cm** of width.
>   - ~25 cm wide → CO **45 sts**
>   - ~20 cm wide → CO **36 sts**
> - **Shorter scarf?** Simply knit to your preferred length and adjust yarn quantity accordingly (each 50 cm of length uses roughly 90–110 g).
> - The pattern (knit every row) stays exactly the same for any width or length.

---

## FINISHING

1. **Weave in ends:** Thread each loose yarn tail (cast-on tail, cast-off tail, and any join points) onto your tapestry needle. Weave each tail through the bumps of the garter ridges on one side for about 5–6 cm, then trim the excess close to the fabric. Garter stitch hides ends beautifully.

2. **Block the scarf (recommended):** Blocking evens out your stitches and relaxes the fabric.
   - **Wet blocking:** Soak the finished scarf in lukewarm water with a little wool wash for 15 minutes. Gently squeeze out water (do not wring) and roll in a towel to remove excess. Lay flat to the finished dimensions (30 cm × 200 cm), patting it gently square, and leave to dry fully.
   - Always check your yarn's ball band for care instructions first.

3. **Add fringe (optional, for extra "Sophie" cosiness):**
   - Cut lengths of yarn about **30 cm** long. Hold **3–4 strands** together, fold in half to form a loop.
   - Using a crochet hook or your fingers, push the folded loop through a stitch at the cast-on edge, then pull the loose ends through the loop and tighten.
   - Space tassels evenly across both short ends (about every 2–3 cm), then trim level.

---

**Congratulations — you've knitted a scarf!** You now know how to cast on, knit, cast off and finish a project. Every future pattern builds on exactly these skills. Wear it with pride. 🧶
Disclaimer: This pattern was generated by AI and should be reviewed for accuracy before use. While we strive for quality, AI-generated content may contain errors. Please verify measurements, stitch counts, and instructions before beginning your project. Generated by purlJam.uk
Access your pattern anytime
Bookmark this page to access your pattern anytime