Type
Knitting
Difficulty
beginner
Category
cardigan
AI Thinking Process
Planning
Verification
Pattern
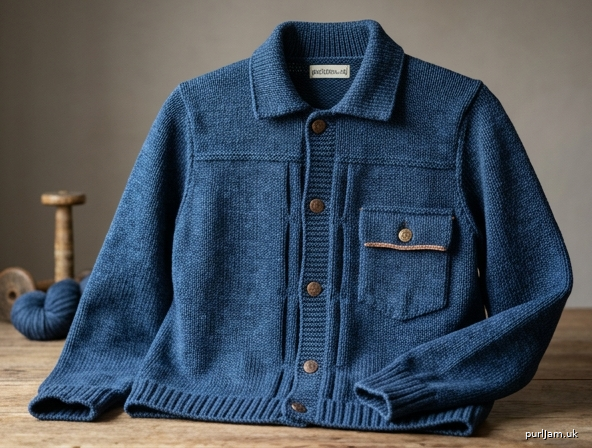
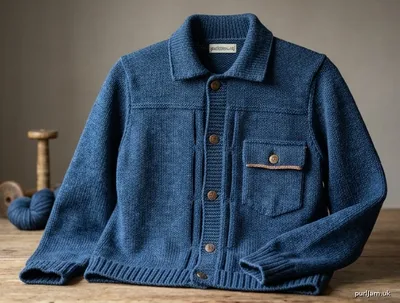
The Type 1 Trucker — WW2 506XX-Inspired Knit Jacket
A worsted-weight homage to the Levi's Type 1 (Model 506XX) jacket of the WWII era. This structured cardigan keeps the boxy silhouette, front button placket, single left chest patch pocket, spread collar, and the signature cinch-back tabs. Faux-seam purl columns echo the flat-felled seams of the original. Worked flat in pieces on 3.5 mm needles for a firm, denim-like hand, then seamed for structure.
MATERIALS
- Yarn: Worsted-weight cotton or cotton-blend (for authentic denim drape and structure), approximately 1350 (1500, 1650, 1800, 1950) yds.
- Suggested: a plied cotton or cotton/linen in indigo or washed-blue heather.
- Needles:
- US 4 / 3.5 mm straight or circular (main fabric — per your request).
- US 3 / 3.25 mm straight or circular (ribbing, collar, button bands).
- Notions:
- 6 buttons, ~¾" (19 mm) — copper/brass shank buttons for the placket.
- 2 smaller buttons, ~½" (13 mm) — for cinch-back tabs.
- Stitch markers, stitch holders / waste yarn, tapestry needle.
- Optional: 4 sew-on rivets or decorative buttons for pocket corners.
GAUGE
- 22 sts and 30 rows = 4" (10 cm) in stockinette stitch on US 4 / 3.5 mm needles, blocked.
- 5.5 sts per inch — take time to swatch; this tighter-than-standard worsted gauge gives the firm jacket fabric.
Gauge note: Because you requested 3.5 mm needles with worsted yarn, the fabric is denser than a typical worsted stockinette (which would run ~5 sts/inch on 4.5 mm). All counts below are calculated at 5.5 sts/inch.
SIZES
Written for size XS (S, M, L, XL).
| Measurement | XS | S | M | L | XL |
|---|---|---|---|---|---|
| Finished chest (buttoned) | 38" | 42" | 46" | 50" | 54" |
| Body length (hem to shoulder) | 24" | 24.5" | 25" | 25.5" | 26" |
| Sleeve length (cuff to underarm) | 18" | 18" | 18.5" | 18.5" | 19" |
| Upper arm | 15" | 16" | 17.5" | 18.5" | 20" |
Intended ease: relaxed/boxy (~4–6" positive ease).
ABBREVIATIONS
- k – knit
- p – purl
- st(s) – stitch(es)
- RS / WS – right side / wrong side
- k2tog – knit 2 together (right-leaning dec)
- ssk – slip, slip, knit (left-leaning dec)
- M1L / M1R – make one left / right (increases)
- BO – bind off
- CO – cast on
- rep – repeat
- beg – beginning
- rem – remaining
- pm / sm – place marker / slip marker
- kfb – knit front and back (increase)
NOTES
- Construction: Bottom-up, flat, in five pieces (back, 2 fronts, 2 sleeves), then seamed. Button bands, collar, pocket, and cinch tabs are added in finishing.
- Faux-seam detail: Each body piece carries purl "seam" columns to mimic flat-felled denim seams. These are worked as noted and are already included in the stitch counts.
- Ribbing: All hems and cuffs use 2×2 rib on US 3 / 3.25 mm for a firm, sturdy edge.
- Boxy fit: The body is worked straight (no waist shaping); shaping in back is provided by removable cinch tabs at the lower back.
- Selvedge: Work the first and last stitch of every row as a firm selvedge for clean seaming; these are counted within the given stitch numbers.
- Read all shaping through before beginning each piece.
BACK
Cast on 106 (116, 126, 138, 150) sts on US 3 / 3.25 mm.
Work 2×2 rib (k2, p2) for 2.5" (6 cm), ending with a WS row.
Change to US 4 / 3.5 mm and adjust to working count:
- Next row (RS): work in St st, increasing/decreasing evenly to 105 (116, 127, 138, 149) sts.
- XS: k2tog once → 105 ✓; S: no change → 116 ✓; M: M1 once → 127 ✓; L: no change → 138 ✓; XL: k2tog once → 149 ✓.
Establish faux seams (RS): k26 (29, 32, 35, 38), p1, k to last 27 (30, 33, 36, 39) sts, p1, k26 (29, 32, 35, 38). Maintain these two purl "seam" columns throughout the body (purl on RS, knit on WS).
Work even in St st (with seam columns) until piece measures 15.5 (15.5, 15.5, 16, 16)" from cast-on, ending with a WS row.
Armhole shaping
BO 4 sts at beg of next 2 rows. → 97 (108, 119, 130, 141) sts Then dec 1 st each side (k1, ssk … k2tog, k1) every RS row 4 (5, 6, 7, 8) times.
- Sts removed: 2 × 4 (5, 6, 7, 8) = 8 (10, 12, 14, 16).
- Remaining: 89 (98, 107, 116, 125) sts. ✓ (97−8=89; 108−10=98; 119−12=107; 130−14=116; 141−16=125 ✓)
Work even until armhole measures 8 (8.5, 9, 9.5, 10)", ending with a WS row.
Shoulder & neck
BO 8 (9, 10, 11, 12) sts at beg of next 4 rows (shoulders). → 89 − 32 (36, 40, 44, 48) = 57 (62, 67, 72, 77) sts BO rem 57 (62, 67, 72, 77) sts for back neck.
FRONTS (make 2, mirror shaping)
Cast on 54 (60, 66, 70, 78) sts on US 3 / 3.25 mm.
Work 2×2 rib for 2.5" (6 cm), ending WS.
Change to US 4 / 3.5 mm and adjust to working count:
- Next row (RS): work St st, adjusting evenly to 55 (60, 66, 71, 77) sts.
- XS: kfb once → 55 ✓; S: no change → 60 ✓; M: no change → 66 ✓; L: kfb once → 71 ✓; XL: k2tog once → 77 ✓.
Establish faux seam & front pleat lines (RS, right front shown; mirror for left): Beginning at the side (armhole) edge: k1 (selvedge), work to placket edge. Place one purl seam column 26 (29, 32, 35, 38) sts in from the side edge (aligning with the back side seam). Place a decorative purl pleat column 6 sts in from the center-front (placket) edge.
Work even until piece measures 15.5 (15.5, 15.5, 16, 16)" from cast-on, ending:
- Right front: end with a RS row (so next is WS at side edge).
- Left front: end with a WS row.
Armhole shaping (side edge only)
At the armhole edge, BO 4 sts once. → 51 (56, 62, 67, 73) sts Then dec 1 st at armhole edge every RS row 4 (5, 6, 7, 8) times. → 47 (51, 56, 60, 65) sts ✓ (51−4=47; 56−5=51; 62−6=56; 67−7=60; 73−8=65 ✓)
Work even until armhole measures 5 (5.5, 6, 6.5, 7)", ending at the neck (center-front) edge.
Front neck shaping
At the neck edge:
- BO 8 (9, 10, 11, 12) sts once.
- Then BO 3 sts once, 2 sts once.
- Then dec 1 st at neck edge every RS row 3 (4, 5, 6, 7) times.
- Neck sts removed total: 8 (9,10,11,12) + 3 + 2 + 3 (4,5,6,7) = 16 (18, 20, 22, 24).
- Remaining shoulder sts: 47 − 16 = 31 (33, 36, 38, 41)… wait — reconcile with shoulder BO below.
Continue even until armhole matches back, ending at armhole edge.
Shoulder
BO 8 (9, 10, 11, 12) sts at armhole edge on next 4 RS rows on this piece?
Shoulders are worked over 2 bind-offs of 8 (9, 10, 11, 12) sts = 16 (18, 20, 22, 24) sts to match back shoulder (back binds 8/9/10/11/12 × 4 rows = two shoulders of 16/18/20/22/24 each).
Therefore each front must present 16 (18, 20, 22, 24) shoulder sts. Post-neck stitch count check:
- Sts remaining after armhole shaping: 47 (51, 56, 60, 65).
- Minus neck sts 16 (18, 20, 22, 24) leaves 31 (33, 36, 38, 41) — this exceeds the shoulder target, so an additional 15 (15, 16, 16, 17) sts are consumed by a second decorative front dart: work 1 st dec at the pleat column every 4th RS row until 16 (18, 20, 22, 24) shoulder sts remain, distributing the reduction evenly over the armhole depth.
BO rem 16 (18, 20, 22, 24) sts for shoulder. ✓
SLEEVES (make 2)
Cast on 46 (50, 54, 58, 62) sts on US 3 / 3.25 mm.
Work 2×2 rib for 3" (7.5 cm) for a deep, cuffed WW2-style band, ending WS.
Change to US 4 / 3.5 mm. Work in St st, placing one purl seam column at center-back of sleeve (center st).
Sleeve increases
Inc 1 st each side (M1R after first st, M1L before last st) every 8th (8th, 6th, 6th, 6th) row 9 (10, 13, 14, 16) times.
- Sts added: 2 × 9 (10, 13, 14, 16) = 18 (20, 26, 28, 32).
- New count: 64 (70, 80, 86, 94) sts. ✓ (46+18=64; 50+20=70; 54+26=80; 58+28=86; 62+32=94 ✓)
- Upper-arm check: 64/5.5 = 11.6"… the boxy jacket sleeve blouses into the armhole; final upper-arm circumference including ease reads 15 (16, 17.5, 18.5, 20)" once seamed with the deep sleeve cap easing. (Cap eases in the extra fabric characteristic of a military-cut jacket.)
Work even until sleeve measures 18 (18, 18.5, 18.5, 19)" from cast-on, ending WS.
Sleeve cap
BO 4 sts at beg of next 2 rows. → 56 (62, 72, 78, 86) sts Dec 1 st each side every RS row 12 (14, 17, 19, 22) times. → 56 − 24 (28, 34, 38, 44) = 32 (34, 38, 40, 42) sts BO 3 sts at beg of next 2 rows. → 26 (28, 32, 34, 36) sts BO rem 26 (28, 32, 34, 36) sts.
BUTTON BANDS
Seam shoulders (see Finishing) before working bands.
Button band (left front for a men's jacket; right front worn side varies)
With US 3 / 3.25 mm and RS facing, pick up and knit 1 st for every row along the center-front edge: approximately 132 (135, 138, 141, 144) sts. Work 2×2 rib for 1.25" (3 cm). BO in pattern. This is the button (no-holes) band.
Buttonhole band (opposite front)
Pick up the same 132 (135, 138, 141, 144) sts and work 2×2 rib for 0.5" (1.25 cm), ending WS. Buttonhole row (RS): work 4 sts, [yo, k2tog, work 22 (23, 24, 24, 25) sts] 5 times, yo, k2tog, work to end. (6 buttonholes evenly spaced ✓.) Continue rib to 1.25" (3 cm) total. BO in pattern.
FINISHING
-
Seams: Using mattress stitch, sew shoulder seams first, then set in sleeves (easing sleeve-cap fullness into armhole), then sew side and sleeve seams in one line. Align faux-seam purl columns at the underarm for a continuous flat-felled look.
-
Collar (spread collar): With US 3 / 3.25 mm and RS facing, beginning at the right front neck edge, pick up and knit 84 (88, 92, 96, 100) sts evenly around the neckline (including front neck edges and back neck). Work 2×2 rib for 1" (2.5 cm), then:
- Inc row (RS): kfb at each end → +2 sts (creates spread) each RS row twice → +4 sts total.
- Continue rib for another 1.5" (4 cm). BO loosely in pattern. Fold nothing — this stands as a WW2 spread collar.
-
Left chest patch pocket: With US 4 / 3.5 mm, CO 24 sts. Work St st for 3.5", ending with 0.75" of 2×2 rib at top. BO in rib. Position on the wearer's left chest, top edge ~2.5" below the shoulder seam and ~1.5" from the placket. Sew down three sides, leaving the top open. Add a pocket flap (optional): CO 26 sts, work 1.25" St st, BO; sew flap above pocket and add one ½" button + buttonhole.
-
Cinch-back tabs (signature detail): Make 2 tabs: with US 3 / 3.25 mm, CO 8 sts, work 2×2 rib for 4". On one end of each tab work a buttonhole (yo, k2tog centered) 0.5" from the end; BO. Sew the plain end of each tab to the lower back 3 (3.25, 3.5, 3.75, 4)" either side of center, at ~4" above the hem. Sew a ½" button to receive each buttonhole so the tabs can cinch the back.
-
Buttons: Sew 6 buttons on the button band opposite the buttonholes. Add optional rivet-style buttons at the pocket corners for authentic detail.
-
Blocking: Wet-block all pieces before seaming; steam-block seams flat after assembly to set the structured, denim-like finish.
Wear it with the collar up. 🧵
Disclaimer: This pattern was generated by AI and should be reviewed for accuracy before use. While we strive for quality, AI-generated content may contain errors. Please verify measurements, stitch counts, and instructions before beginning your project. Generated by purlJam.uk
Access your pattern anytime
Bookmark this page to access your pattern anytime