Type
Crochet
Difficulty
beginner
Category
amigurumi
AI Thinking Process
Planning
Verification
Pattern
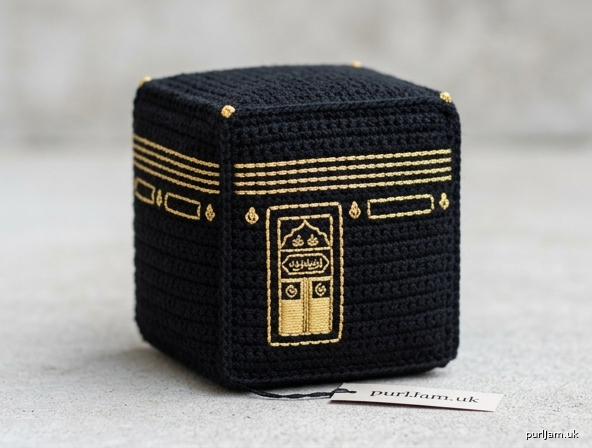
3D Crochet Kaaba Plush (Beginner)
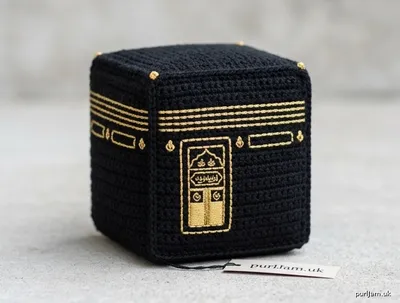
A simple stuffed cube representing the Kaaba. Worked in basic single crochet squares, seamed, stuffed, and finished with easy gold embroidery. Finished size approximately 3 inches (7.5 cm) cube.
Materials
- Worsted weight (4) yarn:
- Main Color (MC): Black – approx. 40 yd (37 m)
- Contrast Color (CC): Gold or metallic gold – approx. 10 yd (9 m)
- Crochet hook: US E-4 (3.5 mm) or size needed to obtain gauge (go down 1–2 sizes from yarn label for tight fabric)
- Polyester fiberfill stuffing
- Yarn needle
- Stitch marker
- Scissors
- Optional: fabric glue or clear nail polish to seal embroidery ends
Abbreviations (US Terms)
- ch: chain
- sc: single crochet
- sl st: slip stitch
- st(s): stitch(es)
- rnd(s): round(s)
- FO: fasten off
- [ ]: stitch count at end of row/rnd
- ( ) : work instructions in parentheses as directed
Gauge
5 sc and 4 rows = 1 inch (2.5 cm) in sc with US E-4 (3.5 mm) hook. Work tightly so stuffing does not show. Adjust hook if needed.
Finished Measurements
Cube: approximately 3 × 3 × 3 inches (7.5 × 7.5 × 7.5 cm)
Pattern Notes
- Work all squares in continuous rows of sc (turn at end of each row).
- Keep tension even so all six faces are the same size.
- Stuff firmly, especially corners, for a crisp cube shape.
- Invisible or whip-stitch seams recommended for clean edges.
- Embroidery is added after assembly; keep stitches surface-level.
Squares (Make 6)
With MC (black), ch 16.
Row 1: Sc in 2nd ch from hook and in each ch across, turn. [15 sc]
Rows 2–15: Ch 1, sc in each st across, turn. [15 sc]
FO after Row 15, leaving a 12-inch (30 cm) tail for seaming on 4 of the squares. Weave in starting tails. (15 sc × 15 rows = 3" square at gauge ✓)
Make all 6 identical.
Assembly
- Lay out squares in cross shape: 4 in a horizontal row (front, bottom, back, top) and 1 square attached to each side of the “front” square (left and right walls).
- Using yarn tails or separate MC lengths and yarn needle, whip-stitch or mattress-stitch adjacent edges together with right sides facing out (or wrong sides together for a ridge-free look—choose consistent method).
- Join into a cube, leaving one final edge open for stuffing.
- Stuff firmly with fiberfill, pushing stuffing into all 8 corners so the cube holds a square shape. Do not overstuff to the point of bulging; aim for flat faces.
- Close the final seam with whip stitch. Weave in all ends securely.
(6 squares × 4 seams each edge paired = closed cube ✓)
Kaaba Details (Embroidery)
All details use CC (gold) and yarn needle. Work after cube is fully closed and stuffed.
Horizontal Band (Kiswah belt):
- About ¾ inch (2 cm) down from the top edge, embroider a straight horizontal band all the way around the four vertical faces.
- Use surface running stitch or backstitch, 2–3 parallel rows side-by-side to create a band approx. ¼–⅜ inch (0.5–1 cm) wide.
- Keep stitches even and snug against the fabric. (Circumference of band path = 4 × 3" = 12" ✓)
Door:
- On one face (the “front”), embroider a simple rectangular door.
- Position: centered left-to-right, bottom edge of door approx. ½ inch (1.3 cm) up from bottom of cube; door height approx. 1½ inches (4 cm), width approx. ¾–1 inch (2–2.5 cm).
- Outline with backstitch; optionally fill lightly with satin stitch or vertical running stitches.
- Optional: small arch or lintel line above the door with a few straight stitches.
Optional corner accents:
- Tiny gold straight stitches or French knots at the four top corners if desired (keep minimal for beginner level).
Secure all embroidery ends by weaving into the stuffing inside the cube or tying off and hiding knots between stitches. Trim close. If ends feel loose, a tiny drop of fabric glue inside the entry point helps.
Finishing
- Steam-block lightly if faces look uneven (hold iron above; do not press flat and crush stuffing).
- Shape gently with hands into a crisp cube.
- Weave in any remaining ends.
- Optional: attach a small loop of MC or CC yarn at the top center if you want to hang it.
Care
Spot clean only. Do not machine wash. Reshape while damp if needed.
Enjoy your beginner-friendly 3D Kaaba plush! This pattern uses only chains, single crochet, basic seaming, and simple embroidery—perfect for first geometric amigurumi projects.
Disclaimer: This pattern was generated by AI and should be reviewed for accuracy before use. While we strive for quality, AI-generated content may contain errors. Please verify measurements, stitch counts, and instructions before beginning your project. Generated by purlJam.uk
Love this pattern?
Save this pattern to your free PurlJam libraryAccess your pattern anytime
Bookmark this page to access your pattern anytime